
As a family photographer and software reviewer at FixThePhoto, I'm always seeking ways to optimize my workflow and ensure my images look perfect everywhere they appear. In our visual world, presentation is key, and properly sizing photos for each platform is essential. However, resizing often feels like a tedious, time-consuming task that keeps me from shooting and engaging with clients.
With so much discussion around different tools these days, I started to think: Are there any solutions that can genuinely simplify the photo resizing process? Plenty of programs claim to offer fast, effortless results and market themselves as essential tools for photographers. While that sounds promising, I wanted to dig deeper and find out whether they can meet the demands of a busy family photographer.
To discover the truth, I decided to research and test out the most popular photo resizing software options.
For a proper examination, I used the same profile picture across all platforms and resizing software. This method made it easy to compare how each program resizes the identical pics, highlighting the top performers and helping me identify which ones truly excel at maintaining detail, quality, and visual appeal across various social media image sizes.
I selected tools with intuitive interfaces and tons of templates to accelerate the workflow. Other features that particularly interested me were batch processing, social media presets, and quality preservation. Some of the tools listed here are free, while others provide advanced functionality for just a few bucks a month.
Resizing photos might feel like a minor, almost insignificant step, which you could easily overlook. Photoshop can take care of it, your phone can do it, and there’s no shortage of online tools that promise to get it done in a flash. So, why even bother?
But here’s the thing: if you’ve ever uploaded a photo that ended up looking like a pixelated mess or created a website that loads painfully slow, you already know the importance of resizing properly.
File size: bigger isn't always better. Nowadays, the size of pics produced by modern cameras and high-end smartphones is really huge. They could be thousands of pixels wide, which is beneficial for printing but not for online publications.
Most website images only need to be about 1920 pixels wide to look sharp on a screen. But if you upload full-resolution photos directly from your camera, your website will slow down significantly. The truth is that slow websites push visitors away. If a potential client has to wait just a few extra seconds for your page to load, they might leave before they even get a chance to see your work.
Blurry, pixelated, and ruined by compression. Photos that look flawless on your computer often end up blurry once uploaded to Instagram or Facebook. Why does this happen? These platforms automatically compress images to save storage, and their compression methods are far from gentle.
Either way, your image quality decreases. For a photographer, this is a nightmare scenario.
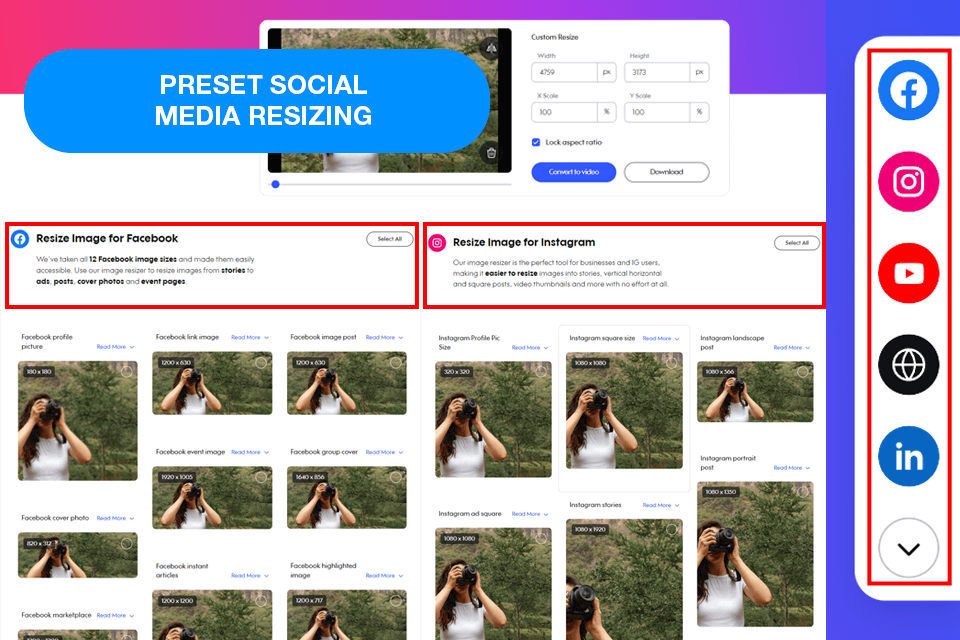
Aspect ratios: avoiding awkward crops. Aspect ratio requirements differ from platform to platform:
If you skip proper resizing before uploading, these platforms will handle it for you, and trust me, they don’t do it well. You could lose key parts of your photo because of cropping or end up with strange white borders that ruin the look. Resizing your images yourself guarantees they’ll fit perfectly, just the way you want.
Professionalism: your photos, your reputation. Ultimately, resizing isn’t just about adjusting dimensions, it’s about ensuring your work looks flawless on social media, your website, or a client’s portfolio. Doing it right guarantees sharp, fast-loading images and a polished presentation to demonstrate your talent.
You could always upload images directly from your camera and hope everything turns out fine. But if you care about maintaining image quality, delivering a smooth user experience, and ensuring your work is presented in the best light, taking the time to resize properly is worth the effort.
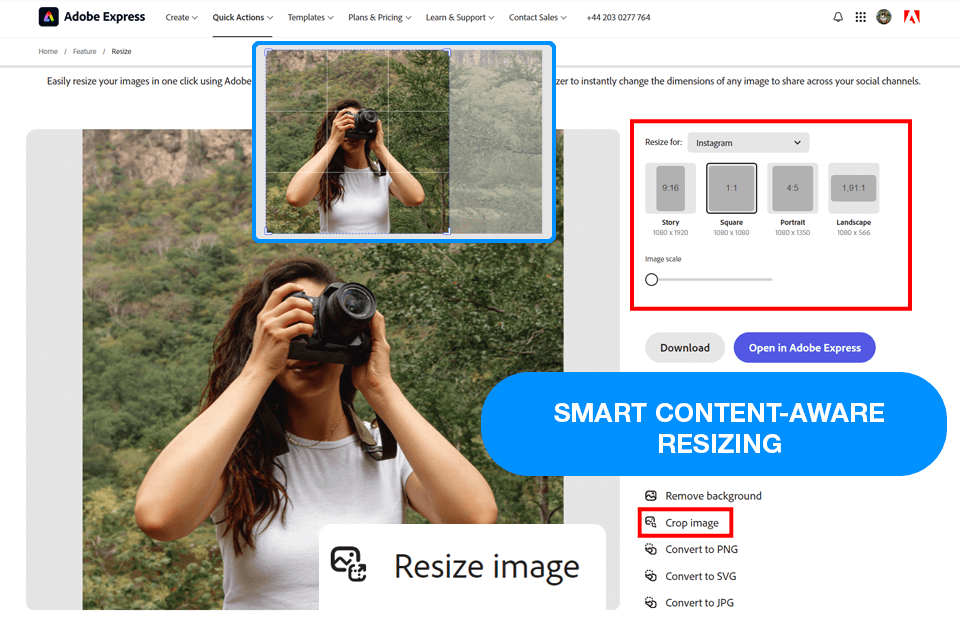
Adobe Express has become my favorite image resizing and video resizer app. A great plus about this image resizing program is its seamless integration with other Adobe apps. I often bring high-quality photos directly from Lightroom, which makes my work process much easier. If I need to use designs from InDesign, I can quickly turn them into editable files in Express. This flexibility is really beneficial, especially when I’m handling different kinds of content for marketing projects.
The freshly updated AI-powered re-coloring tool is another selling point of Adobe Express. This feature allows me to adjust colors to match my branding and give my pics a special vibe in just a single click. It also ensures a consistent and polished look of images throughout my projects.
The most significant downside is the absence of batch resizing. When I need to resize multiple images at the same time, I have to handle each one individually, which is very time-consuming. Hopefully, Adobe will introduce batch processing in future updates, as it would greatly enhance the tool’s efficiency.
In contrast to Adobe Express, BeFunky is a free image resize tool that allows me to process several photos at the same time, which is a lot more efficient and can do wonders for improving your productivity if you’re resizing a lot of pictures for the same platform. This software also offers a user-friendly UI, enabling me to specify the desired dimensions and add them to all selected photos in only a couple of clicks.
Another notable benefit of choosing this option is its resizing accuracy. While some photo resizing programs only let me choose between a small selection of size presets, BeFunky allows me to type in the specific dimensions I want, which is handy when my needs go beyond Instagram and Facebook. You can also use this software to preserve certain aspect ratios or resize photos by percentages.
While I was impressed by BeFunky’s ability to maintain the clarity and sharpness of the original photo, I should still note that the free version of this solution has a maximum upload image size. If you’re dealing with high-resolution photos that take up a lot of space, you should probably pick a different tool.
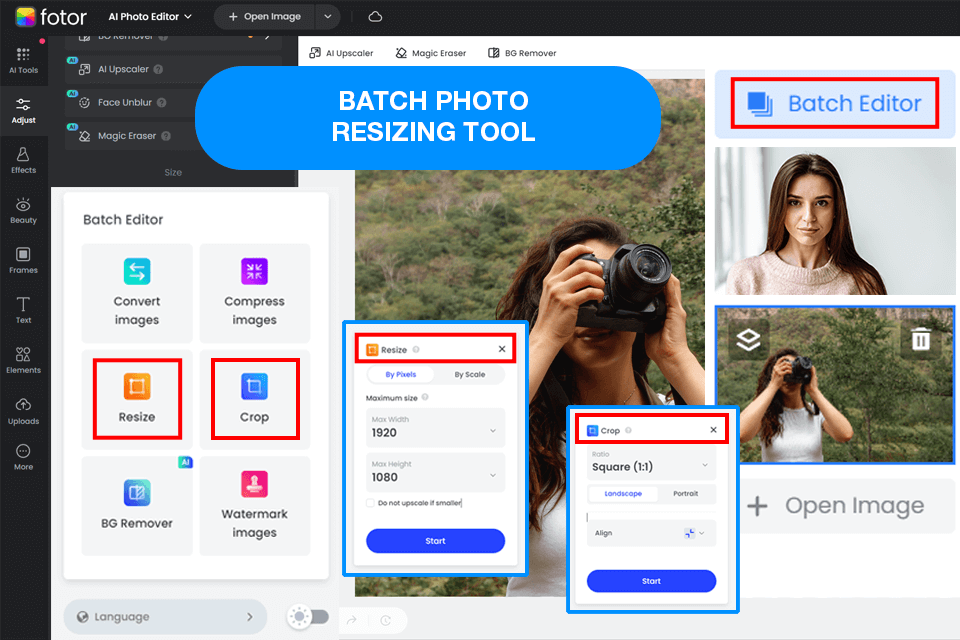
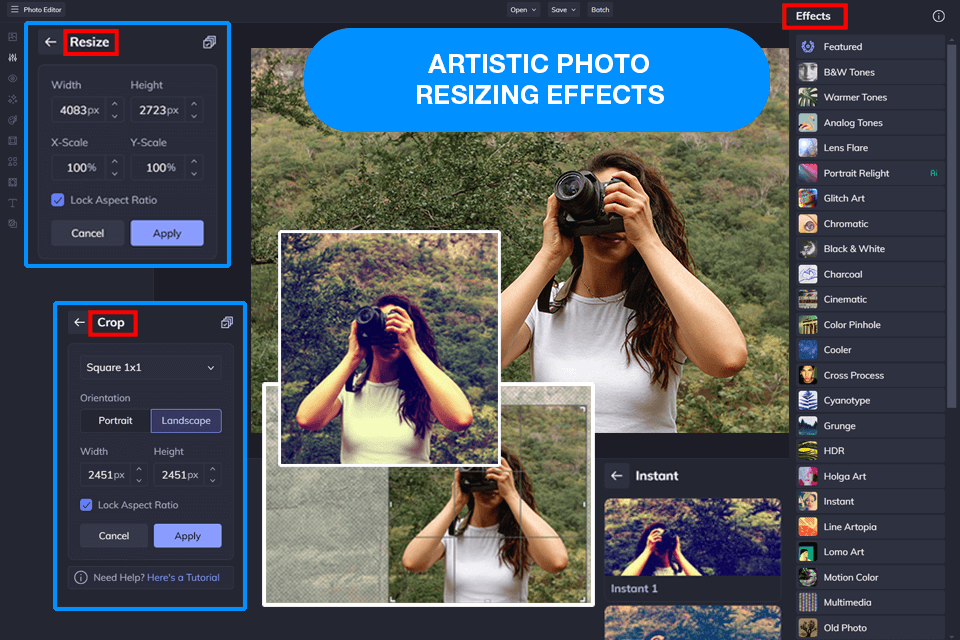
The aspect that impressed me to most about Fotor is the expansive range of the formats it’s compatible with. If you need an image resizer for Windows that supports JPGs, PNGs, RAW photos, and other, rarer formats, this software has you covered.
Moreover, all resizing manipulations are performed with zero quality loss. Such versatility should be right up the alley of anyone who wants to resize photos for a variety of purposes, be it social media, online portfolios, or printed marketing materials.
Fotor allows you to set the exact dimensions for the exported image, which is a feature that is often missing in free services. However, I should note that just like BeFunky, the free version of Fotor imposes a size limit on the photos you can upload, which can dissuade some professional photographers on a tight budget from trying it.
While BeFunky is significantly more user-friendly than Fotor, the latter is better at preserving the quality of the original photo. When juxtaposed against Adobe Express, Fotor has the advantage of offering a more streamlined UI and resizing workflow, representing a more appealing option to beginners.
The most attractive feature of Promo Image Resizer is the smart aspect ratio lock, which ensures all elements maintain their proportions while you change the dimensions of the photo. The convenience of such a function becomes especially apparent after using the Icecream Image Resizer, which forces you to tweak the dimensions manually to preserve the aspect ratio.
This free software to resize images also has a handy built-in watermarking feature. When exporting the processed images, I can apply a watermark to them when needed without having to use a separate application. This is both time-efficient and very useful when trying to add branding elements when showcasing your work on different platforms.
The biggest drawback of this option is the small range of customization features. Even though this tool helps preserve the quality of the image and offers batch resizing, it doesn’t allow you to choose custom aspect ratios or employ different resizing algorithms.
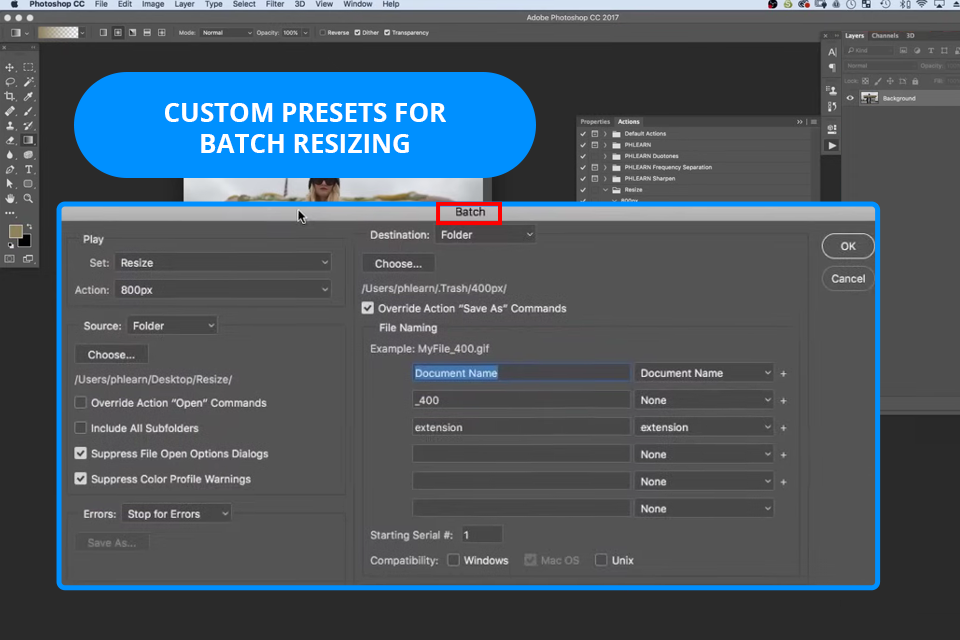
Adobe Photoshop is my go-to tool for photo resizing when I need unmatched precision and control. As a photographer, I rely on Photoshop for everything from detailed edits to straightforward resizing tasks. Unlike Express, Photoshop offers full command over image quality, resolution, and format, making it perfect for professional-level projects.
The latest Photoshop AI updates have significantly enhanced its resizing capabilities. The Remove Tool, with its Distraction Removal feature, allows me to eliminate unwanted elements, ensuring a polished composition. The new Text to Image feature enables me to create custom assets, which is particularly handy for building composites. What’s more, the enhanced Adjustment Brush Tool simplifies selecting and masking, making edits feel more natural and accurate than before.
One of the most valuable features for effective resizing in Photoshop is the ability to create and use custom presets. If I need to resize multiple images, I can set up an action and process them all in one go (a feature that Express doesn’t offer). Another benefit is Photoshop’s ability to preserve image sharpness during resizing, which is particularly important when preparing photos for print or high-resolution displays.
The recent release of Photoshop for iPhone has revolutionized my mobile workflow, allowing me to resize and edit images quickly while on the move. Although it demands more skill than Express, it’s still my top pick whenever I need complete creative freedom and precision.
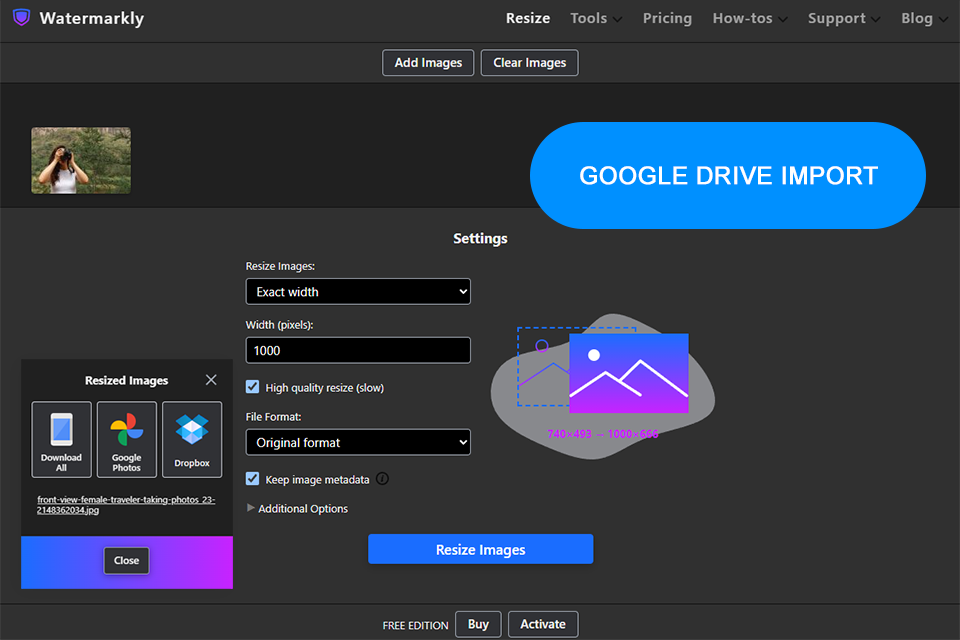
Watermarkly resized a huge collection of my images in a matter of minutes. This free resizing software supported different file types such as PNG and WEBP quite easily and retained the image quality sharp and crisp. Applied the “Exact Width” feature to standardize all images, and the aspect ratio adjusted automatically.
Also, tried the percent resizing feature of the blog graphics - reducing them to 70 percent was perfect for quick loading. Because it processed in the browser itself, the entire experience was both smooth and safe. Live preview and straightforward control helped achieve the desired result without any guesswork.
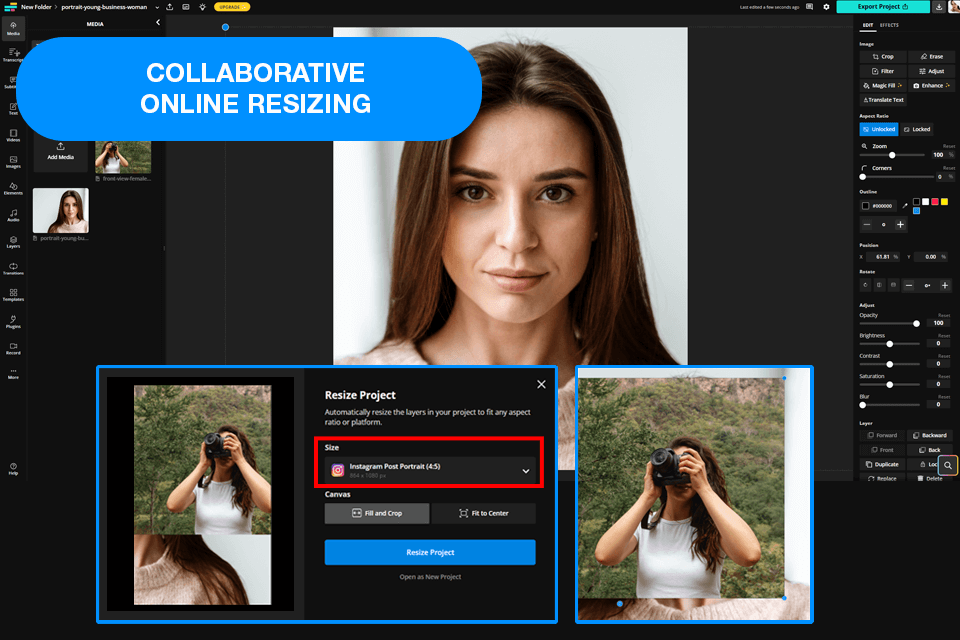
After opening my photos in Kapwing, I had no trouble changing their size thanks to the convenient width and height sections. I can also preserve the original aspect ratio or pick a different one, which is essential when preparing photos for different social media sites. The ability to process multiple images simultaneously also makes it very easy to set the same size to a bunch of photos without wasting any time.
I also appreciate the fact that I can use this app to resize photos while maintaining a single format, as such consistency is essential when adding images to online portfolios or web galleries. The problem is that if you use Kapwing to resize an image for free, it will have a watermark added to it. While you can get rid of the watermark by purchasing a subscription, that might be a deal-breaker for users who want to receive high-quality results without having to pay.
If you pit Kapwing vs Adobe Express or Fotor, you’ll notice that the former’s batch processing tool is a lot more efficient. Meanwhile, Adobe Express is the better option if you want to preserve the high resolution and detail of the original photo.
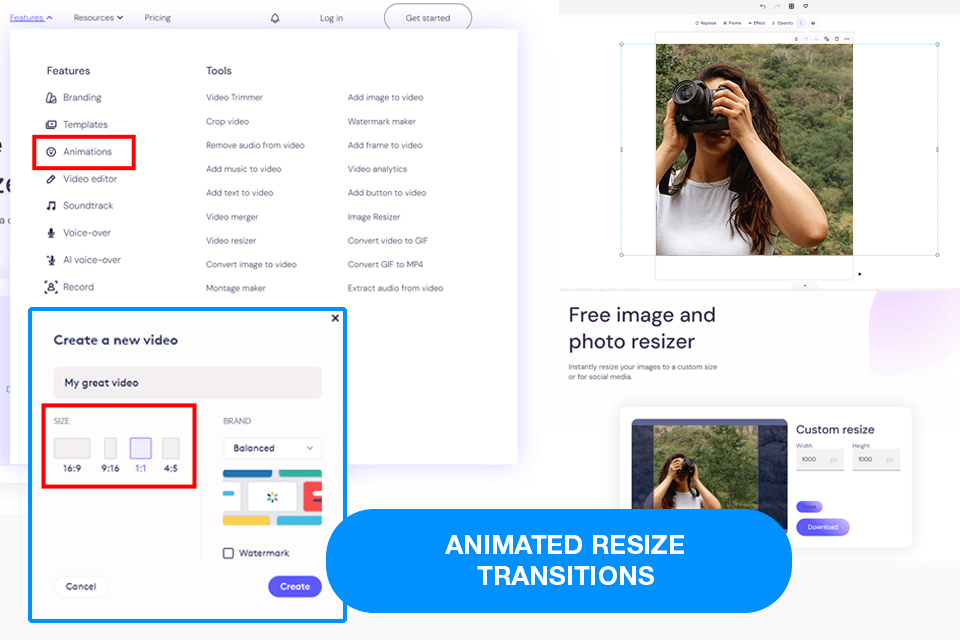
Biteable allows you to pick one of the available size templates designed to fit all popular social media sites, including Instagram, Facebook, and Twitter. You can use this photo resizer tool for free, and you’ll never have to worry about making any manual adjustments afterward.
A unique feature included in this software is the automated background enhancement. When using Biteable to resize photos, I let the tool fine-tune the backdrop elements to maintain proper proportions and ensure no details are lost.
My only problem with this solution is the lags that occur when resizing high-resolution photos. Exporting bigger files is also more time-consuming, and I even experienced several crashes. However, the robust functionality of Biteable more than makes up for its shortcomings, as it represents a great choice for anyone interested in fast, social media-optimized image resizing.
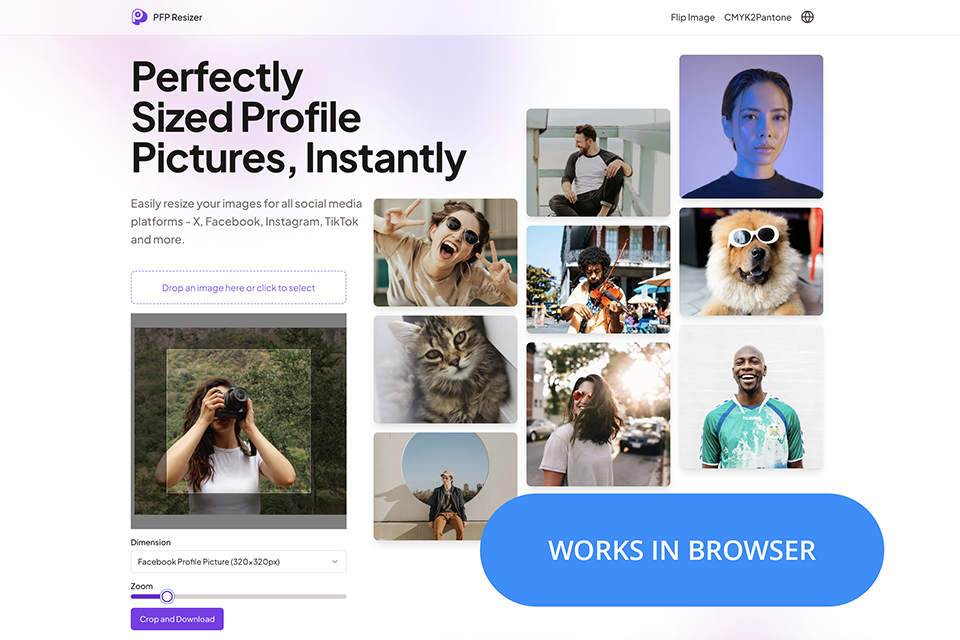
When preparing profile pictures for several social media platforms, PFPResizer came in helpful because it made it simple to upload, crop, and resize everything. The process was far quicker than if it had been done by hand because the tool took care of all the dimension requirements automatically. It is a free photo resizing program that works quickly and doesn't require any setup or downloads.
The preview makes it simple to change the framing before exporting, and everything operates in the browser, which is its greatest benefit. It's a simple and effective choice for anyone who needs neat, appropriately sized profile photographs without having to put in extra work.
Over time, we’ve realized that resizing photos isn’t just about adjusting dimensions. Actually, it’s about doing it correctly to keep your images sharp, clear, and professional. Here are our best tips to ensure your resized photos don’t end up looking like a blurry mess.
Start with the best quality original. Enlarging a tiny web picture for print is an awful idea. Instead, you should choose a high-resolution image from your camera or its retouched version. Stretching pixels leads to a blurry, low-quality photo, so steer clear of it at all costs.
«This is the most important rule to follow. It’s like building a house - if the foundation is weak, even the heaviest repairs won’t make it sturdy. Always begin with your highest-quality, full-resolution original image when resizing.»

Ann Young
Author and Retouching Specialist
Downsampling vs. upscaling. Resizing in photo resizers can go one of two ways:
When you upscale, your software has to predict what the missing details should be. While some AI-powered tools can cope with this task, the results are often below your expectations.
❌ Avoid upscaling if possible.
✔️ If upscaling is necessary, do it gradually and be ready for a slight drop in quality.
Sharpen wisely (especially after downsizing). Over-sharpening can lead to harsh halos and unnatural textures, so keep it subtle. Most editing tools like Photoshop, Lightroom, and Capture One offer sharpening settings. So, tinker with them to find the perfect balance for your image.
«Resizing, especially making an image smaller, can make it look a bit soft or blurry. A little sharpening afterward can help bring back the detail. Just don’t go overboard.»

Tetiana Kostylieva
Author and Retouching Specialist
Save in the right format for the job. Before pushing the "Save" button, think about where you are going to publish the image:
«Picking the right format guarantees your images stay sharp and clear, without unwanted compression or quality loss»

Kate Gross
Digital Technology Writer
Use social media presets. Why guess the right dimensions when tools like Adobe Express or Photoshop’s export settings can do it for you?
Why waste time guessing the correct dimensions when tools like Adobe Express or Photoshop’s export settings can do it automatically?
✔️ Instagram Stories? 1080×1920
✔️ Facebook Cover? 820×312
✔️ Pinterest Pin? 1000×1500
Social media presets are a huge time-saver, making sure your images look perfect without weird crops or quality loss. If you’re frequently posting online, presets are what you need.
When I started searching for the best photo resizing software, I wanted my findings to reflect real-world experience. I didn’t just choose tools randomly, I did thorough research. I read online forums, consulted with fellow photographers from the FixThePhoto team, and even gathered feedback from clients who regularly resize images for social media and marketing. My goal was to identify tools that deliver good results, not just ones that seem to be impressive based on their specs.
After compiling a long list of options, i.e. 20+ programs, including Krita, Pixlr, PhotoResizer, Picsart, GIMP, etc. I tested each one myself. Some tools were quick and easy to use, while others were sluggish and annoyed me. I considered the aspects that photographers care about most:
Ease of use. I was looking for a tool that kept my workflow fast and efficient. I tested how user-friendly each program was. Could I resize images with just a couple of clicks, or did I have to navigate through confusing menus?
Customization. Every project is different, so I checked whether the software allowed for precise adjustments. Could it preserve the original image quality? Did it offer presets tailored for different platforms?
Performance. Since I work with high-resolution images regularly, I tested how effectively each image resizer app managed large files. Did they compress the files too much? Were the final results still sharp and detailed?
Batch processing. Since I often deal with many images at once, I highly appreciate the batch resizing option. Unfortunately, some tools lack this feature, decreasing their efficiency.
Export & sharing. I also checked the ability to save and share pics in different formats. Good software should support high-quality exports, which are great for both print and web use.


