When I discovered that I spent too much time arranging and aligning photos in my layouts manually, I decided to find the best photo grid maker for my workflow. I am often tasked with creating collages for Instagram posts. Besides, I sometimes need to create polished blog previews and client drafts. However, it takes me too long to create grids in Photoshop as I have to take many unnecessary steps.
At first, I tried using some popular apps, as I thought that any of them could help me optimize my workflow. Unfortunately, I quickly discovered that most of them were hardly suitable for streamlining my routine. Most of them failed to create polished layouts, had a limited choice of templates, lacked accurate alignment tools, or added watermarks in the free versions.
This is why I decided to adopt a different strategy and test widely-used solutions on the same projects. I tested over 25 tools to compare them in terms of template quality, intuitive functionality, customization, and output settings.
I wanted to find the solutions that would allow me to create a professional-looking grid quickly, without requiring me to adjust spacing or resize elements manually.
| Tool | Best For | Free Tier Highlights | Free Tier Quality |
|---|---|---|---|
|
|
Clean aesthetic grids, social media content
|
Free templates, drag and drop editor, quick export, text tools
|
★★★★★ (5/5)
|
|
|
Creative layouts, Instagram posts
|
Huge template library, grid layouts, collaboration, export options
|
★★★★☆ (4.5/5)
|
|
|
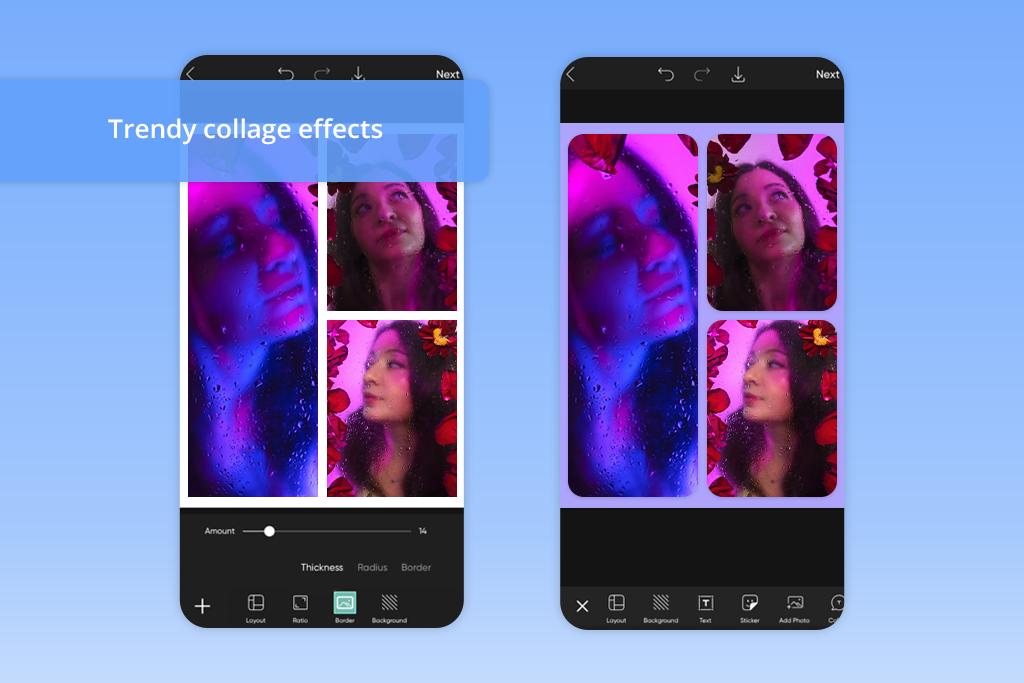
Trendy collages, effects
|
Grid maker, stickers, filters, background remover
|
★★★★☆ (4/5)
|
|
|
Quick collages, simple edits
|
One-click grids, templates, and basic editing tools
|
★★★★☆ (4/5)
|
|
|
Fast mobile grids, social content
|
Grid layouts, filters, stickers, quick sharing
|
★★★☆☆ (3.5/5)
|
|
|
Fun collages, beginners
|
Easy drag and drop, templates, doodles, stickers
|
★★★☆☆ (3.5/5)
|
|
|
Social media formatting, resizing
|
Grid layouts, filters, resize tools, export
|
★★★☆☆ (3/5)
|
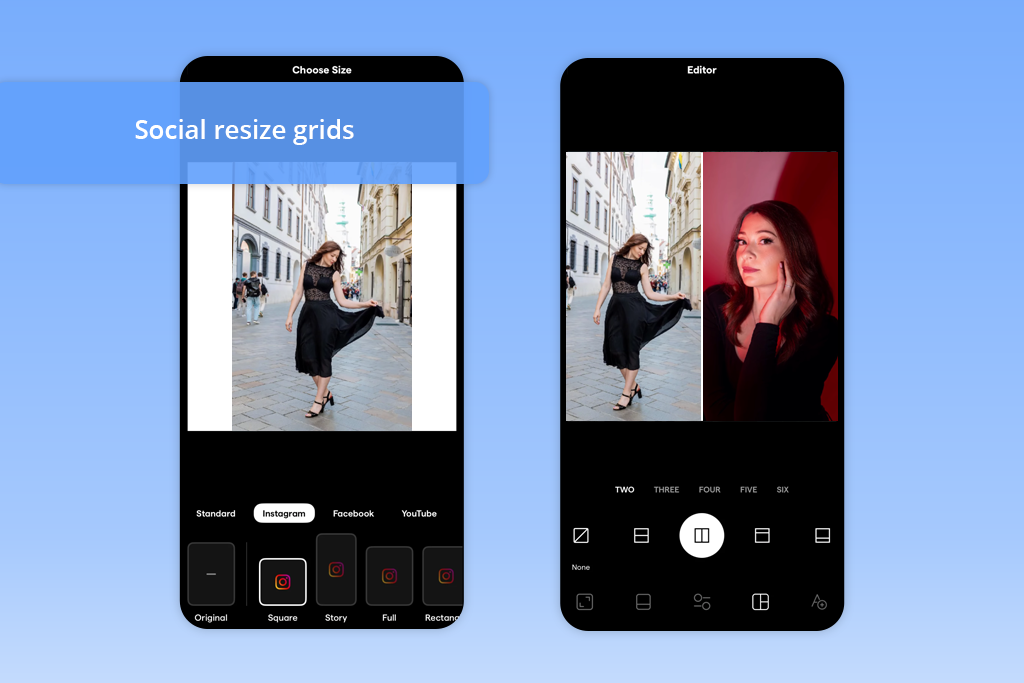
Before building a grid, consider where you want to publish your content. I published the same layouts across different platforms and was surprised by the way they were displayed and perceived there. Some grids grab users’ attention on Instagram but look bleak on TikTok or Pinterest. If you want to achieve social media photography success, you need to understand what format works best for your preferred platforms. The same images will perform differently depending on the layout you use.
Instagram prioritizes clean aesthetics. Use well-balanced grids to give your feed a professional feel. I discovered that simple layouts look and perform better than complex ones. This is why it’s important to align the elements perfectly and avoid making your layouts look cluttered.
The best strategy is to use one main image and complement it with a few supporting pictures to showcase the important details. When you are using a photo grid maker for Instagram, it will help you create layouts that look intentional.
Best formats:
TikTok is all about capturing a viewer’s attention. There is no need to focus on creating nice-looking grids. You need to design layouts that will help you bring your point across instantly and make people watch your content. After experimenting with different formats, I concluded that it’s better to use bold and simple designs than focus on convoluted but eye-pleasing layouts.
The best layouts are the ones that show some contrast. You can show how a person has changed, compare two images, or focus on the result. Use a photo grid maker with text to convey your main message instantly.
Best formats:
Facebook is more streamlined than other social media platforms. Its users do not prioritize design. When scrolling through their feeds, they are looking for comprehensible content. This is why it’s better to use complex grids here.
After testing different types of grids, I realized that clean and streamlined layouts with a limited number of elements help me reach out to a wider audience. You can use a photo grid maker free of charge to create a well-organized grid with a clear structure.
Best formats:
When creating a grid for Facebook, focus on making your content easier to comprehend instead of focusing on design.
Price: Free or from $9.99/mo.
I decided to test Adobe Express when I discovered that it took me too long to adjust alignment and spacing manually when using other solutions. This program allows me to create well-balanced grids quickly.
There is no need to design layouts from scratch, which allows me to focus on my content. It’s one of the best solutions for those who want to use automated tools to streamline their workflows without quality loss.
I was pleased by the fact that Adobe Express helped me achieve consistent outputs. This AI photo grid maker delivers fast performance and allows me to create clean and structured grids. It’s the perfect solution for those who want to achieve polished results with little to no effort.
“I prefer to adjust spacing and padding first to make templates polished and give my grids a premium feel. Even a great template won’t look nice is it has uneven gaps between images.”

Unlike Adobe Express, Canva supports a higher workflow flexibility. If you need to try out different styles instead of relying on the same clean layout, this platform will help you customize your outputs better. It’s the perfect solution for creative designs or mixed-format grids.
I was impressed by the fact that this photo grid collage maker allowed me to make my layouts more detailed without using any third-party software. However, I discovered some limitations of this service when trying to create complex designs. Despite this shortcoming, it can be considered one of the most versatile solutions for everyday use.

Price: Free or from $5/mo.
Unlike more traditional grid makers, Picsart uses a unique approach. It does not impose a strict structure, allowing users to experiment with more creative layouts and create eye-catching grid designs. Even though the grids I’ve created with its help look less polished, they are more engaging. It makes this service perfect for creating short-form content for TikTok.
The key advantage of Picsart is that it can help you make photo grid online and convert it into something more attention-grabbing. However, it’s better to avoid using too many effects if you don’t want to make your designs look cluttered.
Picsart is the top choice for those who want to create visually appealing content quickly. You may also use other apps like Picsart if you are interested in more advanced functionality.
“Try increasing contrast between pictures to make your grid more visually balanced.”

Price: Free or from $8.99/mo.
Among all the services I’ve tested, Fotor is one of the fastest. Even though it does not have a large template library, the available layouts are easy to apply and customize. This solution is hardly the best option for creative editing tasks, but it stands out for its efficiency.
Fotos is less suitable for advanced customization, but it will help you achieve fast results. It’s the perfect service for your needs if you want to create polished grids without taking any unnecessary steps.

Price: Free or from $6/mo.
If you prefer to create grids on your phone, you will enjoy using PhotoGrid, as it’s more intuitive than desktop software. You won’t need to spend hours trying to create complex layouts, as this service allows you to produce eye-catching content in seconds.
PhotoGrid prioritizes high performance speed, making it perfect for those who need to publish content quickly and do not have a lot of time to arrange all the layout elements.
Unlike some other services, PhotoGrid saved me a lot of time. I also consider it the best photo collage app, as it allows me to create engaging posts quickly.
I liked the streamlined editing process. However, I noticed the limitations of this service when I used it to adjust spacing and align elements with high precision.
PhotoGrid is one of the easiest options for those who want to create grid layouts quickly without focusing on details. This photo grid maker with templates is perfect for creating everyday content on mobile devices.
“While using this service, I prefer to check the preview to see how my grid will look in the feed.”

Price: Free or from $4.99/mo.
The key advantage of Pic Collage is that it is more intuitive than other options on this list. While it won’t help you create the perfect layouts with all the elements nicely arranged, it prioritizes simplicity and quick workflow. You may use it if you don’t need to focus on a structure and want to achieve polished results quickly.
I discovered that Pic Collage is more suitable for personal content than professional branding. It did not take me long to master its tools. You can learn how to use it quickly, even if you don’t have any background in design. It’s a reliable service for those who want to design simple but stylish grids without focusing on details.
Price: Free or from $4.99/mo.
When I started to use Instasize, I became impressed by its tools that helped me prepare my content for posting. There is no need to create grids from scratch when trying to design complex layouts. Using the available templates, you can quickly optimize the size of your images to create grids that are ready to be published on popular platforms.
This solution is more suitable for giving your projects a finishing touch than for working on creative tasks. Like many free photo editing apps, it’s suitable for formatting content quickly.
Instasize is hardly the best choice for those who need to create a unique grid or combine different styles. However, it’s perfectly suitable for those who need to save their content in the right format and achieve consistency without spending a lot of time on design.
“Before building a grid, I prefer to match the aspect ratio to the platform to ensure that my composition won’t get distorted after export.”
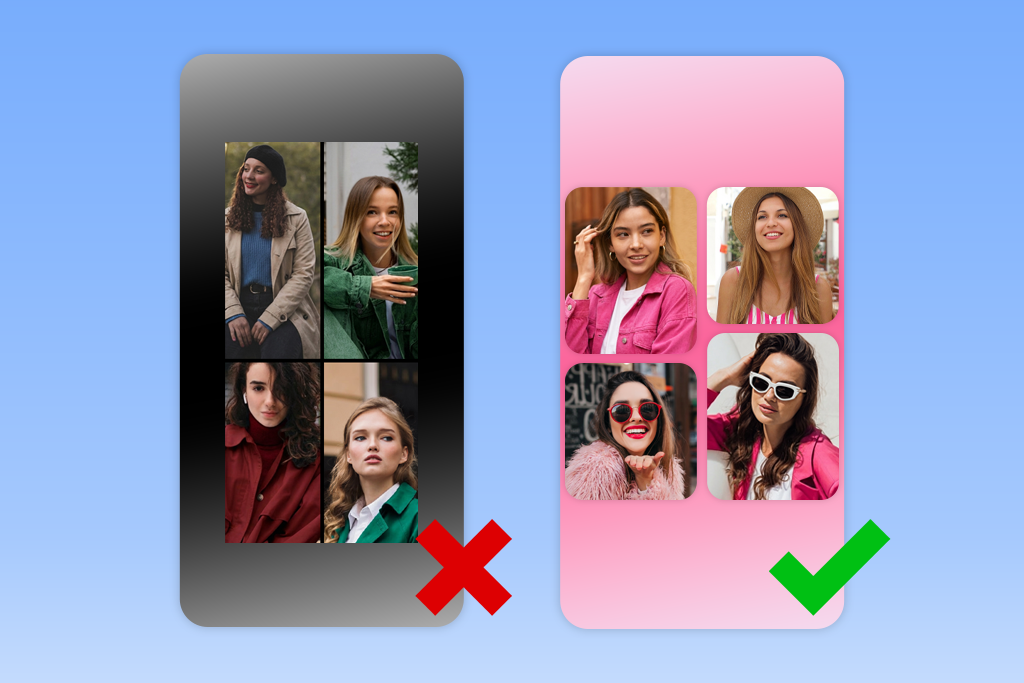
Many grids look cluttered and unprofessional, not because their creators chose the wrong service to create them. They look unimpressive because a person who designed them chose the wrong photos. Random pictures never look great when put together. Even if you choose the best layout, your grid will still look poorly structured.
After testing a variety of tools and experimenting with different formats, I realized that the best grids have the right combinations of photos. This is why it’s better to follow the rule of thirds in photography and put your main subject a bit off-center to create a perfectly balanced grid.
This approach will help your design look polished and intentional. When creating a layout using a photo grid maker without app, do not add every image you like. Choose the best picture and then select the images that complement it in some way. While testing these services, I would often notice it was never a good idea to combine photos that looked equally important. Such grids often looked messy.
Here is an example of a grid structure that could actually be useful for any task. Choose the main shot to convey the key idea and use smaller pictures to provide additional context. This simple approach will help you create a layout that is easy to read.
What to combine:
Example:
Product → main front shot + a picture showing the texture + an extra image with packaging detail
This grid format allows a designer to grab a viewer’s attention without providing lengthy explanations. Such grids stand out among the rest on the feed, as they allow users to see the result clearly.
When using this format, the main thing is to maintain consistency. When we tried creating such grids, they looked great only when we used pictures captured from a similar angle. Besides, our photos had the same lighting and framing. If those parameters are inconsistent, it might be impossible to see the result of the comparison clearly.
What to combine:
Example:
Editing → unedited image + retouched picture
This format allows designers to make their layouts look intentional. It’s often used by those who want to tell an engaging visual story. People create such grids to make their content more informative.
While working on my projects, I discovered that wide shots do not attract a lot of attention when I use them on their own. However, when I combine them with close-ups captured at the same location, it allows me to complement the main image with more detailed pictures.
What to combine:
Example:
Outfit → full look + shoes + accessories
Adobe Express and Canva are the best solutions for creating clean layouts. They have collections of templates that will help you expedite your workflow.
Yes, Adobe Express, Canva, and other similar tools support free exports and do not add watermarks to outputs in most situations, especially if you use basic templates.
Yes, you can find a suitable photo grid maker online. For instance, you can access platforms like Adobe Express, Canva, or Fotor from your browser without installing any software on your device.
It’s better to use from 2 to 6 images. If you add more pictures, it will be more difficult for a viewer to understand your layout, as it will look more cluttered.
It’s better to use basic layouts, such as 2x2 grids, before/after split grids, or add one main image and 2–3 supporting pictures, as such grids look great on Instagram.
Yes, if you are looking for a photo grid maker with text, you will easily find a solution that will enable you to add captions, titles, or brief descriptions to your grids.
Pic Collage and Canva are the most intuitive solutions for beginners, as they have streamlined interfaces, support drag-and-drop editing and have collections of templates.
We wanted to find the most efficient tools that could become an integral part of our workflows. This is why my colleagues from FixThePhoto team and I tested the suitability of each photo grid maker for handling practical tasks we have to deal with daily. We wanted not just to focus on their features but to see how these solutions could be used for creating engaging Instagram posts, blog visuals, and client previews.
While we tested these services, we followed a strict procedure to achieve consistent results. We assessed each solution in terms of its usability instead of focusing on its toolsets or marketing materials. We wanted to see how quickly we could implement our ideas and create grids without making our workflows more complicated.
Here are the main things we considered:
In addition, we wanted to see how each photo grid maker app would function in real-life scenarios. We wanted to find services that would help us meet tight deadlines, edit our files quickly, and revise our designs multiple times. For instance, we used these services to create the same grid to understand which outputs looked better and required less manual tweaking.
Besides, we tested the suitability of these services for different projects. We used them to create:
This approach helped us discover the best solutions for creating grids for different social media platforms.
As we tested these services on the same projects, it helped us understand which of them optimized our workflow and which options required us to take too many unnecessary steps. Some solutions support high speed and are easier to use. Others allow users to work on more creative tasks. However, only some of them are suitable for simple and advanced projects.


![9 Best Descript Alternatives in {{%year}} [Expert Insights]](/placeholder-450x300.svg)


