As a photo retoucher, I use professional editing tools every day for tasks like color correction, exposure adjustment, and image enhancement. My regular workflow involves advanced software such as Photoshop and Lightroom, which provide detailed control over shadows, highlights, and overall image quality. However, many readers have recently asked for simpler ways to lighten photos online without using complicated software, paying for expensive subscriptions, or spending time learning advanced editing techniques.
I wanted to see how these tools performed in practice, so the FixThePhoto team and I spent time testing different online solutions on a range of images. From selfies and product photos to darker indoor shots and landscape pictures, we checked which tools delivered the most natural-looking results, kept important details intact, and offered a good balance between simplicity and useful features.
When narrowing down my recommendations, I focused on overall image quality rather than simple one-click brightening. The best tools were able to improve visibility without adding grain, losing detail, or making skin tones look unnatural. Whether they used AI automation or manual adjustment options, these image brighteners consistently delivered clean results and provided an easy alternative to traditional desktop editing programs.
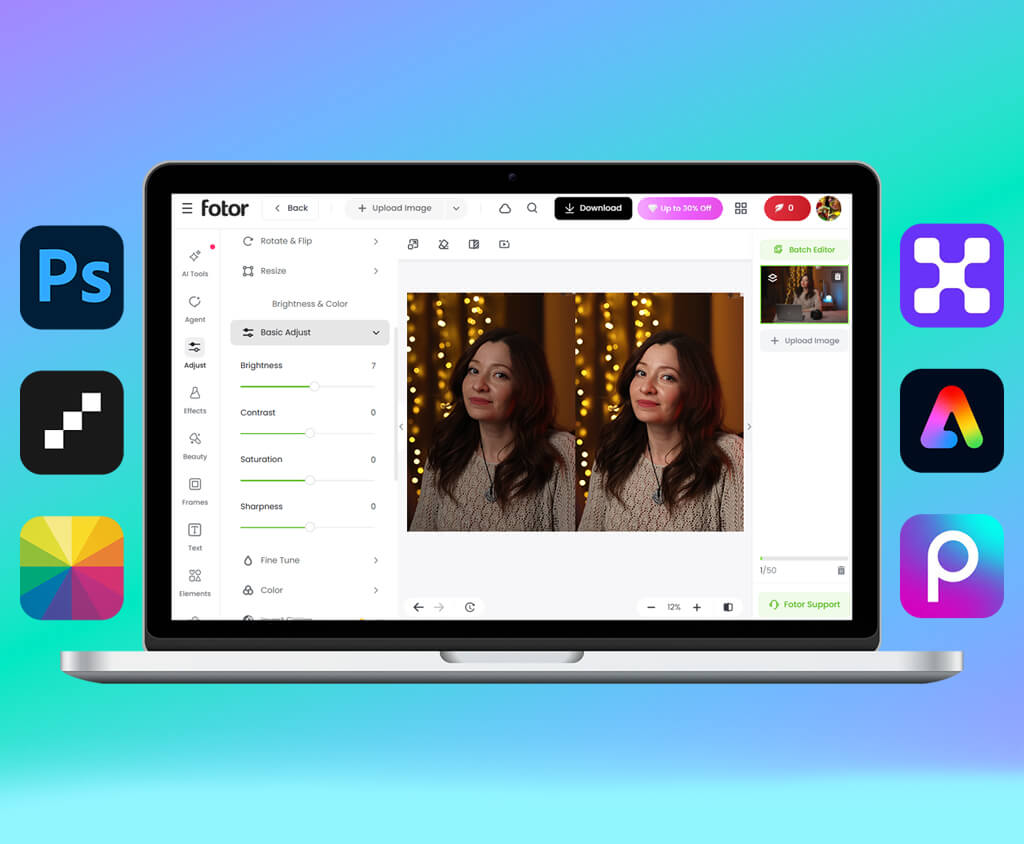
Many people assume that increasing brightness will automatically improve a photo, but that's not always true. Simply making a photo brighter doesn't guarantee better results. A well-edited image needs balanced lighting, not just higher brightness levels.
Pushing this setting too far can remove important details, flatten the image, and make the final result look unnatural. Whether you're improving a dark selfie, a product photo, or a travel shot taken in poor lighting, following a few basic editing principles can help you achieve a much more natural and professional-looking result.
I’ve been using Adobe Express for quick edits when I’m out and about, especially if I don’t feel like opening heavier software just to fix the brightness on one photo. I tested it with a dark indoor portrait and a product shot that was a bit too dim.
I wanted to see how much I could brighten them. First, I went into Adjustments and chose Brighten, then I played with Contrast, Highlights, and Shadows, so the images didn’t end up looking flat and washed out, which happens with a lot of online editors. The whole process felt easy: fast upload, simple controls, no need to dig through menus.
“I use Adobe Express when I need to fix a photo fast without stopping whatever else I'm doing. The brightness tools are easy to use, but what I like is that I can still adjust shadows and contrast after, so I'm not stuck with some automatic result that I can't change.”

What I liked about Adobe Express was that it offered more than a basic brightness adjustment. After using the automatic enhancement feature, I could still fine-tune the image with additional controls. In a portrait photo, increasing the shadows brought back details in darker areas while keeping skin tones natural. A small warmth adjustment also helped maintain realistic colors.
I tested the Sharpen tool on a slightly blurry image, and it improved clarity without making the edges look harsh. The only drawback I noticed was that the automatic enhancement sometimes added more contrast than I preferred, so I occasionally reduced it for a more balanced result.
Adobe Express turned out to be useful for more than simple photo brightening. After improving the lighting, I could continue editing the image by adding text, graphics, filters, or adjusting the size for different platforms. Having everything in one place saved time and made it a practical online photo brightness editor for creating social media content and marketing materials.
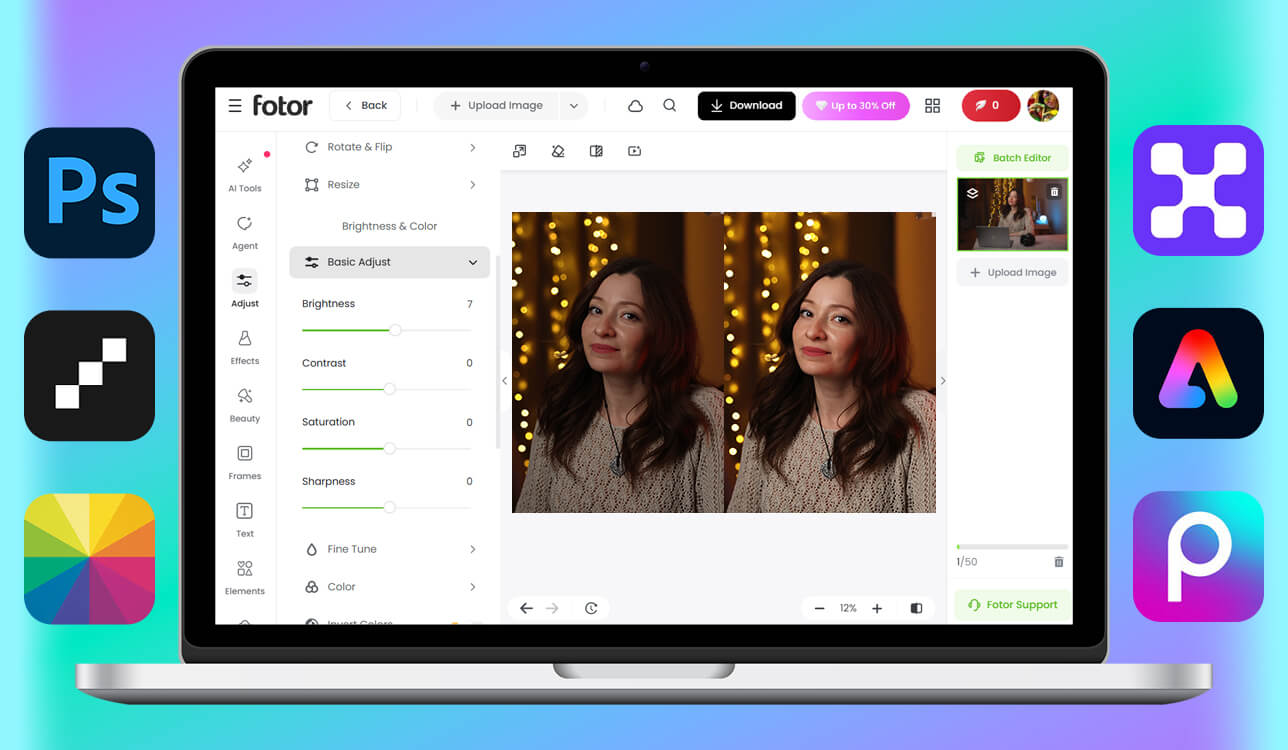
I've used Fotor for years as a simple photo editor, so I was interested to see how its newer AI features can increase image brightness online. To test it, I uploaded a dark portrait and an underexposed landscape photo and started with the AI Photo Enhancer. The results were surprisingly quick.
Dark areas became brighter, facial details were easier to see, and the colors looked more vibrant without any manual adjustments. The only issue I noticed was that the landscape photo looked a little too dramatic after processing, with a slightly stronger HDR effect than I would normally prefer.
“This tool performed better than I expected based on my past experience with it. I tested the AI enhancement on several low-light portraits, and it brightened faces naturally without making them look overedited.”

After that, I tried making changes by hand to see if Fotor could do more than just the basic easy settings. I used the Brightness and Contrast sliders together, which gave me a lot more control than I remembered from older versions. On a dark product photo for an online store, I made it brighter without losing the clear edges.
A small contrast fix also kept the image from looking faded, which happens a lot in web-based editors. I also liked that making faces brighter didn’t ruin the skin details - something many AI editors still have trouble with.
What really made me see Fotor differently wasn't just one thing. It was how freely I could move between letting the AI handle the hard work and then making small manual fixes if something didn't look right. I also tried the mobile app for a short time, and it worked well enough for quick edits when I wasn't at my computer. This online image brightener is beginner-friendly, but it now offers more useful features and better results.
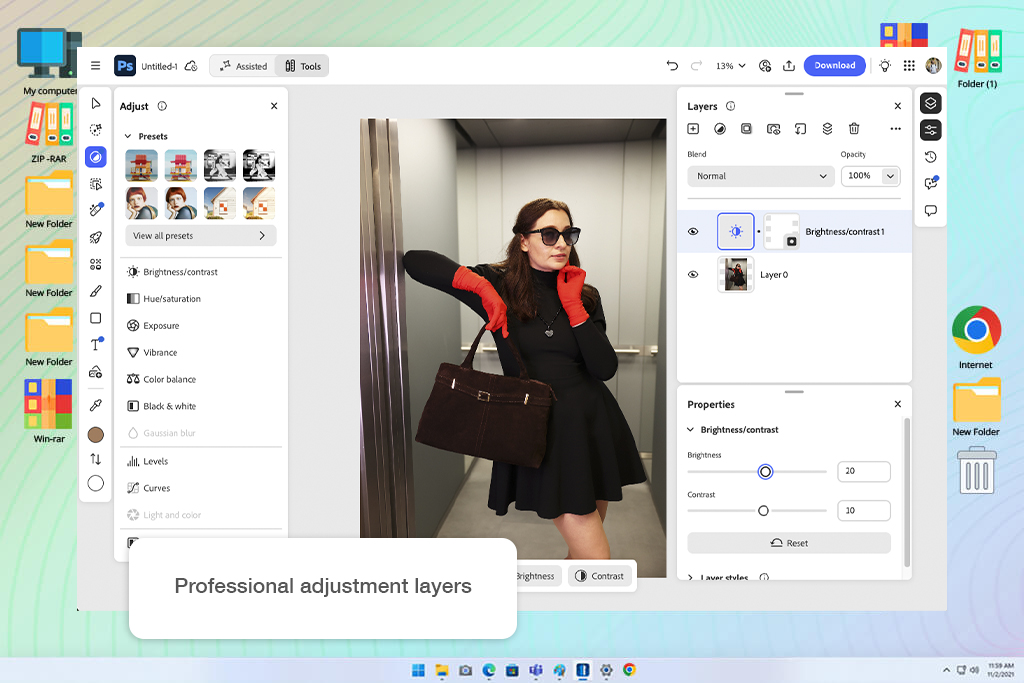
I tested Adobe Photoshop as the most advanced option for brightening dark photos, especially when basic sliders were not enough. I uploaded an underexposed portrait, a product photo with harsh shadows, and a low-light indoor image to see how much detail I could recover without making the result look flat.
The biggest advantage was control. I used Exposure, Curves, Shadows/Highlights, Camera Raw Filter, and adjustment layers to brighten the photos gradually. Unlike simple online image brighteners, Photoshop let me fix only the dark areas while keeping bright parts from becoming overexposed. This was especially useful for the product photo, where I needed to make the object clearer without losing texture or shape.
“Photoshop gives me the most control when a dark photo needs more than a quick brightness boost. I can brighten only selected areas and keep the image natural.”

I then tested the AI-powered masks and tools. In comparison to manual selection, they helped me choose the subject more quickly and brighten the background independently. I was able to minimize the sharp contrast, raise the shadows on the face, and maintain a realistic skin tone on a dark portrait.
If someone requires a one-click adjustment, Photoshop is not the fastest option. For fast adjustments, programs like Fotor, Canva, or Adobe Express are simpler. However, Adobe Photoshop is more superior when it comes to image quality. Photographers, retouchers, designers, and operators of online stores that want accurate brightness adjustment and desire complete control over the finished image will find it most effective.
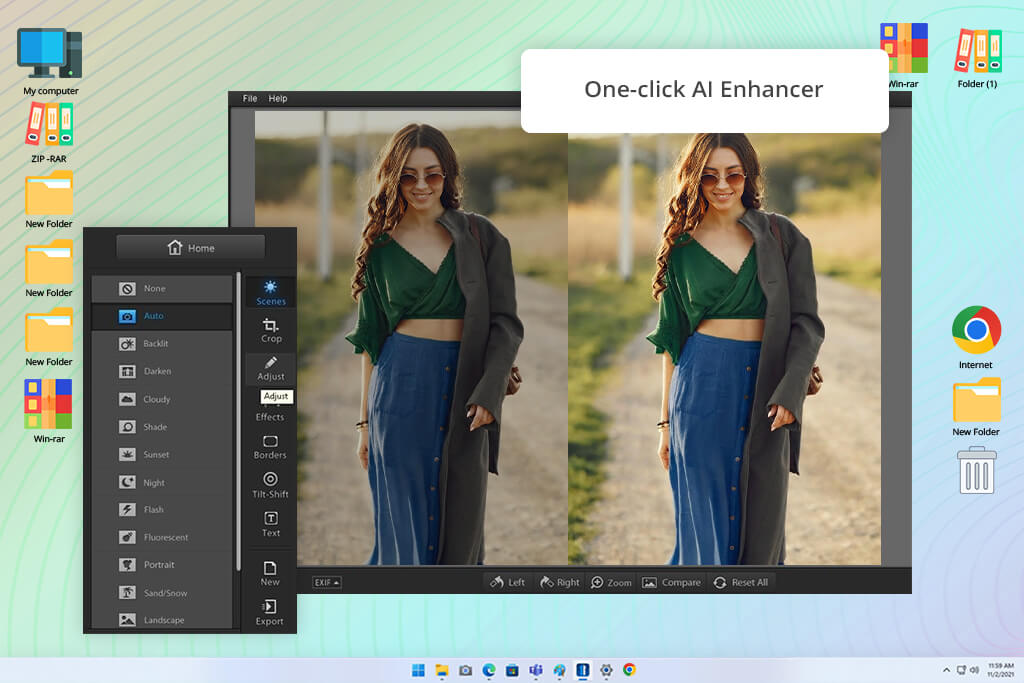
Since Picsart is often used for social media content, I wanted to see how it handled a challenging photo. I chose a dark selfie that was slightly blurry, which is usually a good test for photo enhancement tools. I started by using the AI photo editor to improve sharpness, then adjusted the brightness, shadows, and highlights to make the image look more balanced. What I liked most was the live preview, which let me see the results instantly and make changes without repeatedly undoing edits.
The editor offered more control than I expected. Simply increasing the brightness made the photo look a bit flat, so I adjusted the highlights and added a small amount of contrast to bring back depth and detail. I also tested tools like Clarity, Saturation, and Hue on a dark travel photo to see how much I could improve the overall look after fixing the lighting. The adjustments worked quickly, although some sliders felt a little sensitive and could change the image more than expected with small movements.
What stood out during testing was the range of export options of this image brightness editor. I brightened a logo mockup and was still able to export the final result in high resolution while keeping support for SVG files. That made the tool practical not only for photo editing but also for design projects involving marketing graphics, branding materials, and social media content.
I've always had a positive experience with Topaz Labs software, especially when it comes to image quality, so I was interested to try its online image brightener tool. What stood out right away was how differently it handled lighting compared to many browser-based editors.
Instead of brightening the whole image evenly, it improved darker areas while keeping details intact in brighter parts of the photo. In my test images, shadows around the face and clothing became clearer, but highlights still looked natural, resulting in a more balanced and realistic correction.
“Compared to many browser-based brightening tools, this one handled lighting more carefully. On an underexposed portrait, it improved the darker areas without making the entire photo look flat or overprocessed.”
I wanted to see how much control the tool really gave me, so I turned off the automatic setting and adjusted the exposure by hand. That helped a lot with a dark street photo. I wanted to see more detail without losing the moody feel of the lighting. The tool did a good job keeping the colors natural - blacks stayed black, and skin tones didn't turn too warm. But I did learn that matching a specific style takes some trial and error. Even small changes can change the mood of a photo more than you'd expect.
I tested the editor on a dark photo that had a lot of fine detail in hair and fabric. I looked closely for common problems - like more grain, less contrast, or faded bright areas. But I saw very little of those issues. The online workflow was also very simple: upload, process, tweak if you want, then download. Getting that much lighting help from a website, without having to install heavy software on your computer, turned out to be more useful than I first thought.
I came across Pixelbin while searching for online image brighteners and decided to test it on a group of dark product photos. What caught my attention was its support for batch processing, folder organization, and high-resolution exports. The workflow was very simple: upload the images, let the tool process them, and download the results. It automatically improved darker areas without requiring any manual adjustments, which made the whole process quick and convenient.
I tested the tool on several photos in a row to see how consistent the results were across different images, which is especially important when working with product catalogs or online listings. One thing I liked was that it offered watermark-free HD exports without requiring an account. The process felt quick and hassle-free. I also tried the 8x upscaling feature on a smaller image after brightening it. The photo stayed sharp overall, and most edges looked clean, although some very fine details appeared slightly smoothed when viewed up close.
One thing I appreciated was the encrypted image processing, which made me feel more comfortable uploading commercial and product photos. The interface was simple and organized, making it easy to switch between folders, review results, and manage multiple images at once. Rather than focusing on creative editing, the tool felt designed for fast and efficient image processing, which worked well for handling a large number of brightness corrections.

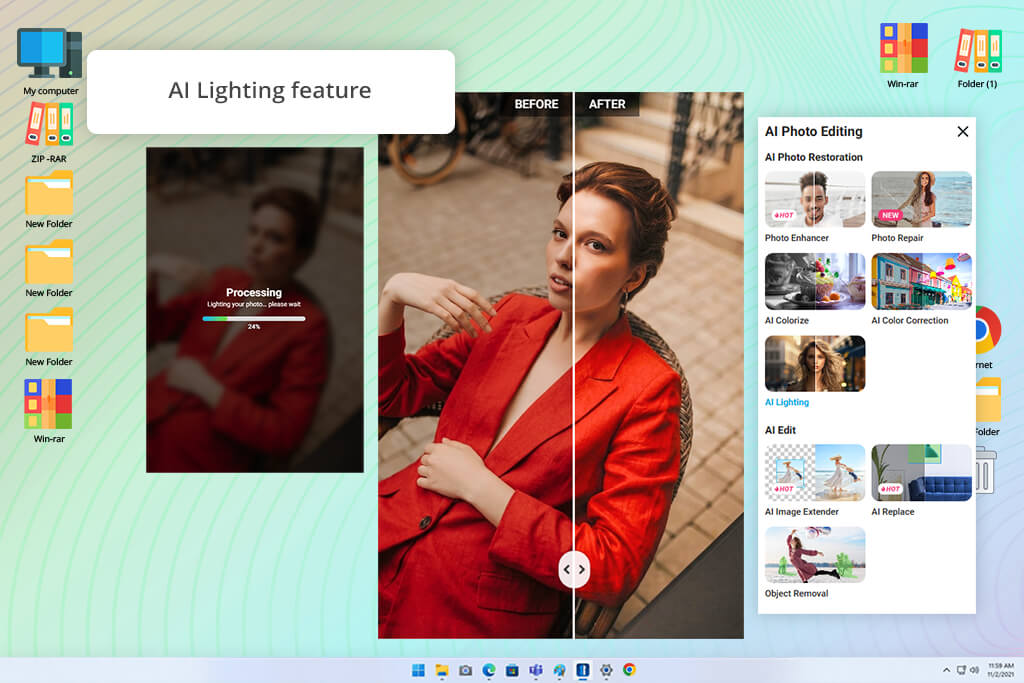
A colleague of mine, Robin, suggested trying YouCam Enhance since the developer is already well known for its makeup editing app. To see how it performed, I tested the AI Lighting feature on a portrait taken in poor indoor lighting. The tool processed the image in just a few seconds, brightening darker areas around the face and background while also improving detail and overall sharpness.
“I tested YouCam Enhance on several casual portraits to see how well its AI Lighting feature handled uneven indoor lighting. The results were quick, and the photo looked noticeably cleaner without requiring a lot of manual adjustments or complicated settings.”
A friend shared a night photo taken on a city street. Increasing the brightness didn't just make everything look lighter - it actually helped me see building outlines, fabric patterns, and facial features more clearly. I kept comparing it to the original because some AI corrections add too much fake detail. This one stayed fairly natural. But on one portrait, the AI correction overdid things a bit, and the person's skin ended up looking slightly over-smoothed.
The interface of this photo lightener was clearly designed for quick edits, which worked well for this type of tool. I didn't have to spend time adjusting multiple settings or searching through complicated menus to get good results. After testing portraits, lifestyle photos, and even a dark product image, I found that most of my time was spent reviewing the AI adjustments rather than fixing mistakes manually. This made the overall workflow fast and efficient.
CapCut is best known as a video editing app, so I didn't initially consider it for photo brightening. However, after noticing its low-light enhancement features, I decided to test them on a few images.
The automatic brightening worked quickly and immediately boosted visibility, making dark areas much easier to see. On a portrait photo, the tool also improved facial details while keeping skin tones looking natural and realistic.
“I tested the low-light enhancement on a dark selfie, and it did a good job of making facial features more visible while improving the overall color balance. I only adjusted the clarity afterward to create a softer, more natural-looking result.”
After the automatic brightening, I adjusted the color, clarity, and saturation to give the image a more balanced look. These changes helped add depth to a nighttime photo that initially appeared a bit flat. I also tested the clarity tool on a slightly blurry travel image, and the results were better than I expected. The photo looked sharper, but the edges remained natural rather than overly harsh. The only issue I noticed was that some darker areas showed a slightly processed appearance when viewed up close.
Switching between the automatic tools and manual adjustments was easy, so I could edit several low-light photos without spending time figuring out the interface. I tested portraits, city scenes, and a poorly lit food photo, and the tool consistently focused on improving the main subject while still giving me enough control to fine-tune the overall look of the image.
I picked three very different kinds of pictures to try out Evoto: a portrait taken in low light, a photo of a shiny object, and a shot inside a restaurant where the light came from all over the place. I was curious whether its brightness tools actually change how they work depending on what's in the picture, or just do the same thing no matter what. The controls felt snappy, but the thing that really stood out to me was how precise the tool was with the shadowy parts of each image.
I tried a portrait photo to see how Evoto balances things. The picture was taken in warm light that didn't fall evenly. Those kinds of shots usually look weird after brightening. When I made the dark areas lighter, I could see more detail on the face and clothes. But the bright parts didn't get ruined. The final picture didn't look washed out or overly fixed, which happens a lot with many other online image brighteners.
By the time I got to the product photos, I was just fine-tuning things instead of fixing big problems. I could adjust the bright spots, tone down harsh reflections, and bring out dark details without starting over. The mobile-friendly setup worked well on my phone too, which made quick edits easy when I wasn't at my computer. But if you want a very specific look, you still need to spend a little time moving the sliders around.
During testing, we used the same approach we follow in our everyday retouching work. We weren't just looking at which tool could make a photo brighter, but how well it handled different lighting situations while preserving details, natural colors, and balanced contrast. Brightening an image is easy. Maintaining image quality and keeping the result realistic is what separates the better tools from the rest.
To make the comparison more realistic, I used a variety of image types rather than focusing on a single category. The batch included dark portraits, indoor photos with poor lighting, nighttime outdoor shots, product images with reflective surfaces, lifestyle photos, and pictures taken under mixed lighting conditions. This made it easier to see how well each editor handled different subjects, colors, textures, and lighting situations instead of applying the same adjustment to every image.
Robin focused on whether each online photo brightener could improve visibility while preserving overall image quality. He looked at shadow recovery, highlight control, color accuracy, and how natural the final image appeared. While many tools were able to brighten dark areas and increase visibility, some also introduced issues such as faded highlights, weak contrast, overly strong colors, or visible noise. By comparing the original and edited versions, Robin checked whether details in skin, clothing, backgrounds, and textures still looked natural after the adjustments.
In addition to image quality, we looked closely at the overall editing experience. Tani evaluated how well each tool balanced automatic enhancements with manual adjustments and how easy it was to fine-tune results without starting over. She also reviewed practical features such as export quality, supported resolutions, mobile usability, privacy settings, batch processing, and whether users could continue editing an image after improving its brightness.
Finally, I tested these tools from the perspective of actual users rather than controlled demos. Some edits were intentionally done quickly, the way a creator, marketer, small business owner, or casual photographer might work under time pressure. Other images received more careful adjustments to see how well each editor could create a clean, balanced, and natural-looking result rather than simply making the photo brighter.


![11 Best AI Sticker Generators [Simple for Non-Designers]](/placeholder-450x300.svg)


