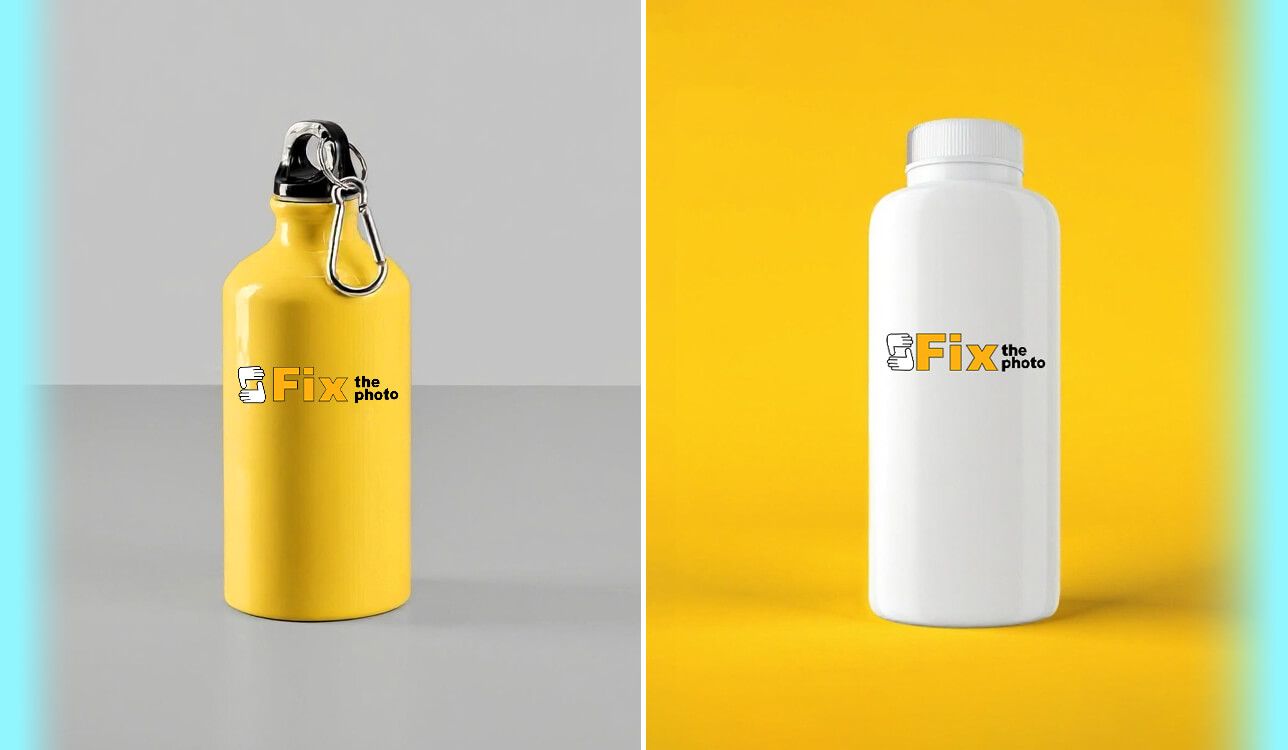
I work as a graphic designer at FixThePhoto, and a few months ago, a small beverage startup came to us while preparing to launch a kombucha line. We created labels for several flavors, and the team wanted to see how the designs would look on actual bottles before production. With a limited budget, arranging a professional studio photoshoot wasn't a practical option.
My role was to show the label ideas as finished products rather than simple artwork files. The client wanted visuals that could be used for presentations, marketing materials, and product previews, so I looked for a bottle mockup generator that could deliver realistic results without the cost and complexity of a full photoshoot.
I expected any mockup tool to do the job, but the differences became obvious pretty quickly. Some generated unrealistic bottle images, while others offered very few customization options. Because I had to present multiple flavor variations, I needed something that made it easy to update designs and create different product views without starting from scratch every time.
Before comparing different options, I put together a short list of requirements: realistic glass bottles, natural label placement, adjustable lighting and shadows, high-resolution output, and multiple viewing angles. Without these features, it would be difficult to create visuals convincing enough for the client. To make the evaluation more thorough, several colleagues from the FixThePhoto team who were also involved in the kombucha project helped me test and compare a range of online bottle mockup generators.
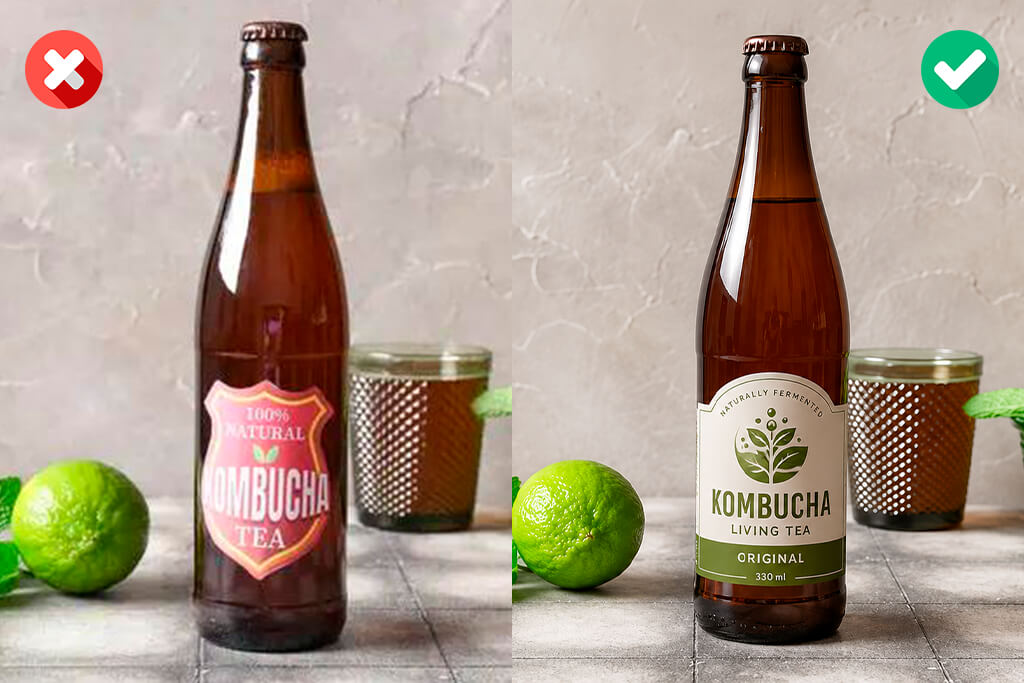
Realistic 3D rendering quality. The quality of the final result matters more than anything else. The best AI image generators can accurately recreate details such as glass transparency, liquid texture, condensation, reflections, and realistic lighting. When these elements look natural, the product feels authentic. If the lighting is poorly rendered or the materials appear flat, even a well-designed label can end up looking unprofessional.
Customization flexibility. A good mockup tool should offer enough customization to match your project. Being able to modify the bottle style, cap type, label placement, and surrounding scene helps create a more realistic presentation. Features like adjustable angles, scale, lighting, and reflections can make a significant difference in the final result.
Wide range of bottle types. A good tool should support many types of packaging, from drink and beauty products to mist and specialty containers. This is especially useful when working with different brands, projects, or industries.
Smart label mapping (warp/distortion support). Bottles have rounded shapes, so labels need to fit them properly. A good tool adjusts the design to match the container’s shape, making it look realistic and professionally applied.
High-resolution export options. For packaging designs, marketing materials, or presentations, it's important to get sharp, detailed images. Support for high-resolution exports and transparent backgrounds gives you more flexibility when using the final visuals.
Lighting and environment control. The ability to adjust lighting, shadows, reflections, and backgrounds makes it easier to create visuals that fit a specific brand style, whether you need a clean studio look or a more natural, real-world setting.
Easy editing workflow. Tools that offer simple editing and quick file handling can save a lot of time. Features like easy uploads, flexible editing options, and support for common design formats make it easier to update and test new ideas without a complicated workflow.
Batch generation capability. If you need to compare several label designs, applying them to multiple mockups at once can save time. This makes it easier to review different versions without updating each mockup manually.
File format compatibility. Support for formats like PSD, PNG, and even 3D files can be helpful, depending on the tools you use. This makes it easier to work across different design and production workflows.
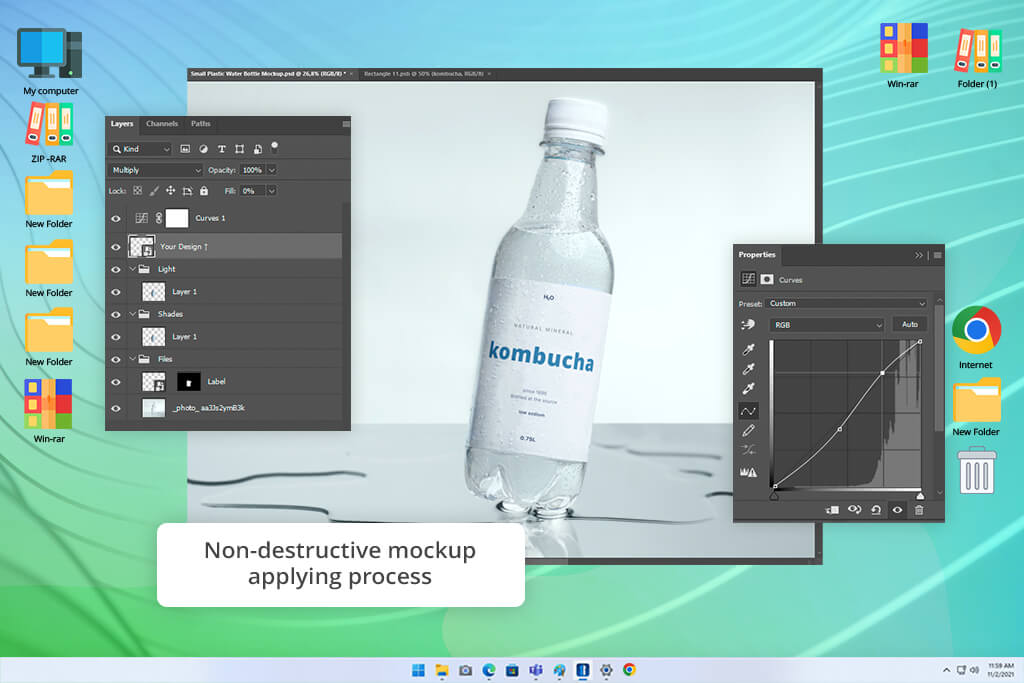
I began my testing with Photoshop because this free Adobe software remains one of the most reliable tools for professional design projects. Rather than relying on automatic features, I worked with PSD bottle mockups and manually applied different label designs using Smart Objects.
This involved adjusting placement, checking how labels fit around curved surfaces, and closely reviewing small details. Very quickly, I realized that the final result depends heavily on the quality of the mockup being used.
After adding the labels, I focused on refining realism by adjusting shadows, highlights, reflections, and other visual details. Some mockups already looked realistic, while others needed a few changes to add more depth. I also tweaked a few settings to help the labels blend naturally with the glass surface. At that point, it felt more like photo editing than mockup work.
“It took a while to learn, but the results looked very professional. The only downside is that it can feel a bit too complex when I need a quick mockup.”
I tested different flavor versions by copying layouts and swapping the label designs. This helped keep all SKUs visually consistent while still giving each bottle its own look. When I wanted a chilled bottle effect, I added condensation overlays and light texture details manually. It took extra time, but the level of control was worth it.
By the end of my testing, I viewed Photoshop more as a tool for fine-tuning than creating mockups from scratch. It won’t make the process faster, but it can greatly improve the final result. With a high-quality mockup, I could achieve a very realistic look, though it required design experience, patience, and plenty of manual adjustments.
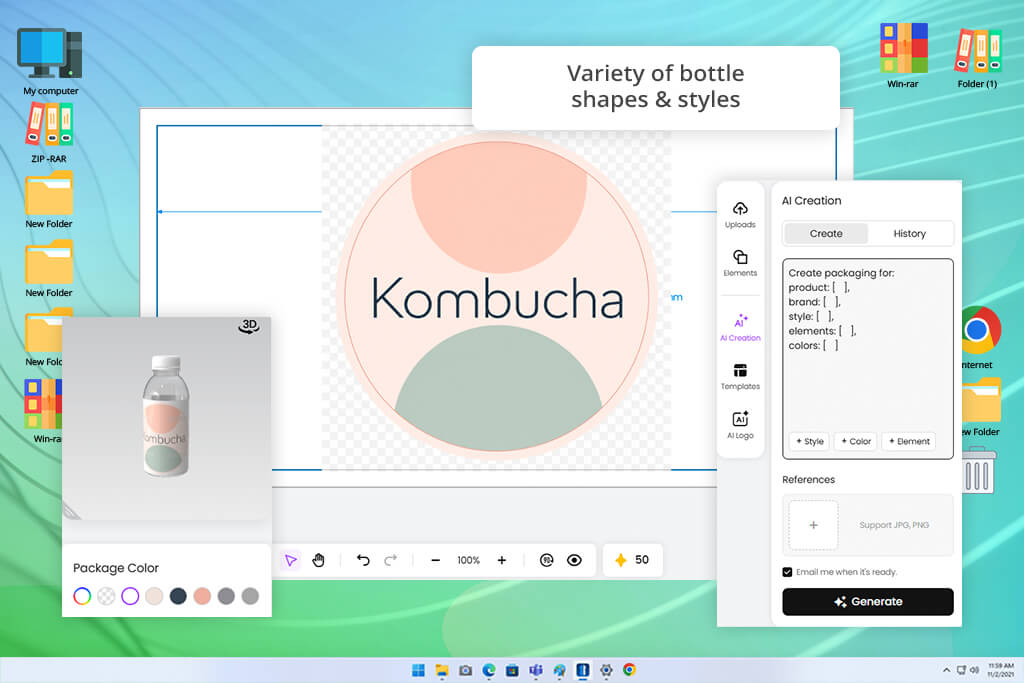
Pacdora felt very different from traditional bottle mockup makers because it let me work in a real-time 3D environment. After uploading my kombucha label designs, I could rotate the bottles and view them from any angle. This made it much easier to evaluate the packaging and see how the design looked on the actual bottle, rather than only on a flat screen.
I spent time trying different bottle styles to create multiple product versions. I could change the bottle shape, transparency, cap design, and proportions without having to redo the label. I also tested different lighting setups, from soft studio lighting to brighter retail-style scenes. This made it easier to see how the packaging might look in real store environments.
During testing, I paid close attention to how labels fit around curved bottles. The results looked realistic in most cases, although some distortion was noticeable from certain angles. Reflections looked good overall, even if they were occasionally a bit simplified. For product previews and client presentations, the quality was more than enough to clearly show the final concept.
This packaging design software became one of my go-to options whenever I needed to compare different packaging ideas quickly. I used it to review multiple versions side by side and make fast design decisions. While it’s not meant for highly detailed final renders, it made the early stages of the project much faster and more efficient.
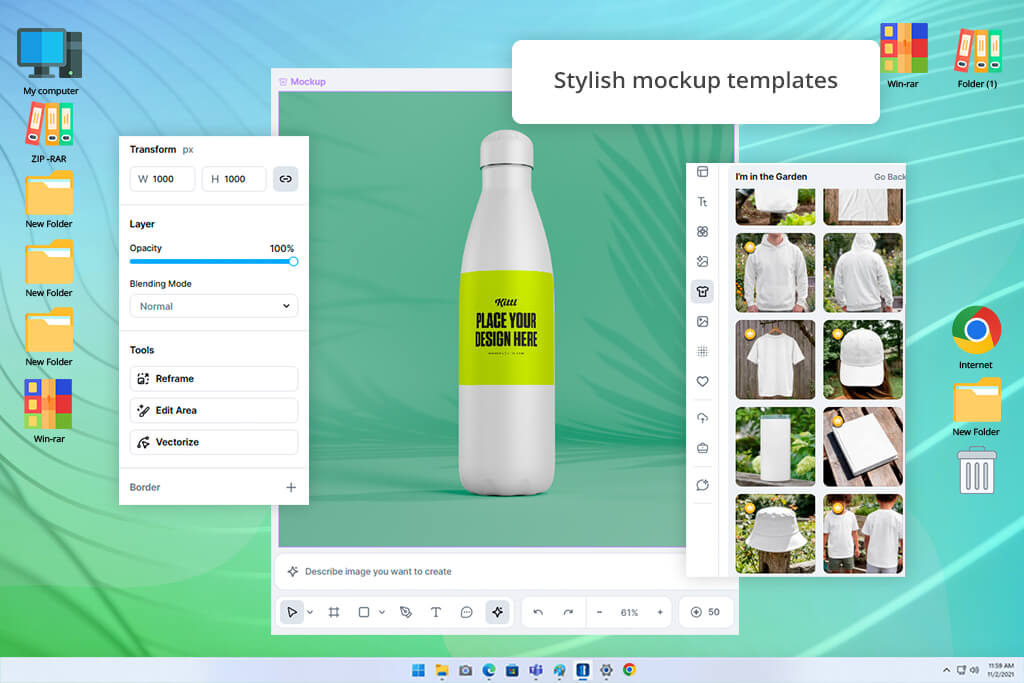
With Kittl, I built label concepts directly inside the platform and applied them to bottle mockups right away. This made the workflow much smoother because I didn’t have to keep exporting and importing files between different tools. It felt more like a complete branding workspace than a simple bottle mockup creator.
I tested typography-focused label designs and checked how they looked on different bottle mockups. This AI art generator was easy to keep a consistent brand style across multiple kombucha flavors while still giving each product its own identity. I also tested different background settings, from clean studio scenes to more promotional-style environments, which helped me quickly define the overall visual direction of the brand.
“The interface is very clean, and the templates look great. I enjoyed using it, though I would have liked more advanced options for customizing designs.”

When I looked closely at the mockups, they seemed designed more for presentation than realism. The glass and lighting effects were fairly simple, but the labels stayed clear and easy to read. For early branding discussions, this worked well because the focus was on the design itself.
Kittl worked best when I was still shaping the overall look of the product line. It let me try different ideas quickly without focusing on small technical details. While it isn’t built for highly realistic renders, it’s great for presenting concepts and building a strong brand style. I used it more as a branding tool than a rendering platform.

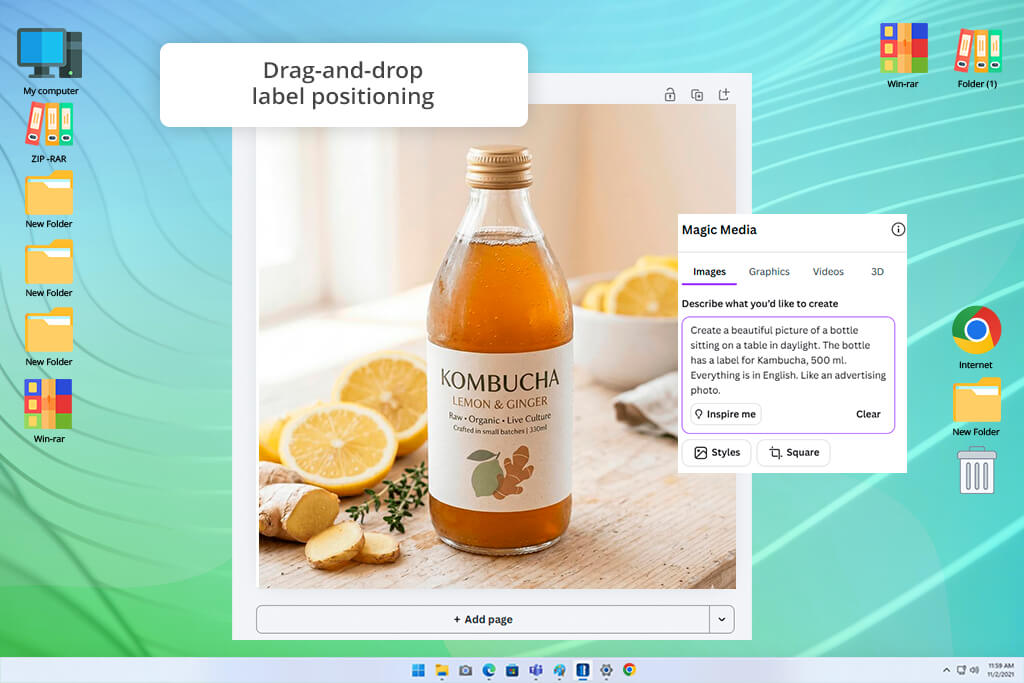
Canva was the fastest tool I tested. I uploaded my kombucha label designs and placed them onto bottle mockups in just a few clicks. The drag-and-drop workflow made everything very simple, so I didn’t have to deal with layers or complex editing tools. It’s built for speed and ease of use rather than detailed customization.
To compare different presentation styles, I tried various backgrounds and adjusted the bottle size for different promotional formats. It was a quick way to create content for social media and marketing materials without extra editing. This custom bottle mockup generator made it easy to present label designs in a more polished and client-friendly format.
After taking a closer look at the mockups, I noticed some limitations in realism. The labels didn’t always follow the bottle shape perfectly, and the reflections were fairly simple. The result looked more like a presentation mockup than a fully realistic product image. Even so, it was more than sufficient for sharing concepts and getting feedback from clients or team members.
Canva became one of my main tools for creating mood boards and presenting ideas quickly. I wouldn’t use it for final packaging reviews, but it works very well for showing concepts and visual directions. Its biggest advantage is how easy and fast the workflow feels. Whenever I needed results quickly, it was usually my first choice.
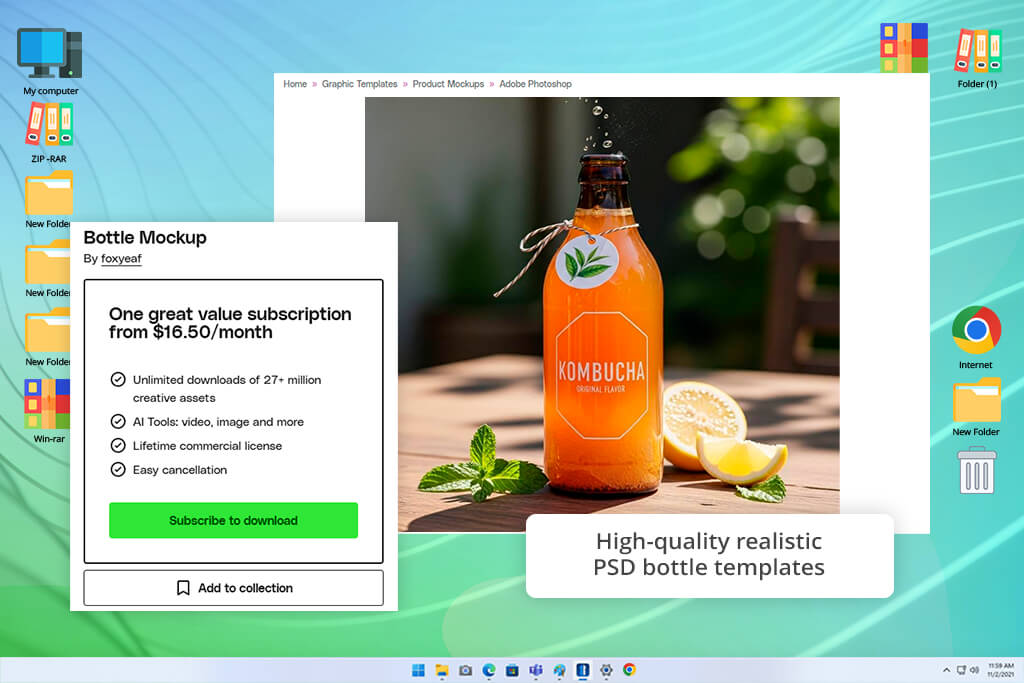
I used Envato as a source for bottle mockup templates rather than as a design tool. For my tests, I downloaded several premium PSDs and applied different beverage label designs to them. Each mockup had its own lighting, layout, and level of detail, making the experience feel like working with a variety of professionally prepared studio setups.
I placed my kombucha label designs into different mockups using Smart Objects and checked how the glass reflections looked. Some templates already had realistic shadows, moisture effects, and depth, so they needed very little editing. Others required a few adjustments to achieve a more polished result.
“The asset library is huge, which is a big plus. However, it can sometimes feel overwhelming when I just need something simple.”

Keeping the look consistent across different flavor versions took more work than I expected. Since every mockup used a different setup, the editing process wasn’t always the same. Some templates of this bottle mockup software allowed more control over lighting and effects, while others were much more limited, so I had to adjust my approach for each one.
Envato delivered some of the most realistic results in my testing, but the workflow wasn’t always the easiest. Since every mockup comes from a different creator, the quality and setup can vary a lot. When I found a well-made PSD template, the final images looked extremely realistic. The downside was that I had to spend more time finding the right mockup and adjusting it.
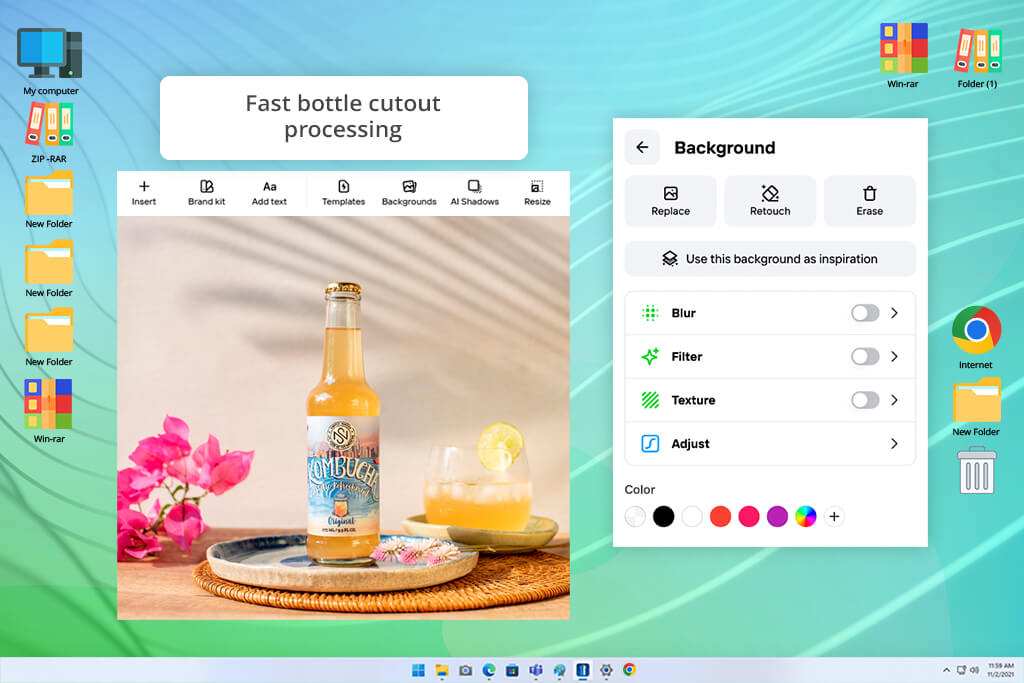
Photoroom was the tool I used most for testing automated product visuals. I uploaded flat label designs, and within seconds, they were placed into ready-made bottle scenes. Backgrounds were removed automatically, and the products were presented in clean, prebuilt settings. The whole process was surprisingly fast and required very little effort.
To simulate different marketing scenarios, I tried a variety of background scenes, including studio-style setups, home environments, and retail displays. Switching between concepts was quick and effortless, making it easy to compare different visual approaches and choose the most effective presentation style.
When reviewing the mockups in detail, I found that some visual effects looked less realistic than expected. Reflections could appear uneven, and labels didn’t always follow the bottle shape perfectly. I also noticed occasional issues with transparent elements, which meant I had to make a few corrections in other photo editing software for PC. Overall, it was more useful for quick product presentations than for highly detailed packaging previews.
Photoroom was one of the bottle mockup design tools I used most when I needed quick results. It worked well for social media graphics, product previews, and early design concepts. The mockups weren’t always highly realistic, but they looked good enough for marketing purposes and were very fast to create.
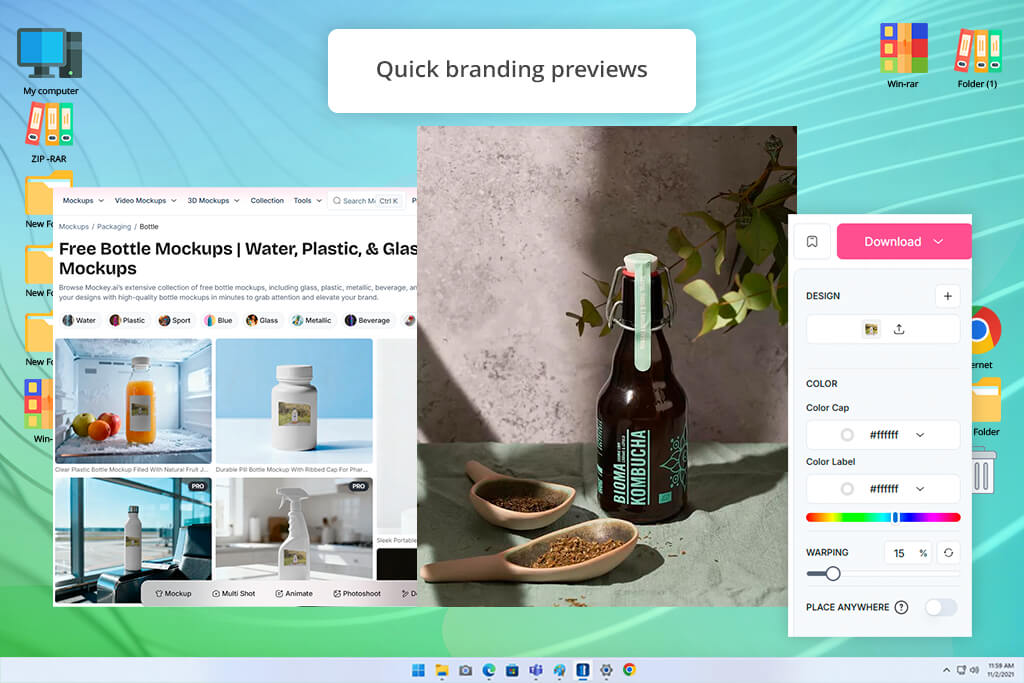
Mockey was easily one of the most straightforward tools I used. After uploading my kombucha label designs, I could apply them to bottle mockups almost instantly. The process was very simple from the start, with no complicated settings or setup required. So, this AI label generator is clearly built for creating product visuals as quickly and easily as possible.
I tried several bottle styles to see what the platform could offer. While there were enough options for basic mockups, the editing features were fairly limited. I could change the size and position of the design, but there was little control over lighting, reflections, or surface details. Most of the visual elements were fixed, which reduced flexibility.
“This product bottle mockup generator is very easy to use. I could make decent mockups in minutes, but customization options were limited.”

When I reviewed the outputs, I noticed that realism is intentionally minimal. The bottles look clean but slightly flat, especially under closer inspection. It doesn’t attempt to simulate real glass physics or complex lighting conditions. Instead, it prioritizes clarity and simplicity.
After reviewing the mockups, I found them easy to use for showing product ideas. The bottles looked clean and attractive, although they weren’t highly detailed or ultra-realistic. For quick presentations and sharing concepts, the results worked well and were easy to understand.
Mockey was most useful for quickly checking design ideas. I could see how a label looked on a bottle in just a few moments, which made it great for early concepts. For more polished or client-ready visuals, though, it felt a bit too simple. I mainly used it as a starting point before moving to more advanced tools.
After comparing Artboard Studio vs Canva, the first option felt like a more pro-grade environment for product mockups. I imported my label designs and built full 3D scenes rather than working with simple templates. The control over camera angles, lighting, and scene composition made the process feel much closer to a virtual product photography studio.
I spent a lot of time fine-tuning reflections, shadows, and the overall scene composition. This online bottle mockup generator lets me create store shelf displays, product hero images, and promotional compositions from different angles. This level of flexibility made it possible to build complete marketing visuals in one place. It felt less like working with mockups and more like creating and staging a full product presentation.
When I examined the bottle mockups more closely, they looked very realistic. The glass interacted well with the lighting, and the labels fit naturally around the bottle shape. I made a few adjustments to the reflections to keep the product looking natural and avoid an overly glossy appearance.
Artboard Studio took a little longer to learn than other tools, but the results were worth it. It gave me more control over the final look and helped create high-quality product visuals. I used it mostly for presentation and marketing materials where a more polished result was important.
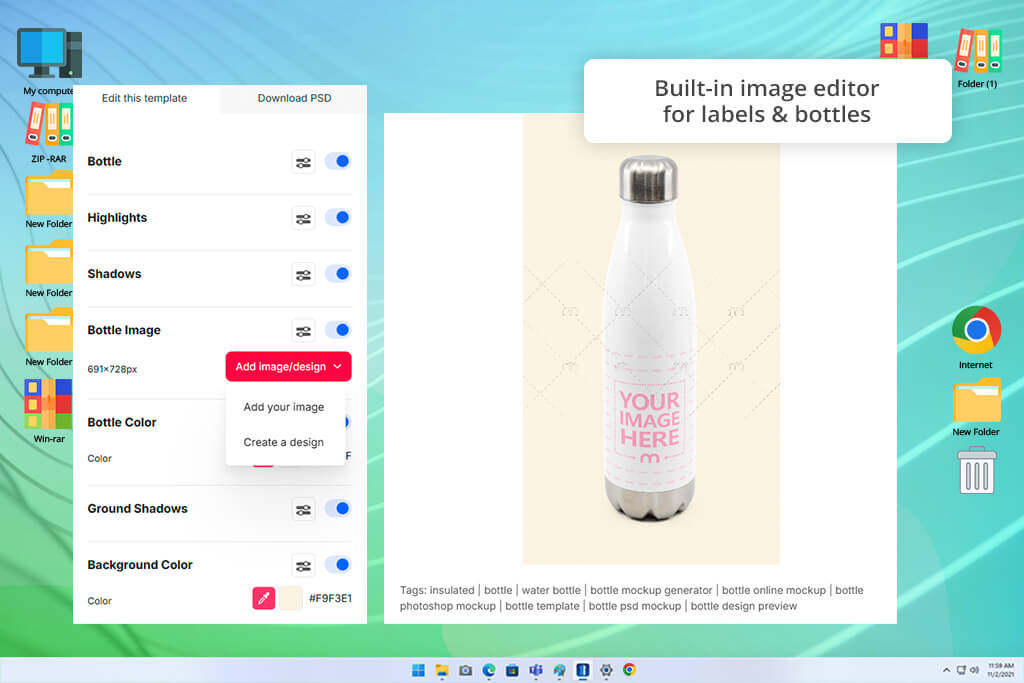
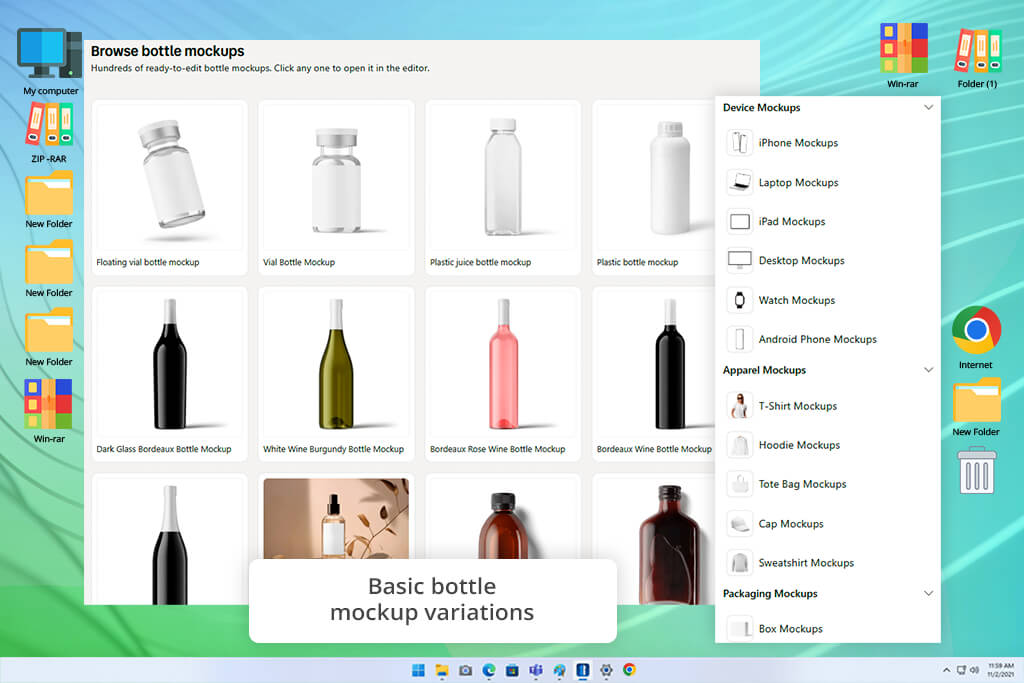
Mediamodifier felt like a large library of ready-made mockups. I uploaded my kombucha label and tried it on different bottle templates, generating previews in just a few clicks. The workflow was simple and easy to follow, making it great for quick results. However, there wasn’t much flexibility for exploring different creative directions or making detailed adjustments.
To compare different flavor designs, I tested them across multiple bottle angles and background variations. The mockups had a consistent style, which helped maintain a unified look throughout the product line. While basic adjustments were easy to make, there was little control over lighting, reflections, or material details. For more advanced editing, I had to use other free graphic design software.
“Great for marketing materials and quick product previews. The only downside is that I’d like more options for higher-quality exports.”

The mockups look clean and professional, though not highly realistic. Shadows and reflections are consistent, which helps create a polished appearance. The results are reliable, but somewhat predictable.
I mainly used Mediamodifier for quick client previews and internal feedback. It wasn’t the best choice for high-end advertising visuals, but it worked well for creating clean, consistent presentations. Whenever I needed a fast and professional-looking mockup, this bottle mockup maker helped save time.
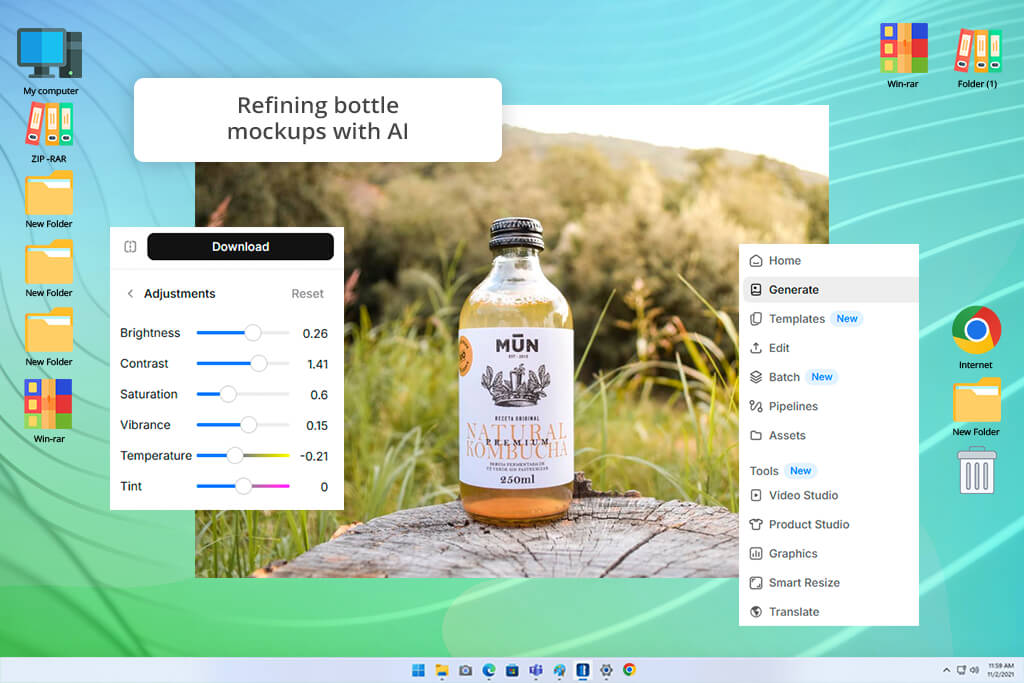
Pixelcut felt like a tool made for quick mobile editing. I uploaded my label designs from my phone and applied them to bottle mockups in just a few taps. Everything worked smoothly and required very little effort, making it a convenient option for creating product visuals while on the go.
I also tested AI background generation to place the product in different settings. It was easy to switch between studio scenes and everyday environments without extra setup. This made the tool useful for creating marketing visuals quickly, and I could compare several design directions in just a few minutes.
The results looked good overall, but some details were less convincing up close. Labels didn’t always follow the bottle shape perfectly, and reflections could appear somewhat basic. For quick visuals, it worked well, though the limitations became more noticeable on closer inspection.
Pixelcut became a useful extra tool in my workflow. I mostly used it for social media posts and quick promotional visuals. It was fast and easy to use, but not the best choice for final presentations or detailed product reviews.
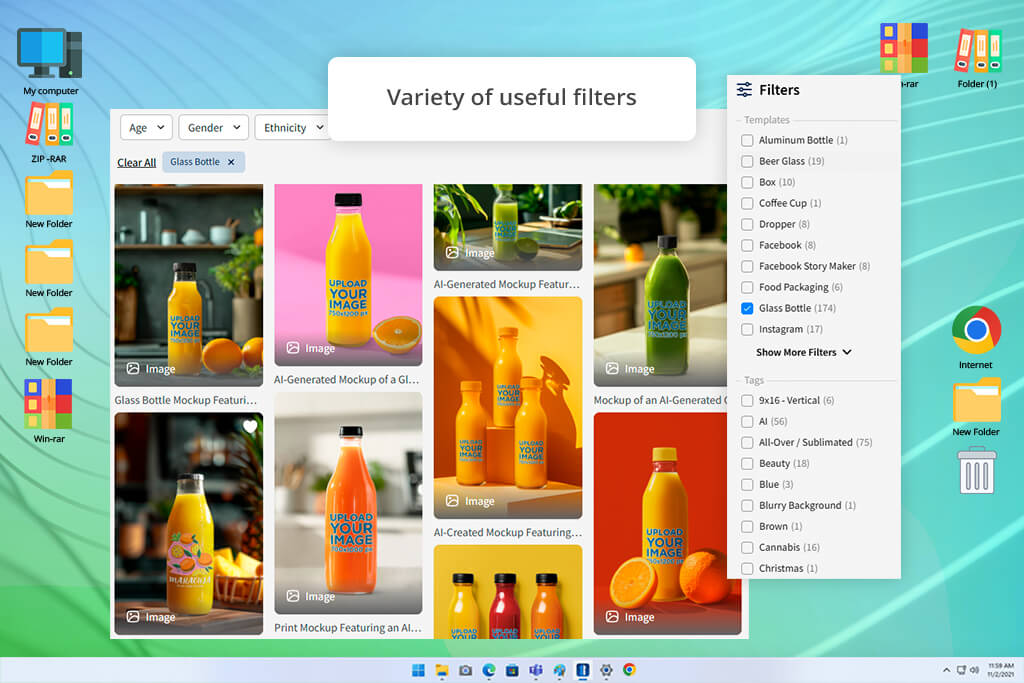
Placeit was one of the easiest tools I tested. I uploaded my kombucha label and had a finished bottle mockup almost instantly. The platform relies on pre-rendered scenes, so most of the work is already done for you. There was very little setup involved, making it a good choice for quick marketing visuals and users who want fast results without complex design tools.
I tried multiple lifestyle templates, including studio scenes, store shelves, and café environments. The lighting, composition, and overall atmosphere were already built into each pre-rendered scene, making it easy to create consistent marketing visuals. The tradeoff was limited flexibility, since most of the customization was limited to changing the label design.
“Very easy to use, with plenty of ready-made templates to choose from. The only downside is that many of the mockups have a similar style, so the results can start to feel repetitive over time.”

After looking at the mockups more closely, I found that the visuals stayed the same regardless of the design I applied. The glass and lighting effects looked clean and professional, but there was little flexibility to adjust them. Instead of building a scene from scratch, I was selecting from finished templates and placing my design into them.
Placeit was the 3D bottle mockup generator I turned to when I needed results fast. It worked well for client drafts, presentation materials, and quick marketing visuals. While it wasn’t ideal for detailed brand development, it was a reliable option for creating polished mockups under tight deadlines.
Our testing team included me, Julia Newman, Vadym Antypenko, and Tati Tailor. To make the results more balanced, each of us focused on a different group of tools. Vadym worked with Photoshop and Artboard Studio, concentrating on realism and overall visual quality. Julia tested Canva and Kittl for fast branding and design creation.
Tati focused on Placeit, Mockey, and Pixelcut to evaluate quick marketing outputs. I tested Pacdora, Envato mockups, and Photoroom to compare 3D flexibility and AI automation. We used the same six-flavor label set across all platforms and reviewed the results together, looking at label placement, lighting, realism, and how ready each mockup was for client presentations.
Comparing the mockups side by side revealed noticeable differences. Photoshop and Artboard Studio delivered near-photographic results once reflections and fine details were adjusted. Canva and Kittl were much quicker at creating early concepts, though their visuals were less realistic.
Placeit and Pixelcut looked polished for marketing, but some imperfections became visible when viewed closely. Pacdora offered a good balance between speed and flexibility. It was quick to use, easy to adjust, and helpful for viewing designs from different angles without much extra work.
By the end of our testing, a clear trend emerged. Photoshop, Artboard Studio, and high-quality Envato PSD templates delivered the best realism, though they required more time and effort to use. Photoroom, Pixelcut, and Mockey were much faster and worked well for quick drafts, but they were less accurate in finer details.
Pacdora and Mediamodifier offered a solid balance between speed and visual quality. In the end, we found that no single bottle mockup generator is perfect - choosing the right one depends on the stage and goals of the project.





![7 Best Free Pokémon AI Generators [{{%year}} FixThePhoto Choice]](http://fixthephoto.com/blog/images/gallery/news_main__preview_29022.jpg)
![9 Best AI PDF Editors in {{%year}} [Expert Tested Guide]](http://fixthephoto.com/blog/images/gallery/news_main__preview_29012.jpg)