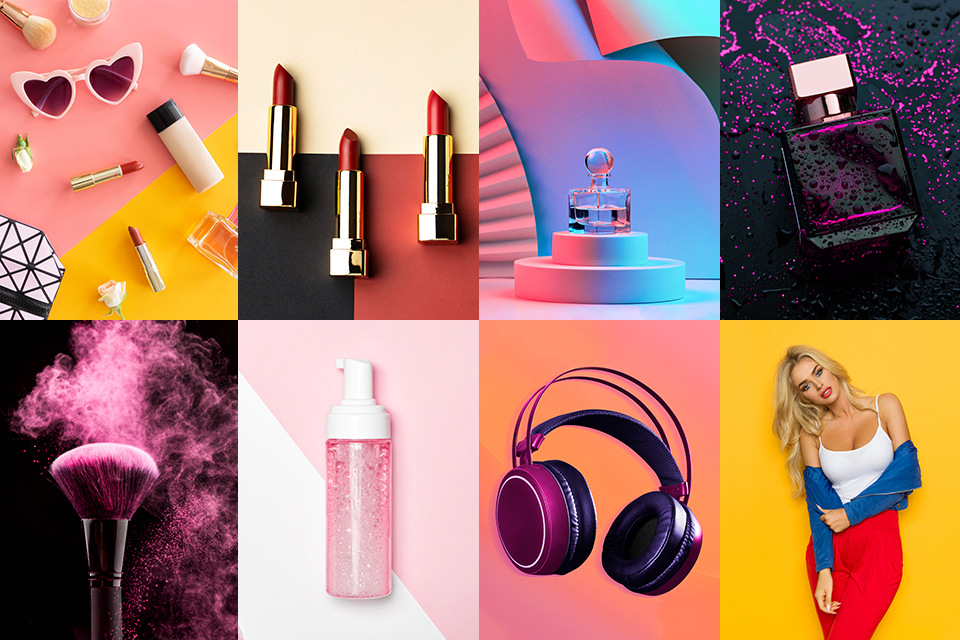
If you want your images to reveal the philosophy of your brand/company, you need to pay special attention to photo styling. A well-thought-out composition spruced up with matching props is sure to attract clients. There is much to learn about proper photography styling considering new trends that constantly appear, but I tried to highlight the most important aspects and tips in this article.
Product photography is a very demanding sphere, so you need to hone your skills and expand your knowledge all the time. The tips listed below will help you grasp the essence of product styling and how to take campaign-worthy images.

Before getting down to photography styling, you need to find out what your client expects to get in the end. The easiest way to collect the needed info is to prepare a creative questionnaire and ask a client to fill it in. Thus, you can better understand the peculiarity of the company, its strong and weak points, requirements, etc.
Sometimes, people find it difficult to verbalize their demands, so providing them with prompt-questions is a nice thing to do. The more info you receive before you start to shoot, the better outcome you’ll get.
You can add such questions to a creative brief:

Photo styling depends much on the people you want to attract with your images. Pictures that are bound to appeal to teenagers will have little impact on the older generation and you need to keep this nuance in mind. Besides, you have to learn whether the product you’ll photograph is aimed at women, men, or children.
Is it a kind of luxury item and the one coming with a lower price tag? Understanding the target audience is crucial for photography styling. It is impossible to lure all categories of buyers, so you need to clearly define who you are working for. Thus, a profit potential can reach unbelievable levels.
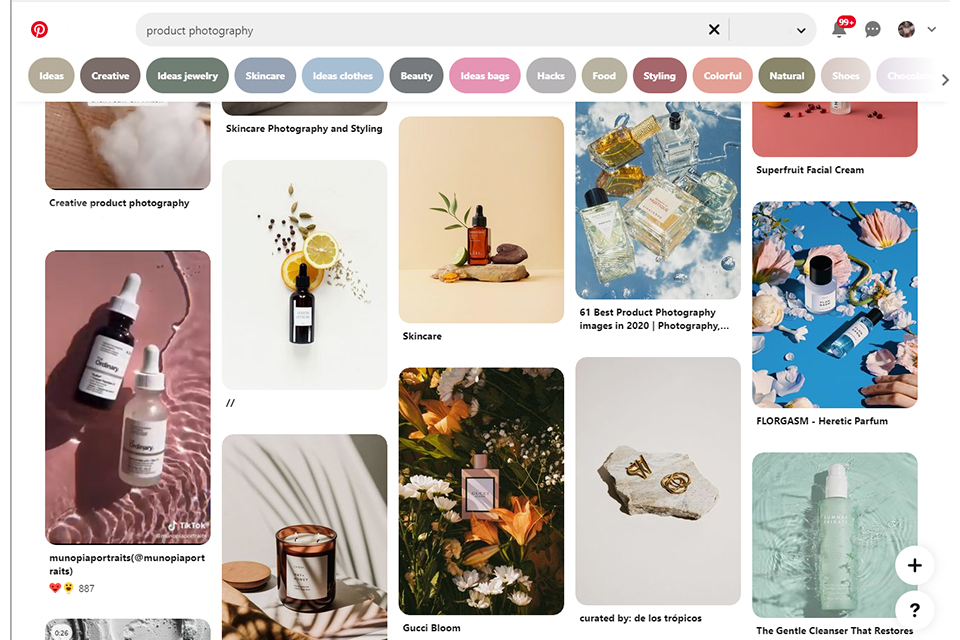
Starting any photo project, you have to come up with a catchy concept and develop a moodboard to have all your ideas arranged in one place. The most popular source of photography inspiration is Pinterest. Here you can find a slew of original images, graphics elements, and more. Encourage your client to pin photos he/she likes to the board, so that you come to terms considering colors, mood, and aesthetics.
This is not only an efficient way of finding interesting samples, but also a cool method of communication. I recommend concentrating on unique color mixes, offbeat backgrounds, props, and textures, rather than seeking images that are in line with your brand. This way, you will simply copy someone else’s work, while you need to develop one-of-a-kind photography styling.
Colors can either make or break your creative game, so choose them accurately. Depending on the product photography ideas you want to bring to life and the message that you want to deliver to the audience, you may need to try several color combinations. Are you after a light and airy mood? Then choose pastels tones and white color.
Want to make a bold statement? Feel free to employ bright colors and catchy props located against a light blue/grey background. If your client has a particular color scheme across a product lineup, you need to stick to it. Alternatively, you can use complementing colors to create a harmonious brand representation.
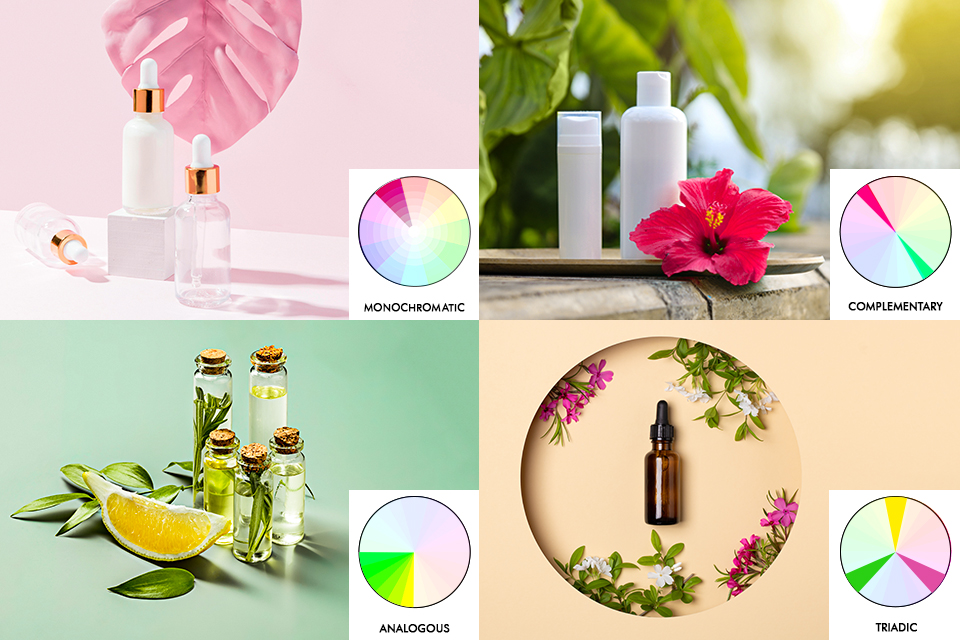
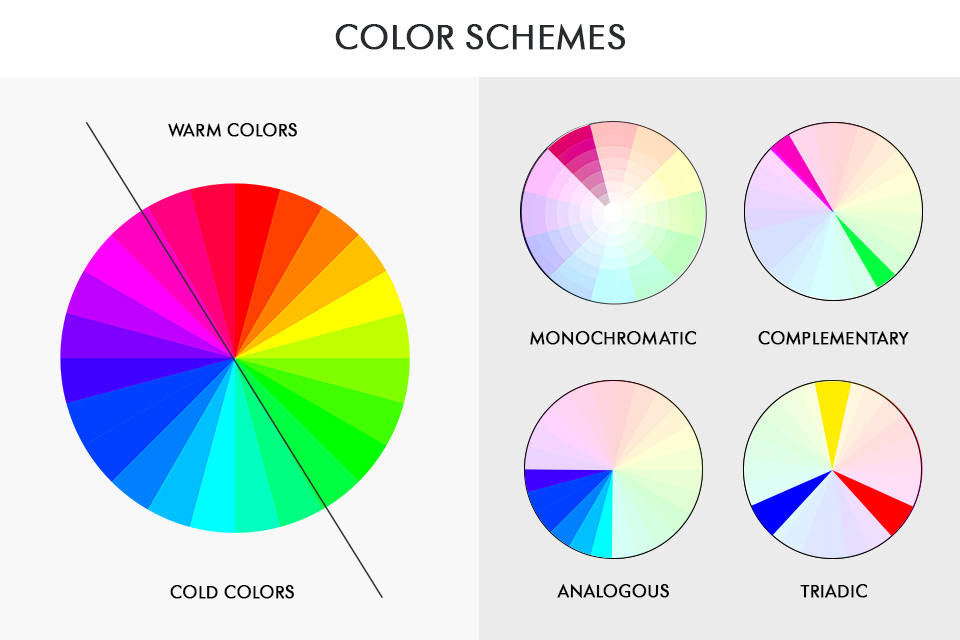
There are some color photo styling tips you can use as a guideline:
Analogous: 3 adjacent colors on a color wheel; e.g., yellow-orange, yellow, yellow-green.
Monochrome: one color from the wheel that is divided into shades; e.g., yellow, saffron, canary, and lemon.
Complimentary: 2 colors on the wheel located opposite each other; e.g.; green and red.
Triadic: three colors of an equal triangle; e.g.; blue, violate, and red.

When the shooting is over, you need to proceed with photo enhancement. Even if initial pictures look great, they may become even better with simple contrast and brightness adjustments. Undoubtedly, you want to post flawless images, so don’t neglect a post-processing stage.
If you are mainly interested in styled product photography and don’t want to spend time improving shots, delegate the task to professional service. We enhance images for famed product photographers and know all the nuances of this genre. We can make your photos shine in a quick way and at a moderate cost.

Showing a bare product in a photo is weird, so all photographers use product photography props. Such items can explain to buyers how to use a product, define its main features and what makes it better than analogs, and provide other important visual messages. However, remember that props must match the composition and embellish a product rather than diverting attention from it.

I like using plants, vintage objects, and knick-knacks. You should select props with fitting colors. Besides, pay attention to their sizes and shapes. I recommend avoiding props with logos or removing them in Photoshop.
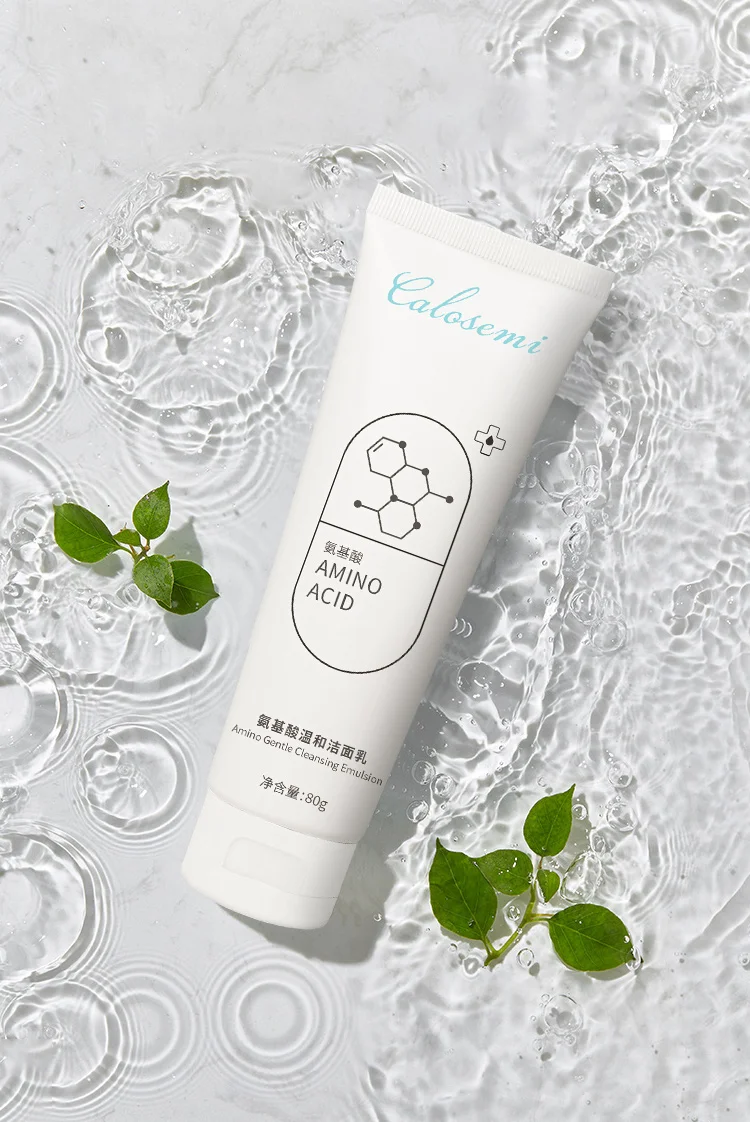
There is a great variety of product photography backdrops, so you can find something really adorable. While working on photography styling, opt for a background that fully matches the rest of the composition, so all elements share one and the same message.
For instance, if you are going to photography expensive objects and want to add luxurious touches, choose a marble background. For eco-themed projects, you can safely rely on natural wood backgrounds. A pure white backdrop helps convey a minimalistic feel best of all.

You can use colored paper or go creative with different textured surfaces, including wood, wallpapers, and fabric. Reflective surfaces are also very popular in food photography, though they require accurate handling. I recommend keeping away from flashy colors, hectic patterns, and busy locations, which are bound to diffuse viewers’ attention.
Styled product photography requires shooters to be very mindful of angles. Decide whether you want to stick to flat lay style or want to try different perspectives – front angle, ¾ angle, back angle, or a closeup photo. Many favor tabletop photography that involves shooting straight from above. This approach has become extremely popular over the past few years, so you can find lots of these images on social media.

Photographing from different angles, you can achieve more diversified results. This is a go-to approach for experts involved in bokeh photography. This effect produces a stronger focal point in photography and makes a photo more eye-pleasing.

Every constituent of a photo has to bear its own meaning that is complemented by other elements, which altogether tell your brand’s story in a straightforward manner. So, while picking props and accessories, think about whether they logically match and how well their colors, shapes, and sizes build a cohesive whole.

For example, if you are taking images of an organic apple juice, you can arrange the shooting in an orchard and locate several fresh apples on the table where you will lay out your product. In this case, a wooden table is an ideal background, as it adds a natural fragment to your scene.

Taking photos of various products, you are likely to stay near them to capture the details, so investing in complicated lighting setups doesn’t make sense. Actually, the most beneficial lighting is that emitted by the Sun.
However, this is no option on gloomy days, so you can use artificial lighting sources that produce soft light. For instance, ring lights for photography cast soft and shadowless light thanks to the circular nature of bulbs.

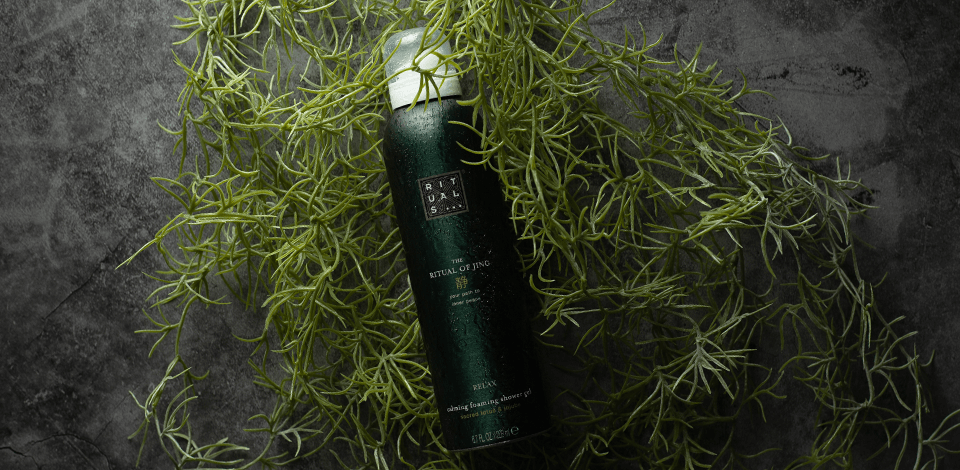
Those practicing low key photography, often choose dramatic lighting, which makes it possible to take moody and even mysterious photos. You can also come across such lighting setups in drink photography, dark food photography, and perfume photography.
Product styling is impossible without evaluating the scale. This involves combining objects in a frame based on their sizes. In general, those items that are located closer to the lens, look bigger in photos and you need to keep this in mind while realizing your still life photography ideas.
If your props are bigger than a product advertised, no wonder, people will pay attention to secondary objects and may not even notice the key element. To be on the safe side, I suggest picking smaller props or putting them further from the camera to achieve the desired result.

This is one of those photo styling tips that is often underestimated. But, having a clear shot list prepared in advance can save your entire photo session. You just need to write down all the photos you have to take and cross them out as you go.
Thus, you can be sure you will end up with all the must-take shots. Besides, you can divide a list into 2 columns – styled shots and simple product images.

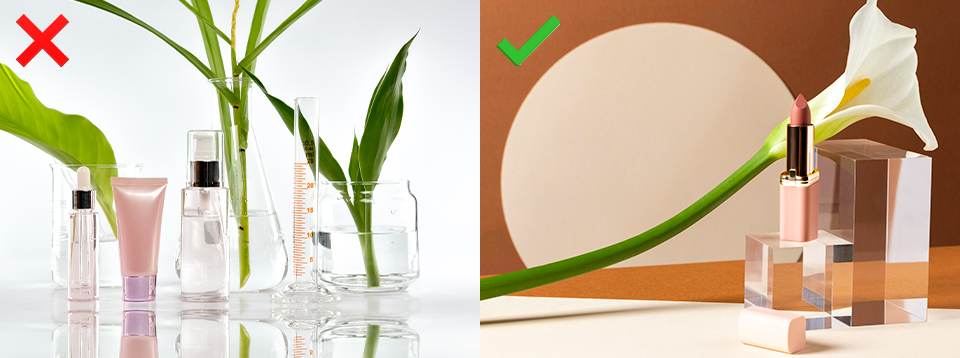
Adding props to the composition, you can mix totally different types of items. In other words, these objects require different lighting, and if you don’t take this into consideration, you are likely to get messy photos. For example, if you want to photograph an expensive golden necklace on a glass stand, you shouldn’t use a built-in flash not to get images with many glares.

Sometimes, photographers try to combine a non-reflective product with reflective props, each of which makes a lighting part a disaster. What’s the point of complicating your photo session? You can find nice non-reflective props and use them together with the main product to tell the story.
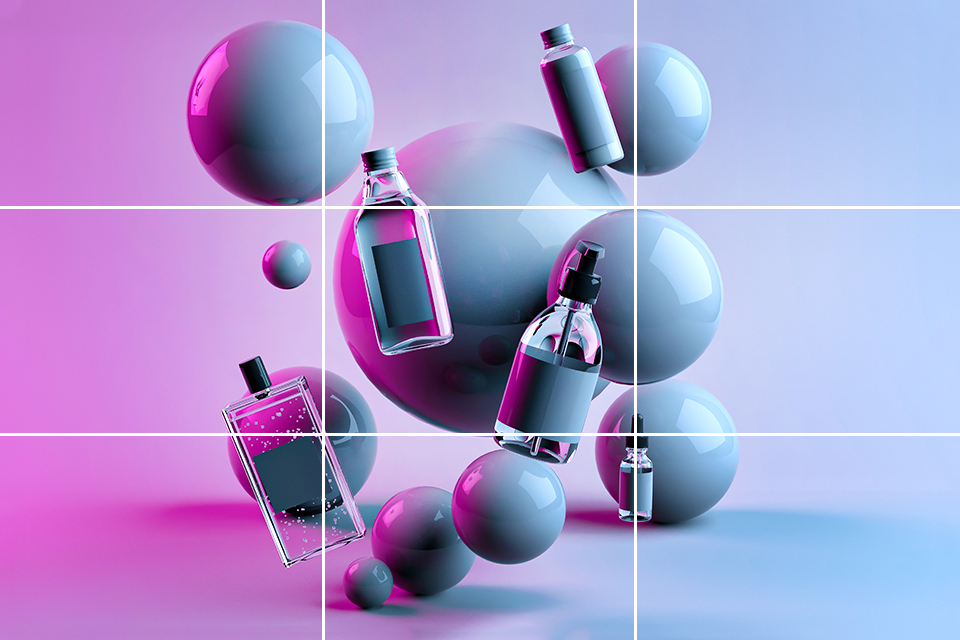
There are many proven photography composition techniques that you can use to build a balanced composition. The most popular is the rule of thirds in photography, which implies you have to visually divide the scene into 9 equal squares and place your product in the left or right third of an image.

Besides, you can follow the leading lines photography principle and use your props as leading lines to direct viewers’ eyes to the product. The negative space photography rule states that you need to leave a piece of an image empty so that buyers’ eyes can rest there.

Adding a human element to a photo is a win-win method of showing how a product is used and what advantages it can give you. This technique is popular among makeup product photography experts.

You have probably seen pictures of perfumes sprayed on a woman’s neck or a photo of a ring worn on a finger, etc. You can also take advantage of this tip if you want to make a name in lifestyle product photography.
Photography styling is very important but that is only one part of your creative work. The next stage is photo enhancement, and you can streamline this process by using these presets. They are developed by skilled product photographers and professionals who know about the biggest challenges the genre poses. Use them to improve colors, WB, exposure, contrast, sharpness, and other parameters.


