Since most purchases are made online these days, it’s essential to provide realistic product photos with accurate colors. This task becomes easy if you have a photography white balance card. Bad pictures might discourage your potential customers. Plus, a real product may differ from that one on the photograph and a client might get disappointed.
To avoid these misunderstandings, you should learn how to use white balance card. Continue reading and you will learn how to effectively use the white balance when photographing your goods. This detailed tutorial will help you develop your business and improve sales.
You can set up the correct white balance by adjusting your camera’s settings. This way you will get great product photography that will help you attract more customers. You have to take several steps to achieve the desired results. Keep in mind that this method requires a decent artificial lighting set.

First off, you should choose the size of a photography white balance card suitable for your needs. Amazon is flooded with various grey cards so you can find anything you like. If you want to use a custom white balance, you need a large model.
It will allow you to crop out all unnecessary things later. Business card-sized models are not suitable for these purposes. If you need a card for exposure metering and white balance adjustment in Lightroom, a small model will do. You can purchase a portable solution to carry it in your pocket or camera bag.
Next, you have to decide what type of lighting you need. To get the most accurate colors, you should use artificial strobe lights for photography. Set up lighting and lock your camera settings to get consistent shots.
A stable lighting environment plays an important role here since you will have to use the grey cards every time the lighting changes. It may happen naturally, for example, when a cloud moves in front of the sun.
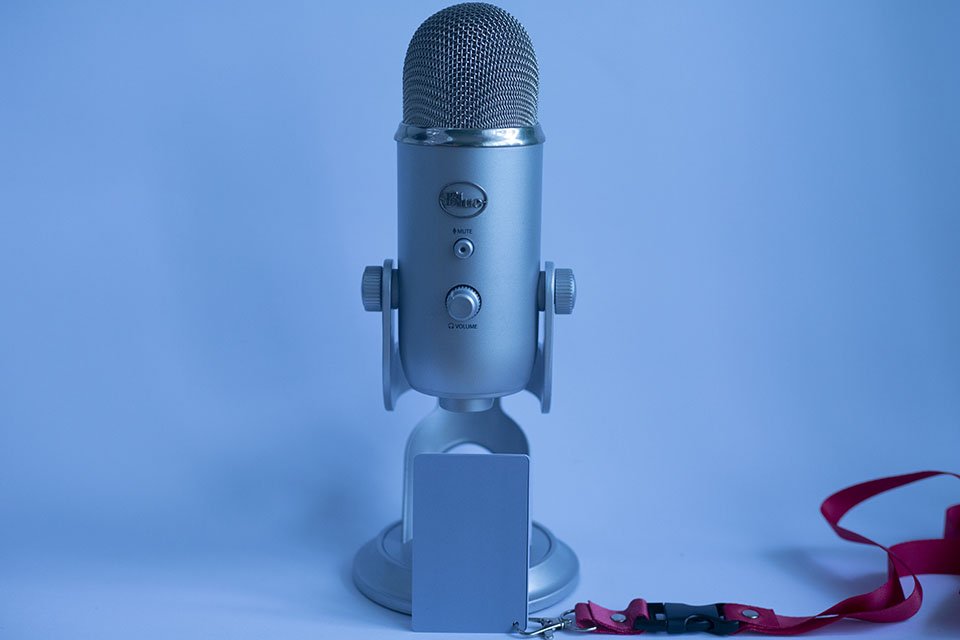
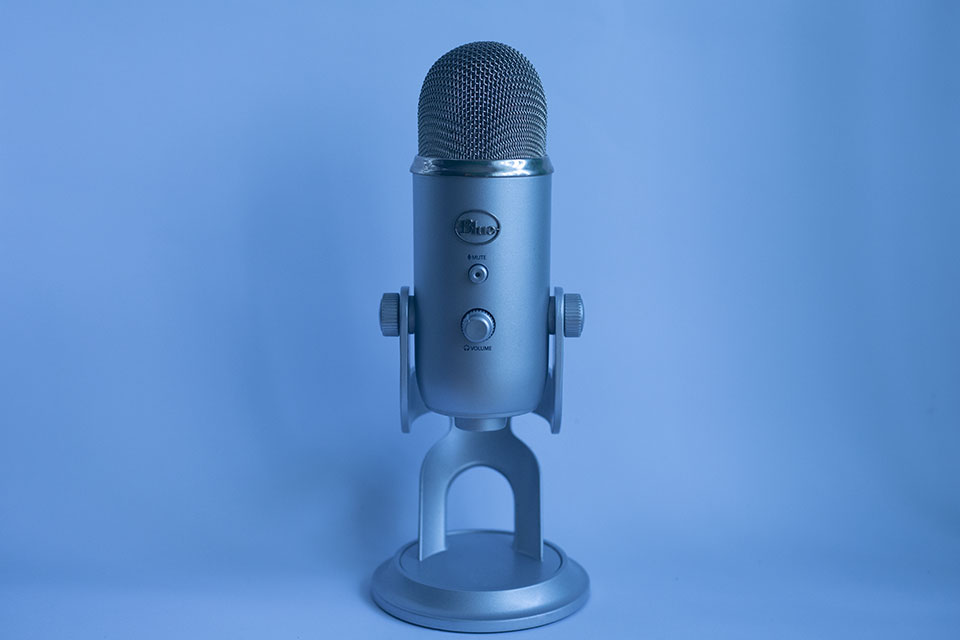
Then, you have to measure your reference point. To do it, you should place the grey card in the area where you plan to take photos. The grey side should face the camera. In other words, the card should be put exactly in the place where your subject will be located. The card should reflect the light source.
When your photography white balance card is ready, you can change your camera’s settings. Select the optimal exposure and focus. You may take several shots to achieve the results you expect. Finally, put the card away and photograph your objects.
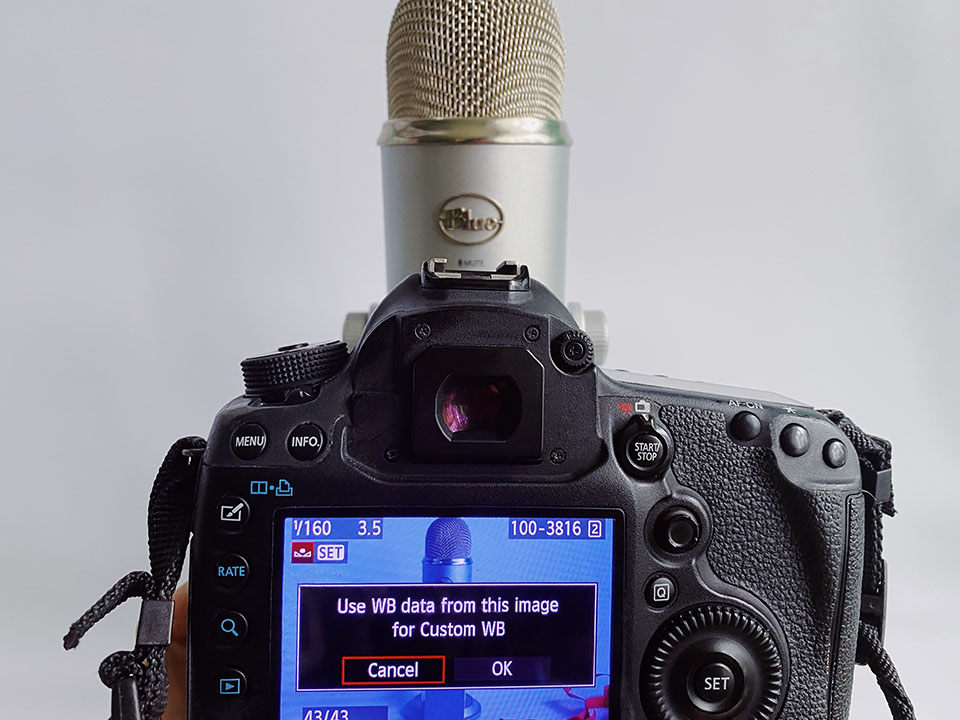
Go to the camera’s white balance menu and choose the Custom Mode. Select an image of a grey card you have just taken. Next, select “Use WB data from this image for custom WB,” and click OK.
This step might differ depending on the camera model, so you should read your camera’s manual first. If you do everything correctly, your camera will take all further shots with the appropriate color rendering for your lighting environment.

Now, you know how to use white balance card and adjust WB settings to get accurate colors. Even if lighting conditions will change, you will know what to do to take appealing product shots.
The next method of using white balance card is more convenient and doesn’t require much time during the photo shoot. Here, you should also photograph a grey card and later use it with photo editing software for PC, such as Lightroom. This way you can create a custom profile and apply it to your pics to correct colors.
First, import RAW files into Lightroom. You can do it by clicking the Import button in the lower-left corner of the Library module.
You should import all pics (grey card photos and all product photographs). Mind that if you plan to enhance your shots, it’s recommended to shoot images in a RAW format.
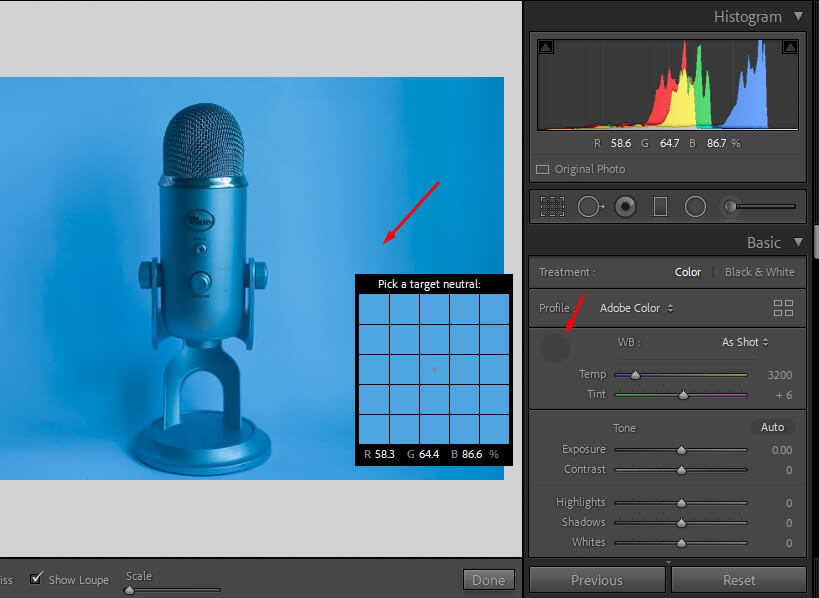
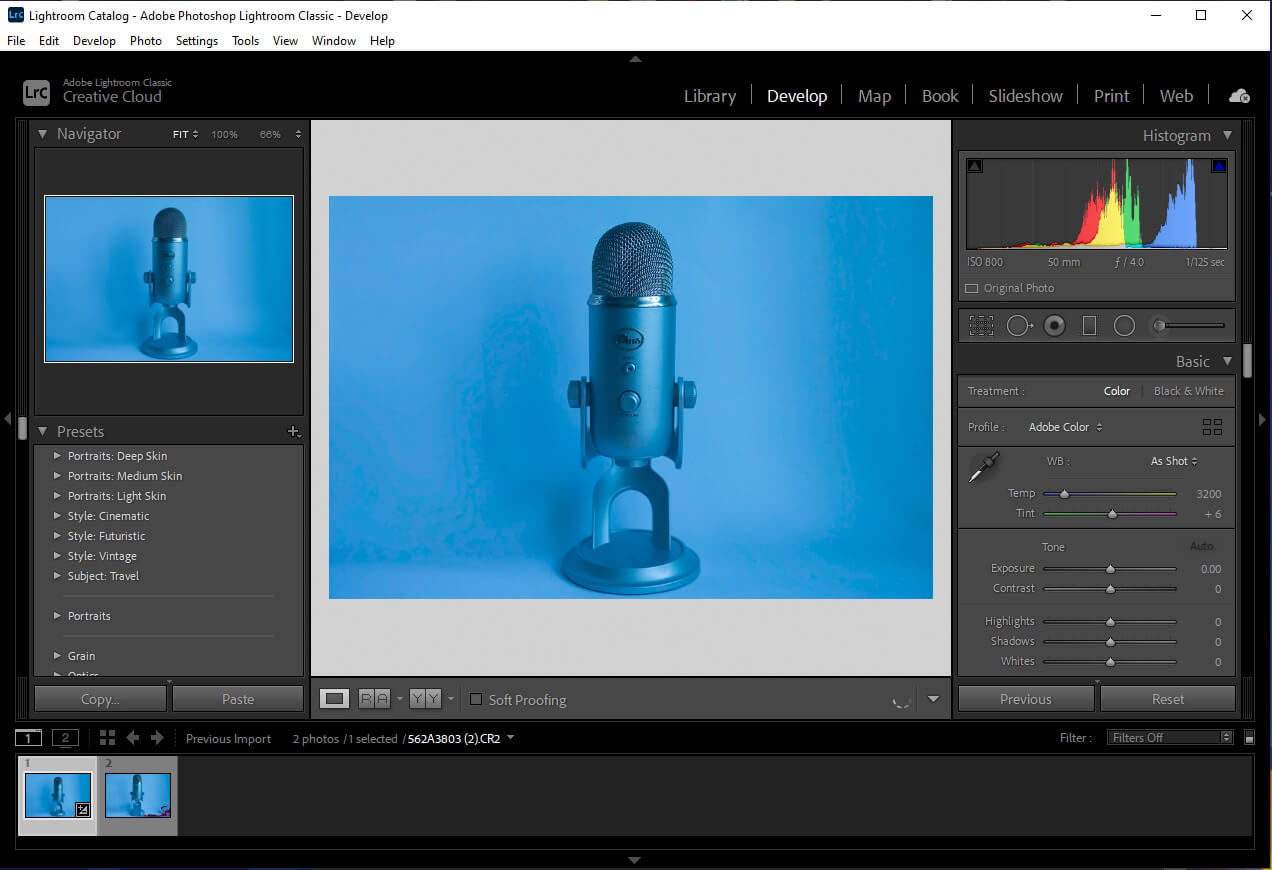
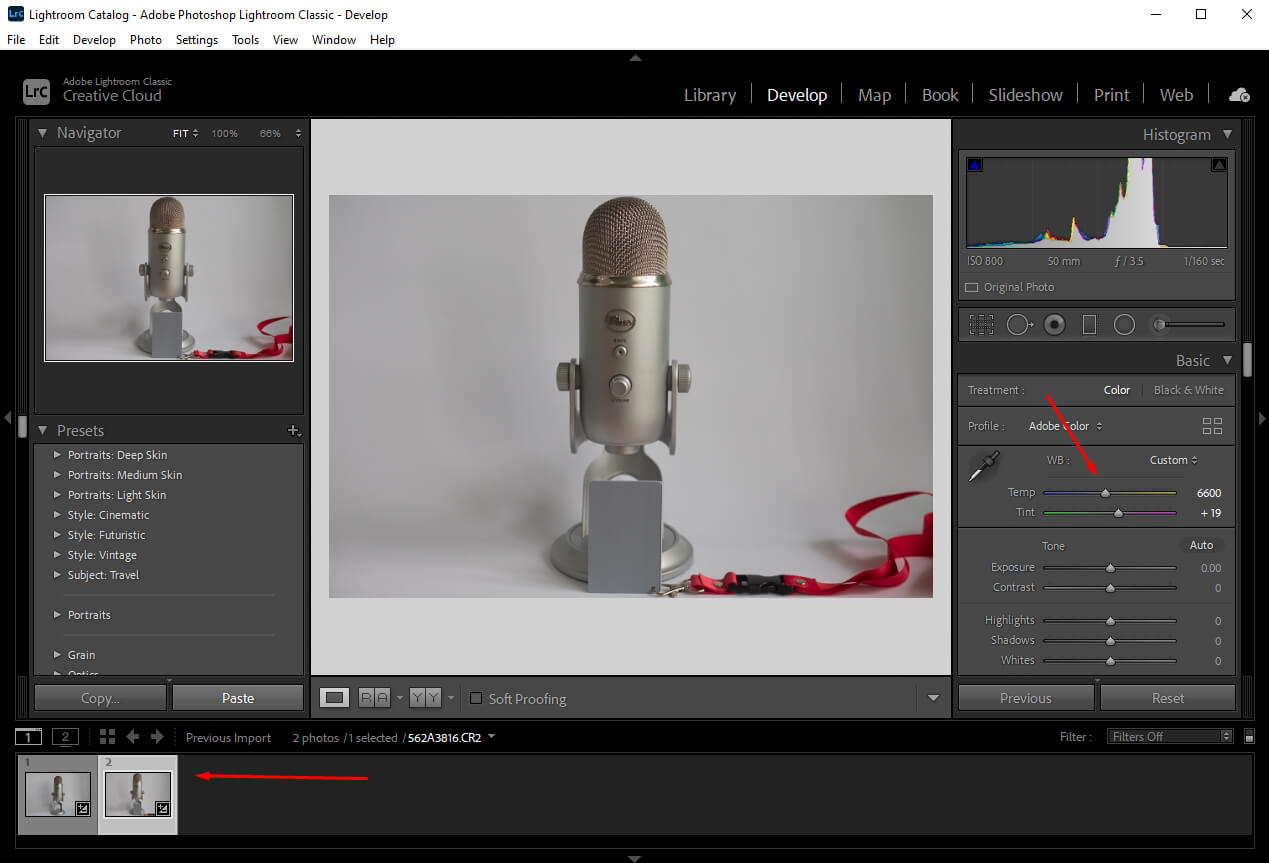
Your next step is to use the WB Eyedropper Tool in Lightroom. Choose the White Balance eyedropper tool in the Basic menu of the Develop Module and click on the grey card photo. This way, you can adjust the white balance for this shot.
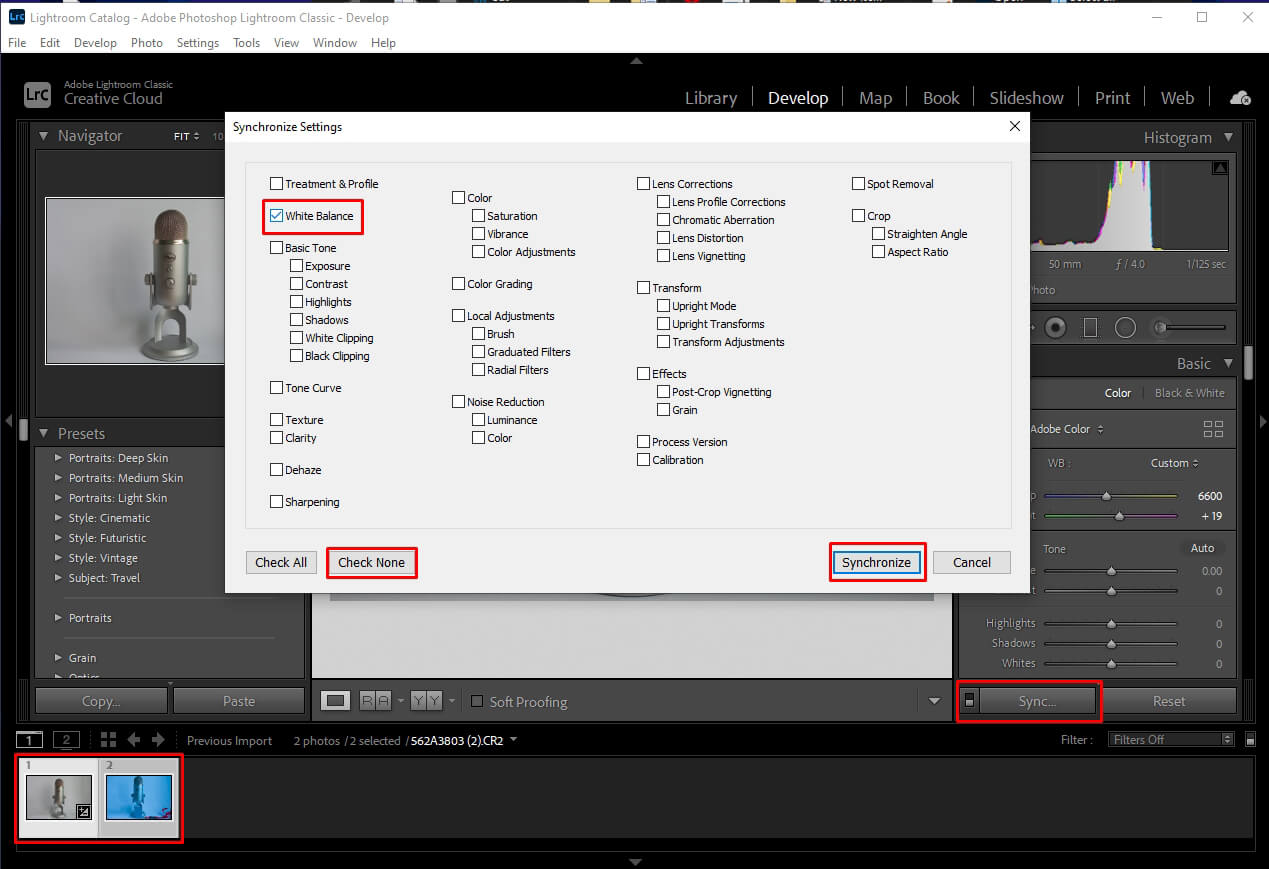
Finally, you have to batch edit in Lightroom. Select all the photos that you want to correct by holding the Ctrl/Cmd key and clicking on the desired shots. The selected pics will have the same WB settings. Then, click on the Sync button at the bottom of the right side panel. You will see the “Synchronize Settings” window.
Apply the changes to all product shots you’ve selected. Note that we have corrected only the WB, so you have to click on the “Check None” button (on the bottom left) and then turn on the checkbox for “White Balance.”
Then, you need to click on the Synchronize button to apply the WB settings to your shots. You can also learn how to edit photos in Lightroom to make them even more attractive.
If it is a complicated task for you, you can contact a professional service. You will quickly get images with an ideal white balance and lighting at a reasonable price. You’ll save lots of time, and get appealing results with much less stress.
Although the white balance is truly important in photos that sell goods, colors should also look natural. These professional presets will help you cope with the task in several clicks. They will help you correct the most common lighting issues that might arise when you take photos of products.


