
If you want to enhance your photos by creating various effects, adding depth, or a sense of movement, make sure to learn more about diagonal lines in photography. You can notice such lines everywhere, whether you take photos in an urban space or a magnificent forest. An experienced photographer can also create them artificially by framing a model in a specific way.
When it comes to diagonal lines, people usually use three main types. You can use actual lines, lines that are created when the objects in the frame are arranged diagonally, or lines that are created by using a specific angle.
If you have a keen eye for detail, you will easily notice diagonal lines wherever you go. Seasoned photographers will see them everywhere since they know what they are looking for. After practicing diagonal line photography for some time, you will learn how to quickly notice these lines. They will help you fully transform the frame and take unique photos.
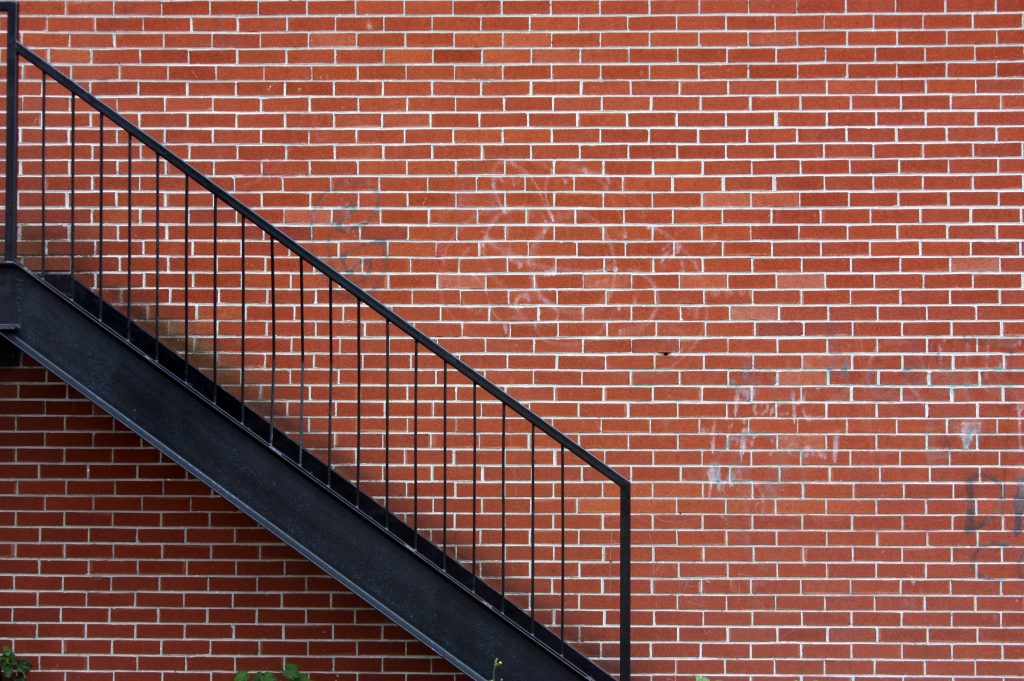
While you can find them in different places, it’s easier to notice them in buildings and various architectural structures, such as roofs, bridges, or stairs. In a natural environment, you might notice a fallen tree or take a picture with a mountain in the background. Try to find the best way to fit these lines in the frame to take a more eye-catching photo.

If you haven’t found any actual diagonal lines, you can still arrange the objects in the frame so that they form a diagonal line. Keep in mind that when a person takes a look at a photo, their gaze moves from the bottom left to the top right corner.
You can frame your objects in a way that will make it easier for a viewer to notice a diagonal line. Avoid putting a diagonal line in the middle since it will divide your picture and prevent you from creating a well-balanced composition. It’s better not to use rigid lines, such as stripes. You need to create an imaginary line and indicate several focal points that will help your viewers notice it.

To use diagonal lines in photography, you can start experimenting with angles and points of view. By selecting the right angle, you can make the vertical or horizontal lines in your frame more or less noticeable.
If you select an unusual angle, it might help you take a unique photo. When visiting various places, take photos from different angles to see how they could be changed. Photographers who specialize in landscape photography know that it’s also crucial to avoid taking photos with a cluttered horizon. Such images look amateurish and unattractive.
Besides, you will also find handy tips that will help you create diagonal lines using various objects and angles.

Seasoned photographers know that it’s important to use a diagonal method when framing an object. You need to arrange objects in a way that will allow a viewer to notice them one by one by moving their gaze diagonally.
Similarly to the rule of thirds, this method requires putting objects at the intersections of the vertical and horizontal lines in the frame.
It’s better to put your main objects on the diagonal lines that start from the corners and cross your frame. You can use one or several diagonals, depending on your needs. It will help you to make a viewer focus on the most important parts of your image.
If you have already seen some examples of diagonal photography, you might have noticed that such lines allow creating a sense of depth. You can use them when taking a picture of a road or create a 3D effect when experimenting with various locations. In some cases, you might need to put an object on the ground to make it seem closer.
Another method is even simpler. You just need to extend your hand so that it is clearly visible in the frame. It will allow you to achieve the effect of presence and make your picture look more real.
If you take photos from far away, you might notice that they are insufficiently sharp. To improve their quality, make sure to use professional long distance lenses.
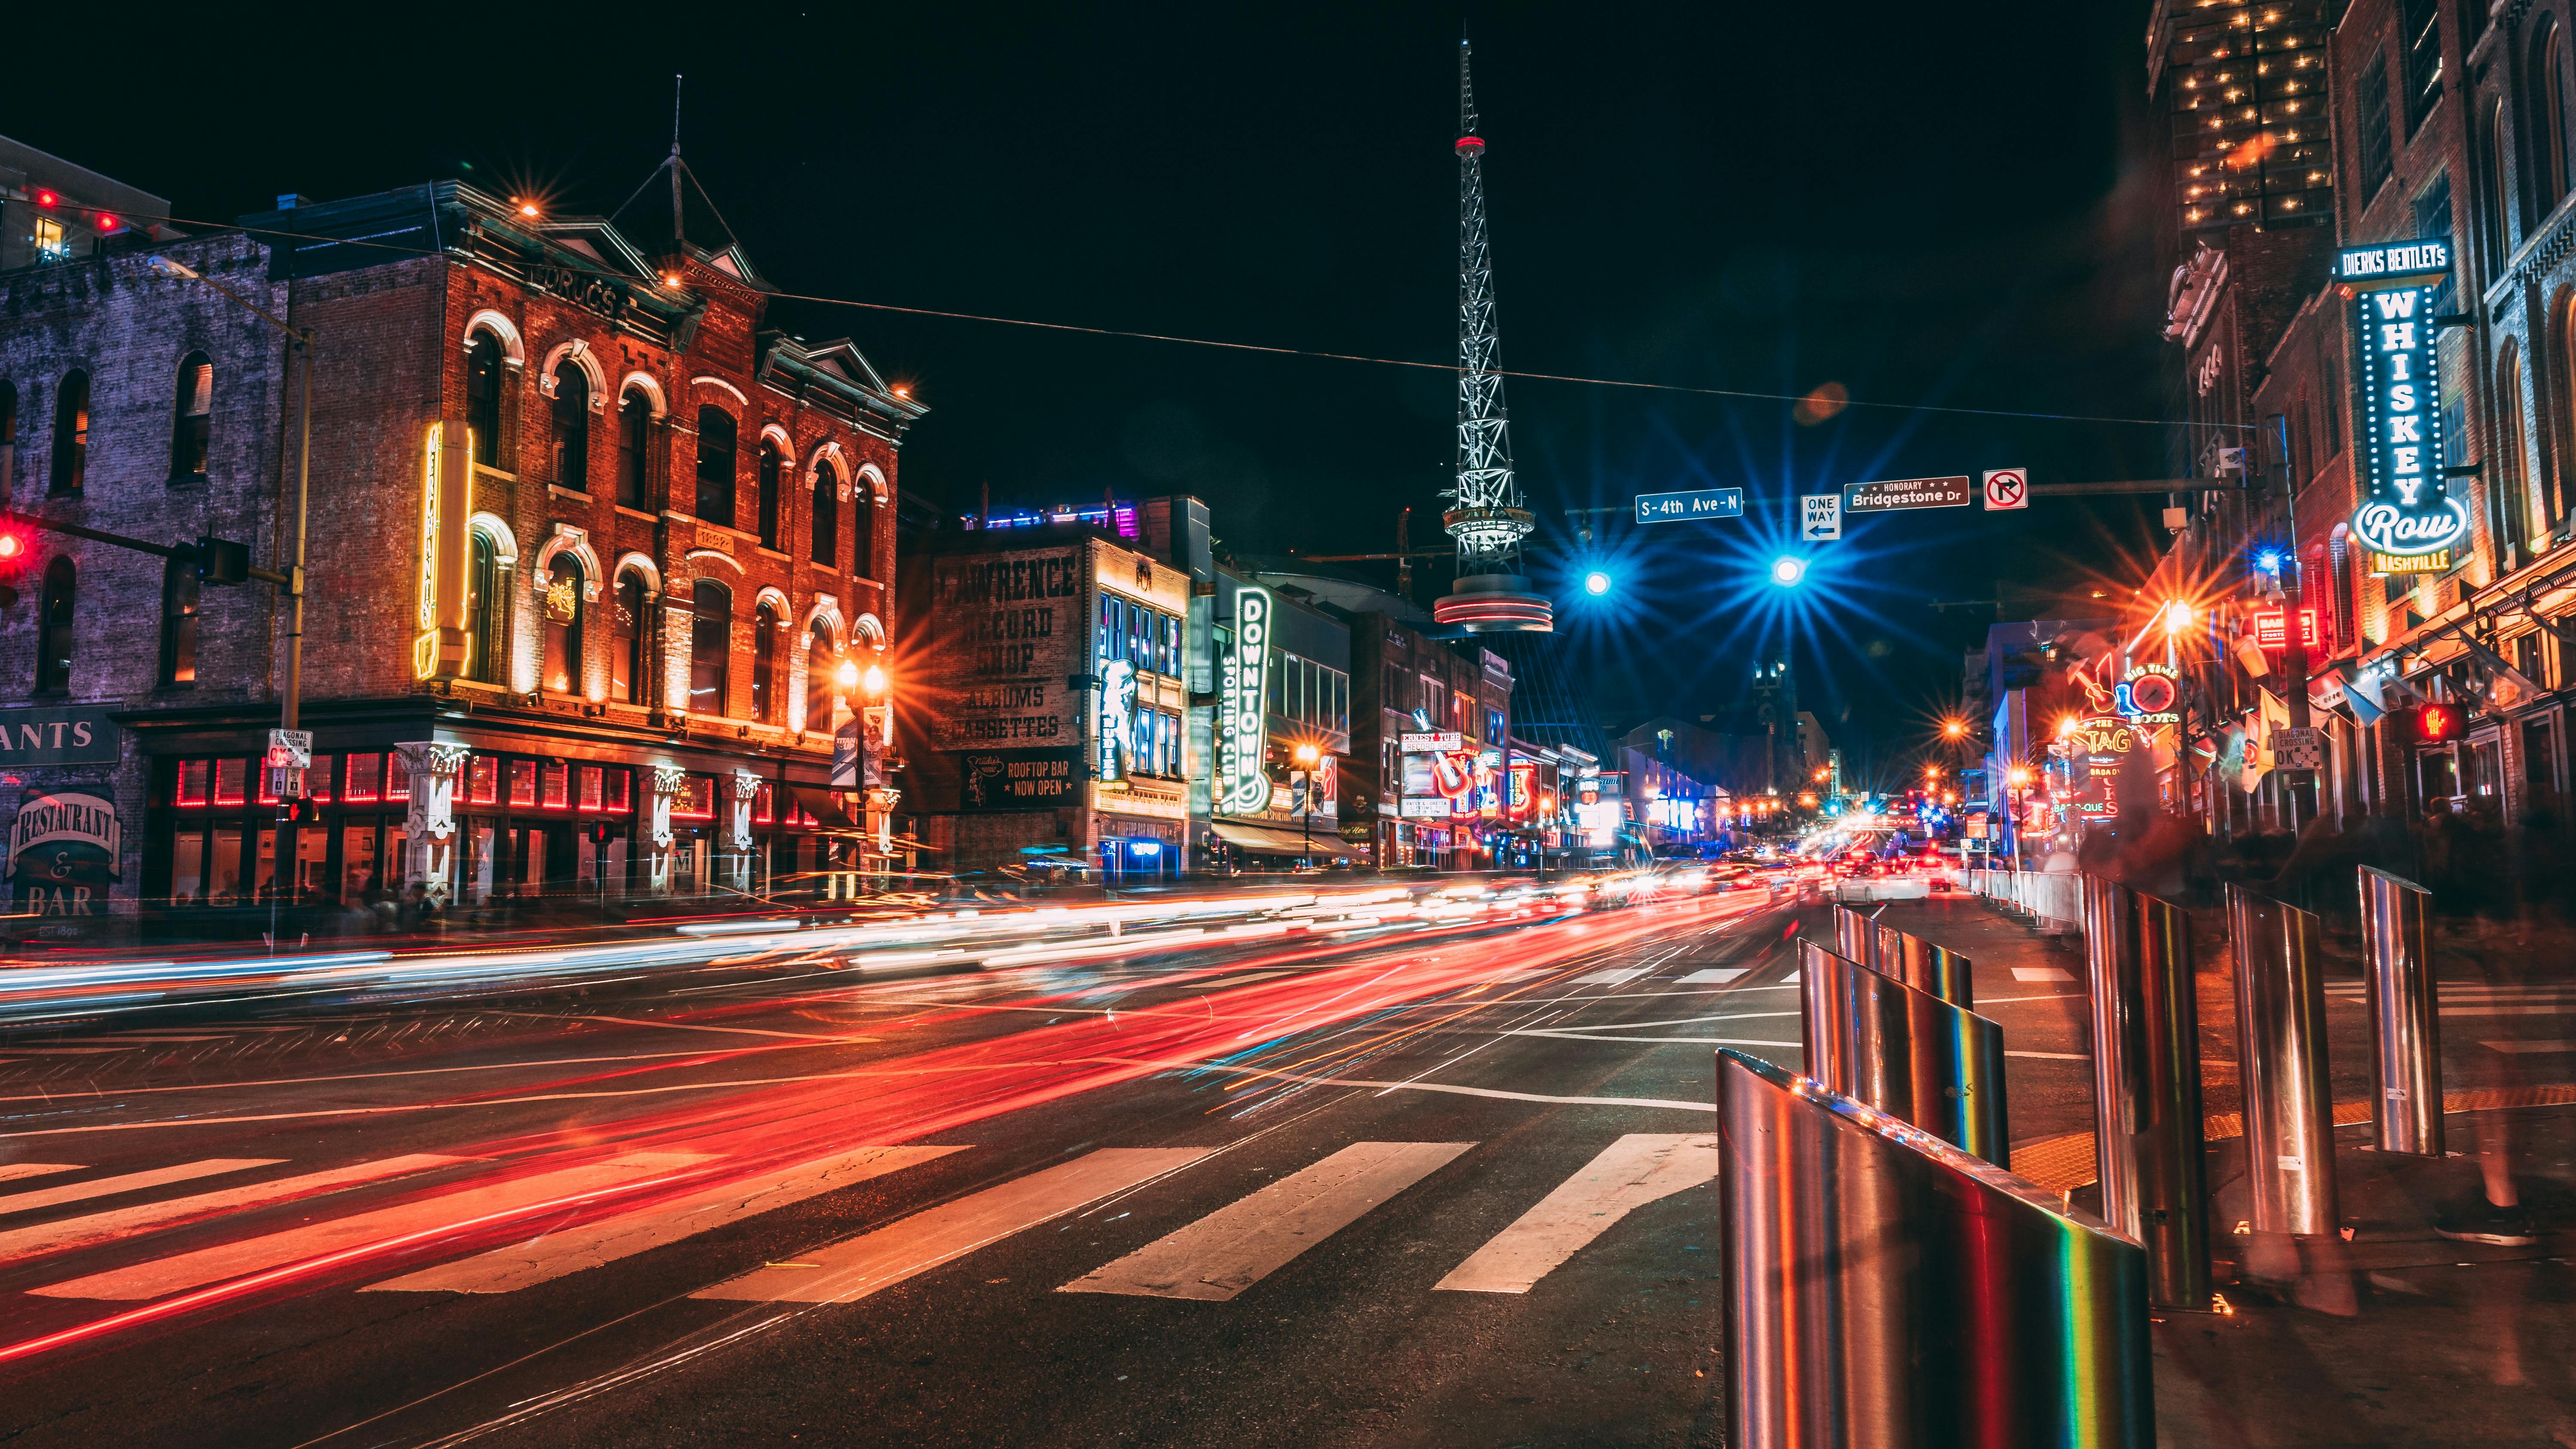
In some cases, you can make your photos even more impressive by using leading lines that draw a viewer’s attention to the main object in the frame. The place where these diagonals converge becomes a focal point of a photo.
This method will come in handy for professionals who specialize in portrait photography. If you notice any existing lines in the background, make sure to select a position where they can be seen from an angle. This way, you can add a sense of movement to your photo and make it more engaging.
However, if you have never used advanced techniques and want to take a high-quality portrait photo, you can contact FixThePhoto professionals.


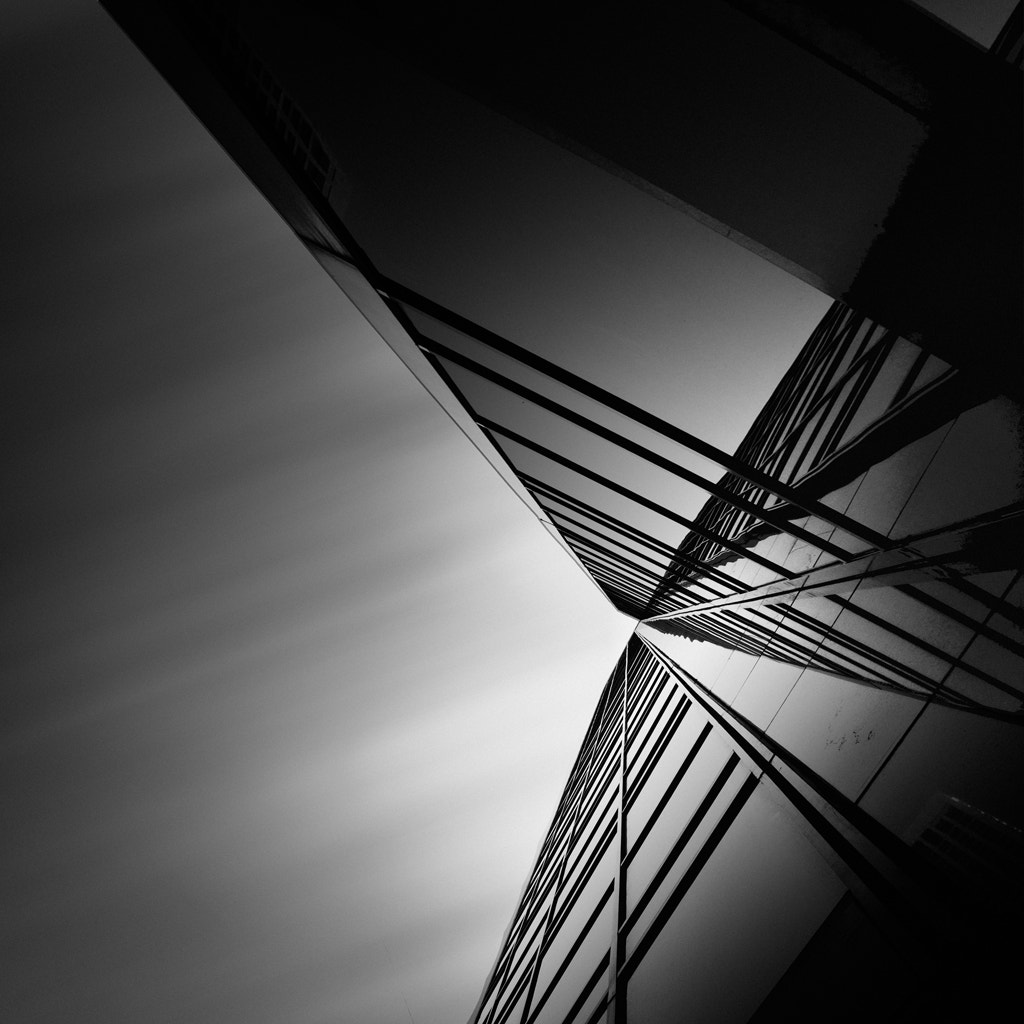
When taking a photo, you can also deliberately change the proportions of horizontal or vertical diagonals to produce unique effects. For instance, by tilting your camera, you can make the horizon look almost vertical. Try using various angles and camera positions to implement creative photo ideas that will make your pictures more unique.
Artists usually call this technique the Dutch Angle. It allows photographers and videographers to add a dramatic touch to their visuals. This technique will come in handy for experienced photographers who want to make their photos more stylish. If you are a beginner, it might be difficult for you to find the best angle without distorting your picture too much.

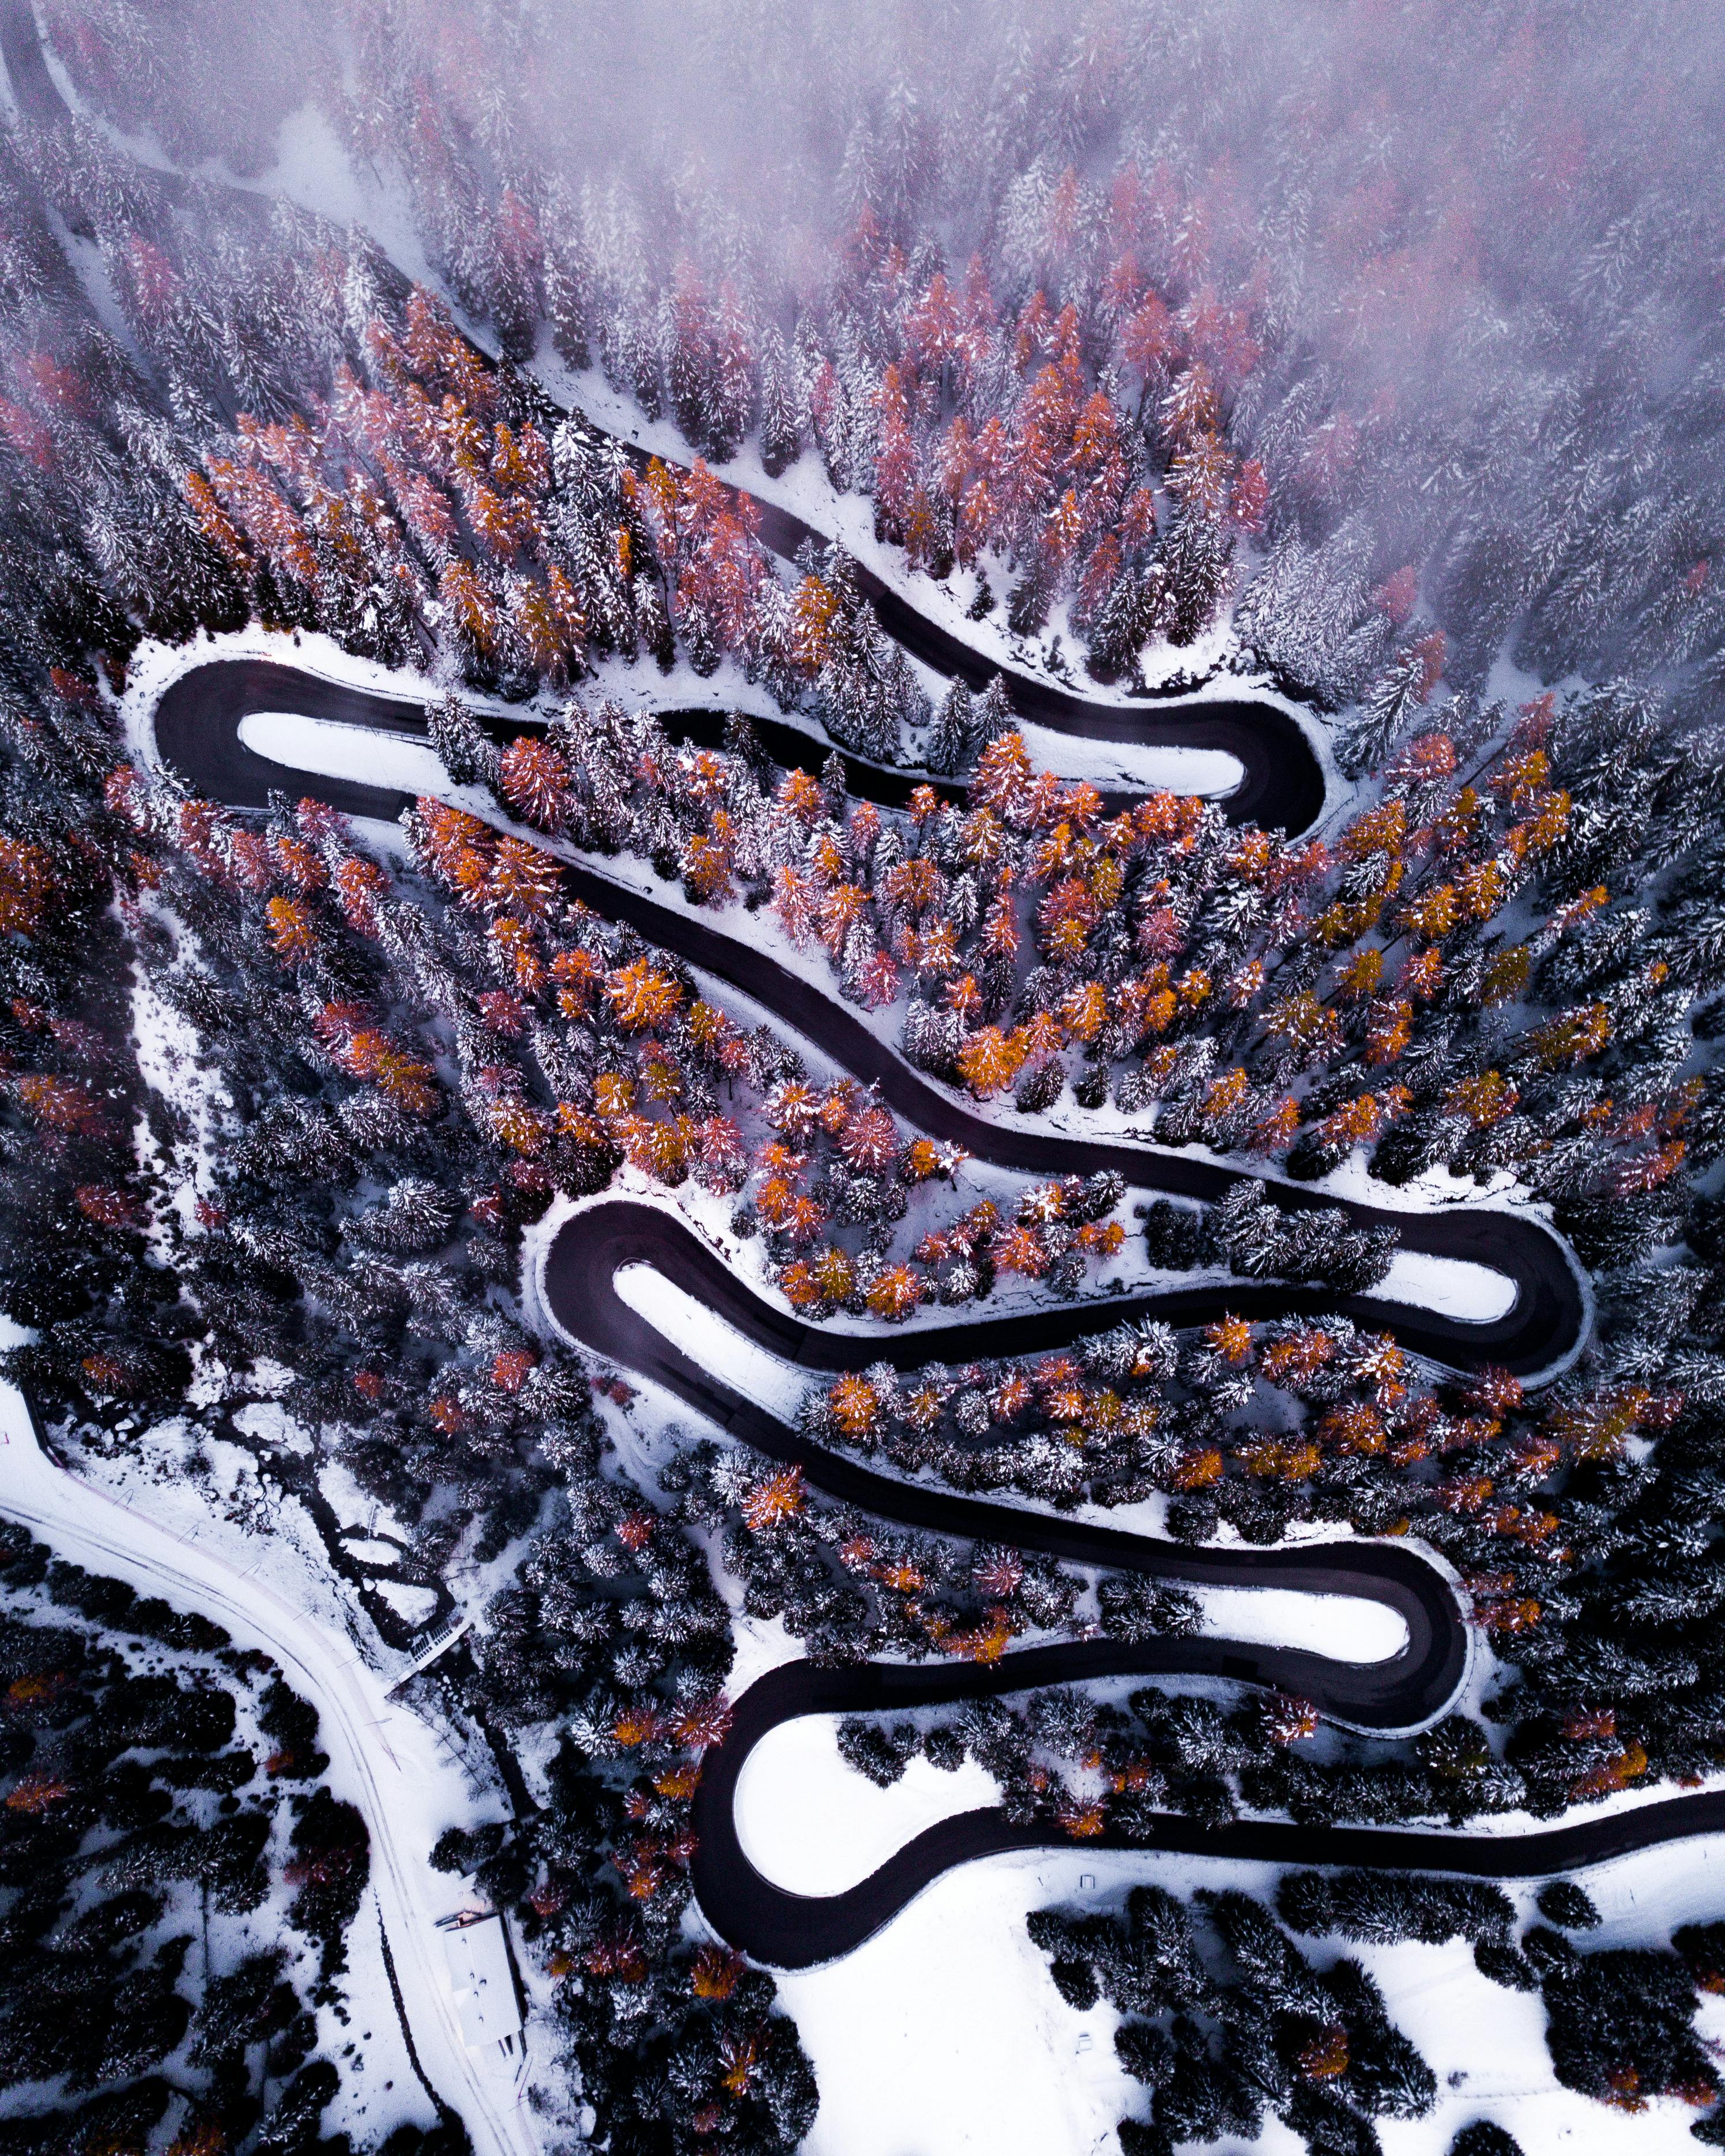
When trying to create a diagonal in your frame, keep in mind that there is no need to look for straight lines. There are no clear lines in nature so wavy diagonals will do. For instance, you can take a photo of a river or forest path that crosses your frame. It will allow you to convey a sense of movement and add depth to your photos.
Seasoned photographers also use intersections and zigzags to create an unusual photo composition or show the contrast between different parts of an image. However, zigzags are quite eye-catching so make sure not to focus on them too much if you don’t want to make your photo look cluttered.
If you are interested in diagonal photos, make sure to use these handy tips to enhance your composition with diagonals. Keep in mind that you can either use existing diagonal lines or create them by yourself.

You can create diagonal lines using trees. For instance, you can take photos from the base of the tree to fit it in the frame. Some photographers take pictures where the tree crosses the frame diagonally, from the bottom right or left to the opposite corner.

You can give a dynamic feel to your image by experimenting with various poses that allow you to create diagonals. For instance, you can use extended hand poses, take photos of legs, or use a variety of group photo ideas. Select the poses that allow models to create diagonals with their bodies.

With the help of shadows, you can take stunning diagonal photos with various objects. Make sure to use shadow photography tips to add depth to your images.

You can take an amazing picture if you manage to capture your model looking up or down diagonally. It will create an effect that won’t be noticeable at first glance but will instantly grab a viewer’s attention and make them focus on important details.

Diagonal lines are suitable for any type of photography, since they allow you to add some depth to your pictures by following simple rules. For instance, you can take photos of a road disappearing into the horizon. Just lower your camera a bit to ensure that the sides of the road create diagonals.
If you like diagonal lines in photography, you can easily create them by experimenting with shooting angles. This way, you can create diagonals when taking real estate photos. For example, you can use windows and doors to divide your frame diagonally and make your pictures stand out.

While many people disregard this option, you can easily add diagonals during post-processing. For instance, you can highlight diagonally arranged objects, raise contrast, adjust saturation, and add an unusual tint.

Another easy way to create diagonals is to take photos of triangular objects or ask a model to pose so that their hands or legs form a triangle. This geometric figure consists of several diagonals that lead to different directions.

If you don’t want to spend much time improving your shots, try using these handy presets. With them, you can raise contrast, tweak colors, add highlights, and remove minor defects from your photos.


