How to Use Leading Lines in Photography: 18 Tips

We constantly meet photography leading lines in our every-day life. These are wires, branches, benches, the horizon, etc. Photographers frequently take pics following these leading lines. But if you want to make them a predominant part of your photo composition, follow these tips and add a professional look to your photos.
Leading Lines Photography Guide: 18 Tips
Although many of us underestimate the compositional value of the leading lines, they may be called one of the most effective tools in photography. With their help, you can make the viewer focus on some particular object in the image (a point, a person, etc.).
1. Learn Leading Lines Definition

In simple words, leading lines in photography is a compositional method that features line shapes ‒ a road, river, bench, etc. In such a way, the viewer’s attention is drawn to the main subject in the frame.
As a rule, when a person sees this or that image, his/her attention is instinctively focused on lines ‒ we try to see where they go. These lines lead us to the main subject in the picture.
If you apply the leading lines photography technique, you may produce several effects:
- Make the viewer follow the lines, therefore, capture the whole scene presented in the frame
- Focus the viewer’s attention on some particular subject or point
- Make the picture look more natural and three dimensional
- Create unique shapes using these lines (abstract images)
2. Find Out Why Are Lines So Important?

It’s interesting that we subconsciously focus our eyes on lines in the photo. That is why, if you want to attract even the most uninterested client, use a strong leading line in the frame.
It will immediately catch his/her attention even from a distance and create a specific visual experience. The viewer instantly gets a hint of what is going on in the frame because the leading line leads him/her to the main subject. In such a way, he/she will feel the depth of the scene.
Moreover, a strong leading line will help you compose the frame. For example, if you want to highlight a specific object in the picture, you may locate it along the leading line or at the end of it.
This technique is also helpful when you have to choose a place for yourself before the shooting. For instance, if you decide to take several shots of the road, you should position yourself in the center of the road along the central line.
- Check out forest photography tips.
3. Find Leading Lines Everywhere
Leading lines are everywhere. You may use anything as a leading line ‒ it depends only on your imagination.
Here is a list of objects that may serve as leading lines for your shots:
- Fences
- Builds
- Lamp posts
- Roads
- Dunes
- Window panes
- Doorways
- Bridges
- Shorelines
- Train tracks
4. Learn About Types of Leading Lines
There are various types of leading lines in photography and each of them adds a particular feeling to the image. If you use this technique appropriately, you will convey the necessary emotions and give your shots a particular mood.
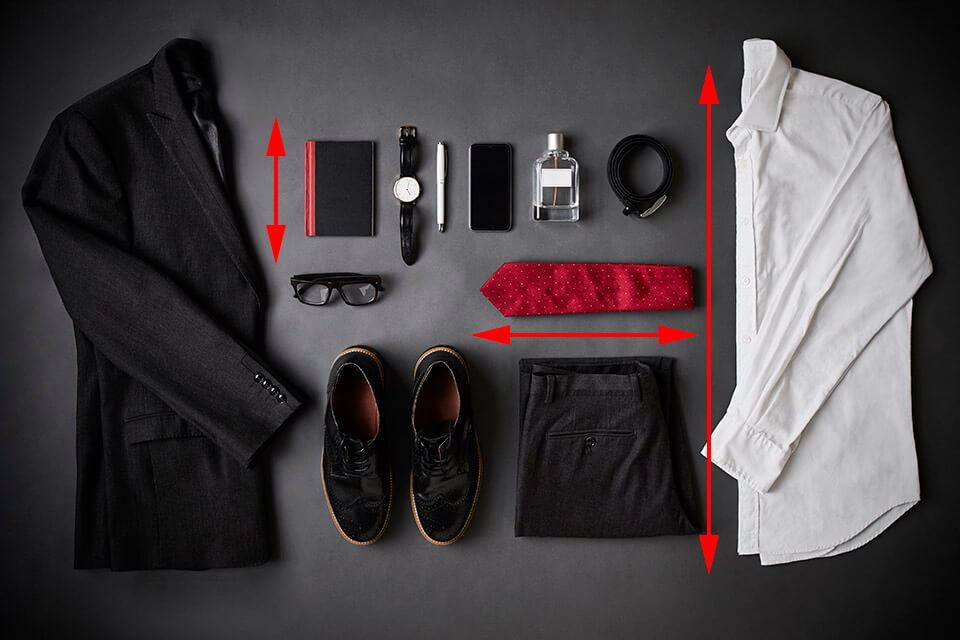
Horizontal Leading Lines
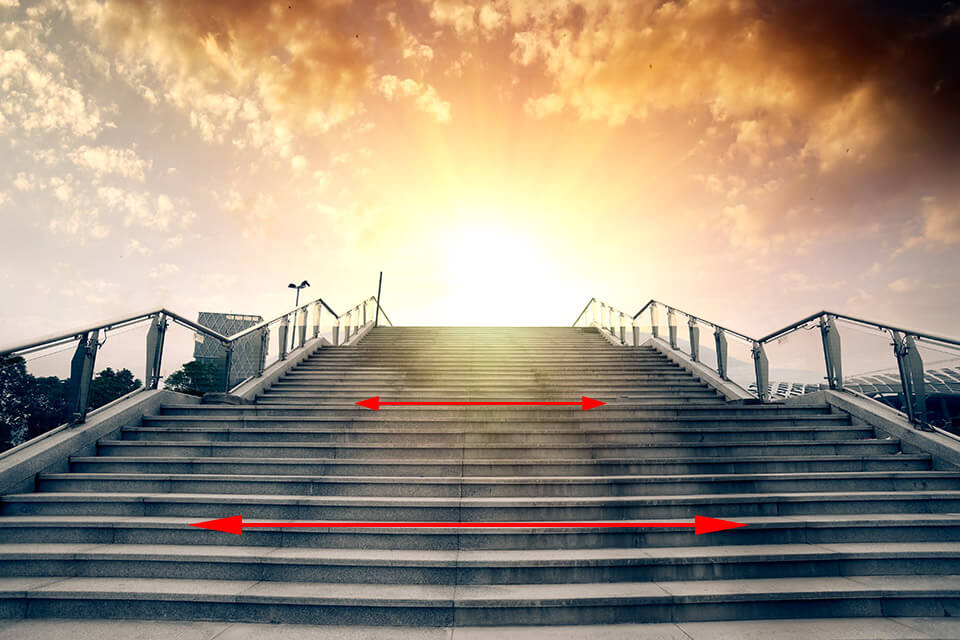
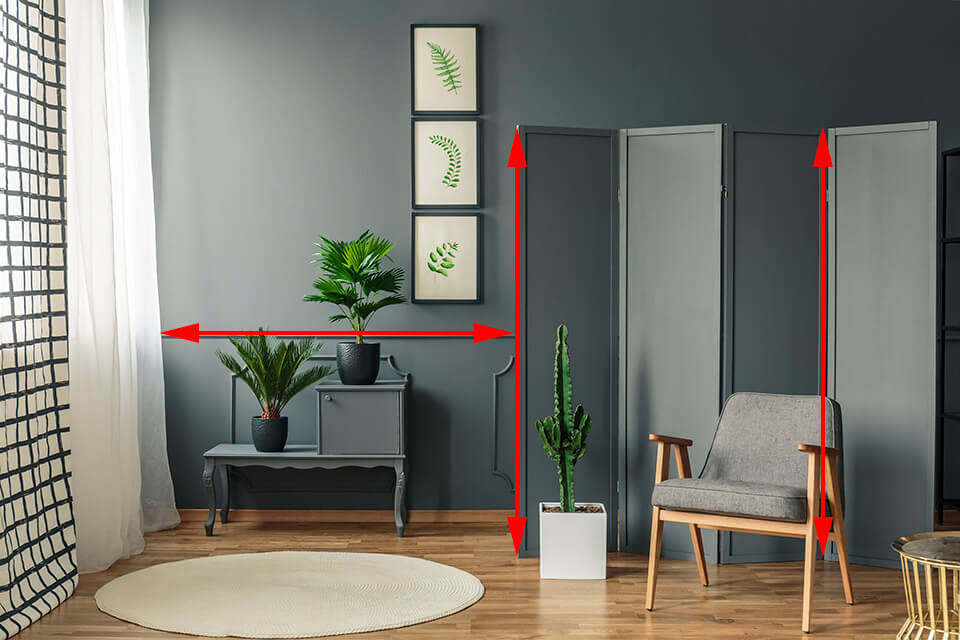
These lines are used to convey calmness and tranquility. Find horizontal leading lines if you shoot landscapes and relaxing objects.
In such photos, the horizon leads you along the scene and creates a peaceful atmosphere.
Vertical Leading Lines
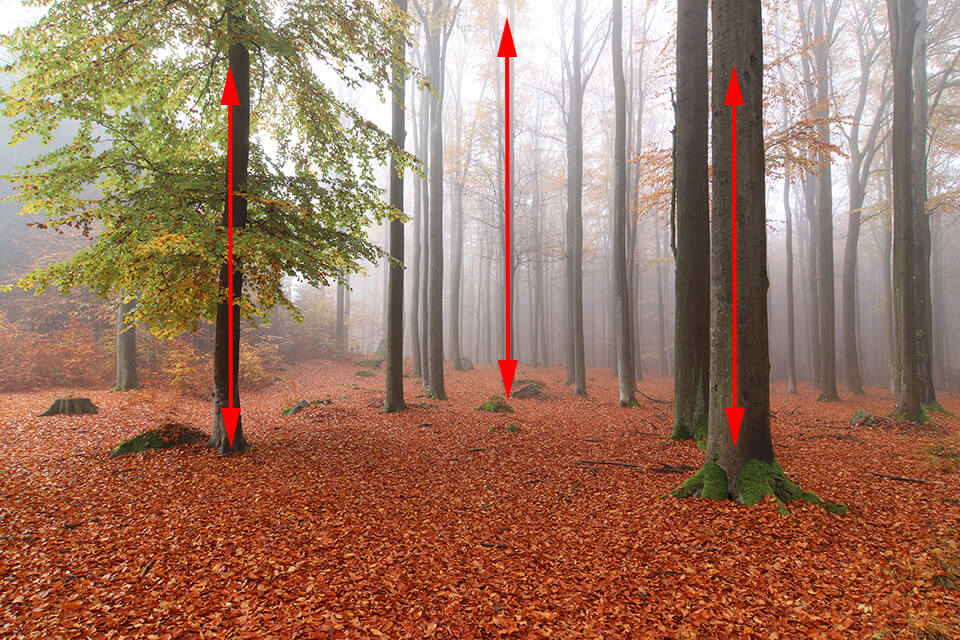
Speaking about vertical leading lines, they imply power and authority. Your main subject will look strong and superior.
Diagonal Leading Lines

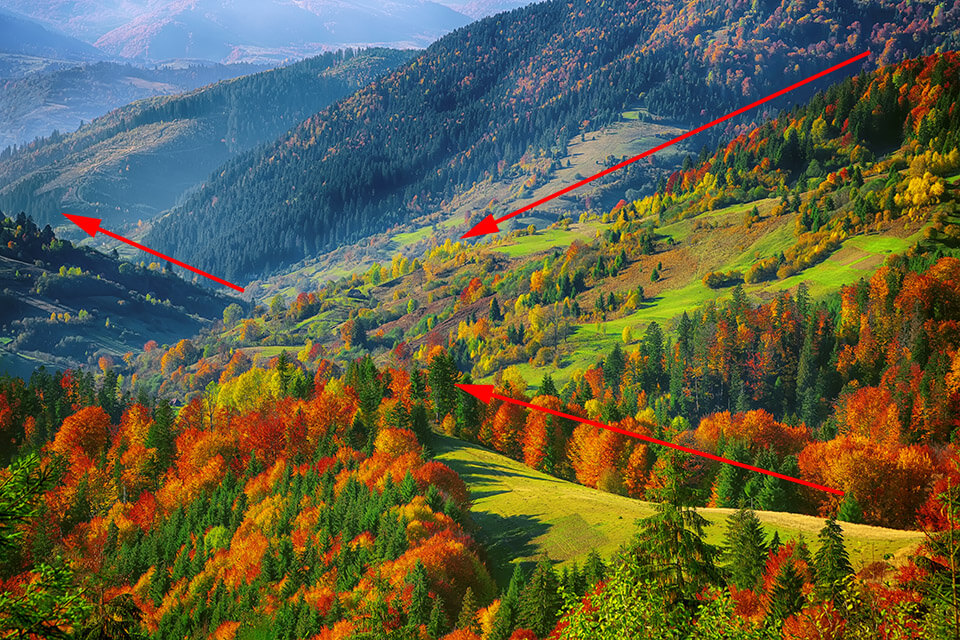
Diagonal lines in photography create a feeling of movement and change. They successfully cope with their main task ‒ to guide the viewer through the scene. In such a way, they lead us from foreground to background, highlighting the main subject at the beginning or end of the line.
People instinctively watch the lines from left to right, like we read and write. That is why downward diagonal lines that go from left to right seem calm and natural. Those going upwards convey tension and influence.
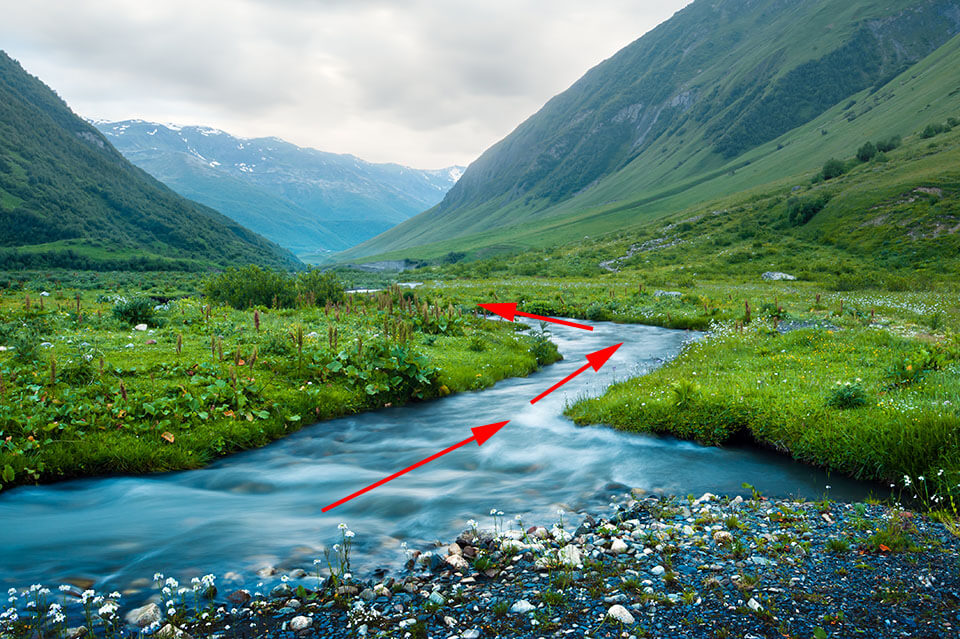
Curved Leading Lines
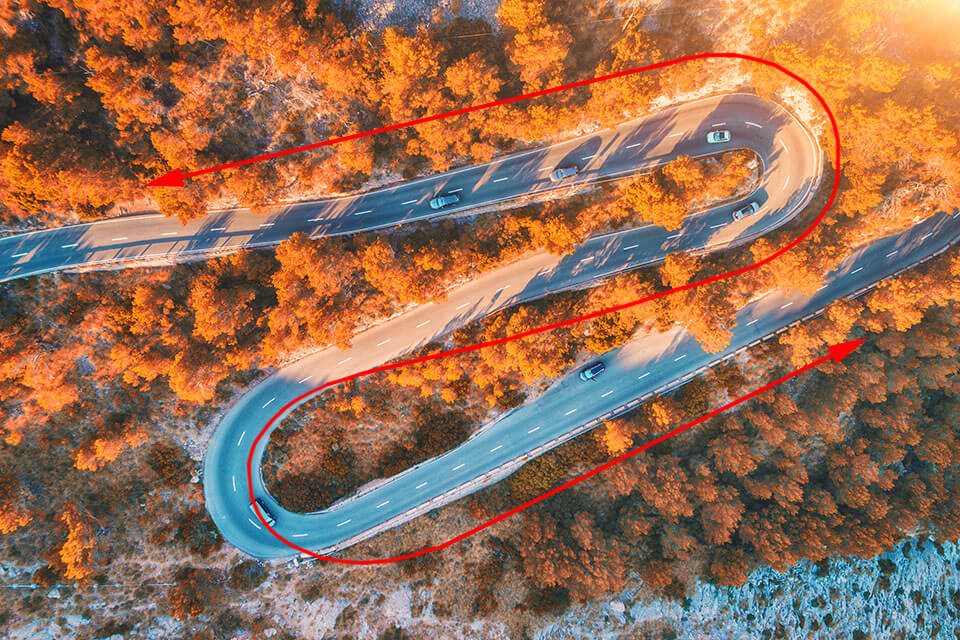
These lines look more natural than straight ones. It is recommended to use them in landscape photography if you want to make the scene “flow” in the frame.
- Learn the basic of landscape photography.
Converging Leading Lines
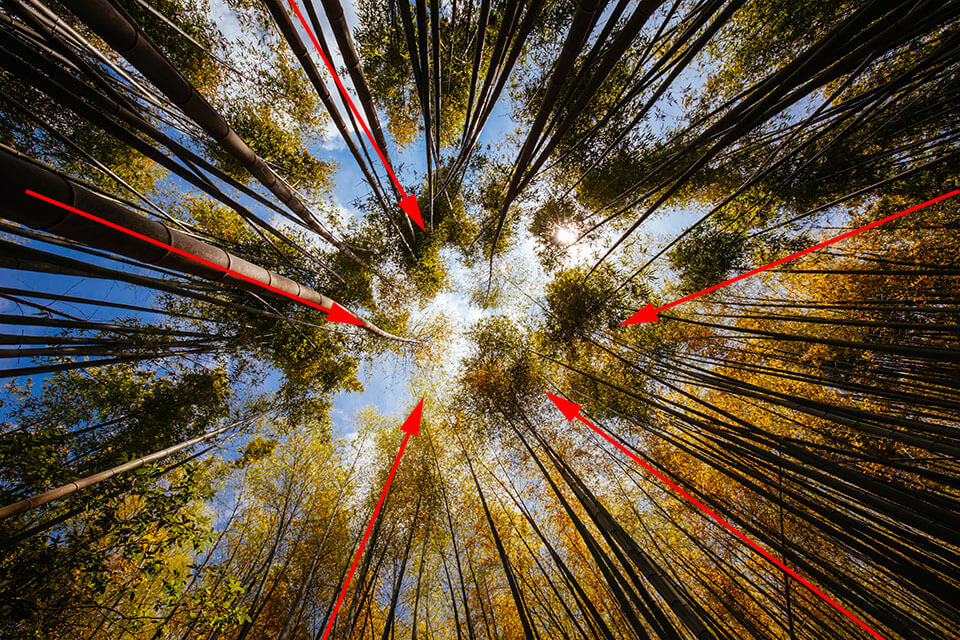
If lines meet at a certain point, we usually concentrate on it. So, if you want the viewer to focus on some object, place it on this very point. Moreover, if you want to create a three-dimensional feeling, you may also use converging lines.
Implied Leading Lines
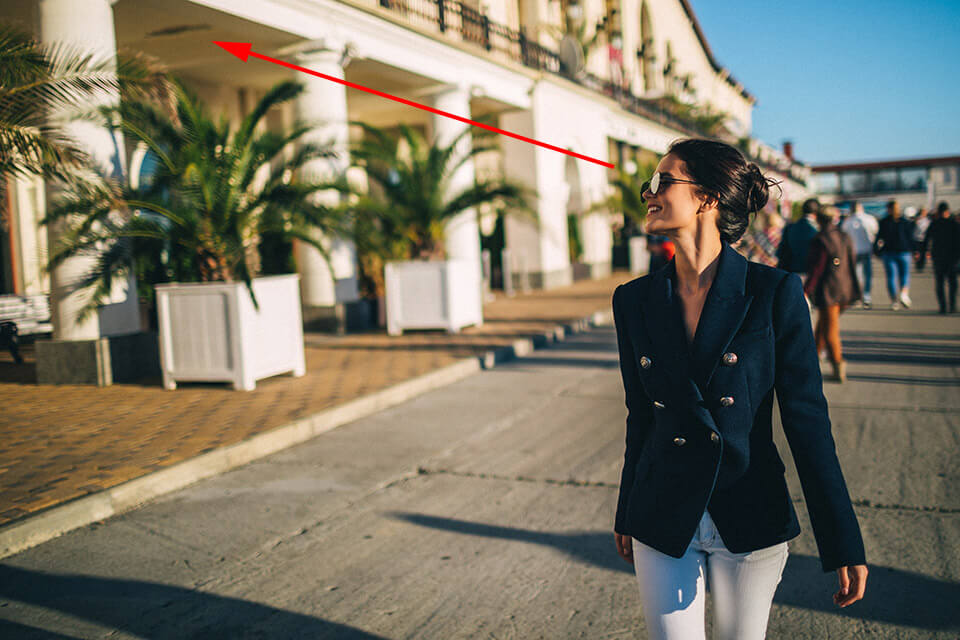
Implied leading lines are the ones that do not exist in reality, we just imagine them. For example, a person’s gaze. If a man/woman looks somewhere in the photo, we follow their line of sight to see where they are looking. This type of leading lines is a very powerful tool in the frame.
Intersecting Leading Lines
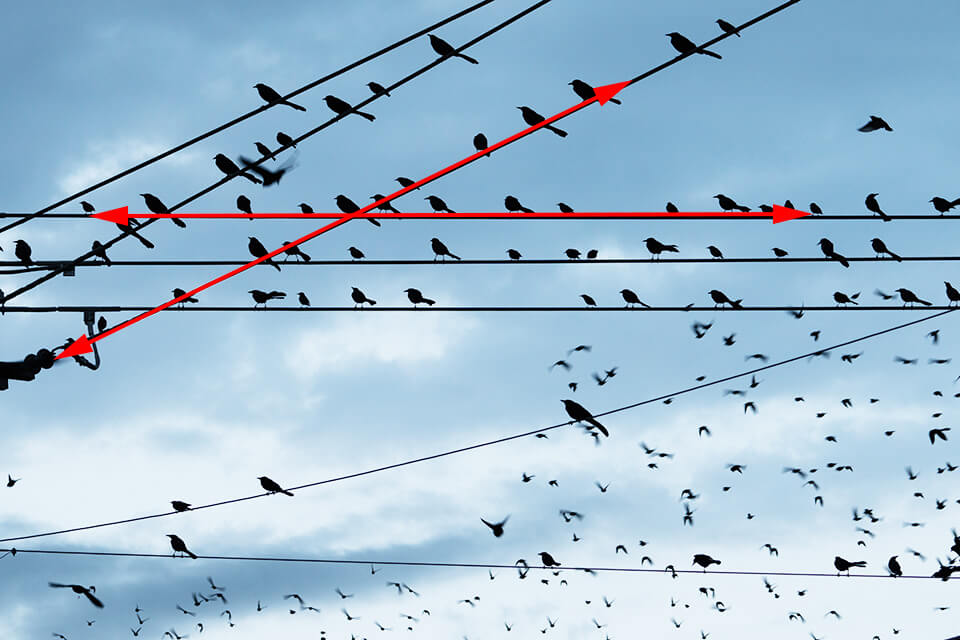
Intersecting lines are a great tool to create a feeling of tension and conflict. For example, if you show the lines intersecting each other, you may ruin the flow of a photo and the viewer will not follow the line.
5. Find the Difference Between Paths and Leading Lines
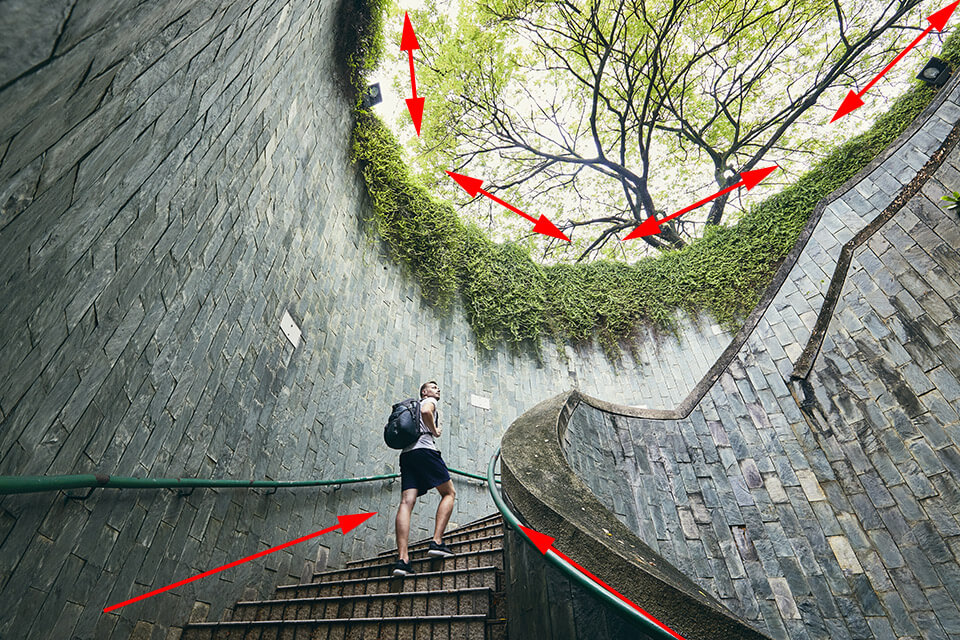
Leading lines, as well as paths, guide the viewer to some particular point. The camera settings like shutter speeds, aperture, film, as well as equipment do the same. The thing is that a leading line will take you to the main subject in the image and a path guides the eye towards a horizon.
Check out the example above. A railroad track guiding your eye to the horizon is a picture with a path. But a loving couple walking along the track is a leading line photo where the focus is on the couple, not on the horizon.
- Check out the best landscape photographers to inspire.
6. Remember This Rule on Line and Depth of Field
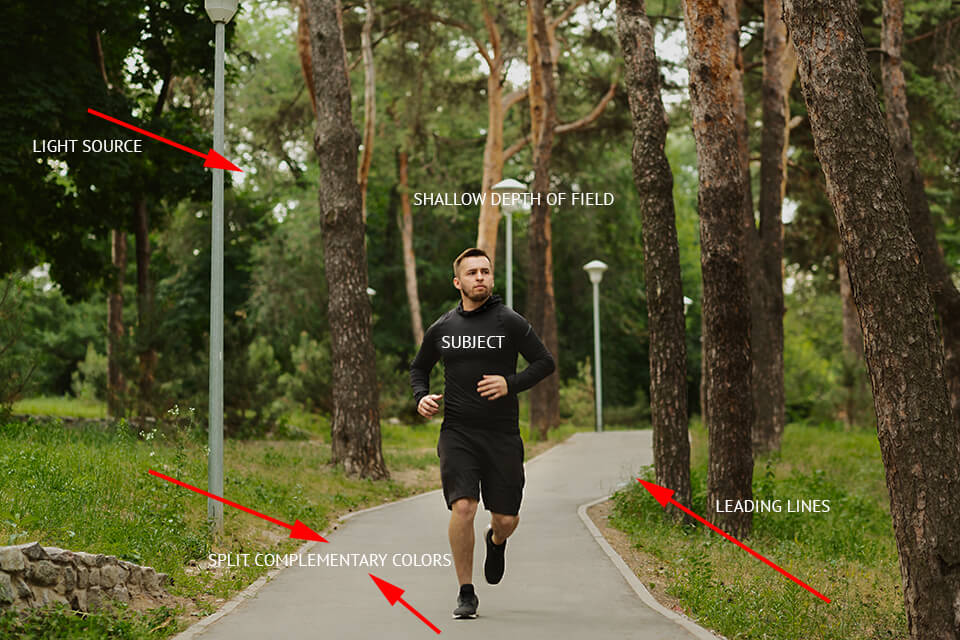
In case you have managed to define leading line in the scene, you need a complete depth of field. The foreground part of the line isn’t supposed to be subtle. Subsequently, the background part has to be defined and sharp.
It matters because the main aim of the leading line is to direct the viewers’ attention to the subjects located farther. If the subjects aren’t sharp, it is impossible to get a proper leading line effect.
That’s why it is necessary to set small lens aperture values from f/16 to f/32 and shoot with a tripod. The lower the aperture value, the less the amount of light is. So to preserve the same correct exposure, you need to keep the shutter open for a long period of time.
Long shutter speed may result in a stable shot only if the camera stays still during the exposure. In other cases, if you don’t use a tripod, blurred leading line shots are guaranteed.
- Learn information on aperture and depth of field – focusing basics.
7. Find Leading Lines in Distinctive Lighting
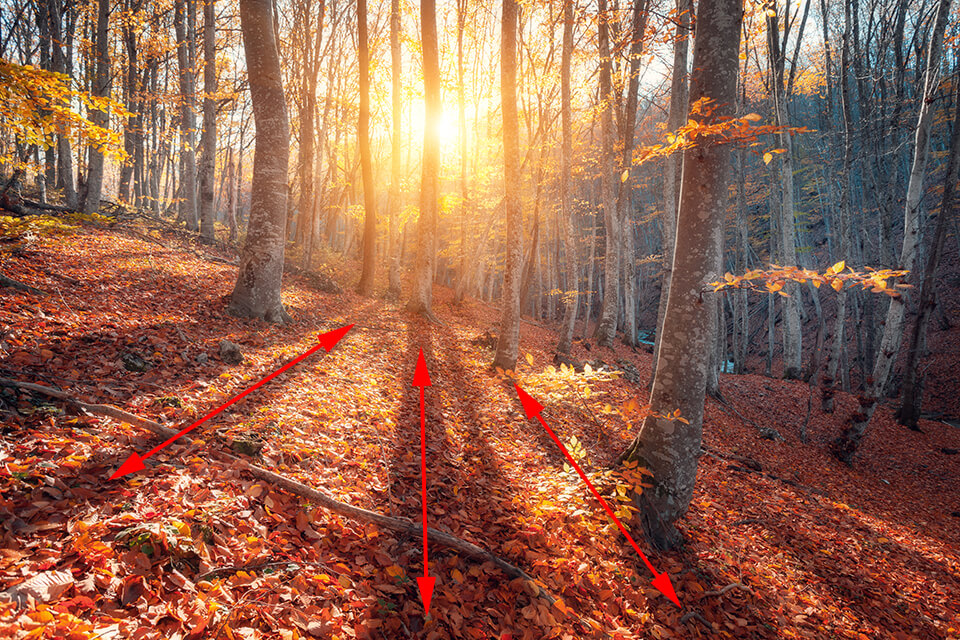
Whenever I do leading lines photography, I search for eye-catching lighting. Dark shades contrasting light ones, long shadows and streaks of lights in motion produce eye-catching foregrounds.
For instance, tail lights may be turned into gorgeous leading lines at nighttime. In such a composition, the lines are diagonal and, therefore, add more dynamics to the shot.
- Learn additional information on shadow photography.
8. Use Grid in Camera App
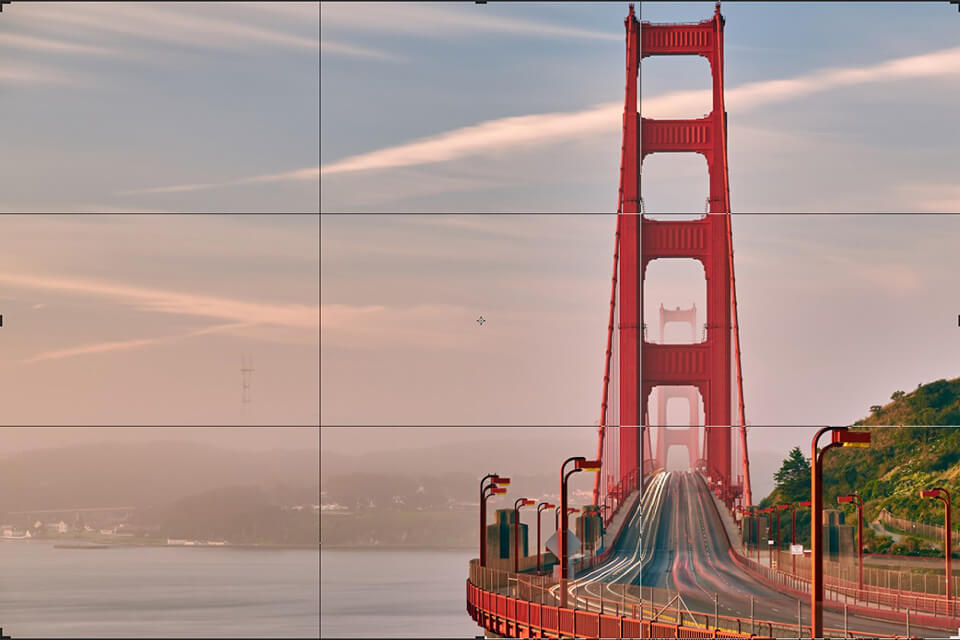
Before you start arranging the composition for leading line photography, you should enable the grid in the Camera app. Simply open Settings > Photos & Camera > Grid. With the help of the grid, you will position the subjects in the shot more properly, particularly, in case you use leading lines to guide to the center of the composition. For such shots, you need a straight horizon.
- Follow basics of rule of thirds in photography.
9. Keep Horizon Straight
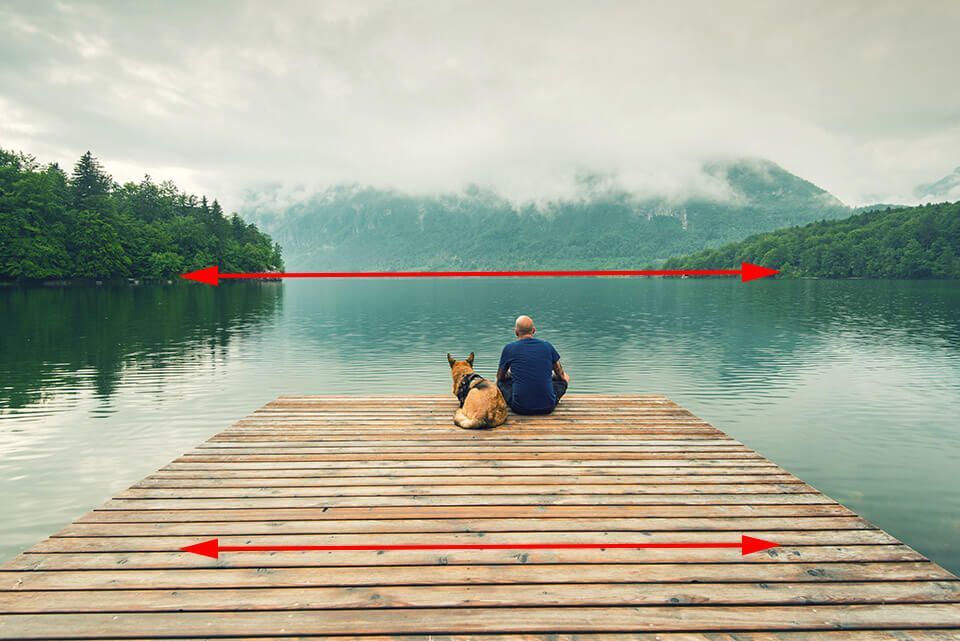
I had plenty of situations when I successfully used leading lines to guide to the central subject but I didn’t manage to achieve a straight horizon. It is always possible to crop and straighten the shot in the picture editing software.
However, the shot may lose its symmetry and get distorted as a result. So pay close attention to each primary element of the shot and make the horizon stay straight.
For the correct location of parallel lines, they should start at the bottom corner of the shot and travel through the shot until they reach the primary point. As a result, you will achieve a balance and symmetry in your leading line images. For a better effect, get lower to the ground and take pictures from a low angle.
- Check out the best seascape photography tips and ideas.
10. Create Depth & Symmetry
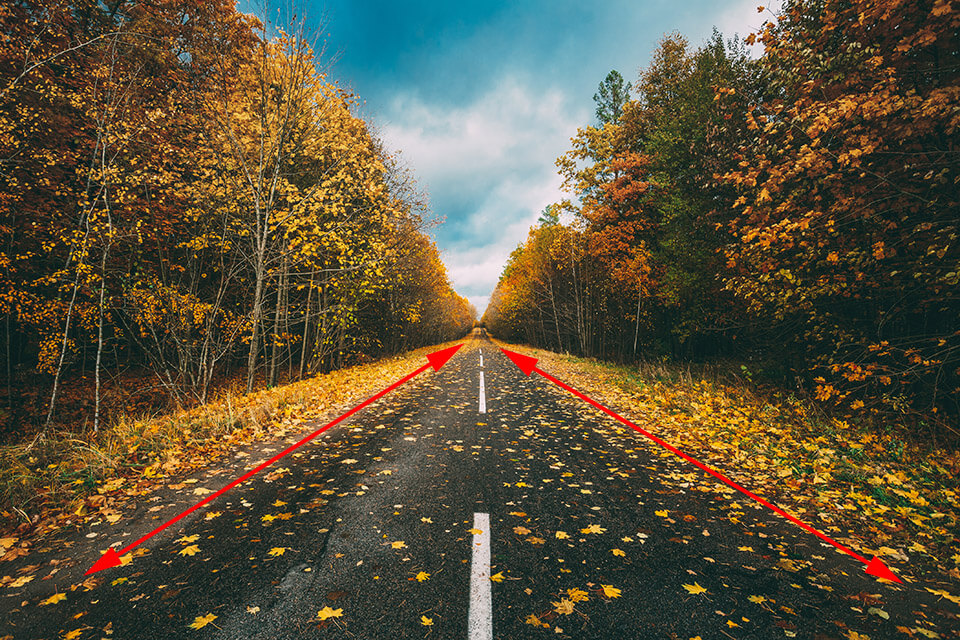
For symmetry photography with stunning depth, capture a straight road or path. The viewers’ eyes are sure to follow the lines into the distance.
When arranging the composition of a shot with leading lines, decide on the starting point of the lines. I recommend you to make the lines start from the corners of the shot. To find a perfect location for the lines, you can always try photographing from a different angle or stepping forward or back.
For a stronger focal point in the shot, locate the subject at the end of a leading line, for instance, a structure at the end of the path.
11. Use Shadows as Leading Lines
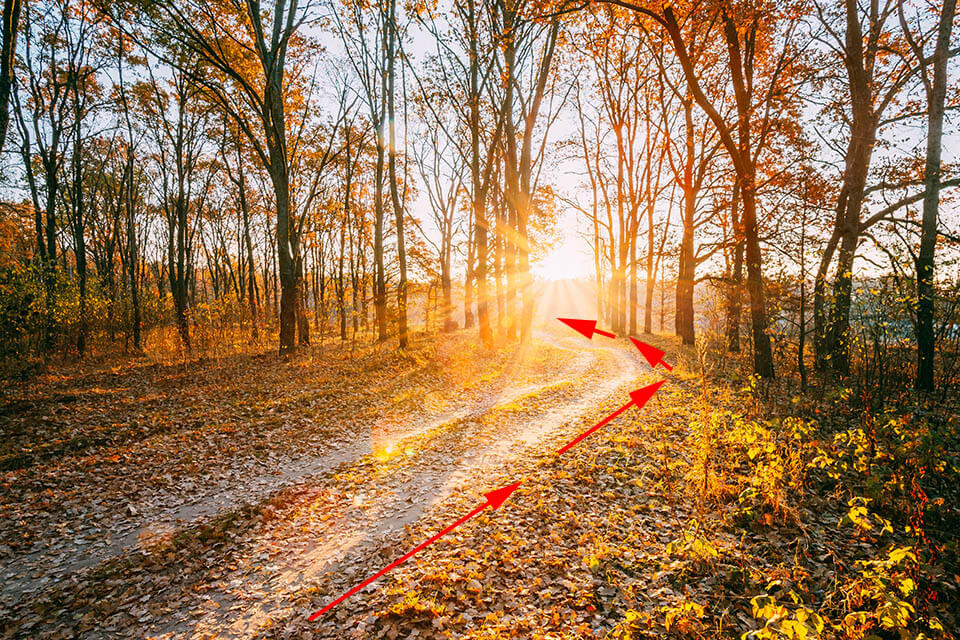
Take a look at these beautiful leading lines photography examples. The path guides viewers through the forest and tall trees direct us to the upper part of the shot. Shadows in the foreground add an extra flair to the entire image and make it more eye-catching.
Trees had thrown long shadows, which created prominent lines, leading viewers straight from the front part of the shot. In this way, the scene looks deeper and more meaningful.
Of course, there is always an option not to include the shadows in the composition. But if you are interested in capturing shadows in your leading lines photography, take pictures when the sun is low in the sky.
12. Use Color to Emphasize Lines
Leading lines on photos can be created artificially, like in this shot. Examine it and you will see that straight edges or lines don’t surround the path. Instead, the color creates a strong leading line effect.
Since the orange path and green grass and trees are contrasting each other, it produces a visible border. The border guides the viewers from the foreground straight toward the mountains and the person located farther.
To prove that the color makes a big difference, here is this shot in black and white. As the levels of brightness vary, the path is still prominent. However, that sought-after leading line effect isn’t executed to the fullest.
13. Experiment with Roads and Paths
One of the most conventional ways to include leading lines in photography is to shoot paths and roads. Viewers instantly pay attention to the point where lines meet. In case the lines start in the foreground and end in the background, it makes the shot deeper, more dimensional and visually appealing. To see how it works, try photographing sidewalks, paths in the alleys or parks, or the path to the front door.
14. Landscape Lines
One of the best leading lines photography ideas outdoors is to shoot landscape (ridges, mountains, bushes and trees that grow in the same direction).
In this shot, the ridge line draws your attention to the girls. The row of trees directs you to the photographer’s daughter in the foreground.
15. Find Lines in Clothes
Don’t underestimate the importance of clothes and outfit details, especially when it comes to leading lines portrait photography.
In the shot, this little guy’s suspenders meet at his cute little hands. The photographer’s intention was to attract attention to the remainder of baby chub and dimples on his hands, with his nails showing hours of play. The straps on the woman’s dress direct us to the graceful curve of her back and shoulder.
16. Use Linens

Linens with the shapes and patterns may produce captivating leading lines. That’s something you can do within the comfort of your home. In this shot, the stripes on the blanket direct us straight to the girls’ cheerful faces.
If you locate the subject on the bed and notice pleats, don’t rush to smooth them. The same as the comforter under the baby, the pleats may be turned into excellent leading lines.
17. Remember about Furniture
One more efficient way to include leading lines in photography is to shoot furniture pieces. In this shot, the cushions on the sofa direct us to the mother and her cute newborn. The window sill behind the mother is the second leading line in the shot.
Now take a look at the next shot. To guide the viewers to the subject, the photographer captured the cushion lines and posed the subject in the v-shape of the sofa.
18. Use Props as Leading Lines

Props don’t only make the shots appear more remarkable but can also serve as great leading lines.
In this shot, the guitar strings guide us to the girl and her father playing. That makes the shot more dimensional. The straight line of the slingshot shows up against the curves of the background, which draws attention to the primary subjects of the shot.
Freebies for Leading Lines Photography
Picture editing plays a significant role in all photography genres. As for leading lines photography, it doesn’t have any specific requirements but you still need to possess certain skills.
In case you don’t know anything about picture editing but want to achieve the best results, the following tools will help you.
Orange & Teal
This filter makes the colors in the shots more vibrant and vivid. Also, it increases contrast and the shot acquires a pink hue.
Wanderlust
This landscape preset will enhance your leading line shot in a matter of seconds. Even if you need to edit a set of shots quickly and in one style, the preset will perfectly cope with the task.
Pure
Do you need to enhance a shot taken in harsh light? Then apply this preset and make the shot look more intense. The preset is mostly suitable for pictures taken in the middle of the day.
Color
Apply this action to give your shots special coloring, intensify shadows, and make the overall shots brighter.
Landscape
Here is a perfect action for almost any type of landscape photography. Apply it to the shot with leading lines and see how the colors and shadows/light will change for the better.


