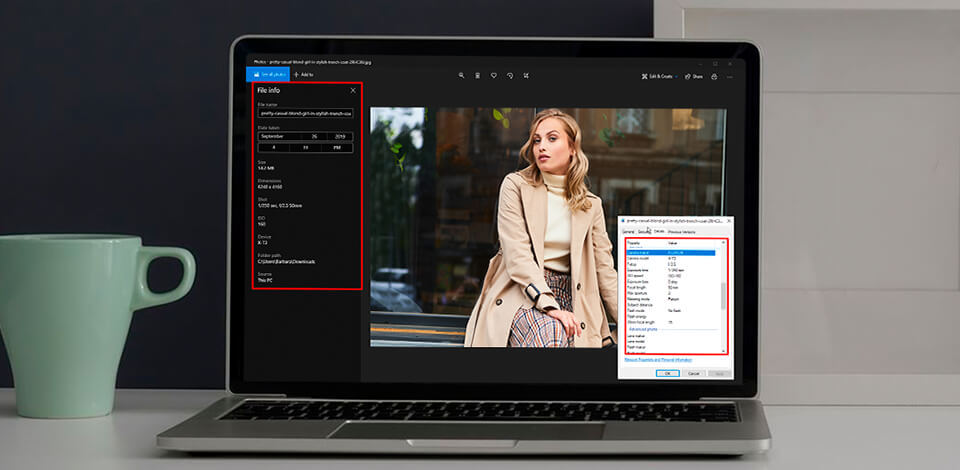
When looking through pictures on the web, you have probably noticed that many websites reveal some handy info about the exposure configurations, type of camera the picture was taken with, and more. This is “EXIF Data” that can tell you many details about media files, photographers, and the device that was used for making images.
EXIF is a format that specifies the info about a snapshot or other media files produced with a digital camera. It can reveal some precious knowledge about when and where a shooter took a picture and with what gear.
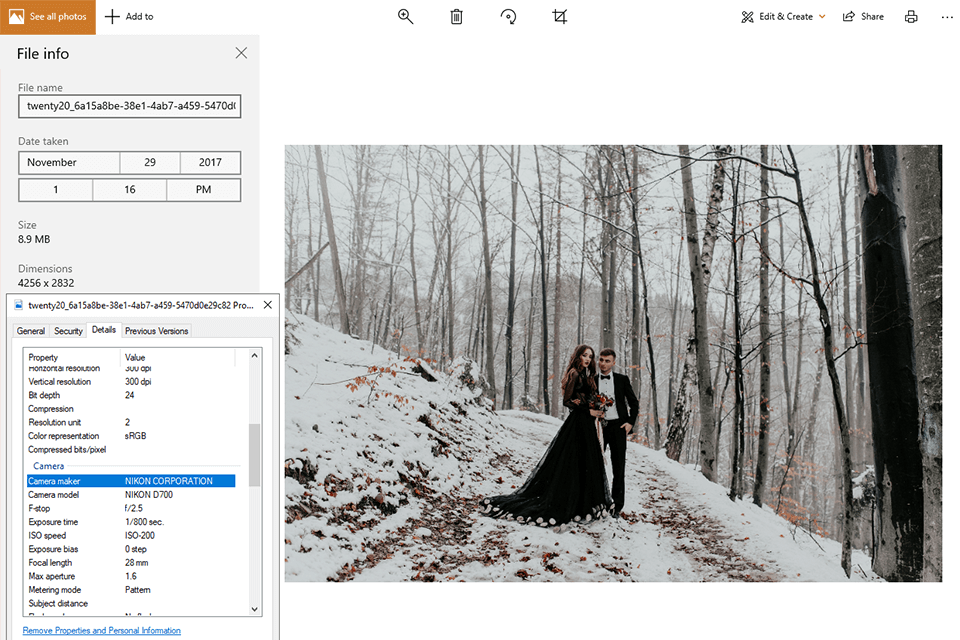
A digital camera allows recording the info about its configurations and other important specifications right into a photo. You can use this data for managing your visuals, finding the necessary file, and learning some essential info about how a shooter captured a particular image. The EXIF image data is a pivotal source of knowledge about the exact settings used to take photos.
Check out the EXIF data on various media files to see what particular configurations were used. When taking snapshots in manual mode, you need to know such camera specifications as aperture, shutter speed, and ISO.

Launch Lightroom, head to Library Module, find a Metadata tab in the Filter bar for learning more info about a file. Click on the tab to see a pull-down menu. Press the header to check what kind of info the program can reveal. You can select the files you want to read about. This is a handy feature when you are searching for images taken with a particular lens, camera, or using certain configurations.
For novices, this is a great opportunity to see what configurations were used in a particular photo, since metadata stores information about processing, color adjustment actions, and even filters that were applied.
This knowledge is very important not only for amateurs but also for more experienced photographers who want to know what equipment a shooter used for capturing a particular picture. However, only JPEG files allow reading metadata. Such formats as GIF and PNG do not usually support this feature.
If you use Adobe software, such as Photoshop or Lightroom, EXIF info will provide you with information about the camera settings and the steps made during post-processing (XMP Data). You will also see a thumbnail of the picture.
Metadata contains information about all post-processing manipulations. It can be saved either in JPEG, TIFF, and DNG files, or as a separate XMP file when you are working with RAW files.
Use a standard OS and any image editing program for viewing EXIF annotation. Besides, you can find special EXIF viewers. Regardless of the device that was used for capturing an image, you can view the metadata using either a PC or phone.

All picture editing programs allow you to see the metadata of a particular image. This is one of the easiest and most convenient ways to learn some photo specifications, like the date when it was shot or the shutter speed of the camera.
For Lightroom users, there are several options for viewing EXIF image data. The first one is to learn these details in the Grid module. Go to the top menu and select View>View Options. In the Cell Extra tab, you can select the info you would like to see.
Click “I” in the Library Module and read the metadata of the selected picture. If you want to learn more info, press the F8 key or click on the triangle on the right of the main panel.
Photoshop also allows reading EXIF data. You need to choose File>File Info in the upper menu. In a new window, you will also see special fields for entering the description and keywords.
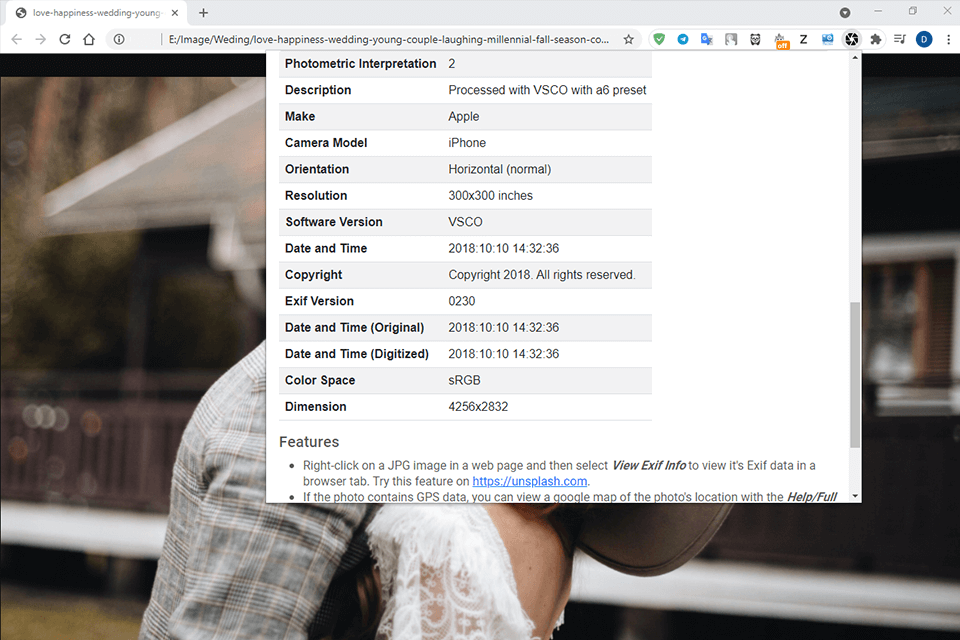
If you are browsing the web using Firefox or Chrome, you can try reading EXIF data with a special add-on. In the extension library, look for the EXIF Viewer add-on. Click on the “Add to Firefox” or “Add to Chrome” buttons. Install the extension and open the browser again, select the file, click on it with a right button, go to “EXIF Viewer” and read the metadata.
By choosing the “All” tab under “Info”, you can get even more knowledge about the media you are interested in. In Chrome, this option allows viewing a histogram. The “EXIF” section of the add-on will provide you with such specifications as camera model, exposure, date, and other useful details.
Thumbnail pictures do not contain EXIF image data. You need to click on the thumbnail image, open it in full size and only then launch the tool. If you see the message “Unable to extract some or all of the Exif data”, it means that this JPEG file does not have any metadata.
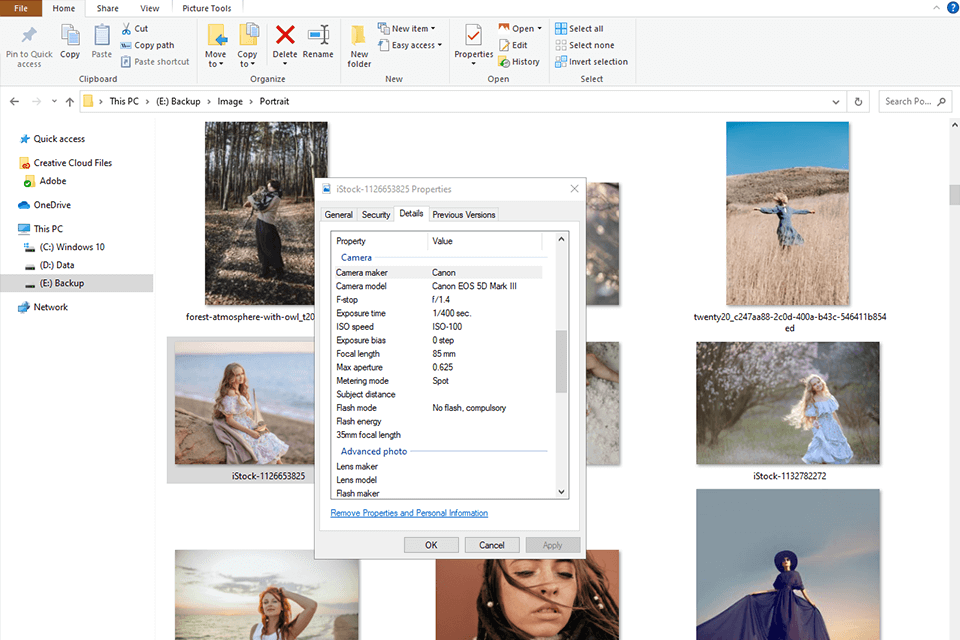
You can also use a special image viewer or the in-built tools of your OS. It requires more time, as you need to save a picture on your device first and then read the EXIF data with the help of a photo viewer or the services provided by your operating system.
If you have a Windows-based PC, activate the right-mouse button menu and click on the “Details.” You will see a pop-up window with all the image specifications. However, to learn about the type of lens used when making a snapshot, use a program for viewing media files.
Now, we will tell you how to erase the metadata from an image. When sharing pictures or exporting them from your photo editing software for PC, keep in mind that the files may contain data about your GPS location that you probably do not want to reveal.
Most modern cameras save this info automatically. By removing this data, you can decrease the size of an image, which is especially convenient if you are going to publish it on the web. By doing it, you can also conceal information about your camera gear, configurations, and post-processing techniques.
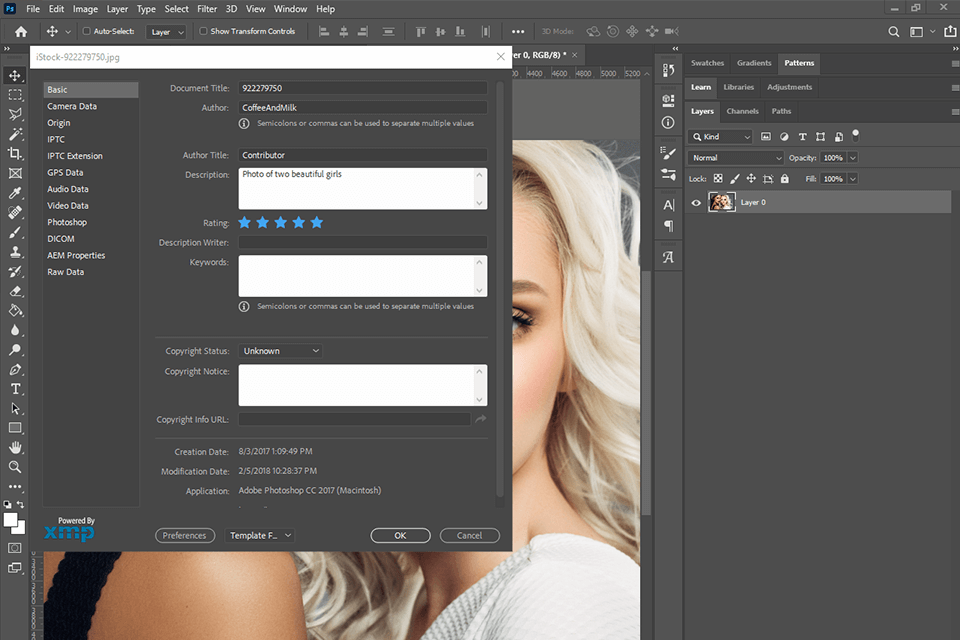
To delete EXIF and XMP data from a picture without installing third-party programs, you can use Photoshop or Lightroom.
STEP 1. Launch Photoshop.
STEP 2. Select File, then Export and click on Save for Web
STEP 3. Go to “Metadata” and tick the “None” box.
STEP 4. Save the result. Now, your file doesn’t have any EXIF and XMP data.
You can perform the same operation in Lightroom. Go to the “Metadata” tab and choose “Copyright Only” from the “Include” pull-down menu. These operations allow removing info about your device, exposure settings, and XMP data. However, the copyright info and image thumbnail will remain untouched.
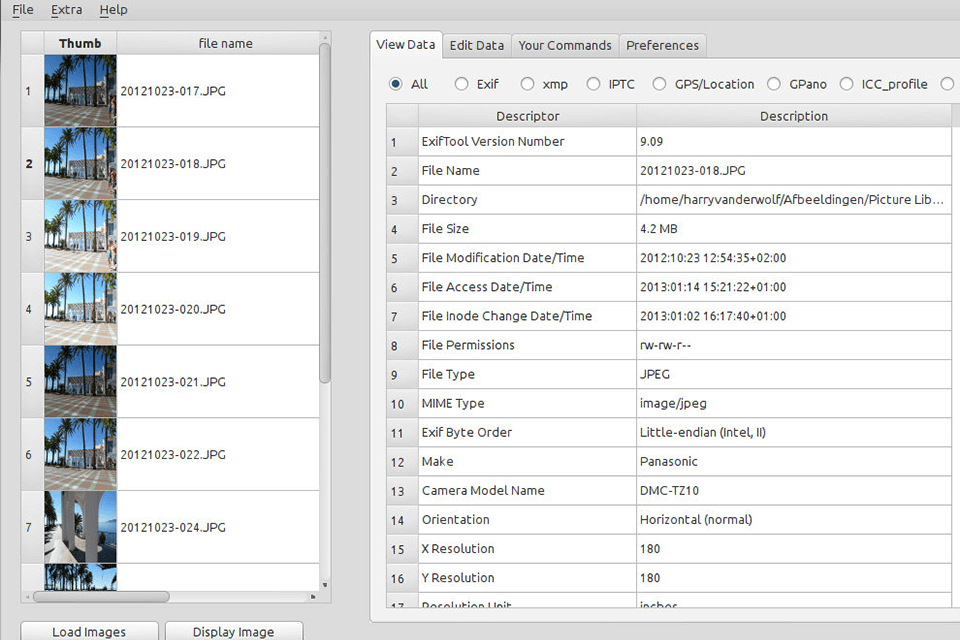
You can find various websites for removing metadata on the web. With the help of Phil Harvey’s ExifTool, you can quickly remove metadata from several files. If you need to delete EXIF data from a specific file, follow these steps:
STEP 1. Save the installation file suitable for your OS.
STEP 2. Enter this command prompt: exiftool -all= SourceFile.jpg.
STEP 3. Replace SourceFile.jpg with the name of the JPEG file you need to remove metadata from.
For eliminating EXIF info from several files that are stored in one place, do not indicate the picture name, but enter *, and the tool will process all the images one by one.
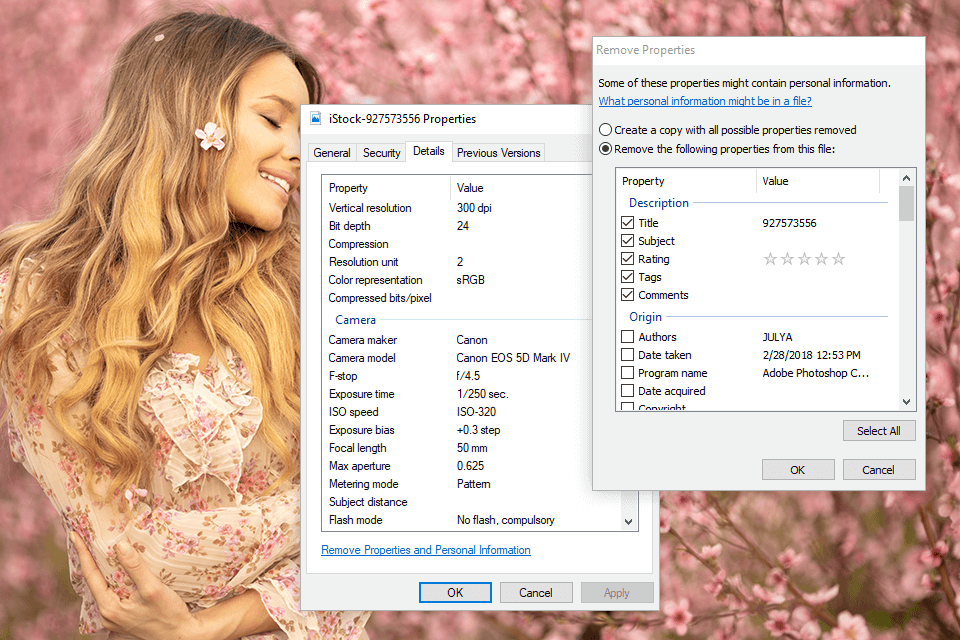
To find out and erase picture specifications in Windows, take the following steps:
STEP 1. Select an image, click on it with the right mouse button and find “Properties”. For inserting metadata, select values and click on the “Details”.
STEP 2. To erase any info from your file, select the “Remove Properties and Personal Information” option at the bottom of the properties window.
STEP 3. There, you can copy all your images and save them without EXIF data. Besides, you can remove the specific info leaving some details untouched.
STEP 4. Make certain that you’ve ticked all the boxes next to each position you want to get rid of.
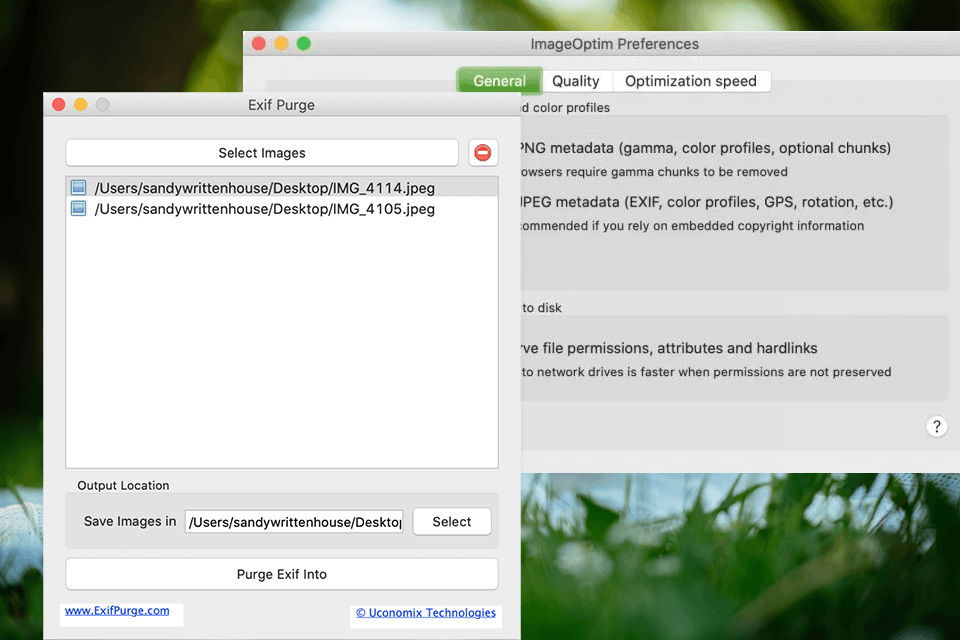
Mac users need to open a file using the Preview option.
STEP 1. Select Tools, choose Show Inspector or use the Command+I key combination.
STEP 2. Click on the ‘i’ tab, choose the EXIF option and clear out the data.
STEP 3. Afterward, go to the “GPS” tab and select the “Remove Location Info” option at the bottom.