Have you ever heard about the back button focus? In short, it is a photo technique frequently applied in sports, wildlife, and news photography. Some shooters claim it is much better than traditional focus. The article below describes the advantages and disadvantages of the back focus button and explains how to use it to get desired results.
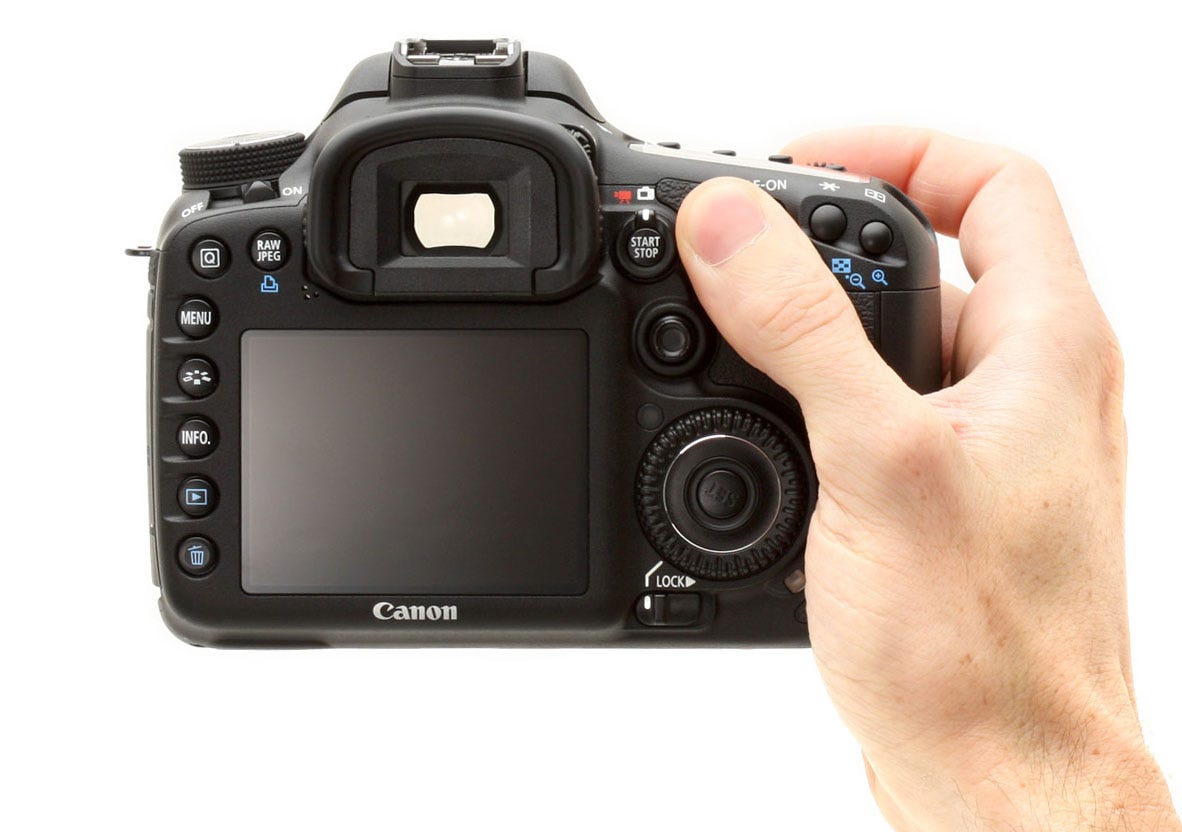
If you have ever used basic DSLR cameras, you know that you have to half-press the shutter button to adjust focus and then fully press it to take a shot. Things are different when it comes to the back button autofocus. These two options are separated.
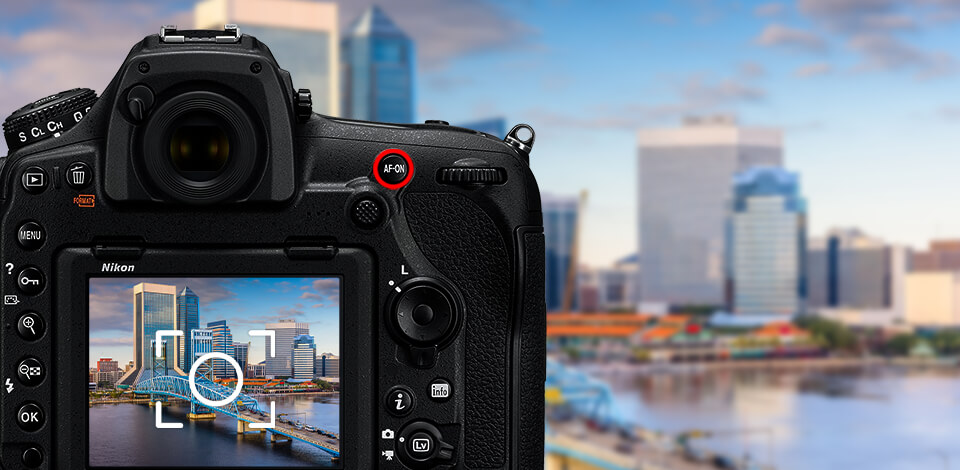
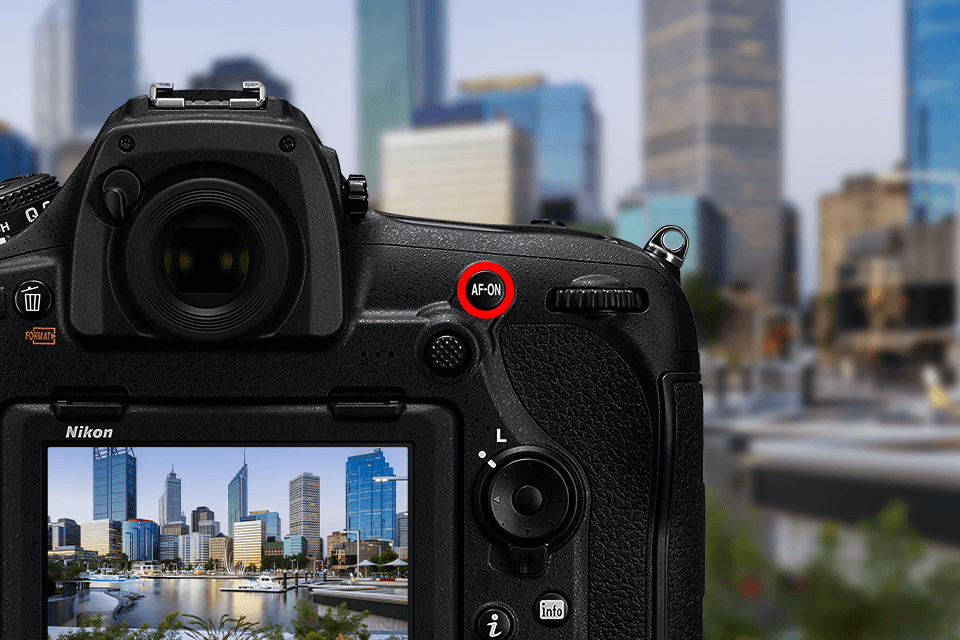
As a rule, a camera has two buttons to perform these functions.
The shutter button is used for taking a photo, while the AF-ON, or AE AF, option is used for adjusting focus in the frame. So, when you need to set the focal point in photography, you can use your index finger to press the shutter button and a thumb to adjust focus. The back focus button can be located anywhere on your camera given.
Whereas the back button autofocus might be not interesting for amateurs, professional shooters can use it to take amazing photos. Check out the main benefits of this option.

First off, if your camera has the back button focus, you don’t have to switch between various focus modes. As a result, you can capture the most unforgettable moments. If you master this technique and remember how to switch between various modes, you will get more successful shots.
If you want to work with manual focus, you shouldn’t touch the AF-ON button. Adjust the focus ring as you like and press the release button. This will allow you to fully control what happens in the frame.
When using the single focus mode, you have to hold down AF-ON until your object gets in focus and then release the button. Even if you change the composition in the frame, the focus will not change.
To use continuous focus mode, you need to hold down the AF-ON button. The camera will continue adjusting the focus until you release it.

Autofocus is not a solution to all photo issues you might face when taking photographs, but it still helps avoid many focus errors. For instance, if you are interested in football photography, you might use the back focus button. When a player is running somewhere in the foreground, you can release the back button to keepthe focus on the main subject.
In addition, when you work with action pictures, the back focus button allows you to stop focusing on the main subject without stopping the shooting. It’s perfect for football photography. When you photograph a player, a referee or other players might appear in the frame and spoil the focus. The back-button focus helps prevent such issues.
Besides, you can instantly pull your thumb off the rear button, and continue shooting while pressing the shutter button. When you stop pressing the back button, the camera stops focusing. Then, when an unwanted object leaves the frame, you need to press the back button again to focus on your main subject.

The back button autofocus allows you to take photos quickly without thinking about how to press the release button to maintain focus. I think everyone experienced moments when they accidentally removed their finger from the shutter and had to start everything over.
Things are much easier with the back button. When you take your finger from the button, the focus is already locked.

The back-button focus is a perfect solution for implementing close-up and macro photography ideas. When working with close-ups and macro photographs, shooters try to pre-focus manually or adjust the focus by hand to take a shot.
So, let’s figure out how to use back button focus with close-up and macro photos. You need to activate the back button AF and focus on your subject. Then, you can remove your finger and adjust the settings manually to raise sharpness. When doing these manipulations, you may be sure that AF won’t get activated on its own.
However, this focus method is not suitable for everyone and has some disadvantages.

The biggest challenge here is to fully master the process. You need excellent coordination to perfectly use these two buttons. The thing is that earlier you had to use one button to perform two functions and now you have to perform two functions with two buttons.
Plus, it might be challenging to apply this technique when you work in difficult shooting conditions. It may be difficult to maintain coordination with the heavy lens or when you are tired.
Another issue you might face when working with the back button autofocus is that your thumb tires very quickly. For instance, when you photograph moving objects, your thumb moves a lot and gets tired really fast.
In those moments, you might think it’s better to have one button instead of two. Thus, if you often work with high speed photography and use the center focus point, the back focus button might not be suitable for you.
So, how to adjust the back button focus on your camera? Here, everything depends on the brand and model. Mind, that you won’t find the back button focus mode on your camera. You have to change some settings to achieve this effect.
The guide below will help you adjust your settings with minimum time and effort.
If you are a fan of Canon cameras, go to the Custom Function Menu. It may look different in various Canon models.
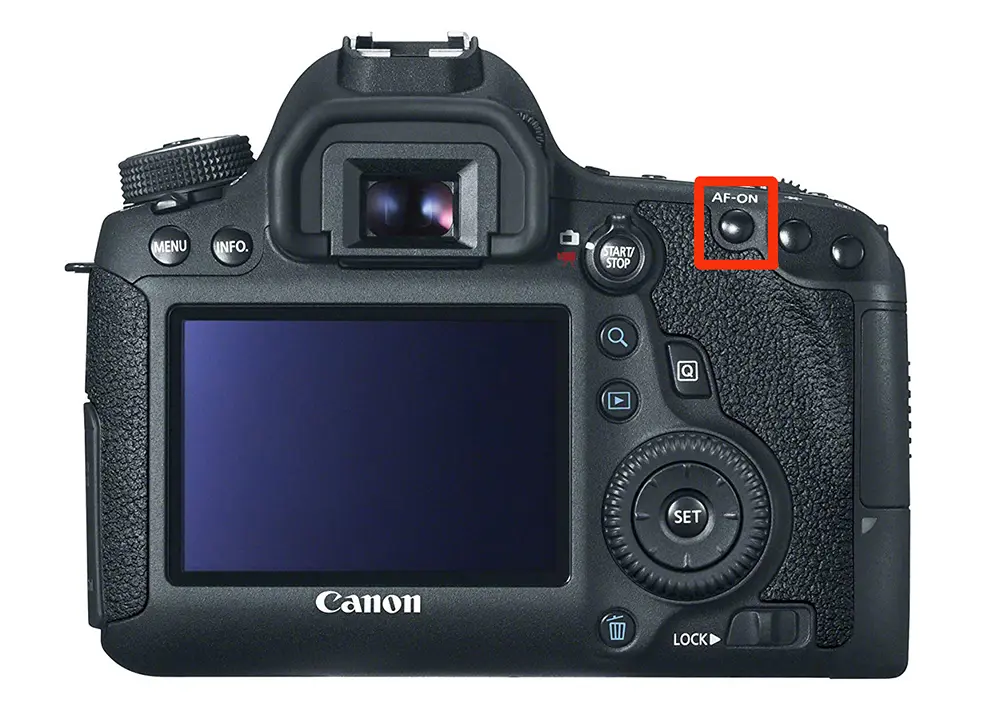
Step 1: Disable Autofocusing from the Shutter Button
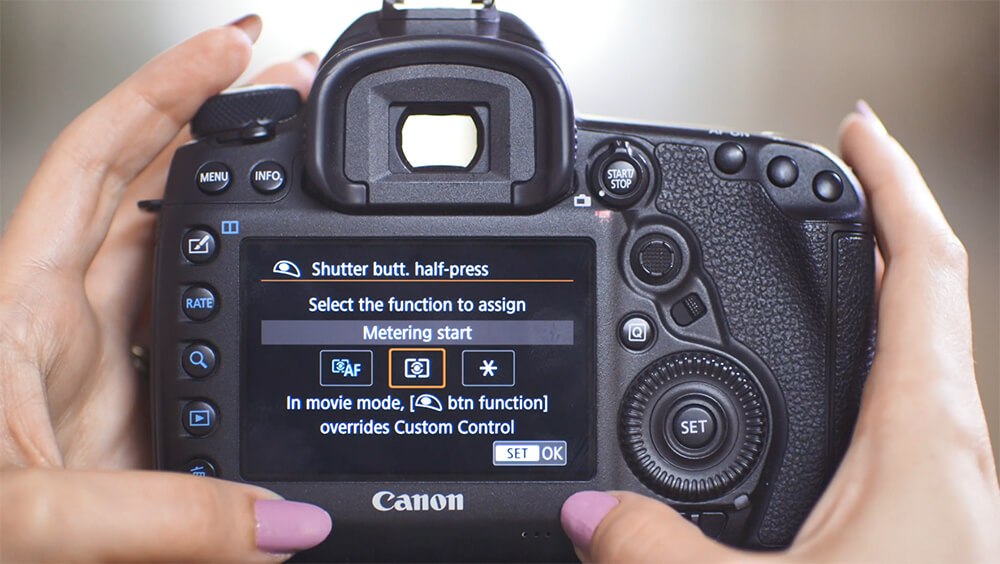
Step 2: Select ‘Metering Start’
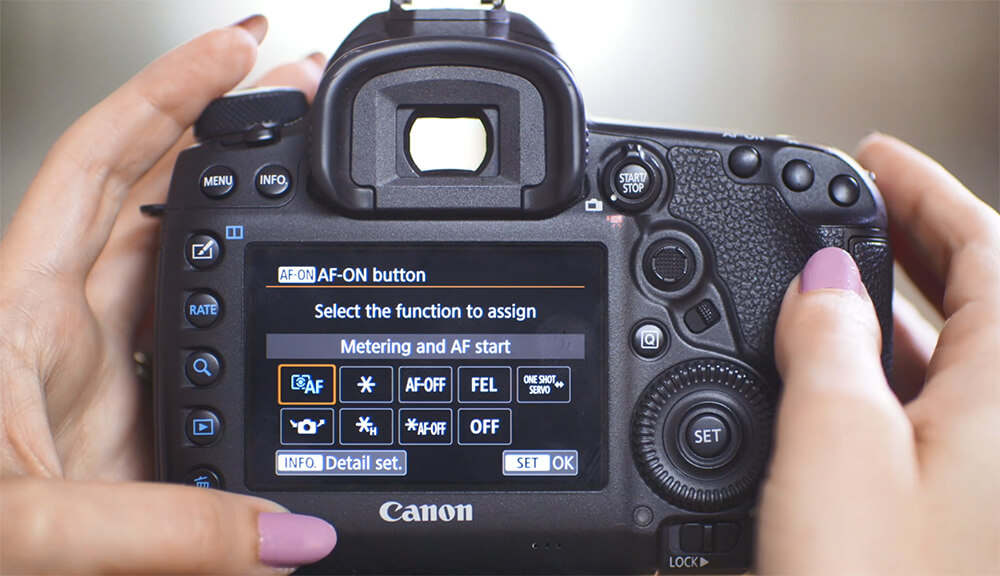
Step 3: Assign Your AF-ON Button
Step 4: Select a Focussing Mode AI SERVO

When it comes to a Nikon photography camera, be it a DSLR or mirrorless model, the procedure is almost the same. You have to find the Custom Settings Menu to set up the back button focus.
STEP 1. Find the Custom Settings Menu.
STEP 2. Choose the “Autofocus” tab.
STEP 3. Select “AF activation.”
STEP 4. Choose “AF-ON only.”
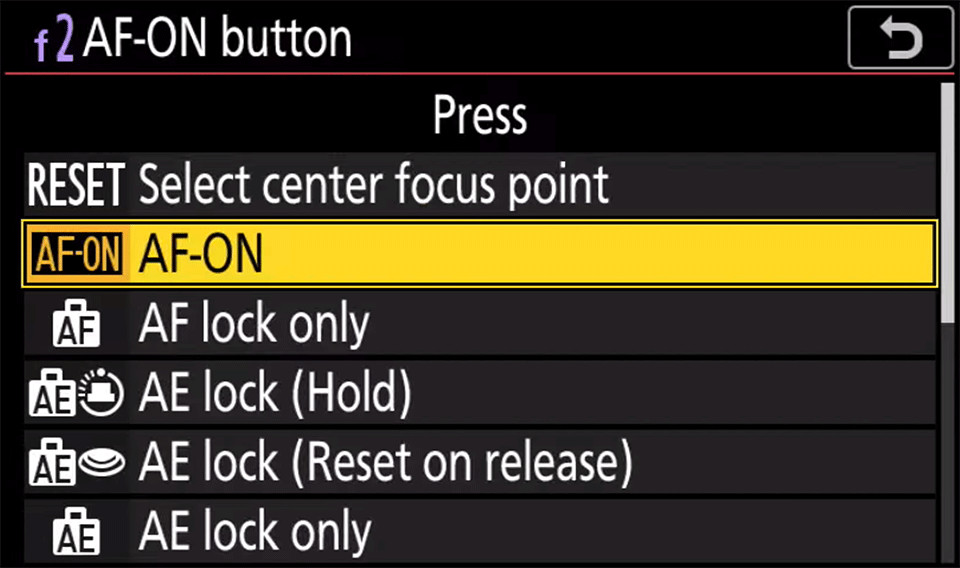
STEP 5. If your camera model has a dedicated AF-ON button, you have to take one more step. Find the Controls Custom Settings Menu and go to the “Assign AE-L/AF-L Button” option. Then, select AF-ON and set the camera’s AF dial to AF-C.
STEP 1. If you work with Sony cameras, find Custom Settings.
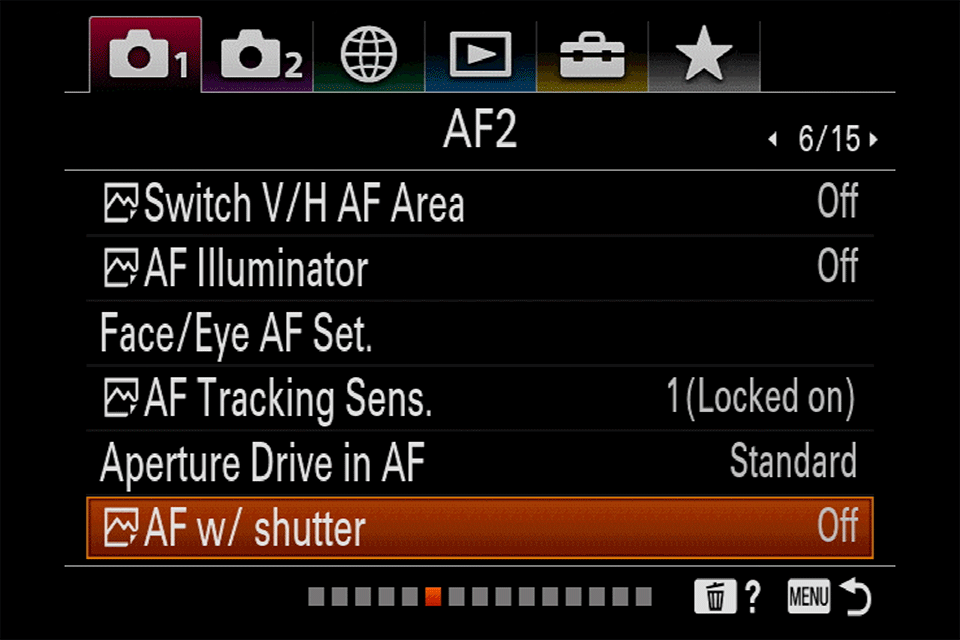
STEP 2. Find AF w/Shutter and turn it OFF.
STEP 3. Then, set the AE-L Button to AF On.
STEP 4. Make sure your camera is in continuous focus mode.
STEP 5. Check if no other settings are activated. Go to the Custom Key menu and find the AF-ON Button. AF ON should be activated.
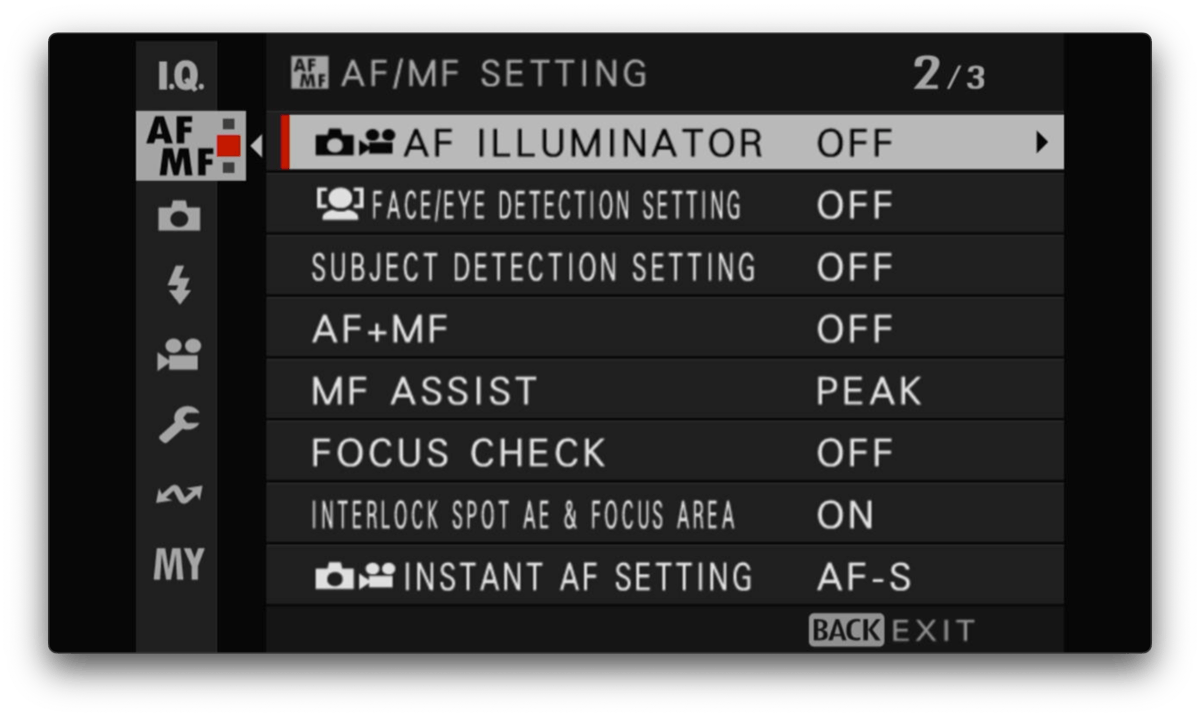
If you like Fujifilm cameras, keep in mind that these models might be quite different. The guide below will help you adjust the latest mirrorless models:
STEP 1. Set the focus selection dial to Manual.
STEP 2. Open your menu and choose AF/MF.
STEP 3. Select Instant AF Setting and adjust this to AF-C.
STEP 4. Open your menu and choose Set Up. Select Button/Dial Setting.
STEP 5. Select AE-L/AF-L Button Setting and set this to AF-L/AE-L.
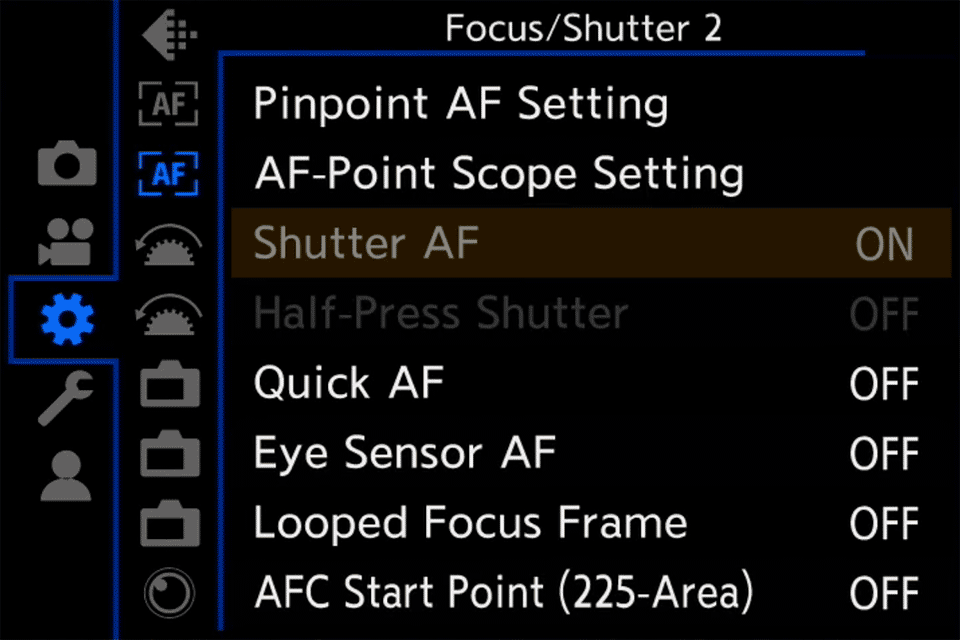
Things are really simple with Panasonic cameras:
STEP 1. If you are a happy owner of a Panasonic camera, set AF/AE LOCK to AF-C.
STEP 2. Open the Custom Setup menu.
STEP 3. Choose AF/AE Lock and set it to AF-On.
STEP 4. Select Shutter AF and turn it off.
STEP 5. Set Focus/Release Priority AFS/AFF to FOCUS.

These presets will help you improve your photos in a few clicks. With them, you can get excellent results with minimum effort. By applying these effects, you can make ordinary pics look more professional.


