Focal Point in Photography: Complete Guide

The area of a picture that catches the eye of the viewer above all else is referred to as a focal point in photography. It may be an animate or inanimate object.
If you have no idea what is focal point in photography and how to choose it properly, you will be confusing the viewers of your shot and won’t be able to convey the initial idea in the right way.
Focal Point in Photography: 12 Tips
If you want the viewer’s glance to dwell on your photographs for longer than just several seconds and carefully study the composition, textures, colors and lighting, check out the tips on focal points in photography below.
1. Use the Depth of Field to Create Selective Focus
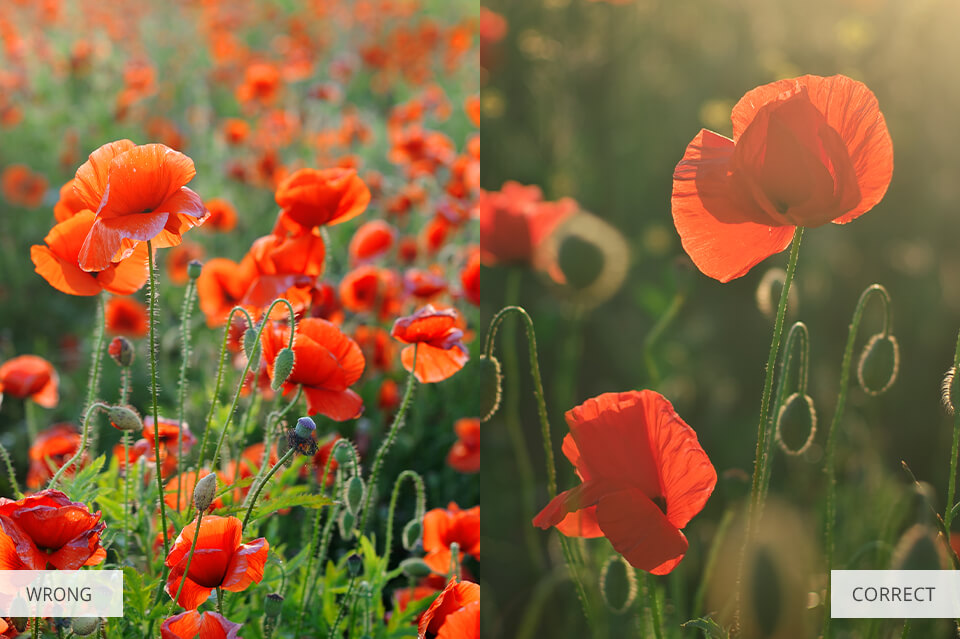
In order to create selective focus and emphasize the focal point, learn the necessary information on the aperture and depth of field. You will have to set a wide aperture to produce a narrow depth of field, thus blurring other elements that surround the focal point.
In this way, you will achieve a prominent focal point as the sharper area of the shot will catch the viewers’ eyes. In contrast, the shot with the even sharpness across the foreground and the background won’t have such a visible focus point.
For a proper focal point photo, adjust a wide aperture value (f4-1.2). With the subject being at a great distance from the background, a more successful result is guaranteed.
2. Create Contrast with Color

If you wish to separate the focal point from other elements in the frame, incorporate contrasting colors. Look at the focal point examples where it features a bright color (or a deeper one in cases of B&W shots).
You will see that a point of interest there is more noticeable against a background with muted tones. Think through the location and the clothing of the model in advance or search for the contrasting colors right on the place for shooting.
I suggest that you study the complementary colors photography and find out about the color wheel to take truly magnificent shots.
3. Create Contrast with Light

Human eyes tend to pay attention to bright items. That’s why you may try producing intense light contrast to highlight the focal point in photography. Besides, it is a nice way to conceal unnecessary details by keeping them in the darker parts of the shot.
Intense light contrast is created when the sun is high in the sky (late in the morning or at noon) and the light penetrates through a window or it is directed artificially. To boost the intensity of the effect, shoot in black and white.
4. Focus on the Eyes for Better Portraits
If you are wondering what is focus point in portraits, it is definitely the eyes. Don’t forget to maintain the sharpness of the eyes while taking portrait shots. A portrait with unclear eyes looks unappealing.
However, it is okay to keep the eyes out of focus if you intend to put emphasis on other parts of the body, or you are taking group portraits where there are numerous pairs of eyes. When it comes to group shots, remember that every person in the frame should be sharp.
5. Incorporate Motion Blur

Motion blur in photography involves blurring a dynamic object in a shot on purpose. For a more extraordinary focus point photography, try contrasting motion with a still object. So, the subject in the frame should stay motionless while other elements have to be dynamic.
Take such pictures in the underground with a person watching the moving train pass by, or a person amidst the bustling crowds of people.
To capture motion blur, you need a longer exposure time. So, you will have to adjust a slow shutter speed value – 1/30 seconds or even less.
6. Capture Objects with High Visual Weight

While you are thinking through the composition in photography, remember that the visual weight of certain objects is larger than the others. They tend to immediately catch the viewer’s eye and serve as wonderful focal points.
For instance, objects with bigger dimensions bear more meaning than smaller ones. We lay our eyes on large objects first and examine them during longer periods of time.
This knowledge will help you either incorporate these objects as focus points or avoid them altogether. In case you are organizing a portrait shoot, ask a model not to put on clothes with letters or text. Otherwise, such a piece of clothing will become an undesired focal point!
7. Avoid Incorporating Similar Focal Points
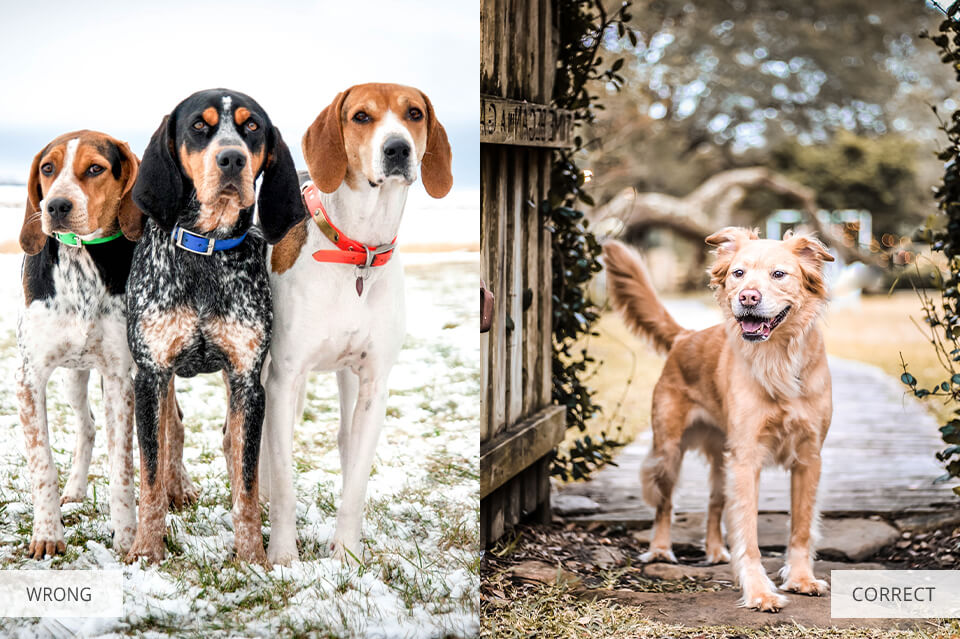
It is fine to use two similar focal points if you intend to make emphasis on symmetry or balance in your shot. But if it isn’t the case, I would like to warn you against placing two or more focal points that are related in one frame.
Otherwise, the focal points will be competing for the attention of the viewers, who will be left confused. An auxiliary point of interest in photography may help guide the eye. But a great number of powerful points will simply be overwhelming.
To solve this problem, try visibly enlarging one of the focus points, which will catch the viewer’s eye in an instant. Then the eye will naturally trail to the second, smaller focus point.
8. Balance Multiple Focal Points
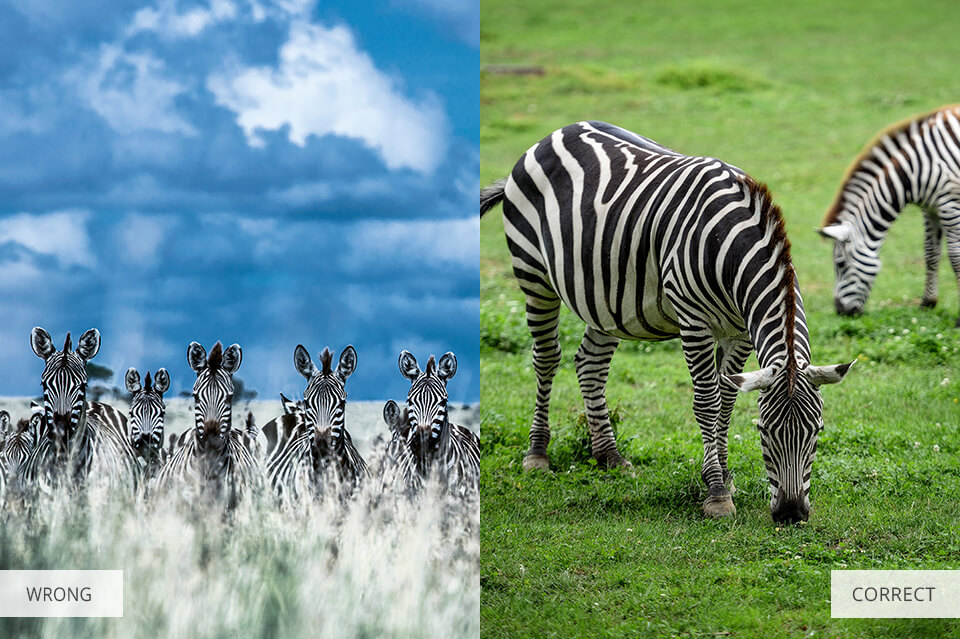
If you are going to combine several focus points in a single frame, I suggest organizing them in the following way. Firstly, place the main focus point, relating it to the auxiliary point, then to the tertiary one, and so on. The proper organization of focus points will be guiding the viewer’s eye through the composition of a shot.
In order to highlight the main focal point in photography, slightly modify its size or visual weight by tweaking the tonality or color. As a result, the viewer will instantly recognize the main element, and then will be moving on to the rest of the elements.
9. Use the Rule of Thirds
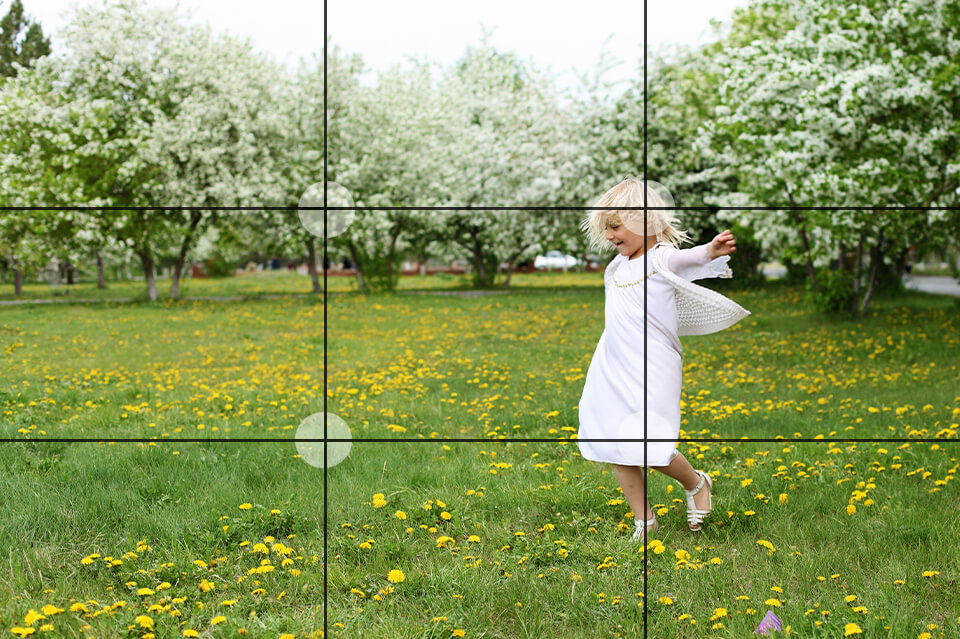
The placement of the subject in the shot greatly influences the focal point. For a truly successful picture, follow certain composition rules.
The most important one is the rule of thirds in photography. According to this rule, you have to divide the picture into two vertical and two horizontal lines in your mind. Imagine this grid mentally or enable the grid built into the settings of the camera.
So, how this rule is applied in relation to focal points? In order to turn the subject into a focal point, place it together with other significant elements along the grid lines or on the intersection points.
10. Use the Rule of Leading Lines
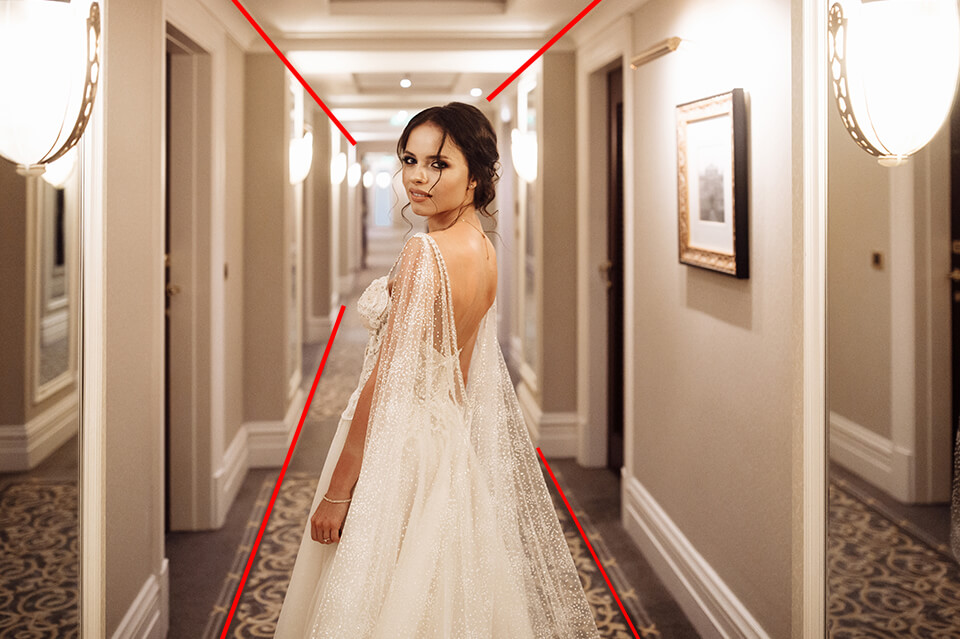
Leading lines photography involves composing a shot in such a way that the viewer’s eye is caught by lines that guide to the primary subject.
To apply this technique properly, take into account man-made objects, like roads, bridges, fences, bricks, doorways, boardwalks, objects in a row like lamp posts, etc.
11. Employ the Rule of Odds

Another rule to apply to the focal point in photography is the rule of thirds. According to it, a photographer has to incorporate an odd number of objects into the shot.
Alternatively, you can organize objects in groups to achieve an odd number. This works more efficiently with three and five objects in the frame.
As for an even number of objects, they will be competing for the attention of the viewers and diverting their attention altogether.
12. Add Negative Space

If you are after a powerful focal point in photography, simply add more negative, empty space. Against a repetitive, minimalistic and large-scale background, any subject will be strongly emphasized.
With the use of negative space, it is possible to capture small objects and prevent them from getting lost in the composition. As a result, you will make the small subject more meaningful amidst a seemingly immense scene. I suggest applying this trick in cases when you are photographing at a distance.
Freebies
In order to make your focal point photo more attention-grabbing and appealing, you need to edit them at a qualitative level. That’s where time-saving and effective Photoshop and Lightroom freebies will come in handy.
Light Bokeh
This overlay is a great helper in cases when you need a model to stand out against a busy background. It will faintly blur the background, putting all the focus on the model in a shot.
Spiral Glow
This free Sparkler overlay will emphasize the focus point by adding a warm glow to the center of the shot. For a truly stunning effect, I suggest applying the overlay to dynamic photographs where the model is in motion.
Orange and Teal
Highlight the focus point and make the picture more balanced by applying this Orange and Teal preset. Since orange and teal colors complement each other, the preset will put emphasis on the main point of interest. The rest of the colors will become brighter as well.
Black and White
In case you aren’t satisfied with the lighting or the colors in the shot, apply this black and white preset. It will make all the problems go away and will turn the shot into a more contrasting one to put the focus directly on the subject.
Eye Highlight
This Ps action emphasizes the eyes as the focal point in portrait photography. It will add brightness and sharpness to the eyes, making them more expressive.


