39 Drink Photography Tips – Styling and Ideas
When you purchase through affiliate links on our site, we may earn a commission. Here’s how it works.
Drink photography is a kind of food digital photography that is about capturing beverages and cocktails. During drinks photoshoots, you can experiment with unusual props, colors and various composition techniques.
Taking photos of drinks is not as easy as it seems. In this post, I will give you 39 drinking photography tips on how to style your cocktails right and achieve magazine-worthy pictures.
39 Drink Photography Tips
How difficult is it to take a really good drinks photo? It seems that pouring a drink into a glass and shooting it at the same time is quite easy but it’s not like that at all.
If you are using a glass as a prop, you have to engage your creativity and do your best to get an interesting picture.
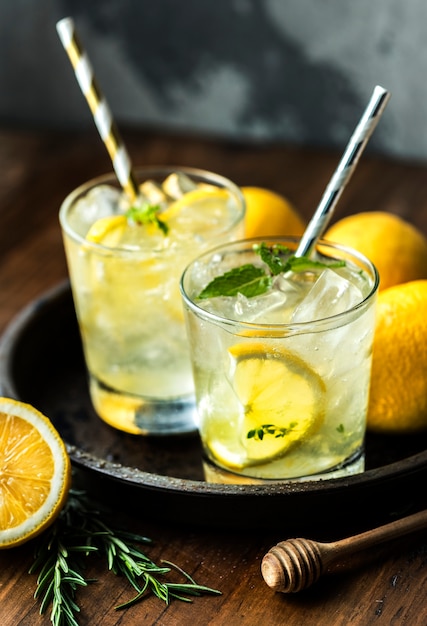
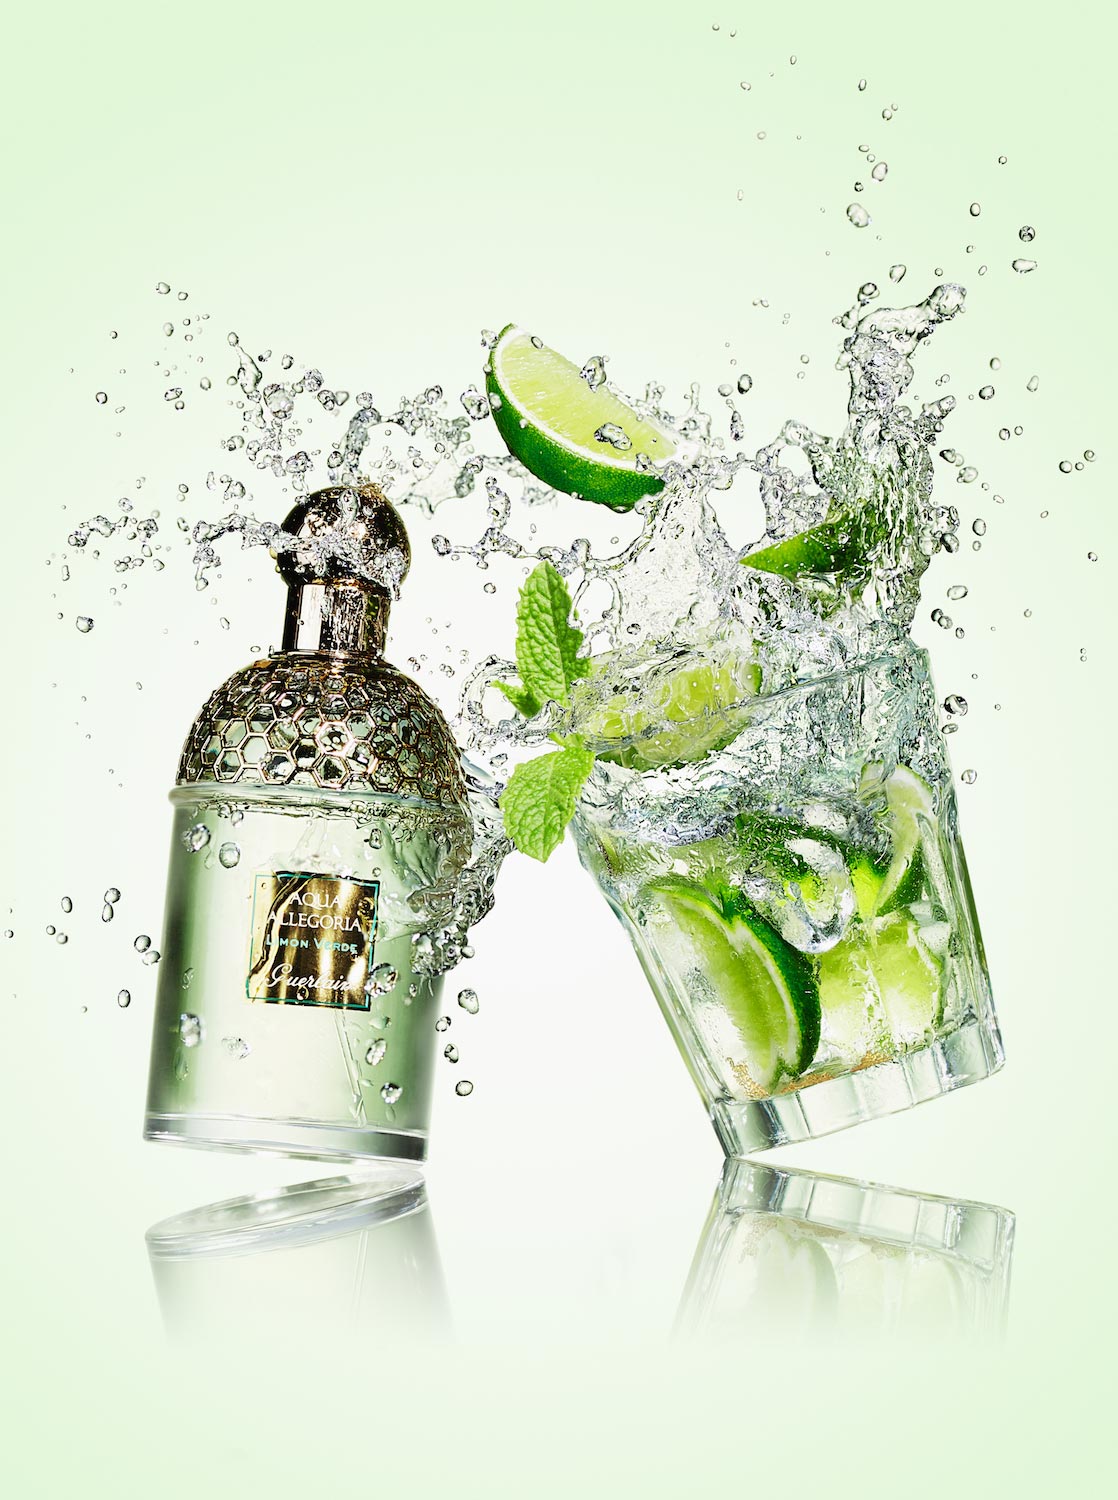
1. Incorporate the Ingredients into the Composition
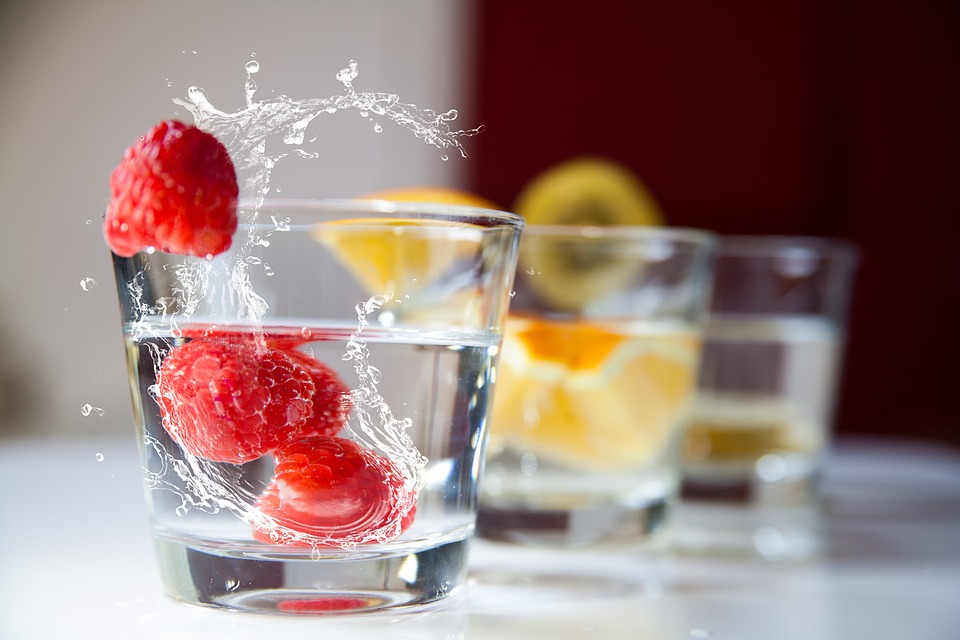
Use different ingredients and they will convey the flavors better than colors would. Include some ingredients from the drink in the composition and it will help you achieve unusual photos. For example, use Clear Fake Ice Cubes.
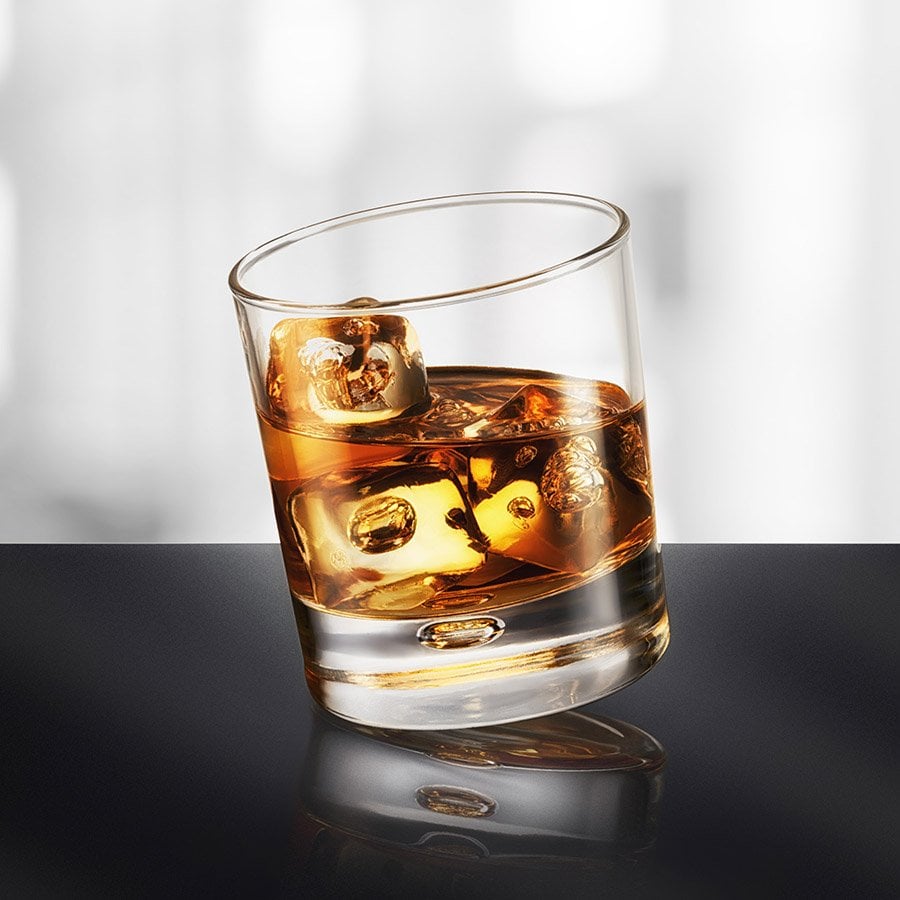
2. Use A Glass That Compliments the Drink

Each drink has its own glass but try not to use generic glasses – they look too boring. Instead, stick to special glasses with unusual shapes when you are shooting drinks.
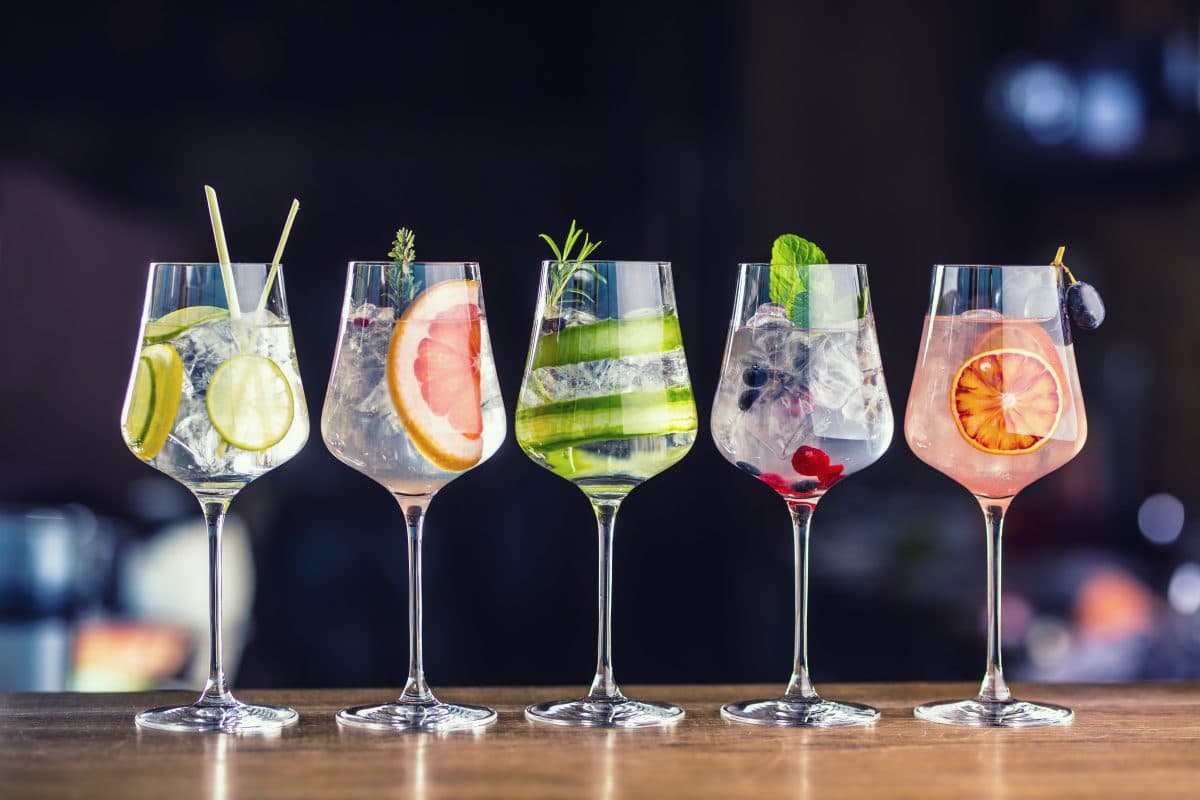
3. Use the Rule Of Odds

The rule of odds says that when you are working with different props and objects for your pictures, use an odd number of them, not even as it will give you a better and visually appealing composition. Drinks photography is an ideal genre to use this rule.
Include 3 or 5 glasses in your composition and play with diagonals and triangles. If you have an odd number of objects in your picture, it will be easier for you to emphasize any of them as the main one. Just place it in the best place of your composition and use a lower aperture.
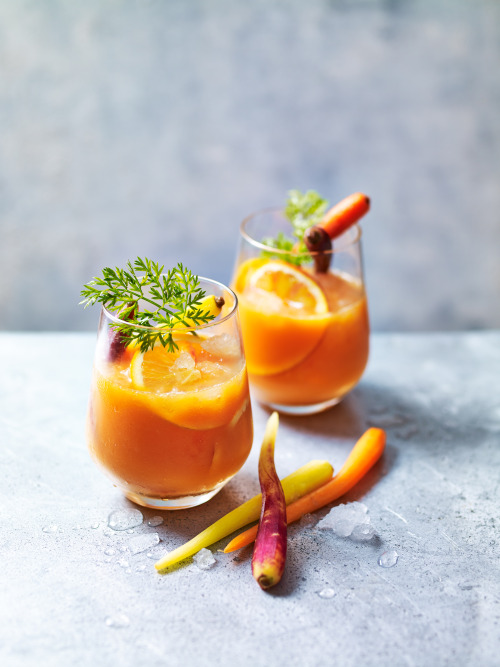
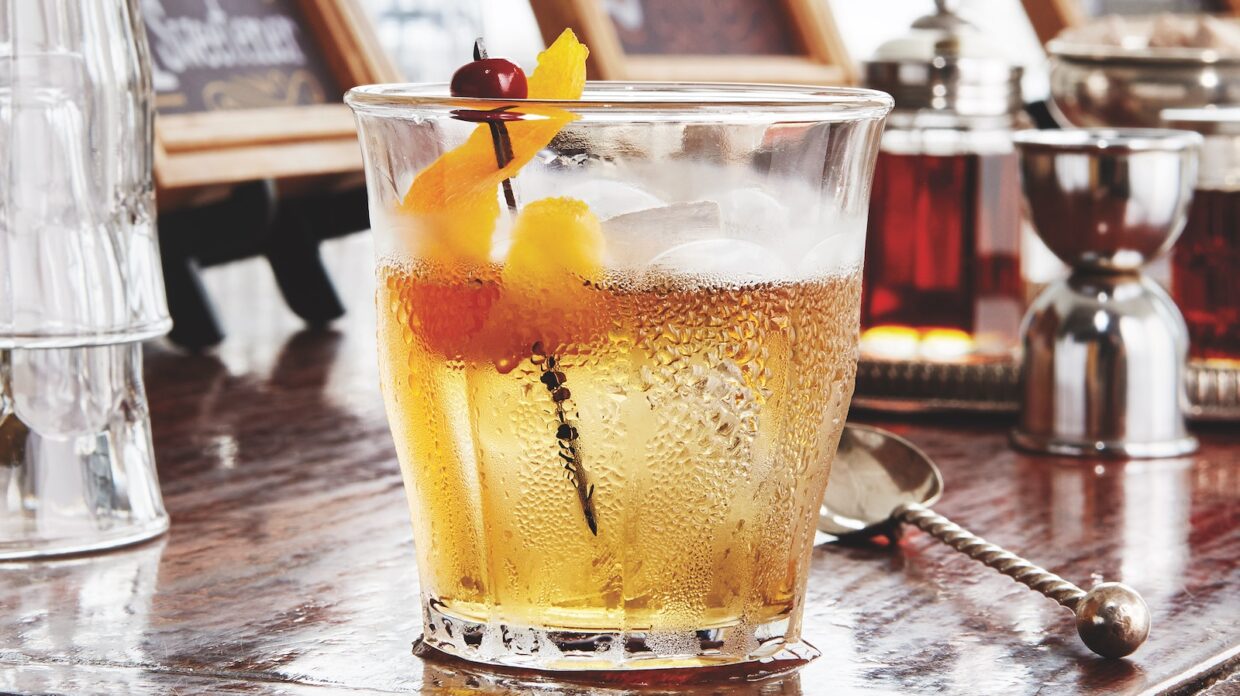
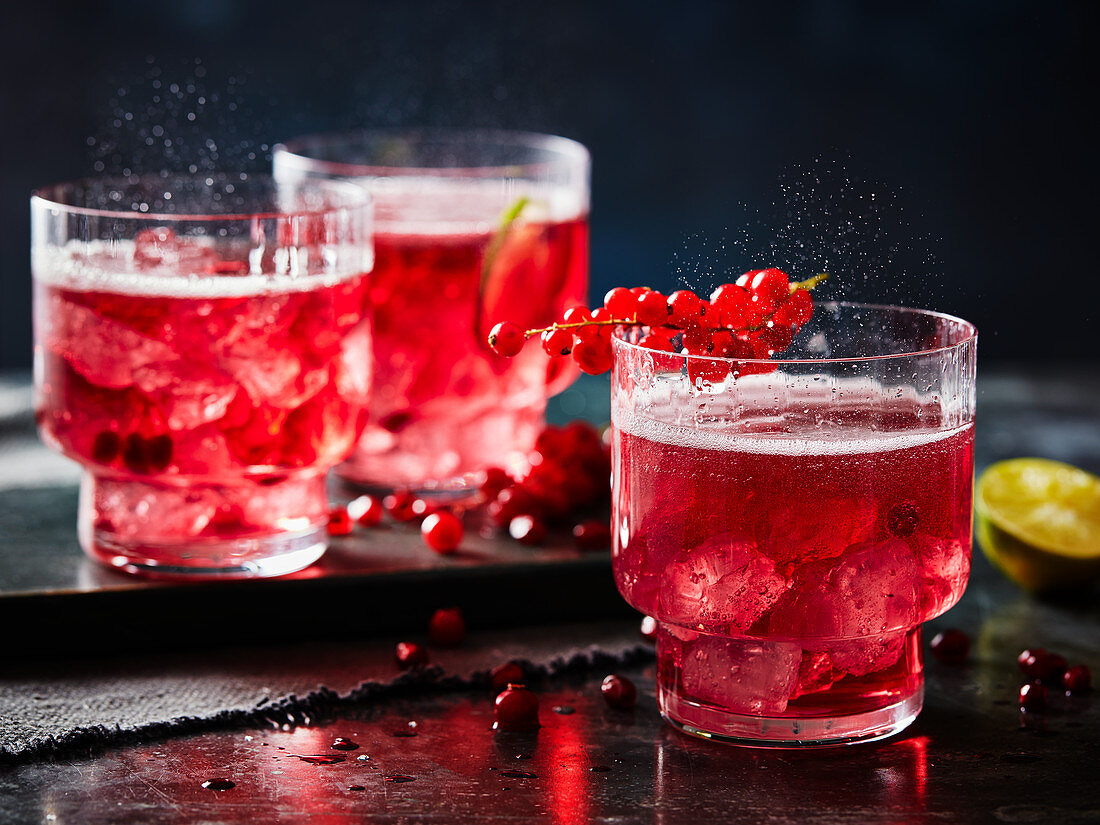
4. Get Creative With Your Garnishes
Another way to make your drink photography lively and vivid is to add garnishes to your composition. Using matching colors in garnishes is a great way to make your photos brighter and drinks look more interesting.
However, not only color can bring more uniqueness to your picture. Add salt or sugar rim to the glasses and it will create a nicer composition.
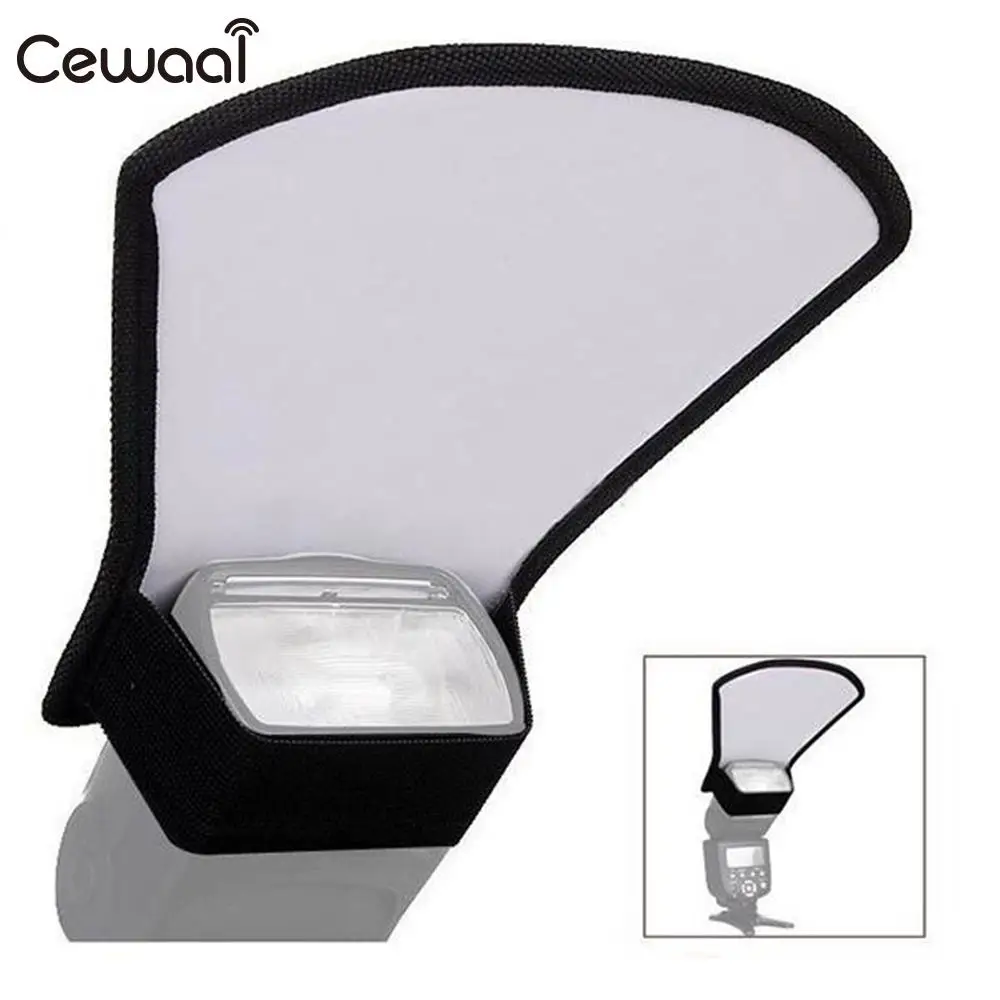
5. Use Double Diffusion to Make Shadows Soft and Manage Reflections


Cocktails are probably the most difficult drinks to shoot because photographers often take pictures of them in glassware. The reflections can make it more difficult and longer to take such photos.
When you photograph drinks in glass or glass bottles, the reflections on them can show all the room around, which will not look good at all.
A bit of reflection is essential. Otherwise, glasses will look artificial. You are the one who decides how to make your cocktail photography look better. But there’s one significant trick to use for such pictures – double diffusion. With its help, you can make shadows softer.
6. Set Up Your Shot With A Stand-In

The look of a drink can change rater fast. The foam will fall, ice will melt, fizz will become flat. If you are going to shoot using a complex setup, consider crumpling a napkin and placing it in a glass in order to use it as a stand-in. In this way, you can prepare the composition before the drink is ready. You can also use a glass of ice water for this purpose.
7. Don’t Get Too Close

If you don’t have a qualitative macro lens, I recommend you to leave some space between the camera and a drink. It’s helpful in cases when you are shooting with a phone as it will be easier for you to achieve a focused picture by backing up a little bit. Professional photographers advise leaving 2-4 feet between a camera and a drink.
8. Try Different Angles
I recommend shooting drinks from different angles. Move 90 or 180 degrees around the drink that you are going to shoot. In this way, you will be able to discover the best lighting and your drink will look very tasty and attractive.
- Read about the best lens for food photography.
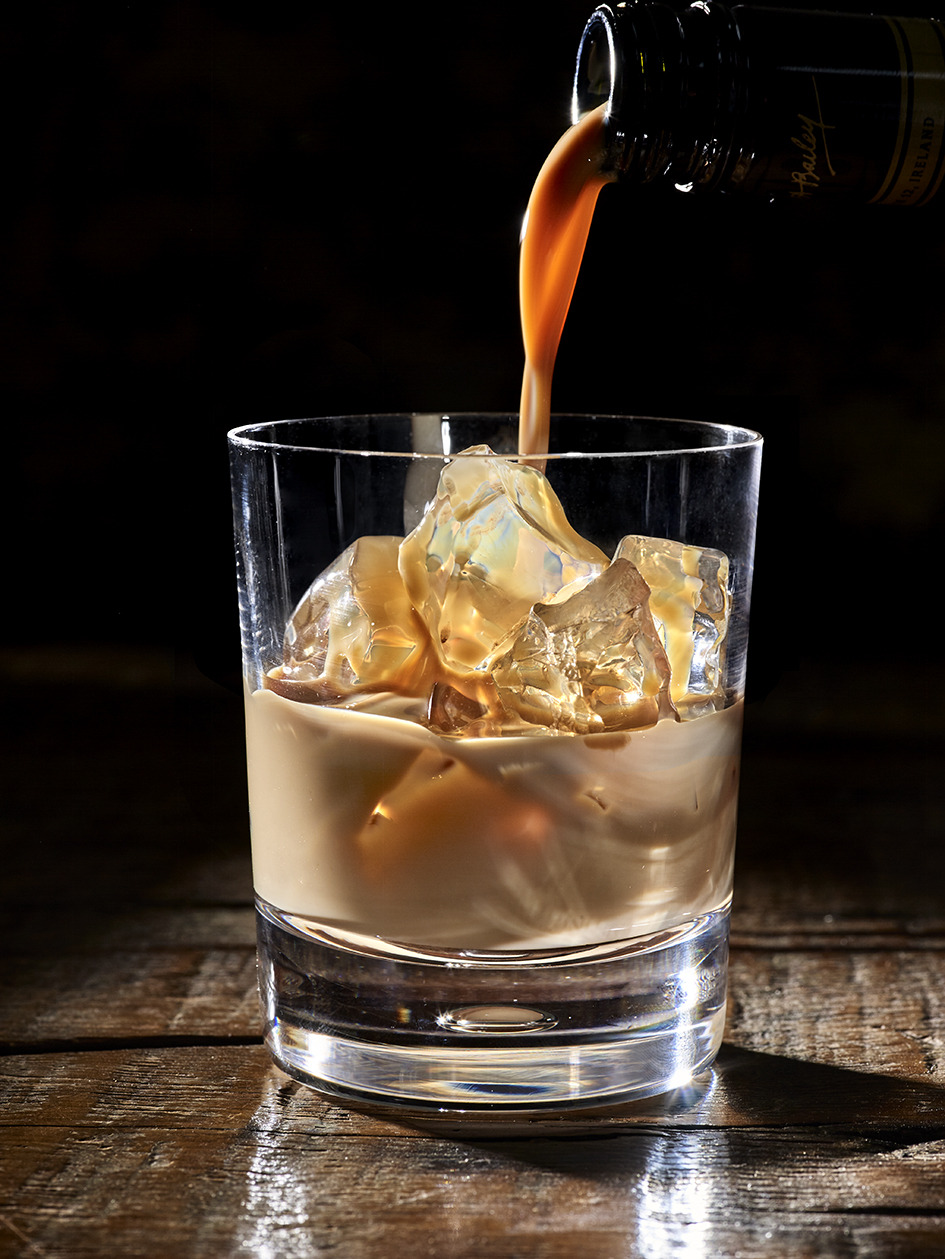
9. Use Backlighting

Another tip for beverage photography is to move the object between your camera and the main source of light. As a result, you will be able to add depth to your photo. You are more likely to use a clean and transparent glass for the light to shine through the drink and make it look delicious.
It’s better to shoot such non-clear drinks as milk and red wine with backlight as it will emphasize their details – bubbles and condensation.
10. Experiment with Hard Light

When it comes to food photography, we are always told that it’s better to have soft light for a photoshoot, create soft shadows and diffuse the light for gentle curves and nice illumination. That’s all good and mostly true.
Hard light may actually look amazing! I believe that, in some cases, drink photography is ideal for shooing with pure, undiffused light that will allow you to show the texture of the glass and achieve practically a prism effect.
For these pictures, I placed the light above the object and put it slightly diagonally. If you place your light further from the glass, you will be able to create longer shadows. So, move your light around to find a perfect position for a necessary effect.
11. Don’t Mix Artificial and Natural Light

If you are taking drinks photography indoors, try not to shoot in a place where natural and artificial light overlap in a frame. Natural light is quite cold and artificial is usually warm.
If you mix them both, you will have not a nice overlap. If it’s possible, switch off the lights in the room or find a window where not much of that light falls on the composition.
12. You Must Be Clear About the Concept

Before taking cocktail photography, you need to think of the concept. Choose the cocktail you want to take pictures of and in what places people mostly drink it. In this way, you will be able to prepare the appropriate props and lighting for your photo.
For instance, strong cocktails are for bars and clubs in the evening so you have to consider that atmosphere when shooting such drinks. If you are shooting summery fruit cocktails, bright sunlight will be the best for them. For these photos, beach and pool background with light props will perfectly do.
I’m not a fan of ideal pictures. I prefer them to have some imperfections, such as drops or a glare on the glass. It makes your pictures look more natural and appealing.
13. Background Props Are Also Important

Get them only at qualitative stores that sell fresh fruit, herbs or spices. Avoid using too many different colors for your props.
I use acrylic ice cubes since they are fake and don’t produce condensation. That’s why I may create the effect of condensation by spraying some water on the surface of the glass.
Do it with gloves in order not to leave fingerprints on the surfaces. This will make the process of picture editing faster for you.
Another important thing for taking a good drinks photo is background props. These can be different bottles or bartending tools. Such props will add a special vibe to your picture. If you are taking photos of cocktails, use different angles and change compositions.
When I do it, I always take from 25 to 50 different shots of the same scene. I change colors on the background to take both light and dark photos. This diversifies my pictures and helps me in the future because I never know which one will be sold better. Frequently, it was the picture I didn’t put high hopes on.
14. Put the Glasses in the Freezer Before the Shoot

Before taking cocktail photos, I recommend putting your glasses in the freezer. Also, use only fresh fruit and herbs. If, for some reason, herbs don’t look fresh enough, place them in cold water before the photoshoot.
You can add a more mysterious vibe to your photos by using dark backgrounds and proper lighting. If you are taking photos of cocktails with milk, consider using cream instead of milk. As a result, your drink will look more interesting and unusual.
In order to get nice light effects, use special techniques to simulate natural window light. For example, take big cardboard boxes and make “windows” inside of them.
15. Never Prepare In Advance Using Natural Ice

Use a waterproof background while shooting. This will save your time as you won’t have to dry the background when the ice melts, you can just simply put new ice there. Also, avoid preparing drinks with ice too early before the photoshoot. Firstly, complete the composition and then prepare cocktails.
In warm weather, everyone enjoys summer cocktails and when it’s cold, we opt for a comfy, hot drink. However, if the temperature in the studio where you are working changes depending on the weather outside, I recommend you to do the opposite thing.
Take photos of food and drinks with ice in winter as cold studio won’t let the ice melt so fast. Moreover, if you take such photos in winter, you can upload them in spring when summer pictures are getting relevant.
In the same way, it’s easier to take photos of hot drinks in summer. It doesn’t get cold so fast and by autumn, you will have a lot of themed pictures.
- Learn some tips on dark food photography.
16. Make Fake Condensation

Shooting drinks, it’s essential to make a glass look appealing. A proven way to attract the person’s attention to the beverage on a hot summer day is to show the tiny drops of water on glass’ sides. However, when the drink warms up, the condensation disappears. But there is a way out ‒ you can make fake condensation.
Cover the top of the glass with something and spray the sides with Krylon Crystal Clear spray. In such a way, you will create a texture. Wait till the glass is dry. Then, make a 50/50 mix of Karo Syrup and water. Spray it over the sides of the glass and you will get a condensation effect which will last long.
17. Create Real Condensation
If for any reason, you can’t make fake condensation, you may create a real one. To do that, the glass should be clean, dry and kept at room temperature. The liquid should be very cold. Put it into a freezer for 20 minutes before the shooting.
When the ice-cold liquid is already in the room-temperature glass, blow hot air around the glass using the straw. In such a way, you will get natural condensation.
18. Using Fake Ice
Today, you may use two types of artificial ice ‒ clear acrylic ice and silicone one. Speaking about acrylic cubes, they are really natural but, unfortunately, they sink while real ice ‒ doesn’t, so the glass looks unrealistic.
However, you may still use them somehow. If you decide on silicone ice, you will have to buy a big piece and then break it into smaller ones. Fortunately, it doesn’t sink so you may confidently use it in drink photography.
19. Bounce Card Behind the Glass

If you want to make your glass or bottle stand out in a drinks photo, you should use backlight. Prepare a bounce card of the size of your subject and place it behind it. In such a way, you will get a beautiful glow of light.
20. Creating Perfect Beer Foam

Although beer foam looks very stable, it will disappear soon. There is a small secret of how to make foam appear again. Just add some salt into the glass and stir it. That’s it! The foam head will come back. But I don’t recommend drinking it anymore.
21. Create Freshly Poured Coffee Look

In beverage photography, if you want to achieve the desired results, you have to sacrifice something. In this case, after you apply this trick, you can’t drink the beverage anymore. However, it is a proven way to take great coffee shots.
When coffee has been just made, it looks fresh and has nice foam with bubbles on the surface. However, in several minutes they disappear. Pour a little coffee in another cup, add several drops of dish soap and stir it. In such a way, you will get foam with bubbles. Transfer it to your cup with a spoon.
22. Tacky Putty
In drinks photography, you can’t do without tacky putty. It is necessary to mark the location of the prop in the frame. Moreover, you may use it to hold the jewelry in place. You may also use wooden blocks to mark the position.
23. Microfiber Cloths
These cloths are indispensable helpers in drinking photography. They help wipe the products in such a way that no fibers or residues are left. So, if you use it, you shouldn’t worry about small particles that may appear in the final photo. By the way, it takes considerable time to remove those afterward using post-processing programs.
- Read about food photography props.
24. Cotton Gloves

If you are engaged in drink photography, you know that gloves are necessary during the shooting. If you wear them, you can avoid nasty fingerprints on bottles and glasses which may spoil the final shot.
25. Canned Air

If you want to show that a bottle has just been taken from the freezer, use canned air. In this way, you will achieve a realistic frosty effect.
26. Glycerin

One more method to achieve a chilled look is to use liquor made of glycerin and water. The proportion is one to one. You will get a sticky liquid that will not dry or run off.
27. Clear Spray

Water/glycerin mixture is a great way to create a chilled look but, unfortunately, after you use it, the paper label begins to peel off. However, there is also a way out. You may use a clear spray. It will produce a tough outer covering and the label will look perfect. So, spray it, let it dry and then apply a water-glycerin solution.
28. Acrylic Ice
In professional drink photography, shooters never use real ice because it melts quickly and the shooting doesn’t take less than 10 minutes.
29. Select the Perfect Surface

When you arrange the objects in the frame, you should always think about the final shot. So, don’t miss any dust, scratches or blemishes that may spoil a perfect drinks photo.
30. Set a Light Source or Window Directly Behind the Drink

To achieve the best results, the light source should be placed behind the drink. In such a way, it will illuminate the contents of the glass. However, mind that the camera shouldn’t be in line with the light source.
31. Put a Second Light Source to One Side of the Glass

Shooting drinks, it is recommended to use the second light source. For example, you may place the object between two windows. You will highlight the glass and remove unnecessary shadows.
32. Make Your Own Clear Ice
If you don’t have acrylic or silicone ice, make your own real ice. It is difficult to work with it but ice cubes will be clear and realistic. Boil some water, freeze it and break into pieces.
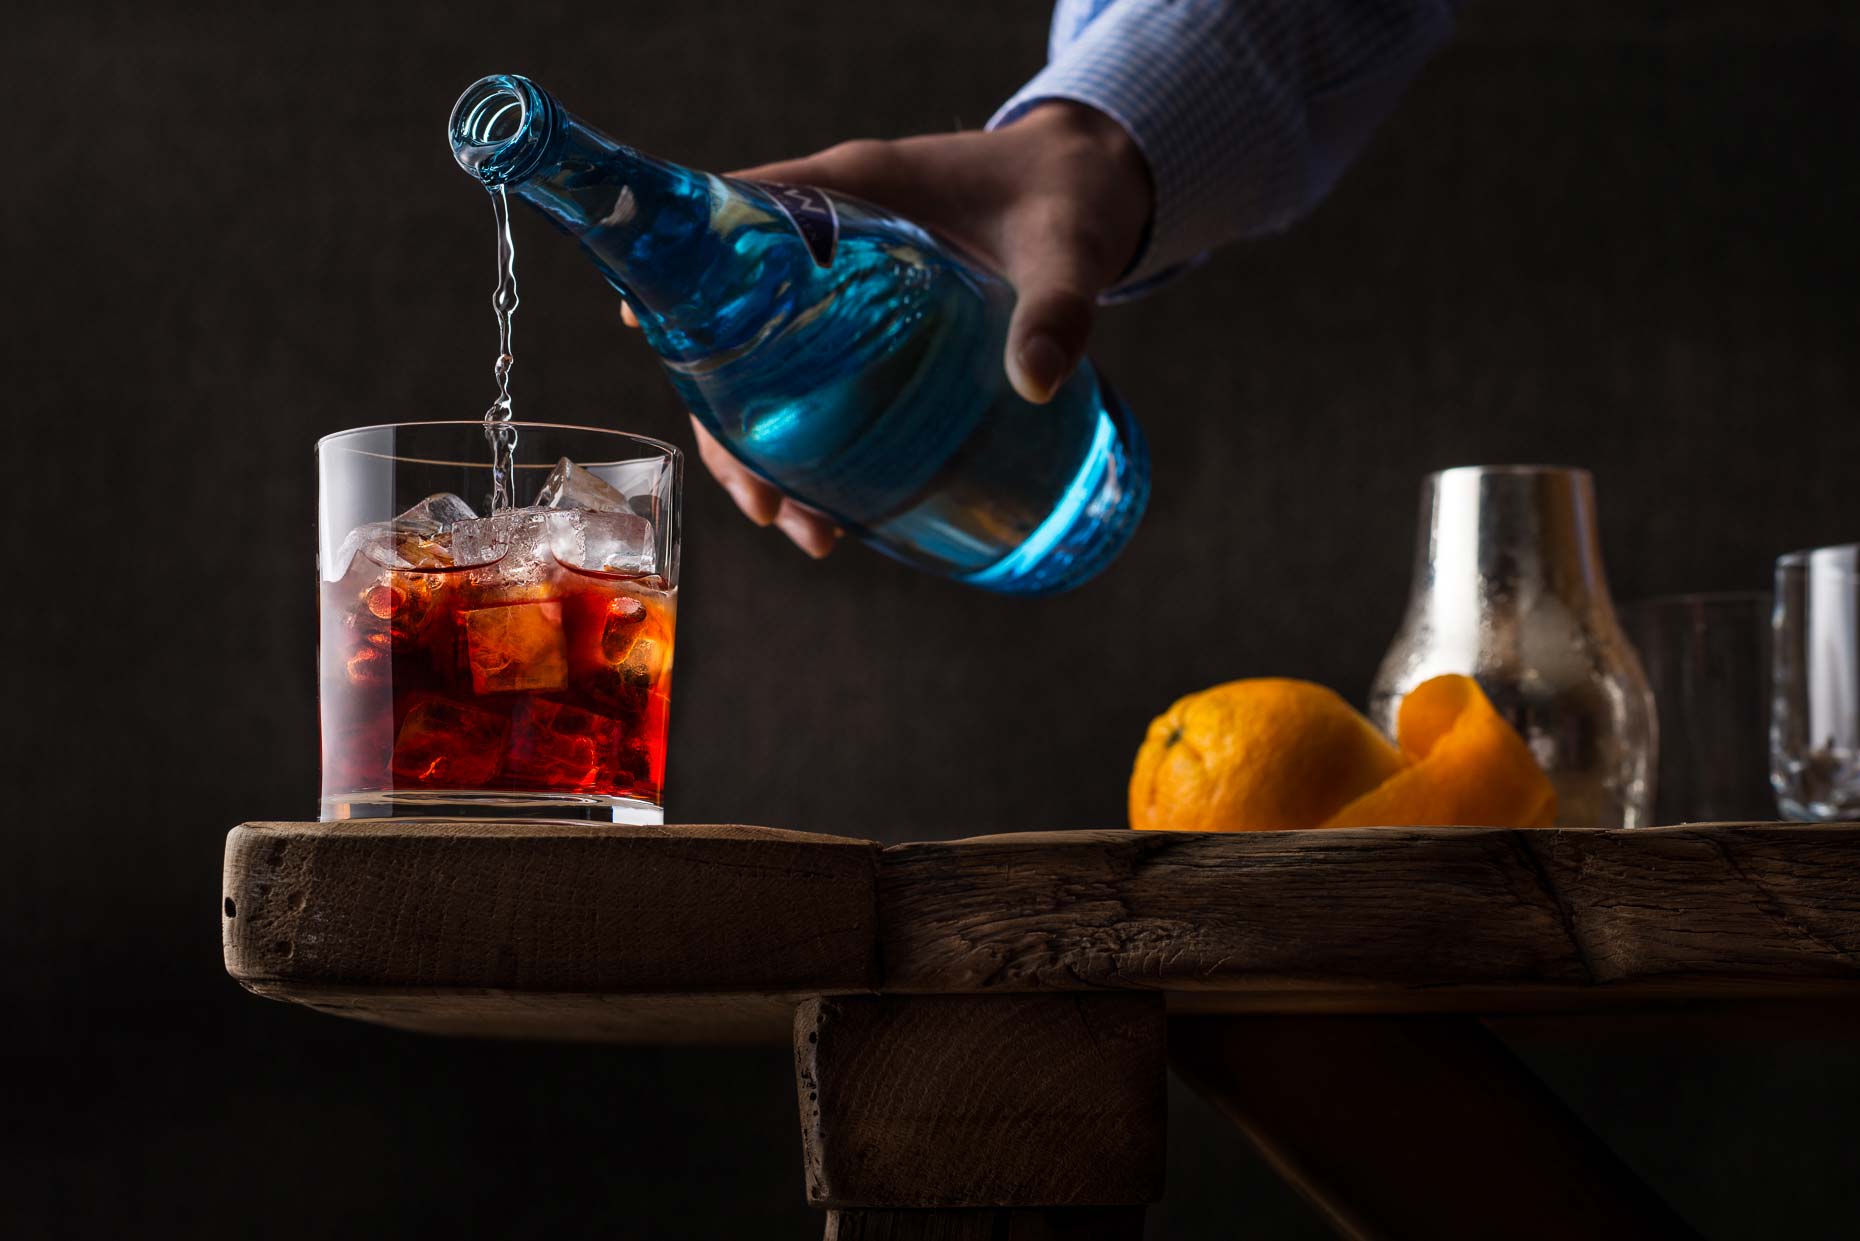
33. Pour in the Liquid
Try to avoid anything that may spoil the frame or complicate the shooting. Use a funnel not to spill the drink and pour it along the back of the glass to avoid splattering.
34. Light the Drink from the Front with a Bounce Card
If you want to fill the frame with additional subtle light, you may use a bounce card; or highlight the sides with the mirror.
35. Use a Spray Bottle to Create Your Own Condensation

It is one more trick used by shooters to create fake condensation ‒ a great way to make your pictures look professional.
36. Add Colorful Accents

Although there are many hacks that help improve the look of the beverage in drinking photography, nothing can be done with the color. You can’t make coffee look more colorful or lemonade more yellow. However, you may add additional details that will diversify the color gamut and even bring some flavors. For example, if you use bright yellow, it will imply some citrus flavor.
- Learn more food photography ideas.
37. Get Your Rocks and Coups
Undoubtedly, glasses are very important in cocktail photography. I recommend using rocks glasses and coupe glasses. Coupes are suitable for all kinds of drinks so you may easily pour martini, negroni, Champagne or even whiskey into them.
If for some reason, a coup one is not appropriate, you may use a rocks glass. Therefore, if you are engaged in drinks photography, you should have a decent collection of glasses. In case you don’t have one yet, look through the barware buying guide.
38. Holiday Drinks

Each season or holiday has the drinks associated with it. Use various drink decorations typical of each season. For example, hot Christmas drinks will perfectly look with a Christmas tree in the background.
39. Use Models

Commercial beverage photography looks great if you shoot not only a single drink but also a model. For instance, when they hold beverages or drink them.
FREEBIES for Editing Drink Photography
Like in any other genre, image editing is also very important in drinking photography. Use these free tools to create fantastic shots.
Saturation


Having applied this tool, you will add slight saturation to the shot spicing it up. Moreover, this effect will make your photo trendy since the main accents placed on the beverage.
Contrast


This effect will help you attract the viewer’s attention, making the picture sharper and brighter. Moreover, it will add contrast to the shot.
Clarity


This tool from the collection of free food Lr presets works with clarity. It changes the tone curves and the color scale. Use this effect and your picture will look like all those images in popular food magazines.


