
Looking for an inexpensive way to take gorgeous tabletop photos of your products? Discover which type of lighting you need for tabletop photography and what photography equipment to get if you are on a tight budget.
Tabletop photography is a genre of photography, which implies placing objects such as food and drinks, gadgets, cosmetics, etc. on the table.
Why has tabletop photography become so popular? Firstly, it’s because of using such kind of e-commerce photography in Instagram. Secondly, arranging a tabletop photo studio won’t take a lot of time and efforts, compared to the traditional product photography studios.
However, image quality will meet the professional level standards. I have described in detail all the steps on how to start taking tabletop photography.
Here are 5 effective steps to create and organize a tabletop photography studio that allows you to achieve a better result with minimal time and money expenses.
It all starts with an idea because different ideas need completely different conditions and different preparations. First of all, you need to understand how you want to photograph, why do you take a picture and for whom.
Only after you’ve grasped the essence of the photoshoot, you can go ahead to the next stages and try to put your tabletop photography ideas into action. I also recommend getting acquainted with similar photos in order to analyze their strong points and improve the flaws.
Undoubtedly, powerful equipment helps you achieve incredible results, but is it really that necessary for a table top photo studio? Keep in mind that photo is created by the photographer, not the equipment, so you can use cheaper analogs without losing on the image quality.
If you plan to use your tabletop photography samples mainly on the web, then you’d better focus on the good lenses for product photography, rather than on megapixels. Although megapixels improve the clarity of your images, they refer more to the printing than viewing visual content in digital space.
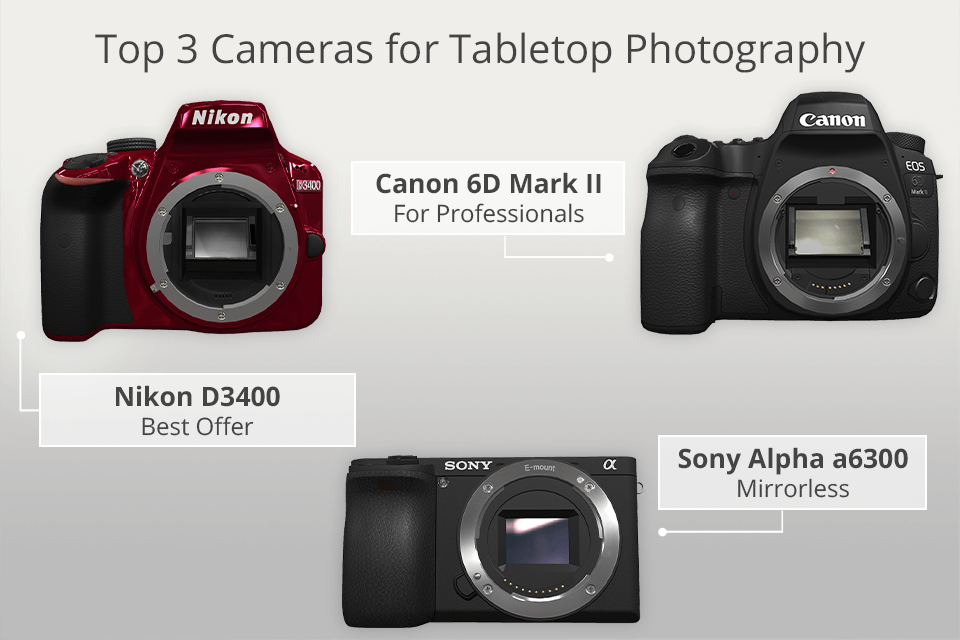
If you are willing to invest much money in a camera for product photography, then I recommend taking a closer look at the options that I indicated in the picture. I personally used the Nikon D3400, but later switched to the Canon 6D Mark II because of the wider functionality.

Since tabletop photography involves taking photos of the relatively small things, there’s no need to buy the telephoto lens and the like. A regular kit lens of 18-55mm, which most often comes with the camera, is suitable for lifestyle product photography, as it gives more flexibility and quite a good picture. Later, you can add 50mm and 35mm to your collection.
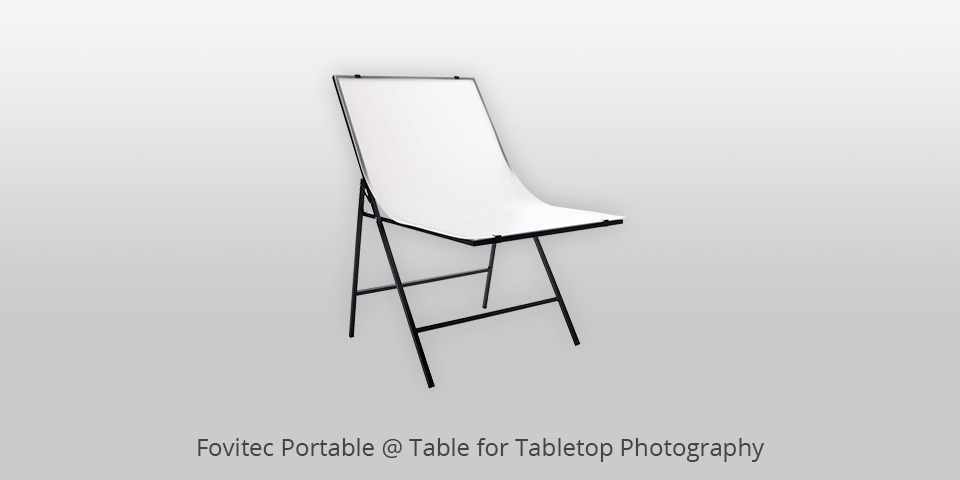
Unfortunately, you can’t just shake off the dust from an old, shabby table that has languished in your garage. You need a high-quality, presentable surface for a successful tabletop photography setup. There shouldn’t be any horizontal line on the surface so that you can place the camera directly in front of the subject.
However, it all depends on the subject you are shooting. After all, if it’s antique, then even an old table would be a good variant. The option above is very versatile, and, most importantly, it’s portable. Now you don’t need to get attached to a specific workplace.
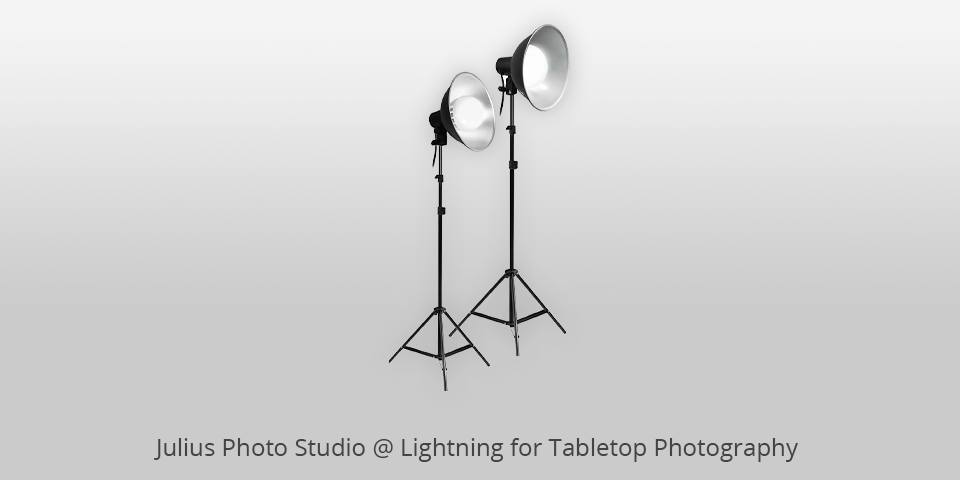
If you have a good SLR, point-and-shoot camera, or even a smartphone, it’s more reasonable to invest in proper studio lighting kit than to buy an expensive body. You can, of course, save even more and use natural light. However, this approach will significantly complicate the shooting process compared to one with the lighting set.
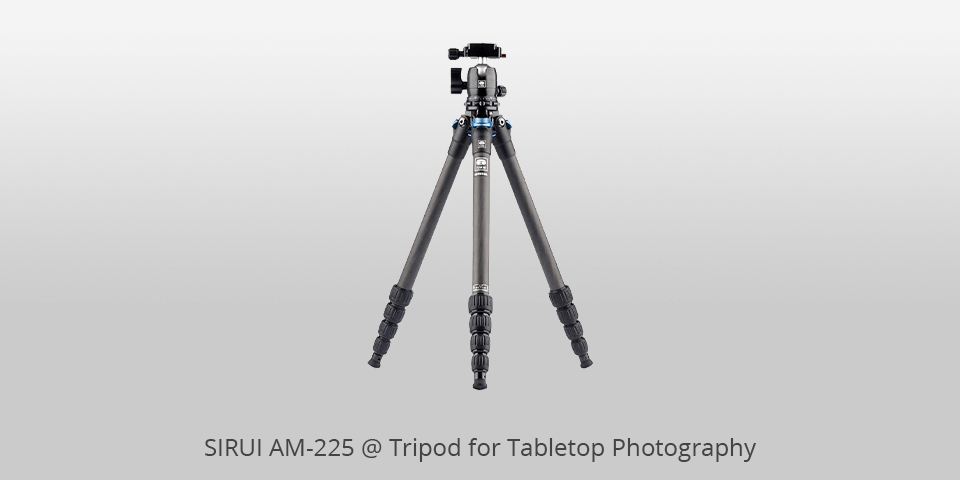
The main purpose of a tripod is to ensure the stability for a camera during the shooting process. This is especially important for still life photography, which calls for a clear and static image.
If you aren’t going to change the shooting place very often, then you don’t need a portable tripod. However, I recommend looking for more versatile tripods for DSLR that provide both stability and portability.


In order to fulfill their main function, the commercial images should look as presentable as possible. That’s why you need to remove all kinds of scuffs, irregularities and other defects, especially, when it comes to the jewelry photography or shoe photography.
If you’re interested in food photography, then a tasty and fresh looking food is an absolute must-have. Still, if your product is supposed to have certain defects, don’t mislead the potential buyers.
On the other hand, a slight imperfection may become a part of your style, in case you don’t plan to use your photos for commercial purpose.

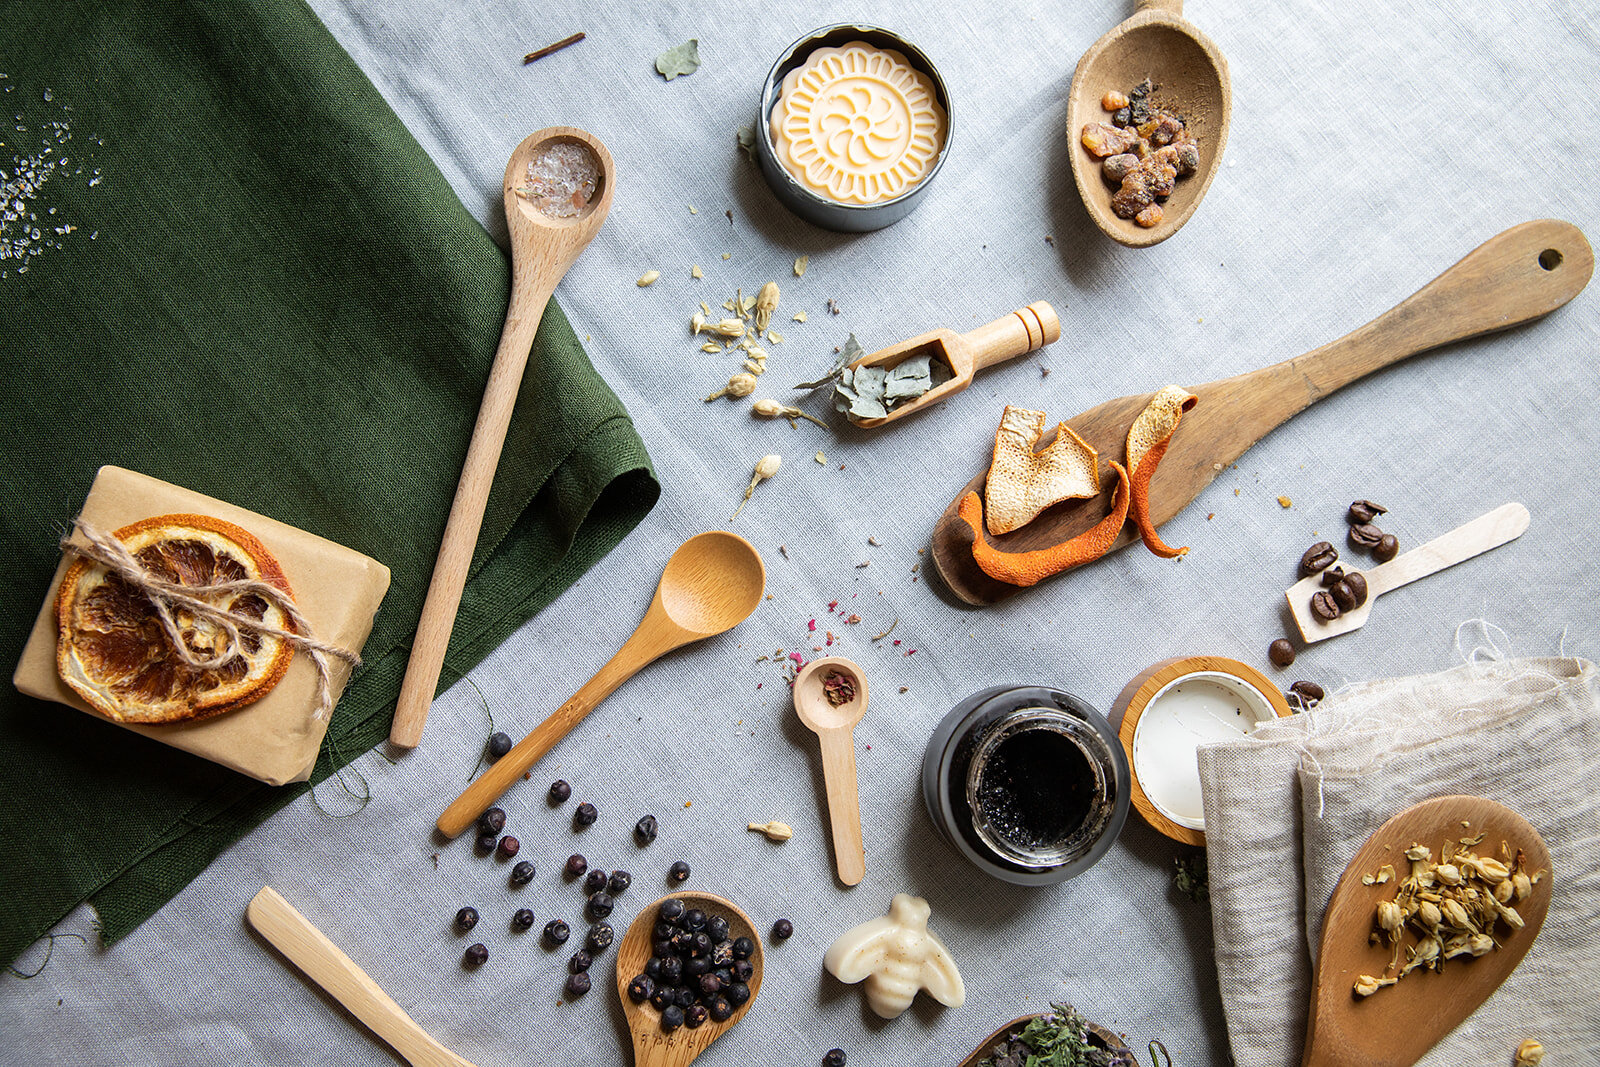
Also, to enhance the composition, you can use props depending on the forethought style. You can use various acrylic trays or plants as jewelry photography props. If you don’t know what food photography props to choose, authentic table serving like a slice of meat on a wooden board or any associated object like the ice cubes for cold drinks would be a great decision.
You can even add a crafting touch to your tabletop photography setup, using DIY photography props. Just don’t overdo and focus the main attention on your product.
Though the Automatic mode seems simple and very convenient, prefer a Manual shooting mode. Only then you can adapt yourself to the shooting situation and show your unique style. Above you’ll find the basic settings for product photography that I use for tabletop photography.
If you correctly set up the light, background, objects and camera, you shouldn’t have any problems while taking tabletop photography. The main thing is to keep the object sufficiently illuminated so that no noise is created during further color correction.
Also, shoot in RAW to have greater flexibility at the image post-processing stage. Take several shots from different angles, experiment with adjusting the lights and shadows, try using reflectors to create interesting black and white patterns.

A great photo session is only half of the success. You need to use photo editing software to get a professional and finished look. It’ll add an interesting flair to your most creative tabletop photography ideas.
There are many software options that you can use, but I recommend considering these programs:
Adobe Photoshop CC is probably the most famous software for this, which is considered to be the best of its kind and fully deserves the title. It’s perfect for both simple and professional editing.
You can remove background, place your product on any background realistically. Of course, there’s a price to pay, but any tabletop photographer will confirm that it justifies the cost. Find several ways of downloading Photoshop free.
GIMP is the best software among free Photoshop alternatives. The only thing that makes it inferior to Photoshop is some limited image manipulation functions. The software can help you bring to life a lot of your tabletop photography ideas.
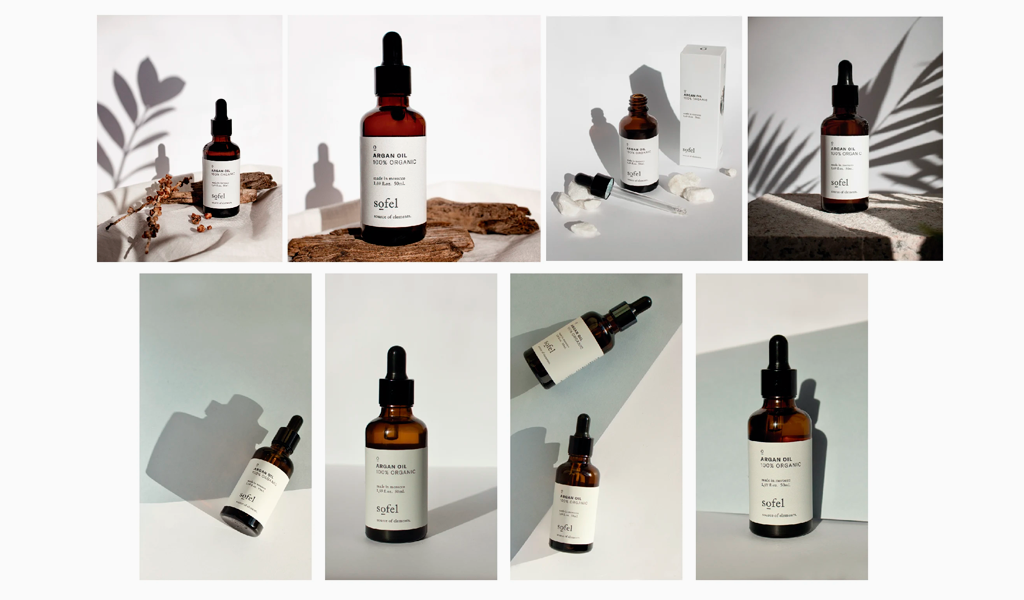
One can divide tabletop photography into three most popular types – flatlays, stylized and white background photos. Each one has its own purpose and peculiarities.

The flatlay tabletop photography is represented with photos that are taken from above, in other words, at a 90-degree angle. This style lets you showcase flat objects or a great number of them in the best way possible.
For instance, it can be a pizza or a roomy suitcase, with the contents that can’t be clearly seen from a side. Yet, if your object doesn’t fall under one of these categories, a 45-degree angle would look better and more dimensional.


The stylized tabletop photography immerses an object into its “natural” environment, thereby creates an authentic atmosphere. It can be a cup of coffee in the coffee shop or a book in the library.
You should remember that it’s hard to carry around all of the necessary equipment (we’ll talk about it a little bit later), thus, it’s better to prepare a tabletop studio nook in advance.

This style of tabletop photography is intended predominantly for commercial purposes. You’ll often see the white background photos on the online markets because white background doesn’t distract your attention from a product and potential buyer can evaluate it thoroughly. It’s very important to choose the right surface for a photo shoot; below I indicated a great inexpensive example.
Having decided on the type of tabletop photography and having studied the tutorial, you can already take excellent pictures. Still, there are several points that you should pay attention to if you want each of your pictures to come out better than the previous one.
Each product is special in its own way and there is no single standard for choosing the appropriate angle for tabletop photography. The difference between a 45-degree and 90-degree angles can bring the fundamental changes to a perception of a photo.
You need to find an exact angle to complement your composition harmoniously by trial and error.

A smartphone can be a good and cheap variant, as it is suitable to shoot most types of products. While the earliest smartphones couldn’t boast of a good camera, their modern versions have advanced characteristics.
The majority of modern flagships have 12+ megapixels camera and temperature settings to adapt to different types of lighting.

A certain light setting may not work for each individual product; a lighting system that works for some of them may have no benefit for others. Typically shooters choose between natural and artificial light for tabletop photography.
For commercial purposes, proper lighting helps to instigate a purchase decision, especially in the online stores, where a photo is the main factor.
No matter what type of lighting you use, be it natural or artificial, your goal is to reduce the shadows while emphasizing the quality of the product and making it interesting to the site visitors. When it comes to tabletop lighting, balance is a key.
Photographers use filters to edit an image. However, you need to ensure that your product doesn’t lose its natural look. Don’t apply Retro, Matte, or Sepia filters to your tabletop photos.
Performing color correction for tabletop photos requires plenty of time. But you can simplify this process if you apply effects that correct white balance, color saturation, and emphasize shadows.


