In order to capture amazing product shots, you don’t always need the most expensive and professional camera. All you need is to learn the recommended camera settings. However, learning how to set up your camera correctly can be difficult, especially if you are a budding product photographer.
In this guide, I’ll go over all the needed settings in detail. You will find out the best way to set up your camera to create irresistible product photography, that will make even iPhone product photography look good. To bring your creative product photography ideas to life, you need to pay attention to aperture, ISO sensitivity, and shutter speed.
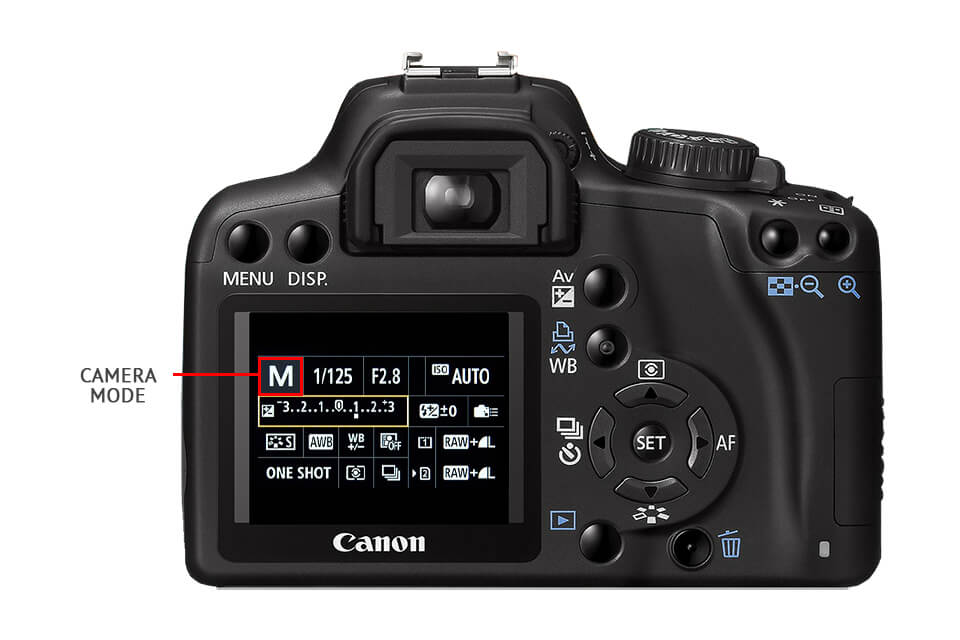
You can choose among 3 camera modes: Manual, Aperture Priority, and Automatic. By activating the Manual mode, you acquire full control over aperture, shutter speed, and ISO.
If you use the Automatic mode, a camera performs adjustment itself. It may seem convenient, but in fact, you are not likely to get ideal exposure this way. In the Aperture Priority mode, you can set the aperture and it will automatically match the ISO and shutter speed. Use this mode when shooting outdoors.

Even if you used ideal (as you think) camera settings for product photography, the final result needs professional photo enhancement. This process requires special knowledge and skills. That is why I recommend addressing a professional image editing company. Professional retouchers will perform qualitative clipping path, and fix all the lighting mistakes.
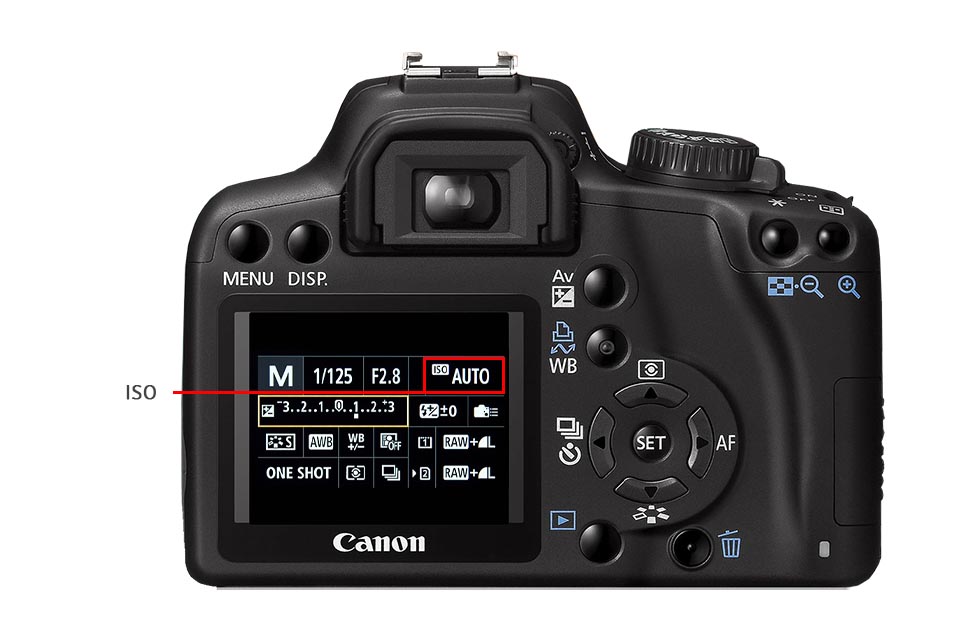
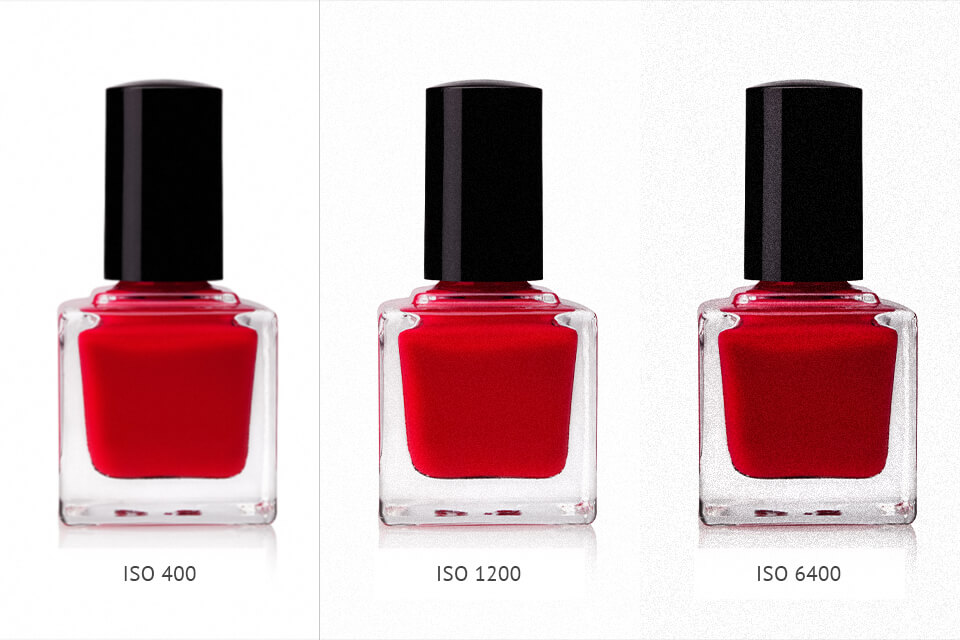
ISO means the sensitivity of a camera sensor to the light. If the number is low, then it’s less sensitive and you will need more time to take a shot. If you want to shoot in low light or take shots faster, increase ISO. However, in this way, the photos will turn out to be grainy.
Noise will degrade the quality of the image. It can be fixed somewhat with noise reduction software, but you risk introducing a plastic look into your images by attempting to smooth out the noise.
Measurements of ISO reflect split second and usually vary from 100 to 3200. “ISO 100” means a full second and “ISO 3200” – 1/32 of a second. To avoid as much noise as possible, start with the lowest ISO (ISO 100) and then slowly increase it if needed.

Aperture and depth of field are another crucial camera settings for product photography you need to pay attention too. Aperture manages the amount of light passing through the lens to your camera and defines the depth of field of a picture. Aperture is measured by the F-stops system and usually varies from F1 to F22.
A small aperture means a high f-stop number (for example, f/16 or f/22). The aperture of f/1.8 allows a lot of light to reach your lens for product photography, and f/22 – works in the opposite way.
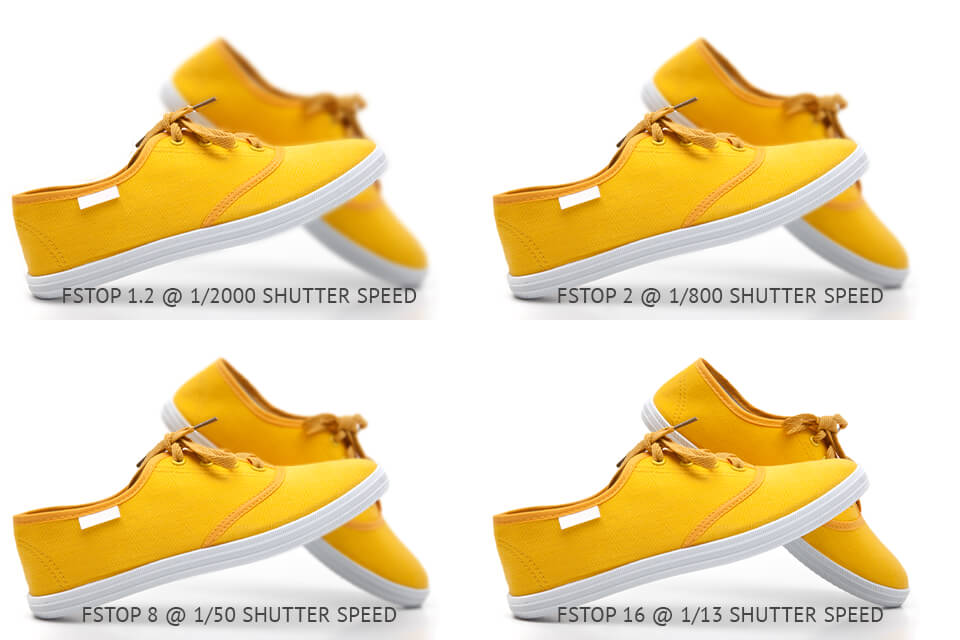
To have a whole product in focus, use as high F-stop as possible, for example, F16, F22. The only case when you should use lower aperture is if you want to emphasize a special detail, such as a belt buckle or a door handle, by creating shallow depth of field.
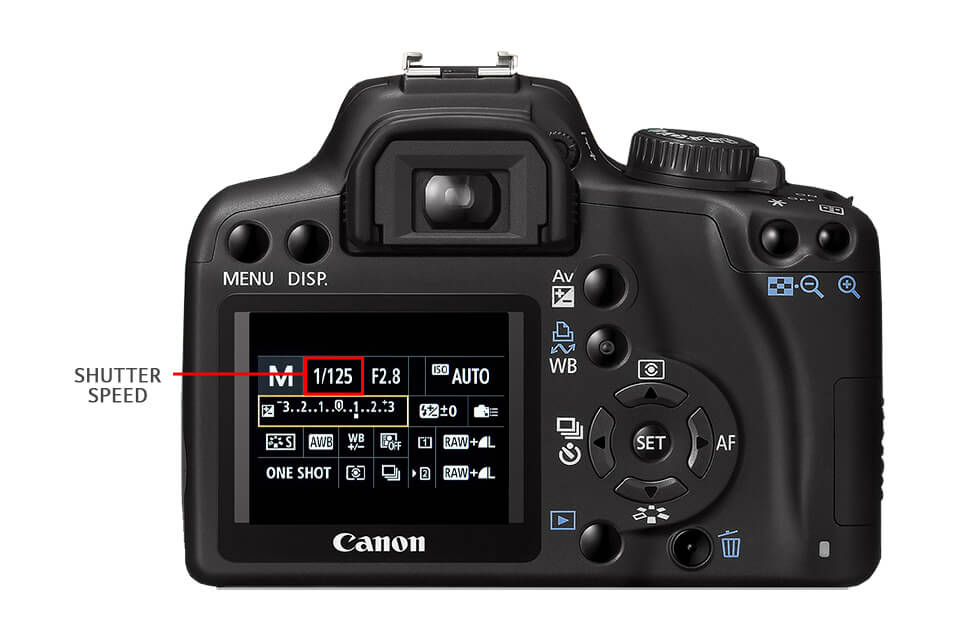
Shutter speed or “exposure time” defines how much time it takes the sensor of a camera to be exposed to the light while you are taking a photo. It is measured in split second. Fast shutter speed makes a product more still and slow shutter speed leads to motion blur.
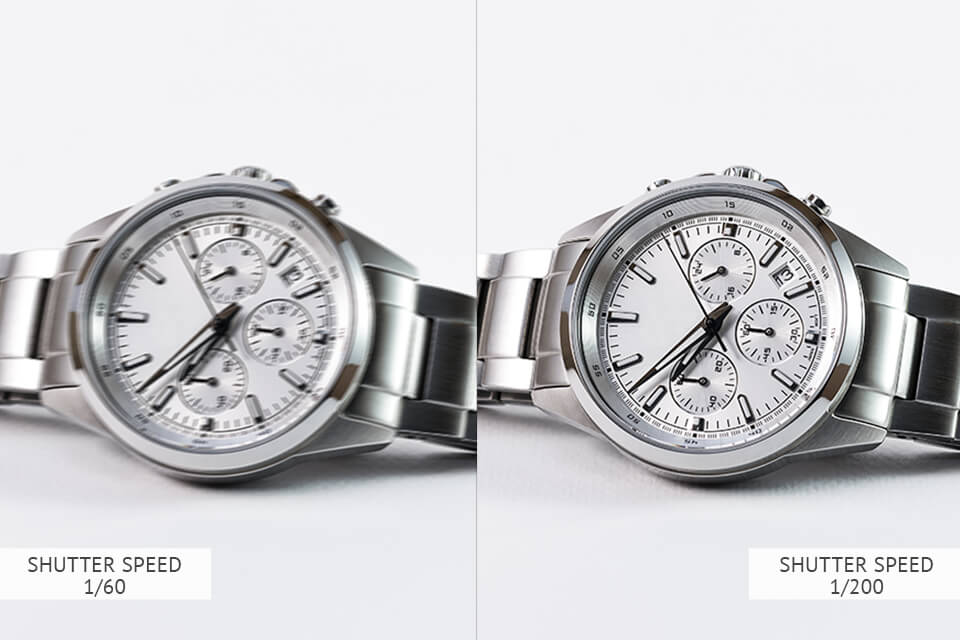
In product photography, you’re not dealing with motion. But if you try to handhold your camera, you’ll get some camera shake. That’s why you have to work with popular tripod brand's products in a studio. When using a tripod, set a low setting, such as 1/13 to create sharp photos. So, when setting up your camera`s exposure time for, let`s say, jewelry photography, ensure you choose the right one as it may affect the finest details and textures as well as the final result during jewelry retouching.
Use a light meter to identify the accurate setting by regulating shutter speed until you reach 0. If you take lifestyle product photography, you might have to increase the shutter speed to 1/400 or higher, because of the motion.
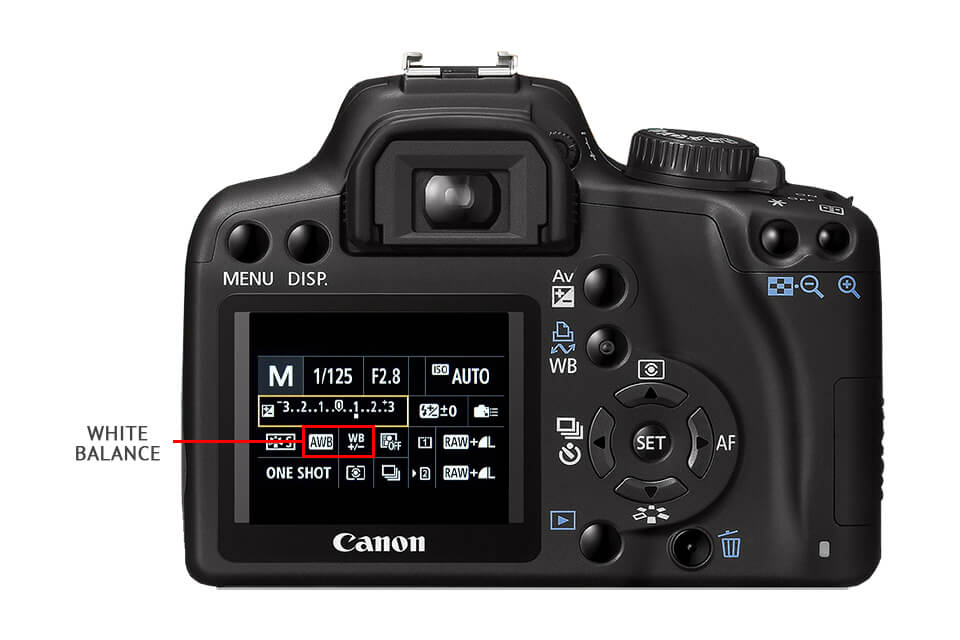
Be accurate with white balance to get whites and colors rendered properly. If it is set correctly, the white areas won’t have color casts and all the colors will look natural. Make sure you always adjust the white balance according to the lighting.
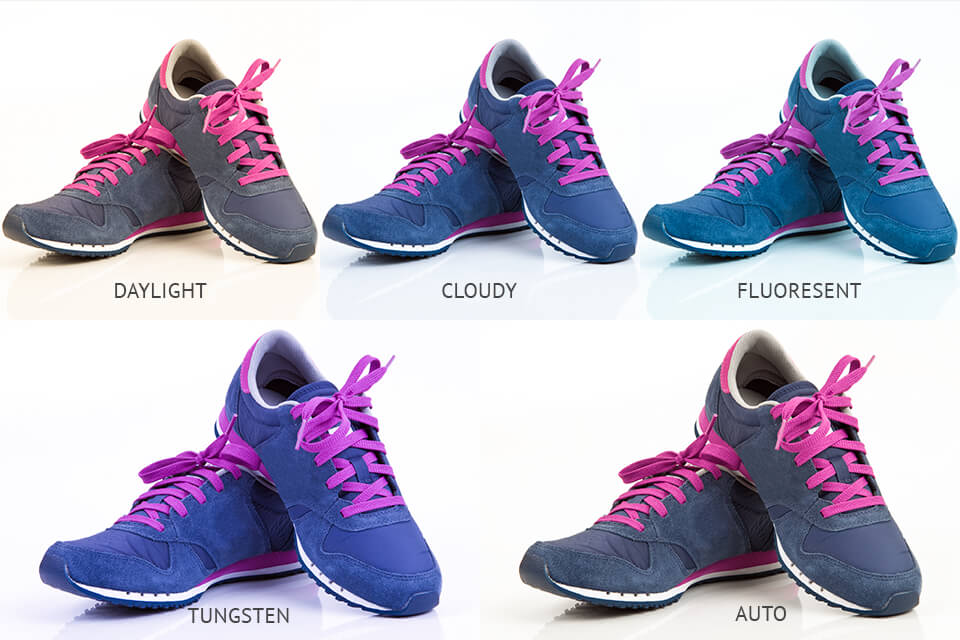
Also, if you use photo light boxes, you always have sufficient lighting, so there is no need to adjust the white balance every time you take a photo. Choose auto white balance and your camera for product photography will set WB based on the available lighting.

I recommend taking photos in RAW to get the best quality. Even though such files are quite heavy (over 20MB) and take up a lot of memory, they keep all the data that you will need when proceed with editing.
Before starting working with RAW files, check how many images can your memory card hold and get large SD cards for DSLR to account for the size of your photos.
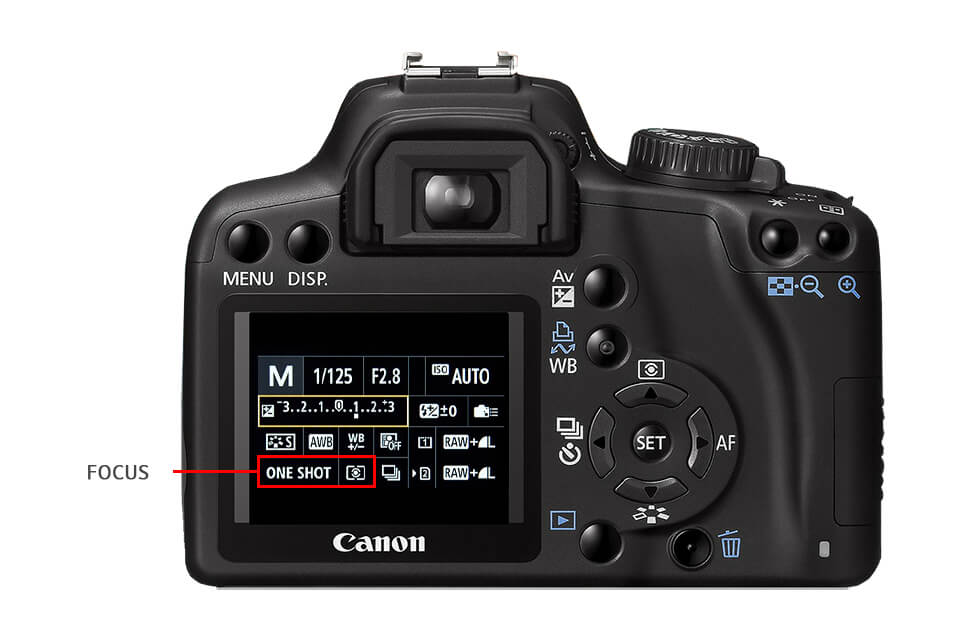
Don’t rely on manual focus unless you are OK with blurry photos. In product photography, everything has to be detailed and clean. If you use automatic focus, the camera will focus on the object, so all images will be crisp.

If you need to work under artificial light, get constant light instead of a camera flash. You may face problems with exposure doing flash photography as an object will be unevenly lit. To get better results, work with off-camera flash equipment instead of the on-camera flash.
Flash photography can introduce harsh and artificial lighting conditions, resulting in washed-out colors, shiny reflections, and a lack of depth. These issues can compromise the accurate representation of your products.
Moreover, a flash can create unwanted shadows and highlights, distorting the shape and contour of the product. Reflective surfaces, such as glass or metal, can produce hotspots and glares when exposed to intense flashes.
To maintain control over lighting, many product photographers prefer alternative methods. Diffused and soft lighting techniques, such as natural light or studio lighting with modifiers, offer a more even and pleasing distribution of light. This approach allows you to highlight the product's features while maintaining a sense of depth and subtlety.
It is generally advised to avoid using a flash for product photography. By opting for alternative lighting setups, you can produce visually captivating images that accurately showcase your products' qualities and characteristics.
Made a mistake when adjusting camera setting for product photography? Don’t worry, this collection of ready-made Lr presets will help you to instantly correct any lighting issues, and will improve the colors in your images.


