Are you planning to take up furniture photography to launch or elevate your e-commerce venture? Then it’s time to learn how to ensure your photos outclass the competition. Many photographers encounter problems when taking furniture pictures such as limited space or insufficient lighting. Sometimes the objects are also hard to fit in the shot in their entirety.
In the post below, I’ll share an array of furniture photography tips that will help you take photos of large subjects on location or in a studio. You’ll also learn how to effectively arrange and shoot furniture even if you have zero experience taking product photos.
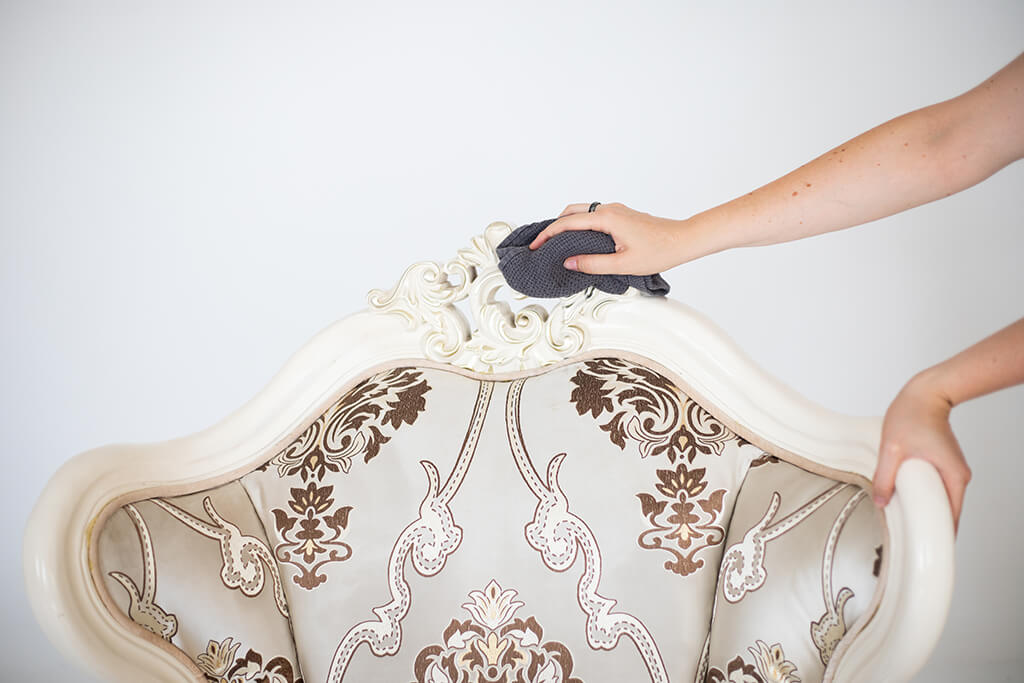
The smaller details of the furniture are more important than you might think so it's advised to properly clean the object before the photoshoot. Not only will the furniture look nicer, but you'll also have less work to do during the image post production stage. Consider purchasing special cleaning and polishing solutions and use them to clean all parts of the furniture that will be featured in the photos.
If you plan to take photos of antique furniture, you might need to approach a cleaning service since removing old stains by yourself without damaging the fabric is very difficult.
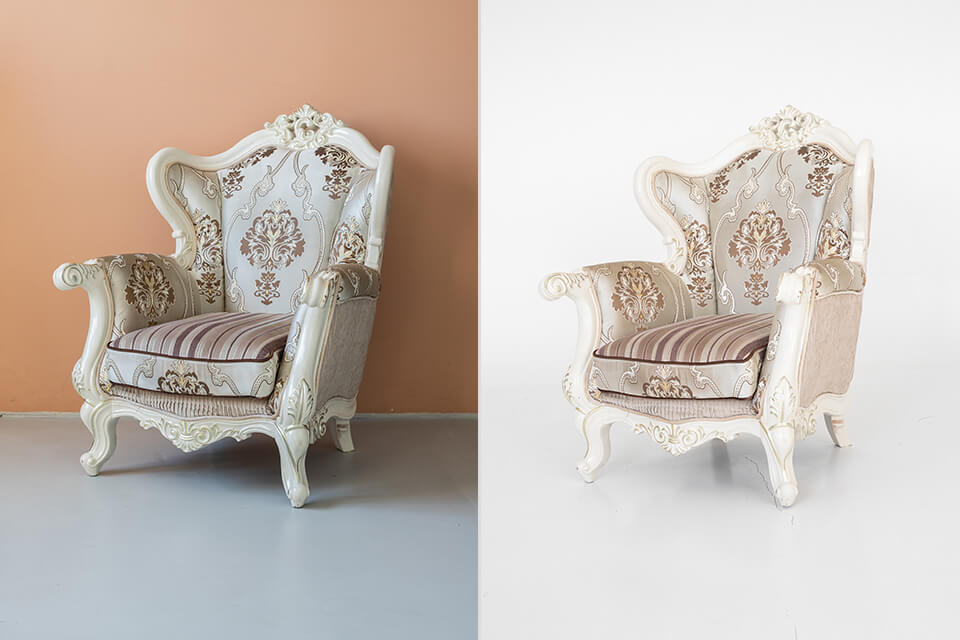
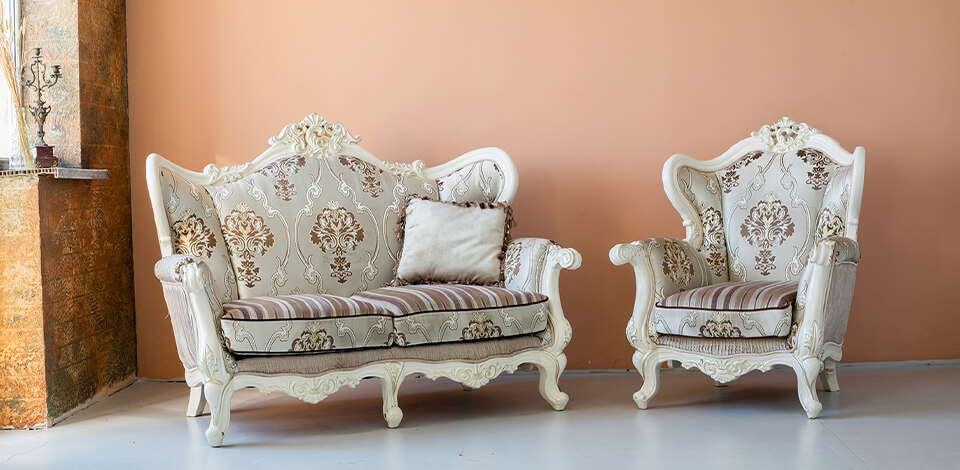
When it comes to furniture, as well as everything else connected to product photography as a whole, you can take one of the multiple paths – take photos using a white background or opt for interior photography (https://fixthephoto.com/interior-photography.html Interior Photography). It all depends on how your subject looks and how fitting your interior is for taking beautiful photos. You also need to have enough space around the furniture to avoid distracting the viewer with unnecessary details.
On the subject of light, it’s advised to pick natural lighting, which you should have an abundance of if you have large windows. If you pick the correct time and take photos during the golden hour, you’ll receive attractive pictures with beautiful shadows. That said, such an approach is more suitable for photos taken in a natural environment.
If you want to use a white backdrop, then get a large piece of fabric and make it look seamless, or better yet, find a professional studio that offers enough space for your furniture. If you’re seeing deep shadows, use a reflector that should fix the issue in most cases. You can also use a studio lightning kit to take perfect photos, but it requires a significantly bigger time investment.
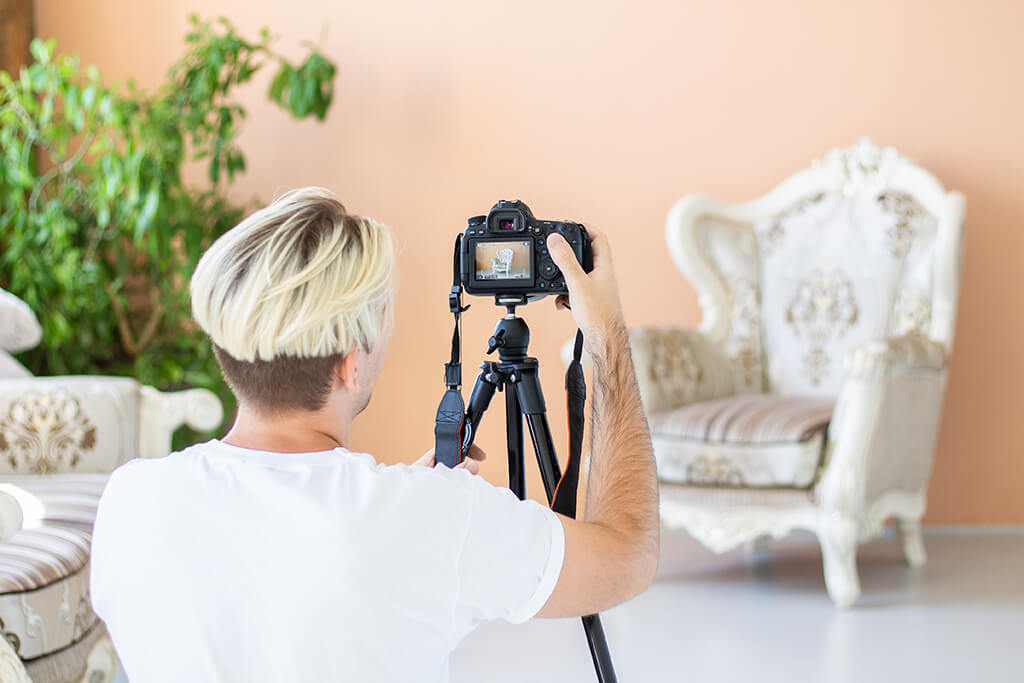
Sadly, this type of photoshoot can’t be done right without a good camera for product photography since you need to receive high-quality images and have the ability to fine-tune the details of each shot, which is why I use a Canon 6D Mark II.
You should also choose a good lens for product photography that won’t cause significant distortions. Don’t look at the lower aperture values since you need photos with maximum clarity, which I achieve with a Canon 50mm f/1.8 that is pleasantly universal while also being affordable
Lastly, a tripod is probably the most important part of this list since it can largely determine the quality and flexibility of the camera settings you can use. There aren’t any criteria you have to follow when picking a tripod, it simply has to do its job regardless of how much it costs. I use a Manfrotto Compact Light because of its reliability and convenient backpack-friendly size.
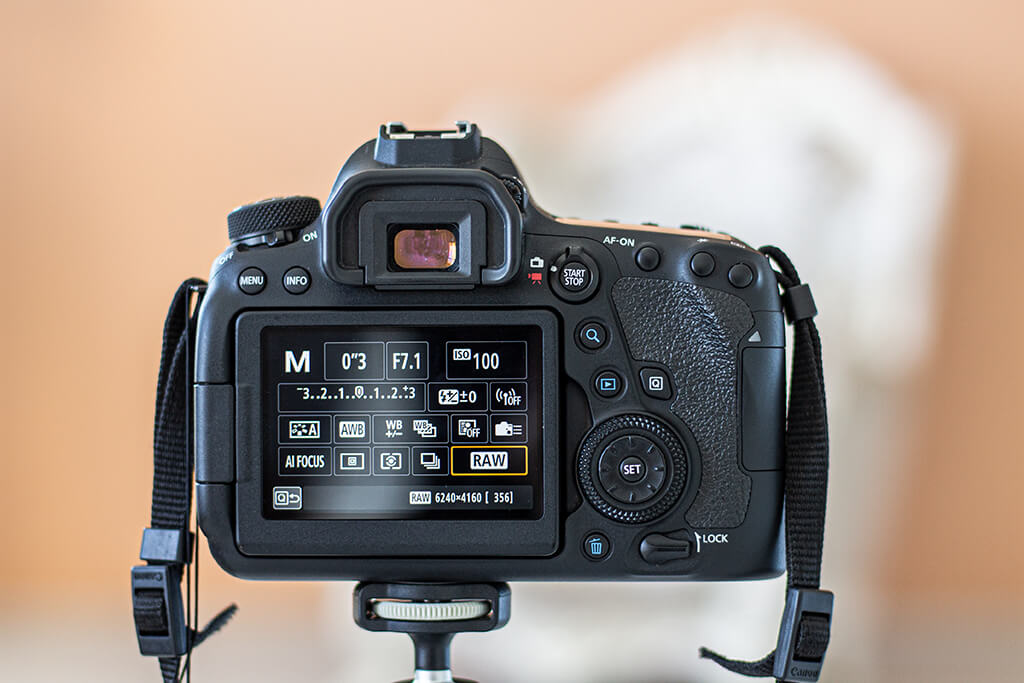
You’ve chosen a background, prepared the furniture, the lighting is okay, listened to other furniture photography tips, and all that is left to do is pick the camera settings. Yes, camera settings play a key role here since they determine how the final photo will look. My settings are the following:
Shutter Speed - 0"3
Aperture – F7.1
ISO - 100
That’s why you need a tripod since you won’t be able to take a clear photo at such a shutter speed with the camera in your hands, but without that setting, you won't get the entire subject in focus. Most furniture is rather large so don't be shy to close the aperture more than I did, as it mostly comes down to the size of the subject and the lighting conditions.
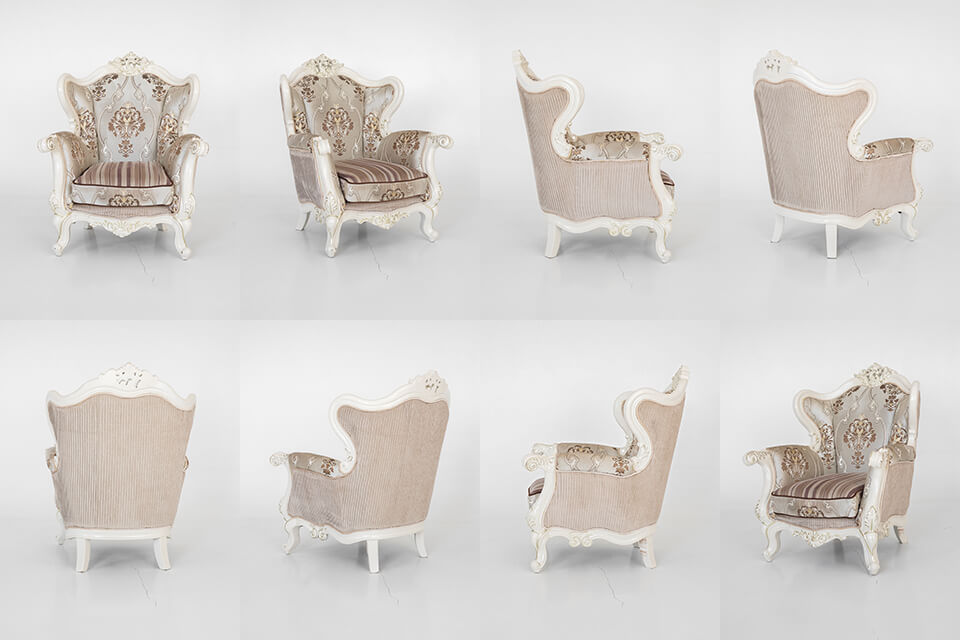
Take as many photos of the product from different angles as you can. A single image won’t be enough to keep the viewer’s attention. Ideally, you should have 6-8 photos of the object from different angles – frontal, 45-degrees, the right side, the backside, the left side, and 45-degrees from the other side.
If you wish, you can also take close-up photos to highlight the details that you think deserve the viewer’s attention like the fabric pattern, wood texture, engravings, etc. Thanks to a broad range of images, the client can get a better look at the item.
Since they can’t examine the furniture in person, the photos are their only means of getting acquainted with the object. Pictures from different angles let the viewer virtually walk around the product and better visualize it in their own interior. You can go even further and order virtual home staging services to provide clients with a comprehensive view of the space.
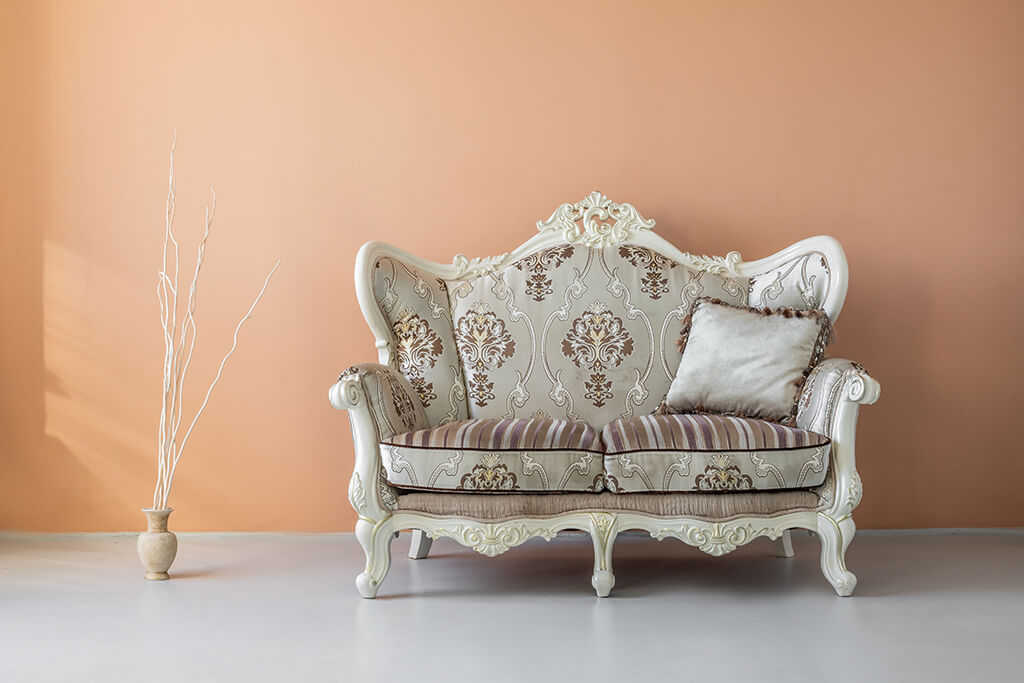
Using product photography props can help make your photo significantly better as long as you employ correct furniture photography techniques.
Moreover, for lifestyle product photography props can be considered a mandatory inclusion. Place a vase of flowers, pillows, or hang a painting on the wall, such little things can help set the mood, winning over the viewer. You can also utilize stylish lamps, candles, or lanterns to create a warm and inviting ambiance. Ensure that the lighting enhances the furniture's features without overpowering them. In addition, potted plants or fresh flowers can introduce a touch of nature, freshness, and vibrancy to your shots. They can be placed on or near the furniture to connect with the outdoors.
While experimenting with different props can be fun, try to not get carried away with it by adding too many of them. People have different tastes and might not like what you’ve used. They might also start suspecting that you’re attempting to hide a flaw or a dirty spot. I suggest taking multiple photos with and without props.

You can’t just send raw images since they will have flaws that need to be removed, starting from color and lighting and finishing with background problems and unwanted objects that made their way into the shot. If you lack photo editing software, don’t know how to use it, or can’t dedicate the time necessary for proper photo editing due to the number of orders you’ve received,
I suggest you pass on that task to professionals. They can provide background enhancement or replacement, perform color correction, draw in natural shadows, and so on.
If you want to do everything yourself, then dedicate most of your efforts to two things – the background and colors. Clean up the background of your photos to get a more Amazon-friendly look. Learning the art of removing product photography background environments is extremely useful for producing photos suitable for all sales platforms, quicker page loading times, and getting extra attention from potential customers.
Don’t let a strange tint on your photos scare away clients. Quite often the camera can botch the white balance so make any manual adjustments when you notice something is amiss. Proper white balance will ensure your furniture photos look realistic and authentic without having to resort to picture post production.
If you decided to work on your images yourself from the first till the last step, you can save time by using special effects to apply simple changes in a single click. Color correction, white balance, color replacements, and other similar tasks will become a lot simpler with proper effects at your disposal.


