30 Tips for Taking Golden Hour Photography
When you purchase through affiliate links on our site, we may earn a commission. Here’s how it works.
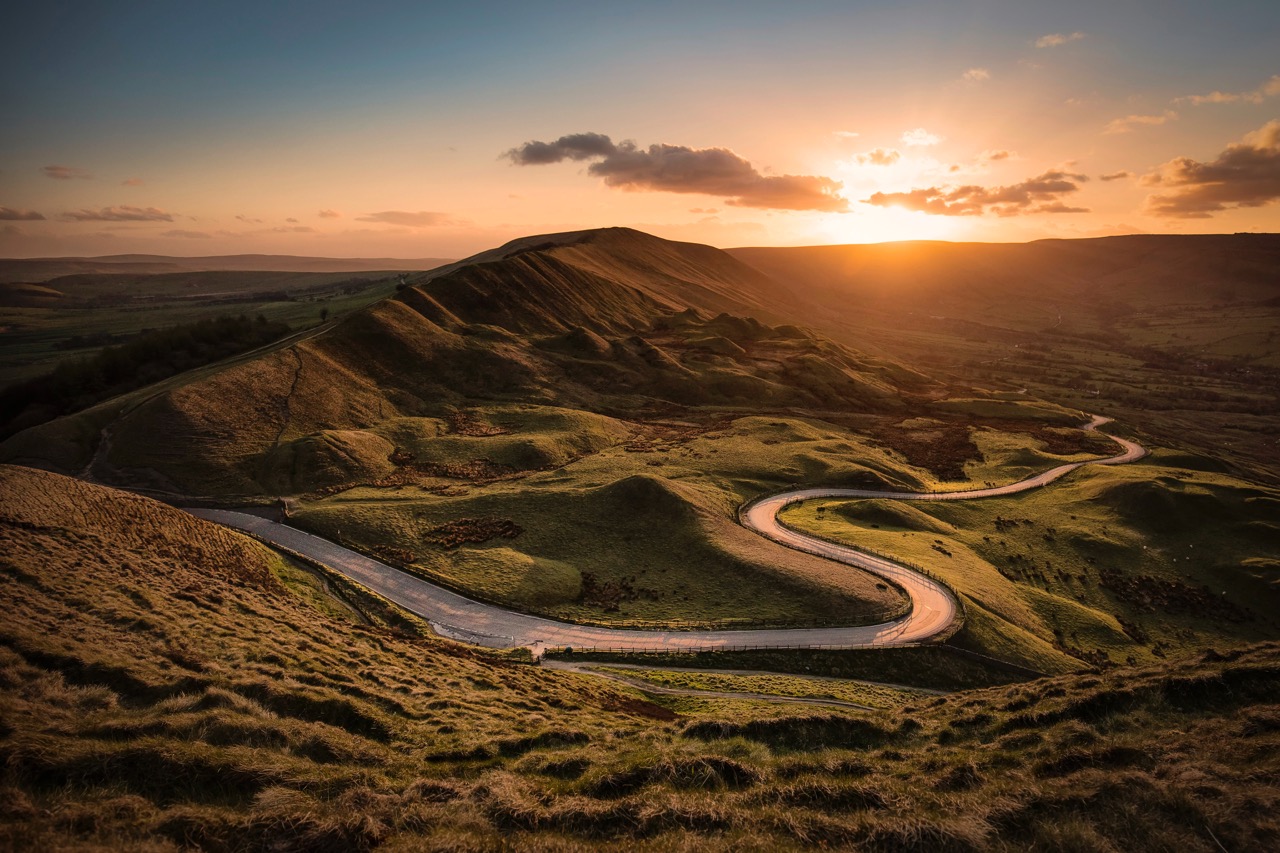
Golden hour photography takes place during the special hours, right after sunrise or before sunset. Unlike the harsh midday light, it directs soft and warm light at your model and casts the long dramatic shadows.
How can this sun’s position influence on your photos? If you are interested in trying golden hour photography, find all the necessary information below.
30 Golden Hour Photography Tips
Together with the blue hour, golden hour is sometimes referred to as magic hour. You get the high quality of lig hting that is beneficial to any type of photography: romantic couple or warm wedding portraits.
1. Learn the Difference from the Daylight

Golden hour:
- The easiest way to avoid extreme shadows or highlights
- Warmer shades of yellow and orange
- Dramatic long shadows
- Perfect light for portraits as it doesn’t cause the model to squint her eyes
- The streets and landscapes are emptier
- It lasts for a short while
Daylight:
- Intense light plus high contrast between lit and shaded areas
- Neutral light is bright
- Small or nonexistent shadows
- Models can’t tolerate such light without squinting
- Any location is bustling with life but it might be useful if you need a crowd
- There are at least several hours a day to shoot with it
- Read my tips about twilight photography.
2. Count the Time for the Golden Hour

To understand what is the golden hour in photography, you just need to know the specific position of the sun, which is from 4° below to 6° above the horizon. Naturally, in every geographical location, the timing of that position would be different. There are apps to help you find out the time.
Try Photographer's Ephemeris (Android, iOS), which considers your location and pulls together useful info that photographers should consider about the day or night light.
There is also Helios (iOS) for Apple devices which tells you the precise timing of the magic hours and the positions of sun and moon.
3. Plan Everything in Advance
Select a place to go and check it up beforehand. You can use the daytime to spot some objects that could benefit from the golden hour. Don’t try to fit too much in this short stretch of time. It is better to do more in one location than lose valuable time moving between two.
4. Take Care of the Weather

Examine weather forecasts and be on the lookout for clouds. If they gather over the horizon, you will have less time to do golden hour photography. But, considering the quality of the clouds, you might get even more beautiful pictures when the warm light is filtered by them.
For detailed hourly and long-term forecasts, use Dark Sky (iOS, Android) that has the additional AI weather prediction. It can be used on both Apple and Android, same as another great option called Carrot Weather (iOS, Android). This one also gives short- and long-term predictions supplied with funny quotes.
5. Come Early and Shoot Long
Don’t limit yourself in time, come much in advance to prepare everything you might need and plan better. Keep on shooting until the sun finally sets (or raises up too high). This will show you how colors and shades alter with every passing minute, following the movement of the disc.
6. Take Care of Shadows
It is an interesting challenge to incorporate the long dramatic shadows in the frame. While you’re doing that, keep an eye on some uncalled-for shadows that can ruin the effect. For instance, keep checking where you’re throwing one yourself to remain out of the picture.
- Check out my 20 shadow photography tips.
7. Choose the Right Time
The best golden hour for photography in your place can also vary. If you find yourself close to the east, the dawn will provide you with a better opportunity to exploit the light. Instead, on the west side, you would do much better with the dusk.
If you need help figuring out the exact position of the sun or moon at your location, install the skyPhysics (iOS) app which works online and offline. There is also SunSurveyor (iOS, Android) which works on both operating systems and can visualize how the lights and shadows would be cast on specific objects from your vantage point.
8. Experiment with Wide and Narrow Aperture

For photographing nature, try narrowing your aperture to f/14 or f/22 to obtain more depth of field. Naturally, this will require a slower shutter speed and a tripod for the camera to receive enough light and make the image sharp.
When you want a really strong bokeh, set the lowest aperture values (f/1.8 to f/2.8). If instead, you set it high, you will get more focus on the perspective of the shot.
Another thing that narrow aperture can do for you is to create sunstars. While doing magic hour photography, choose the perspective that lets the sun disc touch some object that could cover it, like a mountain or tree. In such conditions, the camera will create a large sunburst in the frame.
- Read my Bokeh Photography Guide.
9. Eliminate Motion Blur
After you set the aperture you plan to work with, pair it with a shutter speed that will reduce any risk of motion blur to a minimum. If your object is nature or a sort of still life, a low value around 1/125 should do well.
The livelier the composition, the higher the value will have to be, reaching and even overshooting 1/250 for running kids or moving cars. Also, don’t forget to increase your ISO to ensure the highest possible quality.
10. Use Slow Shutter Speed to Add Motion Blur

If there is nature with clouds or water sources in the frame, it will extend the former and smooth out the latter, creating a different atmosphere. This will definitely require a tripod. The particular setting will depend on the speed of the objects you’re shooting.
If these are cars or strong currents, several seconds will take them to move through the entire length of the frame and leave a trail of blur.
- Read my long exposure photography tips.
11. Keep Low ISO
Since you’re shooting with plenty of light spilling on the matrix, remain at the lower ISO levels, approximately at the 100-200 value.
If you see that the image is somewhat dark, compensate by widening the aperture. Obviously, when the light is insufficient because of the clouds or the time being far from the golden hour itself, raise the ISO.
12. Spot Metering Is Necessary

With this type of photography, underexposing is a real problem. So don’t forget to turn on the spot metering feature. This is especially relevant for taking backlit pictures like portraits.
If this feature is not on, you can get a dark photo with only an outline of your model. A typical DSLR camera would have a button on its body to change the mode. But there is always a point in the menu where you can set it, too.
13. Try HDR Technology
Often enough, objects (landscapes, architecture) have a varying degree of lighting intensity, which makes it hard to set one exposure that would capture complete tonal range.
You should definitely shoot with multiple exposures and then combine them in the picture editing software. As a result, you will bring out all the beautiful detail that gets lost when you try to compromise with the setting.
- Check out my list of Top 5 free HDR software.
14. Set Up the White Balance

When you do golden hour photography, set “shade” or “cloudy” for your white balance. Otherwise, the internal camera computer will try to compensate for the excess of yellow and pull the blues up, which defeats the whole purpose.
Alternatively, keep the auto mode and make the adjustments at the picture post-processing stage.
15. DSLR Camera Is Worth to Use

To really see the benefit of the soft sunlight, it is worth using a high-quality camera. With its help, you will see the little details in whatever things you’re capturing.
Prefer cameras that support the high dynamic range function. Such cameras will be able to record whatever is in the shadow and make it easier for you to edit shots on the computer.
- Canon EOS 6D has that particular function and is provided with 11 points for the autofocus.
- Nikon D7100 also has this function, with the number of AF points reaching 51 and 3D matrix metering.
16. Use Wide-Angle Lenses
For those passionate about nature, I strongly recommend to use at least a 24mm wide lens or possibly more. Although this is not necessarily relevant for golden hour portraits.
Since this time provides stunning shadows, they will look even more dramatic, together with clouds and other objects in a wide-angle lens.
Due to the kind of distortion that such lenses have, you can obtain interesting effects bundled with the magic hour qualities. Plus, such images will have more motion, more space in them and look softer.
If you’re interested, check out Canon EF 16–35mm f/2.8L III USM Lens or Nikon AF-S FX NIKKOR 24mm f/1.4G ED for stunning pictures.
17. Try Circular Polarizer

This filter normally goes over the lens opening and carries out several useful actions, like darkening the sky, reducing reflections and glares on shiny surfaces, blocking the flares and other similar issues.
It maintains the beautiful warm hues and lights, giving them more definition. Besides, it helps set a fixed white balance value. If you’re searching for options, I would recommend either an affordable Cokin P-Series P164 Circular Polarizer or a well-balanced B + W Circular Polarizer Kaesemann - XS-PRO, HTC, 16 Layers Multi-Resistant and Nano Coating.
18. Use ND Filters

Another necessary filter is the one that would help you set the right exposure for the landscape by balancing out the sky. It eliminates ambient light and helps even the exposure, which is indispensable for taking portraits with a wide aperture and low ISO.
You may use a Gobe ND1000 ND Lens Filter (2Peak) or Hoya PROND ND1000 Filter.
19. Bring a Reflector

Among the common golden hour photography tips is to take your reflector. You could really use one when taking portraits in this directed light.
Since the natural light is already warm, use the white or silver side of it. You can experiment with placement, raising the reflector over the head and creating downward shadows.
If you put some orange gel, the light from the flash will pour discreetly into the natural one.
- Read my tutorial on how to photograph with reflective boards.
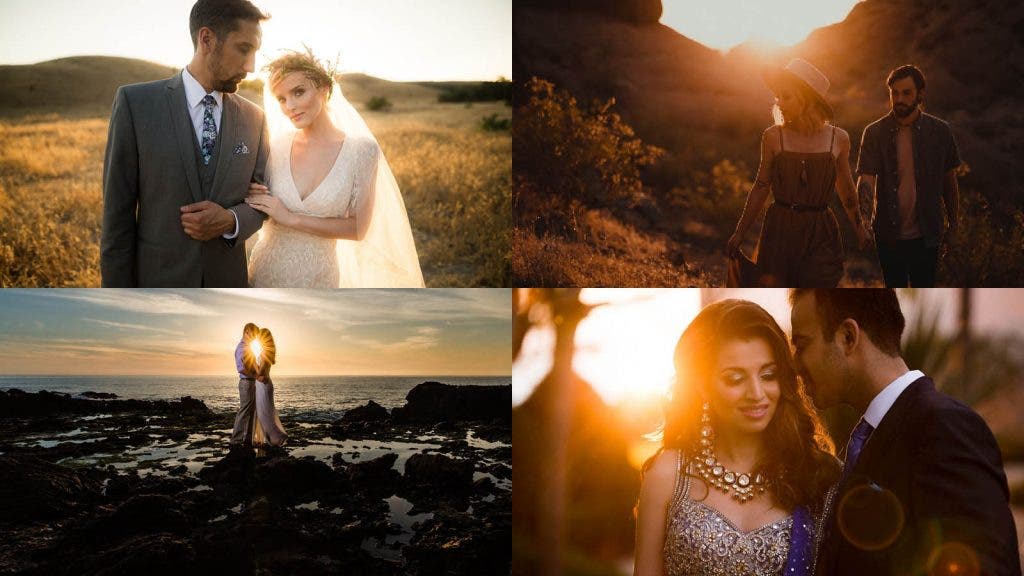
20. Make Front Lighting Images

The lighting gives a very warm feel to the images taken during this portion of the day. Therefore, when light from the sun can hit the model, it is well suited for portraiture. You can easily avoid strong contrasts and sharp shadows.
- Read my list of portrait photography tips.
21. Try Out Back Lighting

At this hour, the sun disc is easy to use as you would a backlight in a studio. The result of this technique is a touching soft glow and a hazy effect. Just select the proper exposure value and the result will look stunning.
- Take a look at my backlit portrait tips.
22. Enjoy the Effect of Rim Lighting

Another similar thing to practice during golden hour photography is the halo that can appear around whatever is in your focus. It shows the best results when you have a contrasting, dark background.
Prepare to spend some time searching for the right position and angle until you catch the halo effect. For a start, try getting closer to the ground. This effect is great for accenting the fur or fibers that animals and plants might have.
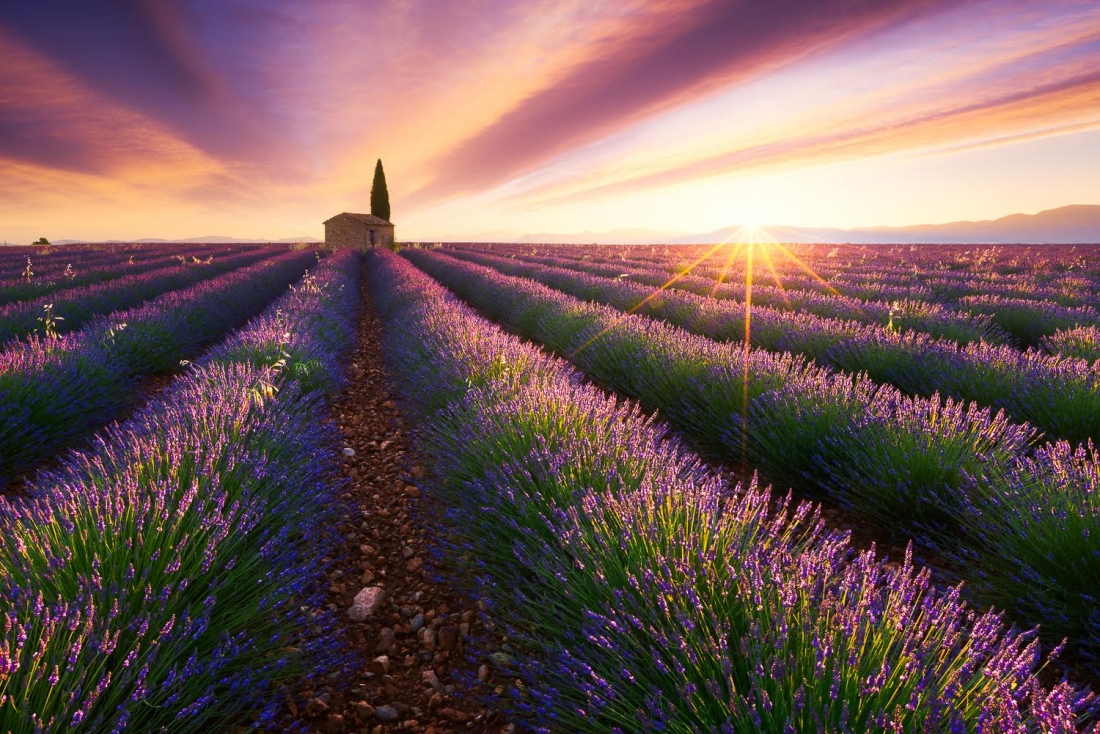
23. Catch the Sun Flare

This effect occurs when the light glides over the surface of the lens at a specific angle. The type of flare you get depends entirely on the shape and coating of your lens, which makes it fun to experiment with equipment.
24. Play with Lens Flare

A flare created by a ray of the sun reflected in the lens is not necessarily something that ruins your shot. In addition, the qualities of the equipment and location influence its shape and intensity.
25. Shoot a Silhouette

Such a photo can be obtained when you place your subject against a bright background and set the exposure so as to reduce details in the darker areas. It is easy to do with the later golden hour photos. Place what you’re shooting against the light and bring the contrast up when you edit the image.
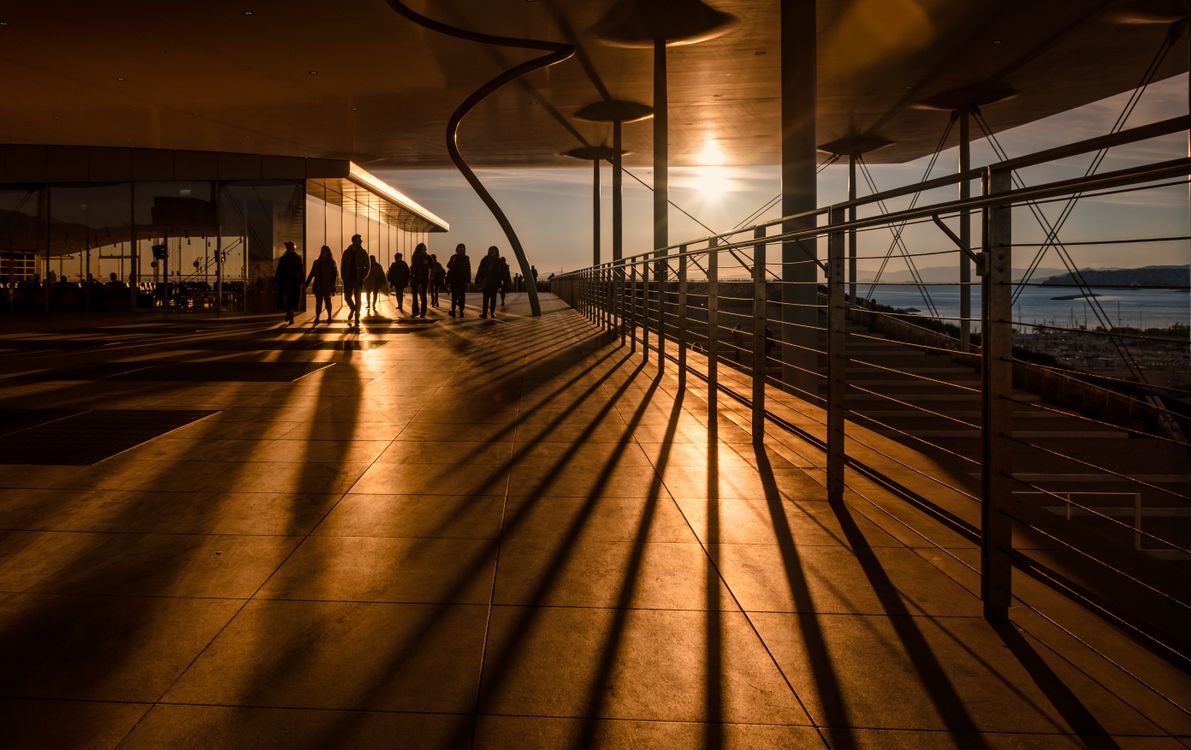
26. Shoot Buildings

Golden hour is a stunning period of time to do architecture photography. The sidelight strikes the structures in such a way that it emphasizes the depth and details. It is also a great moment to capture interesting reflections in the metal and glass elements of buildings.
- Get my urban photography tips.
27. Make Photos Inside

As the warm light of the magic hour reaches indoors as well, you don’t have to only work outside to exploit it. This might prove to be more challenging, so help yourself with a tripod for better results. Play with the exposure values, try bringing them up a stop or two for more detail in the dark areas.
28. Shoot Moving Objects

Warm and soft light during the golden hour is very helpful for long exposure and slow shutter speed values. Many things can be used to play with the motion blur, such as living creatures, cars, or elements of nature like water or clouds.
- Take a glance at my seascape photography tips and ideas.
29. Depict Morning Mist
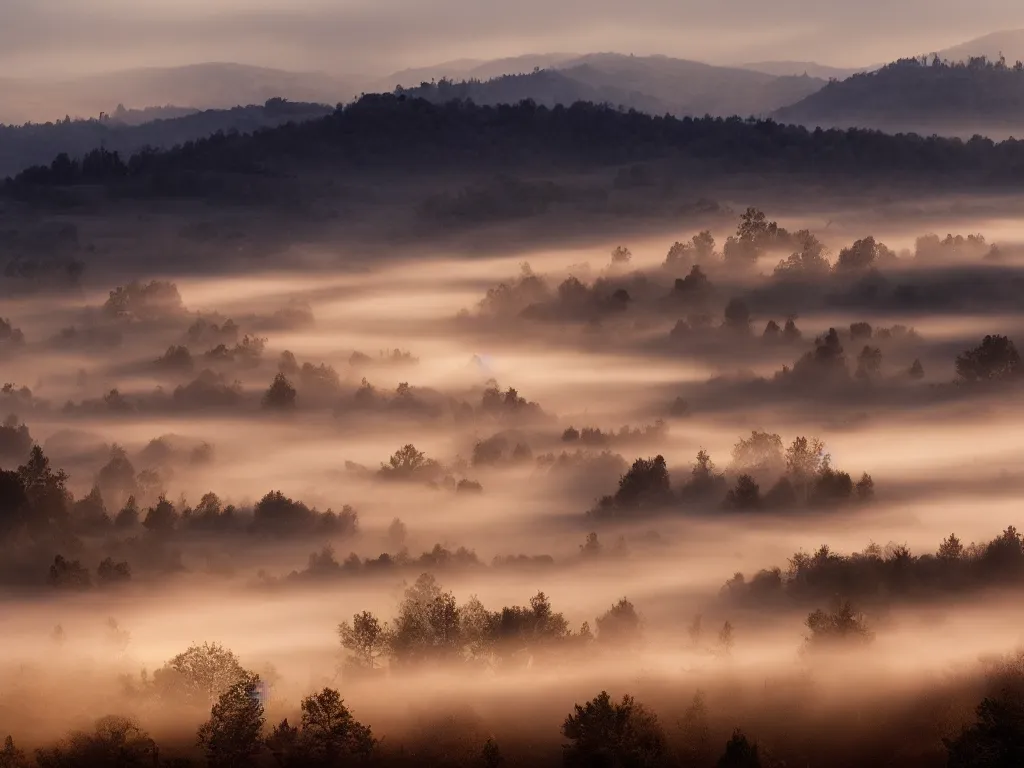
If you are an early bird and love nature, there are some stunning shots you can take. Just imagine the mysterious morning mist being lit up by the first rays of the sun. Or the shreds of clouds you can see below while climbing the mountains. All that beauty is yours to shoot.
30. Cloudy Light Is Also Good

Don’t get upset if the sky is somewhat overcast on the day you planned a session. The pictures can still turn out beautiful even in these conditions. They will simply have a softer light and more pastel colors in a dreamy atmosphere.
Freebies for Golden Hour Photography
Now that you know what is golden hour photography and how to do it, you can figure out which effects will be able to emphasize the beauty of such shots. Here are some fitting options.
Bright
This effect helps balance the image by darkening the outer corners and brightening the middle. Your image will look more vibrant and clearer. The preset is especially suitable for travel and nature images.
Soft Glow
The effect places highlights over the edges to bring the focus to the center of the frame. It works really well with the pictures taken during the golden hour.
Pastel Dream
With this Photoshop Action, you can fix the flaws in white balance correction and add a special golden glow to your photo.


