12 Flash Photography Tips – Complete Guide
When you purchase through affiliate links on our site, we may earn a commission. Here’s how it works.
Experienced shooters know that flash photography are not only a means to brighten the subject in the frame. It is also used to set up the mood, add emphasis to image elements and create special effects in the photo. That is why photographers often apply various flash photography techniques to convey the necessary message.
Top 12 Flash Photography Tips
If you want to know how to use flash to the fullest possible extent and achieve the best results, read the guide below. Master outdoor and studio flash photography following these tips.
1. Bounce the Light
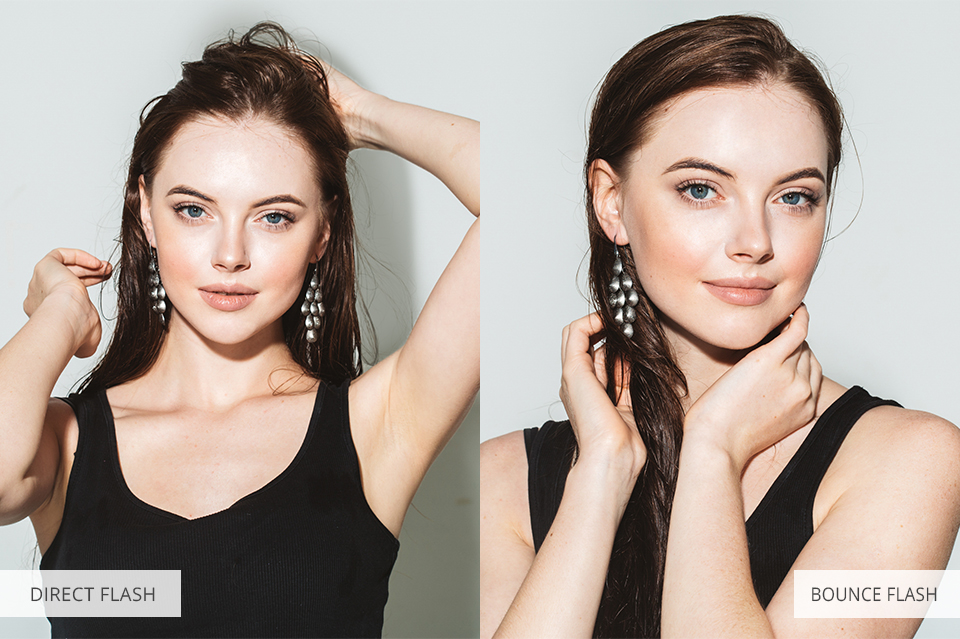
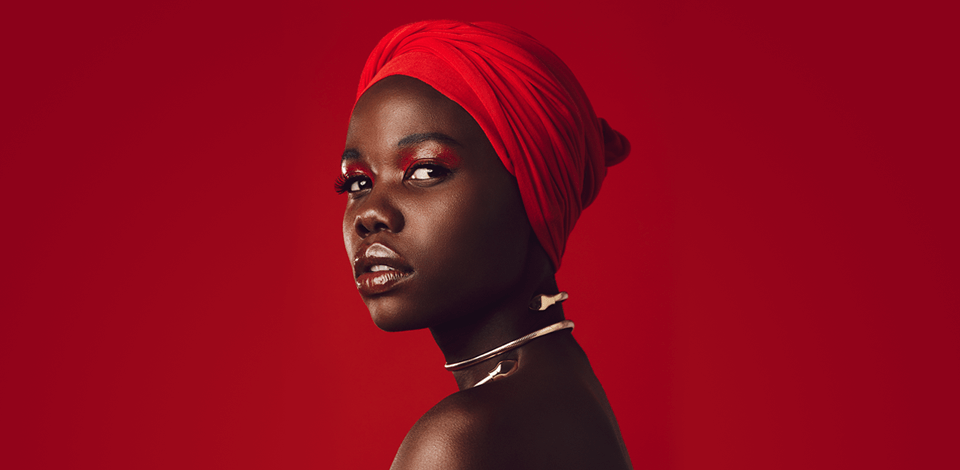
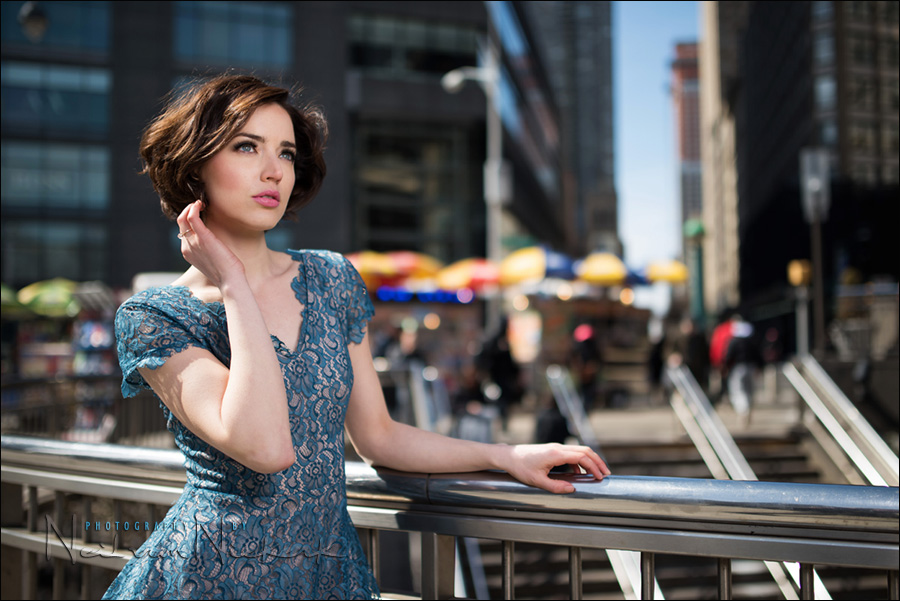
Working with flash, the first thing to remember is that you should never point the flash directly towards the necessary subject. No matter what flash you have, the cheapest one or the best camera flash, when you point it at a model or an object, it will create harsh, flat lighting and unsightly shadows in the photos.
The best way to effectively use the flash is to bounce it against another surface. It may be a neutral-colored wall, ceiling, or a reflective card on your flash. In such a way, you will create a bigger light source directing softer light to a subject.
2. Learn When to Use a Flash

Amateurish shooters tend to think that flash is used only when it’s dark or indoors. However, there are many other conditions where flash is recommended:
Getting rid of shadows from your photo. When you add an extra light source, you neutralize shadows by filling them in. Just locate the flash opposite the light source and you will get rid of shadows.
To use a slow shutter speed when photographing a moving subject. It is one of the flash photography tips that will help create a half-frozen impression.
Illuminating your subject more than the background to help isolate it. Adjust your flash photography settings so that the output is a lot more than the light in the background. In such a way, you will highlight a subject, making it brighter.
When the light is dull to bring color to scenes. Before sunrise, after sunset or on cloudy days, the light is very flat. Incorporate some flash and you will get colorful and lively images.
To counteract strong backlight. According to all backlit portrait tips, you should balance flash with backlighting to minimize the washed out look.
3. Use TTL Mode

Through-the-Lens (TTL) mode is very helpful when photographing in changing ambient lighting conditions. After activating this mode, the flash begins to communicate with the camera, which assesses the current light condition and the distance between the flash and subject to determine the necessary flash power to light the scene.
It is an ideal solution for almost any lighting condition and may be combined with bounce flash photography techniques.
4. Use the Flash Exposure Compensation
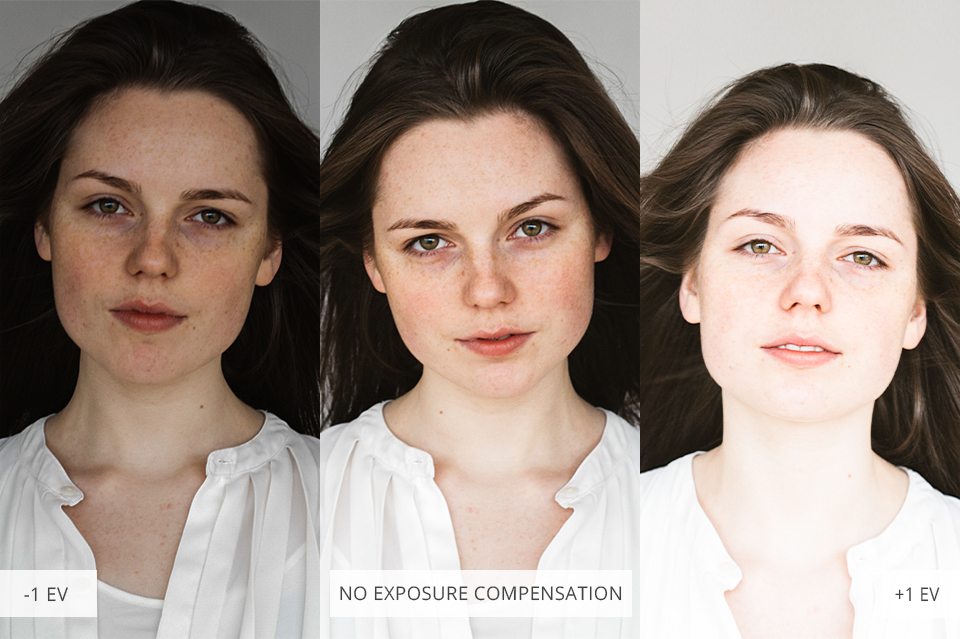
When a TTL mode is activated, it happens that the power output is set incorrectly.
It depends on the metering and the tones present in the scene. If the shot is too light, set the flash exposure compensation to underexpose eg. -1.0. If it’s too dark, set it to overexpose eg. +1.0. Flash exposure compensation can be set in 1/3 stop increments.
5. Turn on High-Speed Sync/Auto FP
If you are a fan of fast-shutter-speed shootings, you should know that there is such a thing as maximum flash sync speed. It is the fastest shutter speed that will remain in sync with your flash. Depending on your camera model, going beyond 1/125 or 1/250 will leave large areas of black in your final image thanks to the shutter blocking the image sensor mid-exposure.
Your cam’s native sync speed doesn’t work well with your flash because the flash duration is shorter than fast shutter speed exposures. So, when you turn on the High-Speed Flash Sync (in Canon models) or Auto FP (in Nikon cameras), the flash fires in the exact moment the sensor is fully exposed, and it also fires longer.
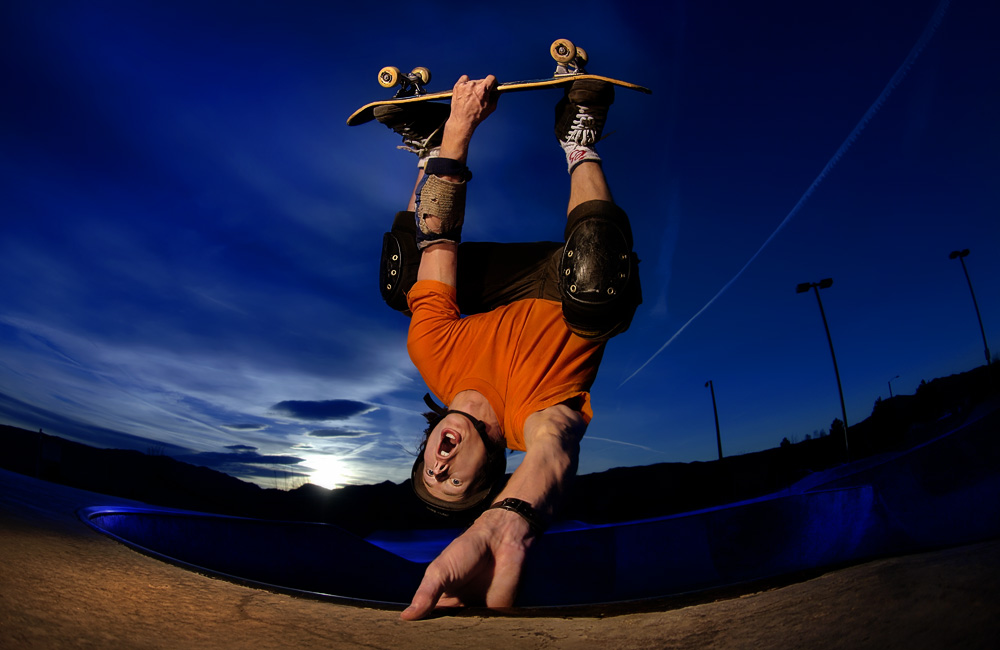
6. Use Ambient Light
One more thing that will show you are not a professional is the dark tunnel effect in the frame. It happens when you misuse your camera flash. For example, the camera is exposing well enough for the flash illuminated object, but there isn’t enough surrounding light.
If you let the ambient light into the frame, your subject will be placed in the context and the photo will become an atmospheric one. Therefore, to achieve the best results, you should activate a manual mode on your camera.
In such a way, you will manually determine shutter speeds and achieve exactly the amount of ambient light you want in the frame. I believe that shutter speeds of 1/15-1/40 second are the best for most environments, including outdoors at night.
7. Use the Inverse Square Law
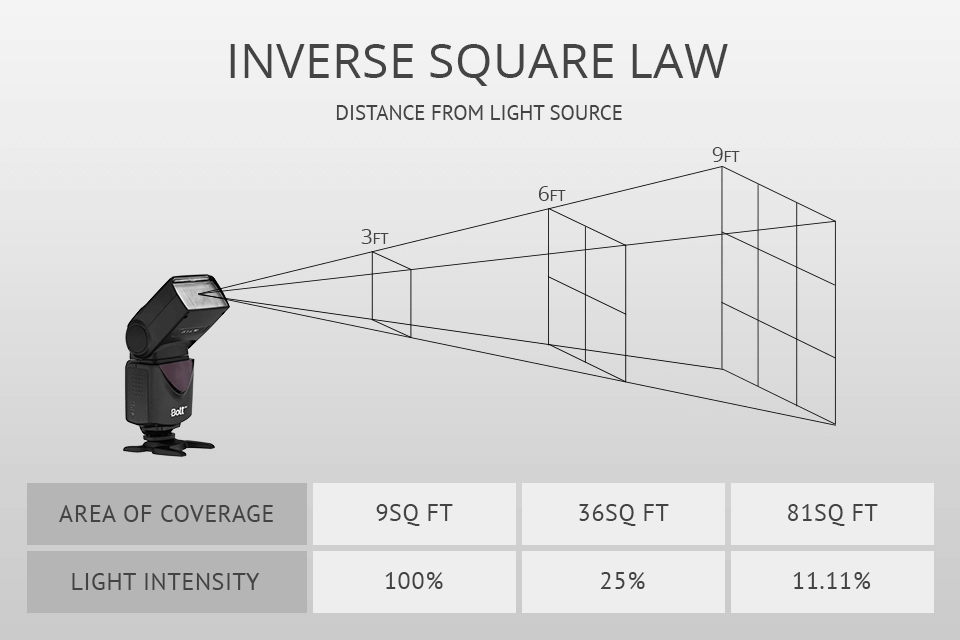
The further the light gets from the source ‒ the more it diminishes. It is not noticeable with the sun because it is far away. It’s really different when it comes to the flash. The effect is different the further your flash is from the subject. It is the inverse square law.
For instance, you are one meter away from your subject. You will need half the output of light from your flash than if you were two meters away.
All of us saw images when a shooter had the flash too close to the subject and it was overexposed. To avoid such mistakes, move back and use a longer lens.
8. Buy Rechargeable Batteries for Your Flash
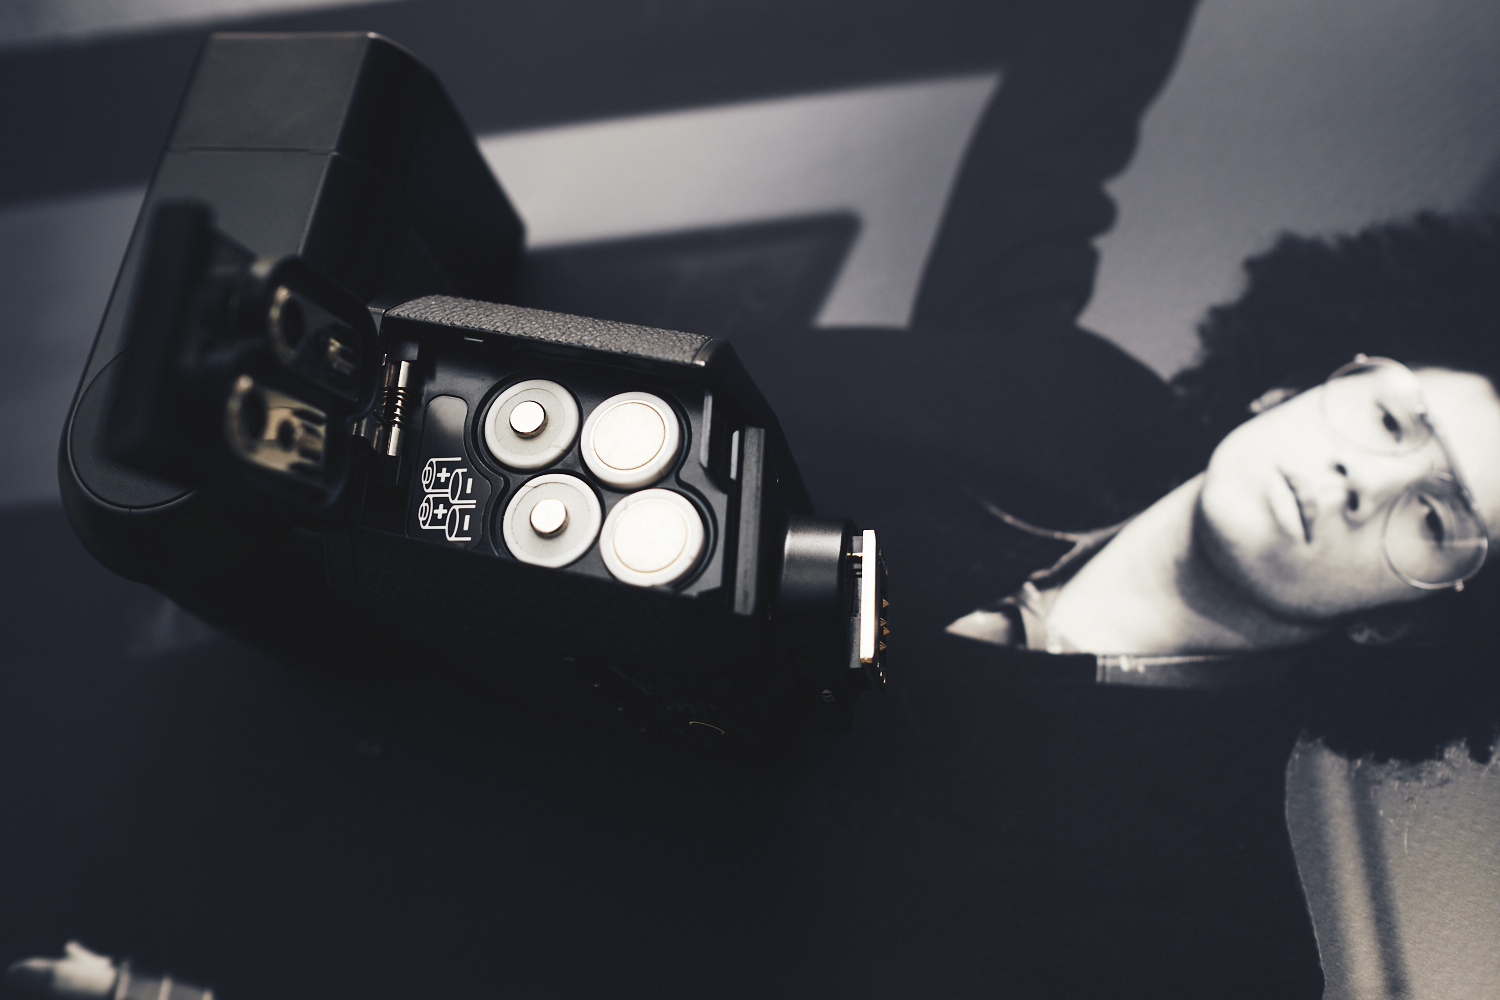
If you want to save your money and time, buy rechargeable batteries for your flashes. The price is not the cheapest one, but after you use flash several times and change numerous sets of batteries, you will see that rechargeable ones are a better solution. Moreover, they have stronger and longer charge so it is more convenient to work with them.
9. Use Flash Gels


Flash gels are used in two cases ‒ if you need to balance color temperature or add fun hues to your photo. They are attached to the flash to add a colored tint to the light that it emits.
They are usually applied not only to produce creative effects but also to balance the color of the flash and the ambient light. As a rule, room lights have a different color temperature than the flash and it is important to match the light temperatures. So, flash gels are frequently used in flash photography techniques to make the image realistic and natural-looking.
However, you may play around with lighting equipment using DIY photography lighting and color gels, with the help of cellophane.
10. Use Light Modifiers
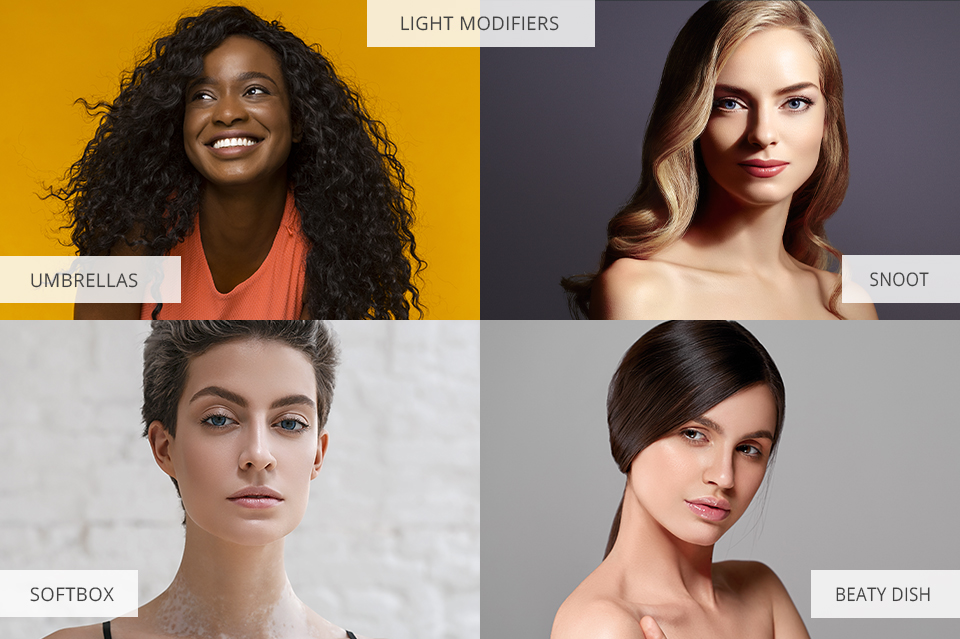
Light modifiers are used to make the light softer and control the way it spreads from the light source to the model or necessary object. In such a way, they manage the behavior of light.
You see, light from the flash is “hard” and it produces strong shadows and contrast. If you want to improve your studio photographs, this piece of flash photography equipment is a must-have.
There are different light modifiers available on the market today: Light Shapers (barndoors, snoots); bouncers, reflectors; diffusers (softboxes, umbrella diffusers) and studio lighting kits.
11. Use Multiple Flashes
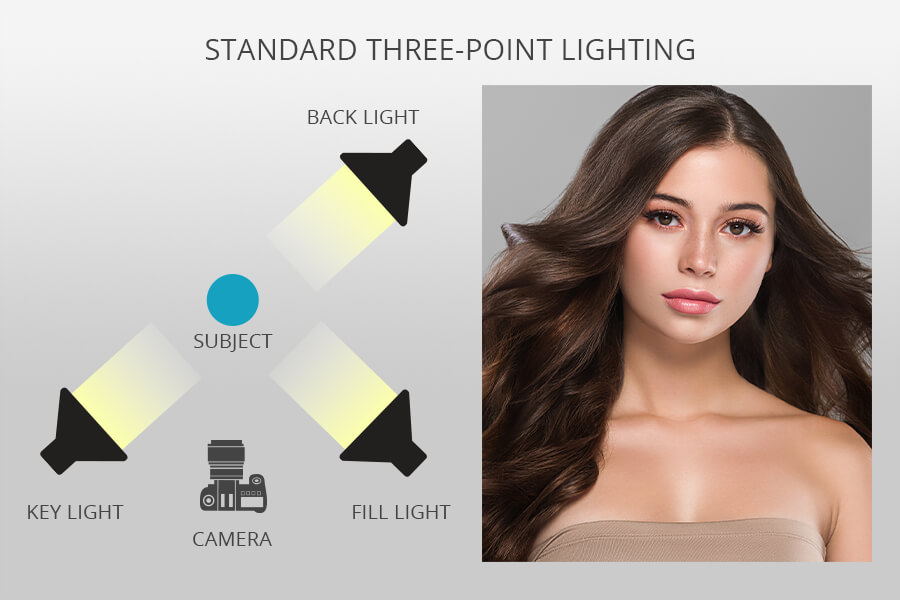
If you want to create a three-dimensional light effect, you may use more than one flash to illuminate your model. However, to do this, you should know how to work with such flash photography equipment as multiple wireless flashes and be able to sync them with your camera directly or via a wireless transmitter.
To create a studio-quality three-point lighting setup, a key light should face your subject and be positioned close to either side of the camera. A fill light should face your subject and be positioned near the other side of the camera.
A backlight should be behind the subject, creating subtle highlights and separating the subject from the background. For a two-point setup, you may use the fill light/backlight with the key light.
12. Learn Popular Lighting Setups
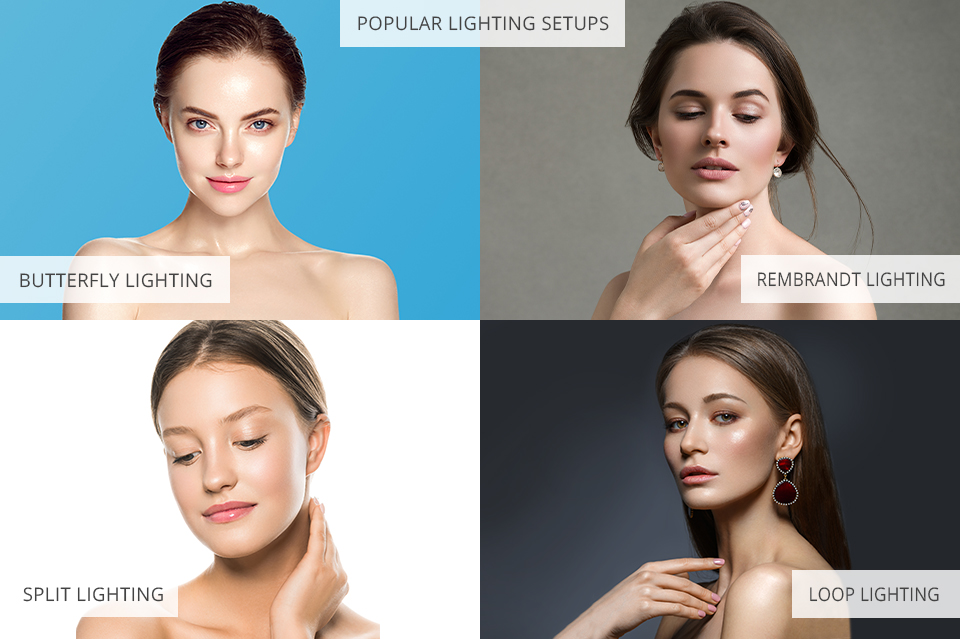
Speaking of classic portrait photography, I may distinguish four common portrait lighting patterns. If you want to improve your flash skills and learn more about studio photography, check out these flash photography techniques:
Butterfly Light. It is a setup when the key light is placed above and directly centered with a model’s face. In such a way, a small, butterfly-shaped shadow is cast under the model’s nose.
Loop Light. If you use this setup, the subject should be lit from about 45 degrees in front of them and above. It creates a nose shadow that “loops” down at an angle onto their cheek.
Rembrandt Light. Rembrandt lighting in photography creates a small inverted triangle of light on the subject’s cheek that is opposite the light source.
Split Light. It is a setup when the key light is placed to the side, which splits the face exactly into equal halves with one side being in the light, and the other in shadow.
Freebies for Flash Photography
Go on reading and you will learn how to boost your productivity and achieve eye-catching results in several mouse clicks! Apply these Lightroom and Photoshop freebies to add professional touches to your images.
Bokeh
If you want to make your photos shining and atmospheric, this collection is exactly what you need. These white bokeh overlays will be ideally suitable for wedding shots. Apply wonderful silver effects and your images will shine with romance.
Fashion
Involved in fashion or lifestyle photography? If yes, then this bundle is exactly what you need. Apply these presets to improve the white balance, color and contrast, making the photo juicy.
Black and White
It is an ideal collection to add classic touches to your images. You will easily correct any color-related drawbacks or some flash issues.
Clouds
With these overlays, you will make your images more dramatic. In a matter of seconds, thick gray clouds will appear in the frame. Or you may also enhance the image with fast floating ones.
Matte
This collection is a great solution for wedding outdoor pics. In several mouse clicks, your images will become creamy and soft. Apply these presets and you will take the viewers a few decades back, creating a vintage atmosphere.


