What Is Spot Metering in Photography

If you shoot scenes with uneven light levels or objects with high contrast, spot metering can improve the results of underexposed or overexposed shots. It isn’t always possible to achieve the desired level of illumination for the entire shot using exposure compensation. That’s why I suggest using spot metering for better control.
Spot Metering in Photography Definition
Metering in photography is a system for determining the correct shutter speed and aperture by the camera’s exposure meter, depending on the amount of incoming light and ISO. Today, every DSLR features an integrated exposure meter that automatically measures reflected light and determines the optimal exposure.
Depending on the area and the measurement algorithm, there are several basic measurement modes used to measure the brightness of the scene and set the exposure.

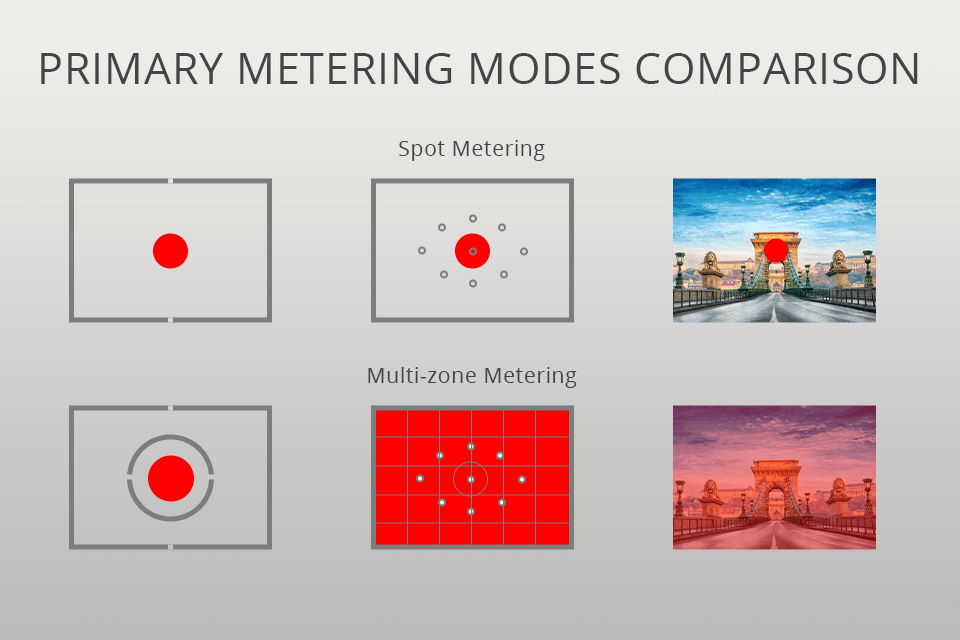
Spot metering is one of the metering systems and an excellent auto function that can preserve exposure if you are photographing an object on a dark or light background. While the estimated (or matrix) measurement and weighted average measurement account for most of the scene, point measurement mode provides a tool for measuring only that part of the scene or focal point which you, as a photographer, consider most necessary for lighting.
Instead of multiple measurement zones or the entire scene at once, the camera’s spot meter takes a tiny area of the image, no more than 5% of the viewfinder area, depending on the specification, and evaluates the light only around a given point, ignoring everything else. It is worth noting that this function is not available in auto mode since it is also a partially automated process. The spot meter offers the greatest control in manual mode.
When to Use Spot Metering?
Spot metering technique is suitable for fixing exposure in high contrast conditions, so as not to average the lighting. Using this mode ensures that the camera properly sets the priority object, not the background. Portrait photography on a contrasting background is an excellent field of activity. Examples also include actors in a theatrical setting, photograph the moon and other bright celestial objects, wildlife animals on the snow, etc.
It is possible to apply this mode in situations with bright highlights and shadows, with uneven and non-standard lighting conditions, according to the type of reflected light. Spot metering saves time when you photograph in the sun and can’t achieve the desired view using the exposure compensation tool.
For instance, if a backlit scene (a man with the sun behind him) turns your subject into dark silhouette photography or light spot, you can achieve high object detailization with this mode.
The trick is to place the accounting point area in the desired part of the object or background. As with most measurement systems, the resulting exposure will be based on the average tone (high-tech cameras use more complex calculation algorithms, even taking into account the distance to the object). In fact, the specified area should be what you wish to achieve as the middle tone.
So, if you place a spot meter on the face of an object in a dark portrait, it will probably get the proper exposure. However, in case you capture a section of the brown eye, you will receive a darker tone. If you still get overexposed or underexposed parts when using the spot metering mode, don’t hesitate to set a different positioning point. In many modern models, it may not coincide with the center of the lens or the autofocus point.
Spot Metering Setting

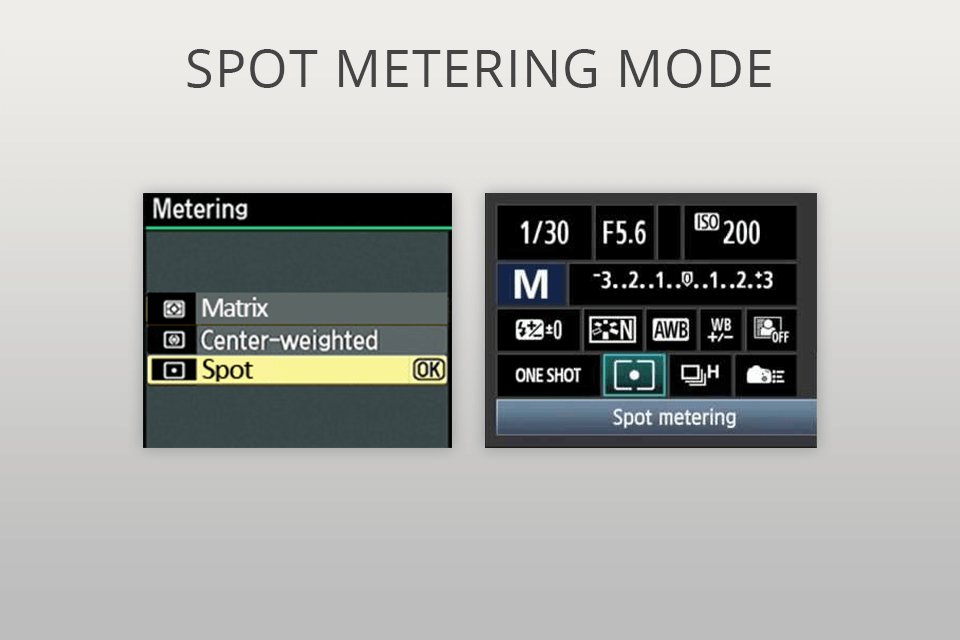
Settings and configurations of a spot metering mode vary by manufacturer and even by model. Every interchangeable lens camera and the majority of compact camera models will feature a Metering menu with a list of measurement mode parameters in its system (shooting menu, information, typically on the first page among other standard ISO settings, white balance). Spot metering on all cameras is equally indicated by a small dot in the center of the measuring display.
The button for switching Metering modes is often located on the back of the camera or above the LSD display. You need to press it until you select the Spot mode. Professional cameras feature a separate button, like spot metering Canon, on the top dial, input dial or metering mode switch. All this information is found in the user manual of your camera. There you will also be able to discover the type of point measurement system: determining the meter only in the center or determining the counter with a focus outside the center of the frame.
Picking a Point Position
By default, the spot meter is located in the center of the viewfinder. It is possible to modify the location of the focus point to the desired measured light with the approval of the specification.
If you are lucky enough to be able to modify the location of the control point regardless of the center, you need to half-press the shutter button after picking the point measurement mode. Then, the device will measure the light and modify the exposure.

If the camera’s spot meter is always in the center of the image area, you will have to use the exposure lock. When the measured point isn’t the center of the image, you need to modify the layout after the measurement.
The meter keeps the exposure you are locked in at least until you release the shutter button. Exposure lock ensures that your exposure is locked after you have measured the scene, before you recompose the shot.
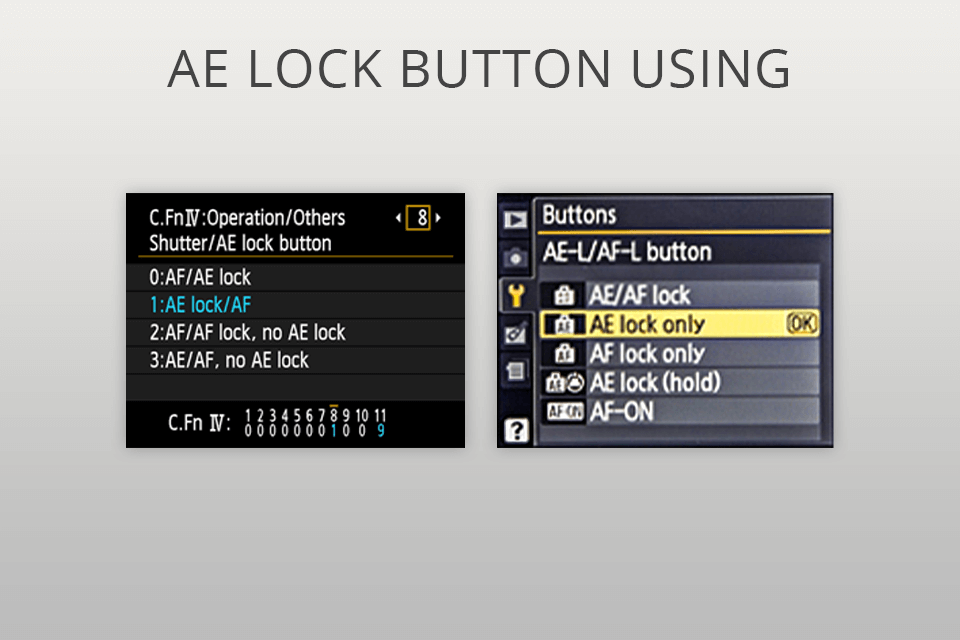
Some cameras will keep the measured values until the exposure lock is disabled. But in most cases, the measurement will change even if you have half-pressed the shutter button. You need to lock the exposure using the auto-lock button (AEL or AE-L for Nikon or the * symbol for Canon) so that the settings stay the same when you change the frame. For this reason, manual mode is best in cases when you apply spot metering, particularly if you are using the focus button.
So, focus on the subject, press the shutter button halfway, and then the exposure lock button. After that, you can restore and take a picture.


