How to Photograph the Moon: Equipment, Camera Settings & Tips
When you purchase through affiliate links on our site, we may earn a commission. Here’s how it works.
If you have ever tried taking pictures of the moon, you know that it isn’t a simple task and the results may often turn out disappointing. This is a sub-type of astrophotography and it requires certain skills to produce sharp images with the moon being clearly defined and of proper size.
I have written this article to help beginner photographers understand how to take pictures of the moon and find inspiration for more creative shots.
Moon Photography Guide: 25 Tips
I’ll try to cover all the nuances of shooting at night, from equipment, settings, techniques, professional secrets to night photography ideas that are easy to implement and receive striking results.
1. Use a DSLR Camera
I recommend investing in DSLRs that come fully equipped for this type of shooting and allow you to change the settings manually. Actually, you can alter such parameters as ISO, exposure, f-ration and more.
These settings are of primary importance when you try to take crisp images of something as bright as the moon.
My favorite DSLR is Nikon D850, which showed remarkable results during testing and can be called the best camera for night photography.
2. Pick a Zoom Lens
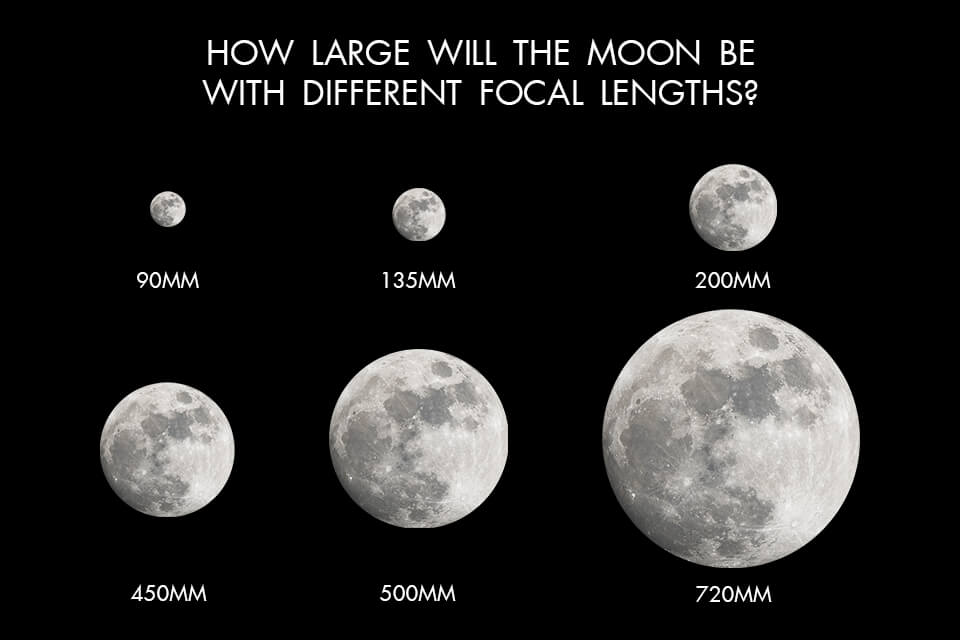
If you have already tried your hand at moon shooting and got an image in which this celestial body looks dim and too small, you probably used a lens with insufficient focal length.
Beginner photographers often choose a wide-angle lens for astrophotography as their main optics and this is a really big mistake, since the object you are photographing appears miniature, especially if it is located at a large distance.
To get a close-up photo, you need a lens with a minimum focal length of 200mm. Longer lenses enable you to get even more detailed moon photographs. Sigma 150-600mm is a good option for this type of shooting.
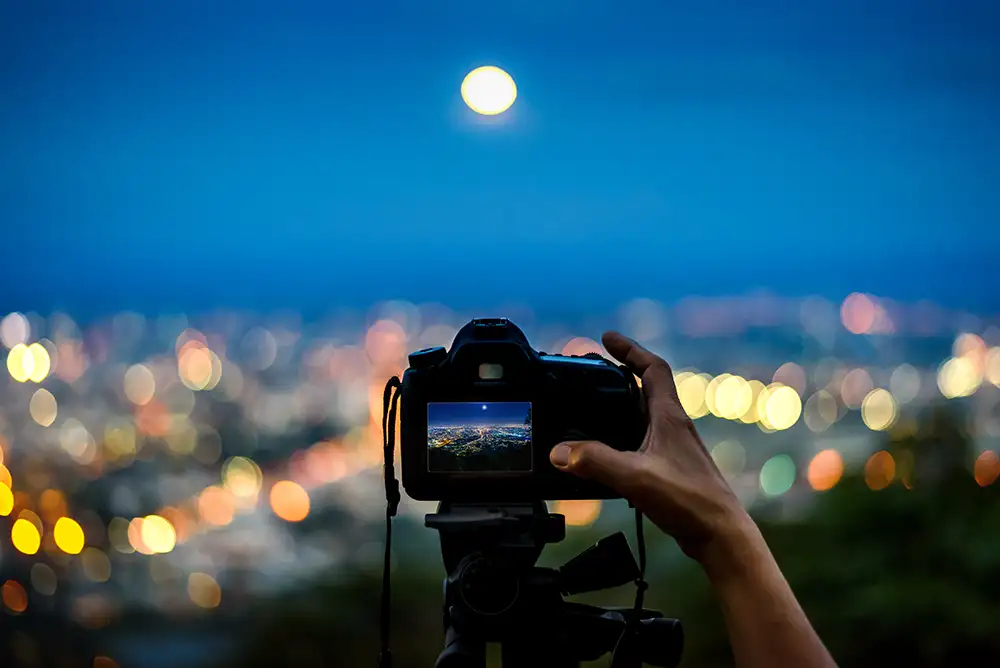
3. Use a Tripod
Shooting the moon, you need to stay absolutely motionless to capture all those mesmerizing lunar details. Of course, it isn’t possible, since your hands get tired quickly. That’s why, I recommend buying a stable tripod and mount your camera on it.
If you can’t afford to purchase it straight away, you can try resting your camera on a rock or ledge, but make sure it is secure. Since you will have to move a lot, it makes sense to look through the backpacking tripods, and choose the most suitable option. Gitzo Traveler Series 1 GT1545TUS seems to be a good value for money.
4. Set a Wireless Remote
I can’t say that this is a must-have for moon photography, but a remote control helps minimize the camera jitter and this greatly affects the results. There are both wired and wireless remote triggers, so choose the one you like most.
I am fully satisfied with Canon RC-6 wireless controller. If you don’t have money to buy a remote control, you can use an alternative stabilization method – enable the self-timer function on your DSLR.
5. Set Low ISO

6. Use the Looney 11 Rule
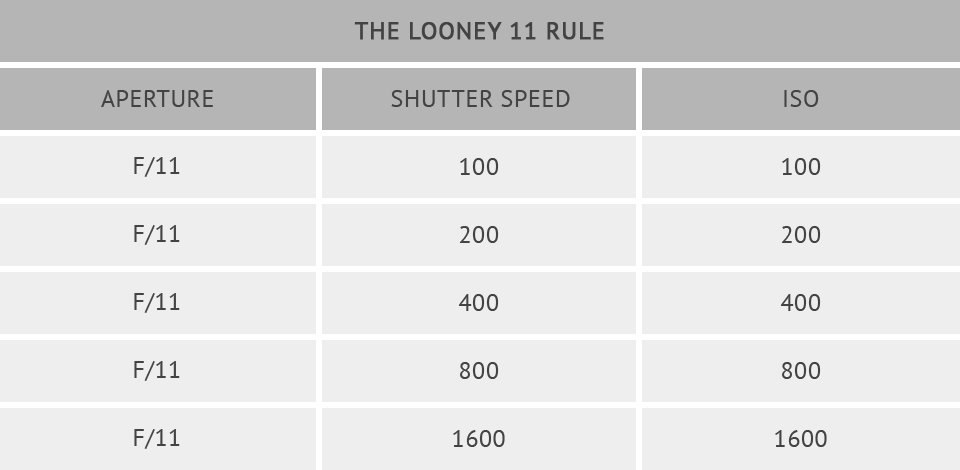
When it comes to moon photography settings, there is a great tip to memorize. It is called the “looney 11 rule” and it states that you need to set aperture to f/11 and the shutter speed reciprocal of the ISO setting to take astronomical images of the moon’s surface.
For instance, if you’ve chosen ISO 300, then the shutter speed should be 1/300 seconds. This rule helps to define correct exposures even without a light meter.
7. Choose Fast Shutter Speed
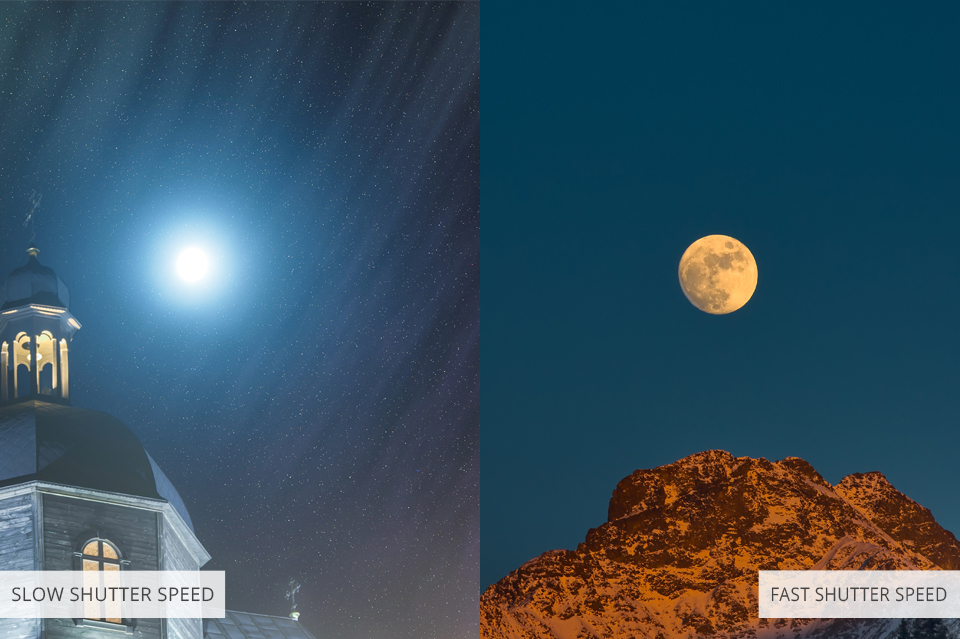
The moon moves around the Earth at a speed of 2.290 miles per hour. Though it isn’t always possible to track its trajectory, this satellite changes its position all the time and if you want to take sharp moon photographs, make sure you have chosen fast shutter speed. Stick to the values in the range for 1/125-250-seconds to be on the safe ground.
8. Use Proper Aperture
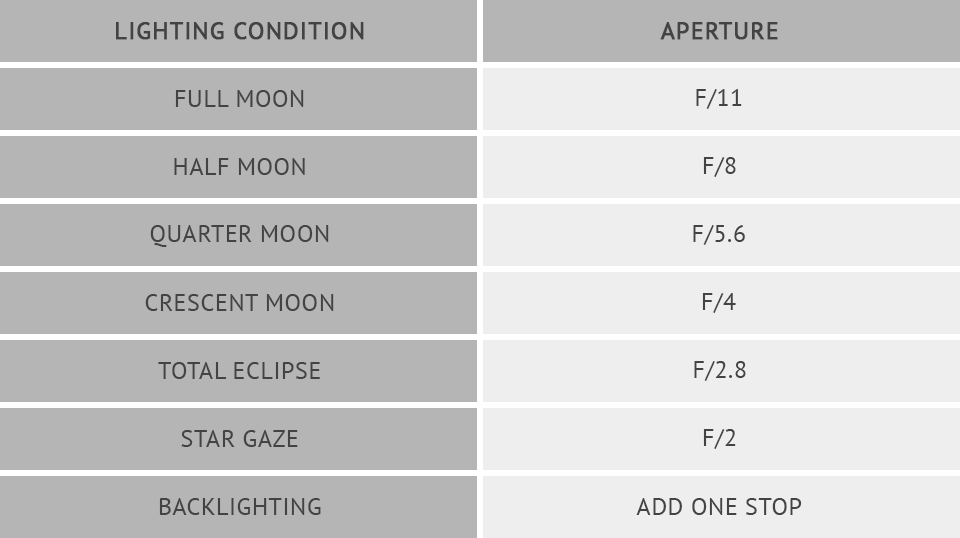
Looney 11 rule can serve as a general guideline, but in most cases, you need to set the aperture in accordance with the lunar phases. When you are taking images of a total eclipse, you need the widest aperture possible to let in more light, and f/11 is perfect for shooting the full moon.
Use the tablet presented above and you’ll never face difficulties setting the right aperture.
9. Only Manual Focus
Most DSLR cameras are supplied with a rather accurate autofocus, but since you have to photograph at night, it may fail to work as it is intended. That’s why, I highly recommend switching to the manual focus and fully control the way your camera defines the object.
Once your lens is set to manual focus, move the focusing ring to infinity. However, those just learning how to take photograph of the moon, may be misled by the camera, which keeps focusing beyond the infinity, so finding the exact point, which is ideal for your lens may be complicated.
10. Shoot RAW
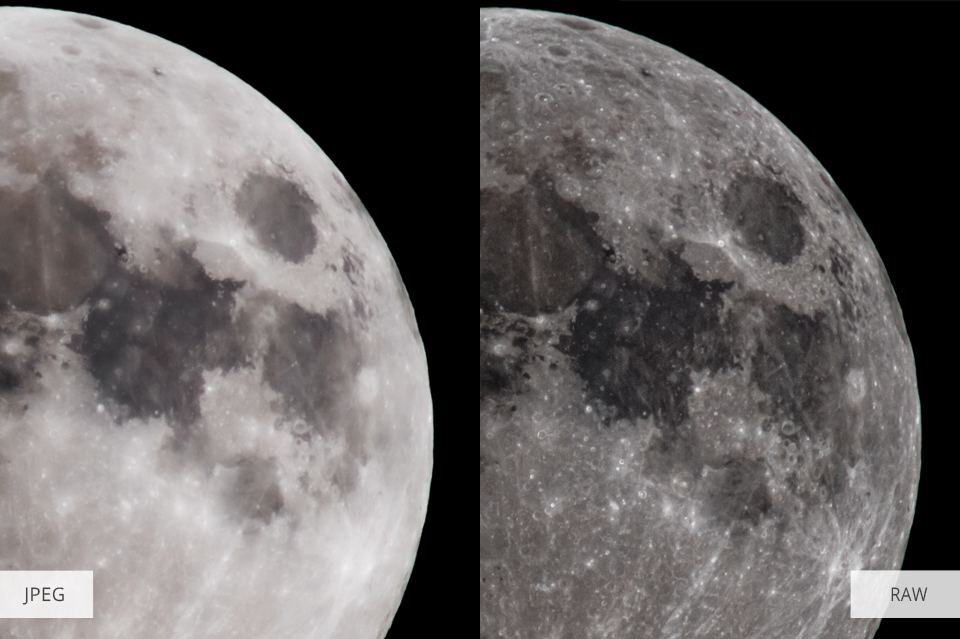
Taking big JPEGs is appropriate for some photography genres, but when it comes to moon photography, you will need to improve your images in a special program, so shooting in RAW is a more reasonable decision. RAWs save more details, which you can extract while editing moon photographs.
However, RAW files occupy more storage space, so you need to purchase the best SD cards for DSLR, which is capacious and fast.
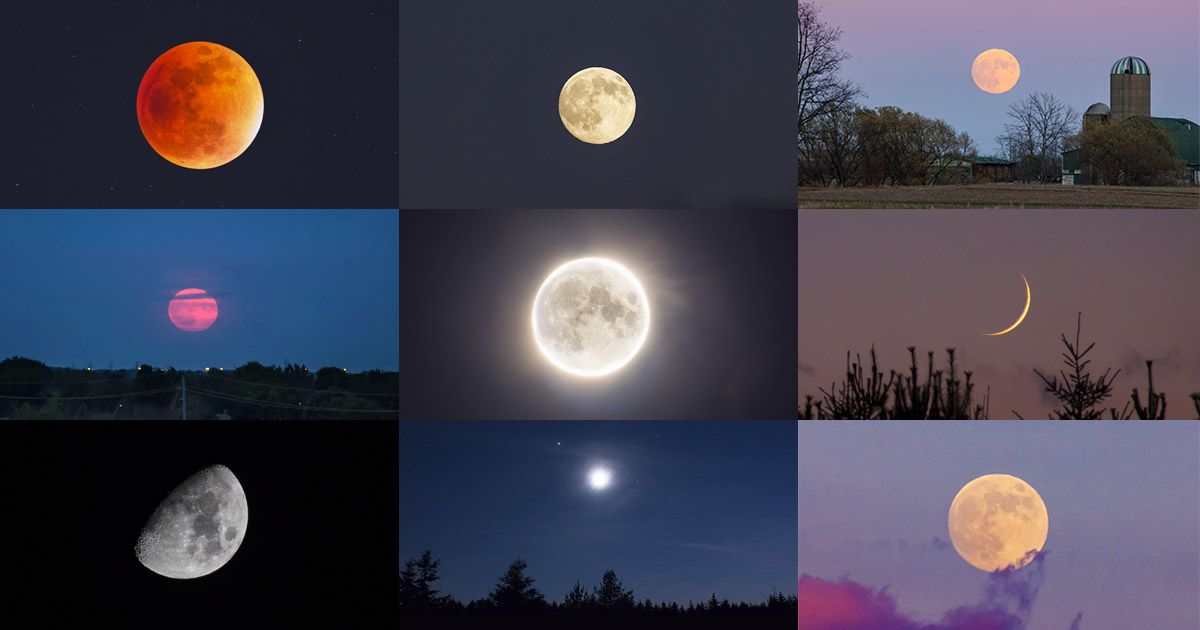
11. Learn About the Moon Phases
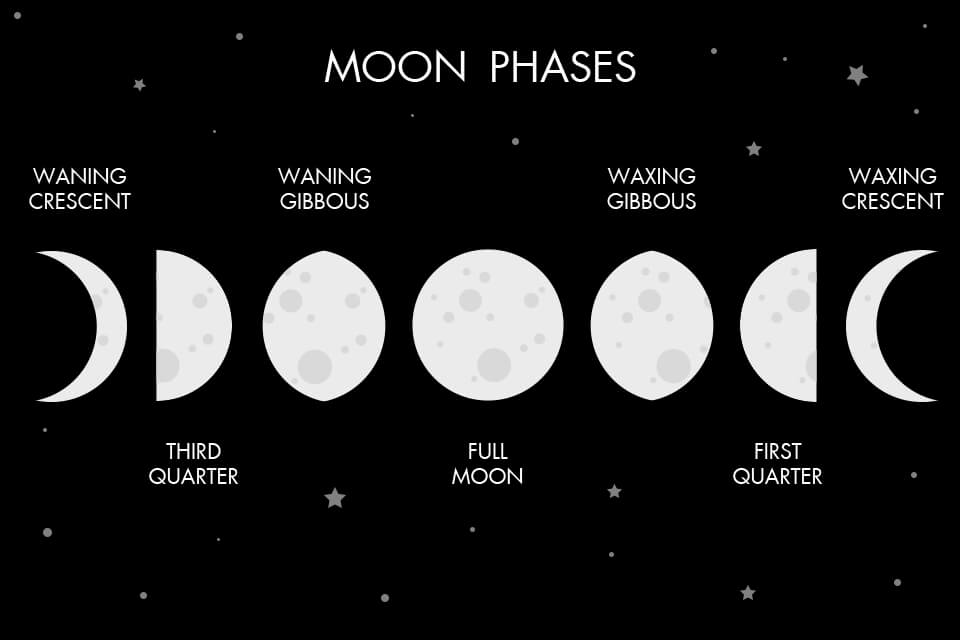
In total, there are 8 moon phases, which largely affect the way the moon looks. They are defined by the moon’s age and illumination and results in varied shapes and a number of visible details.
Throughout the year, you can see the moon at different times of the day.
So, before you grab your camera and start shooting, you need to decide what moon phase you want to photograph and when you can do it. No need to perform all the calculations manually, as there are handy night photography apps that can provide you with the necessary info.
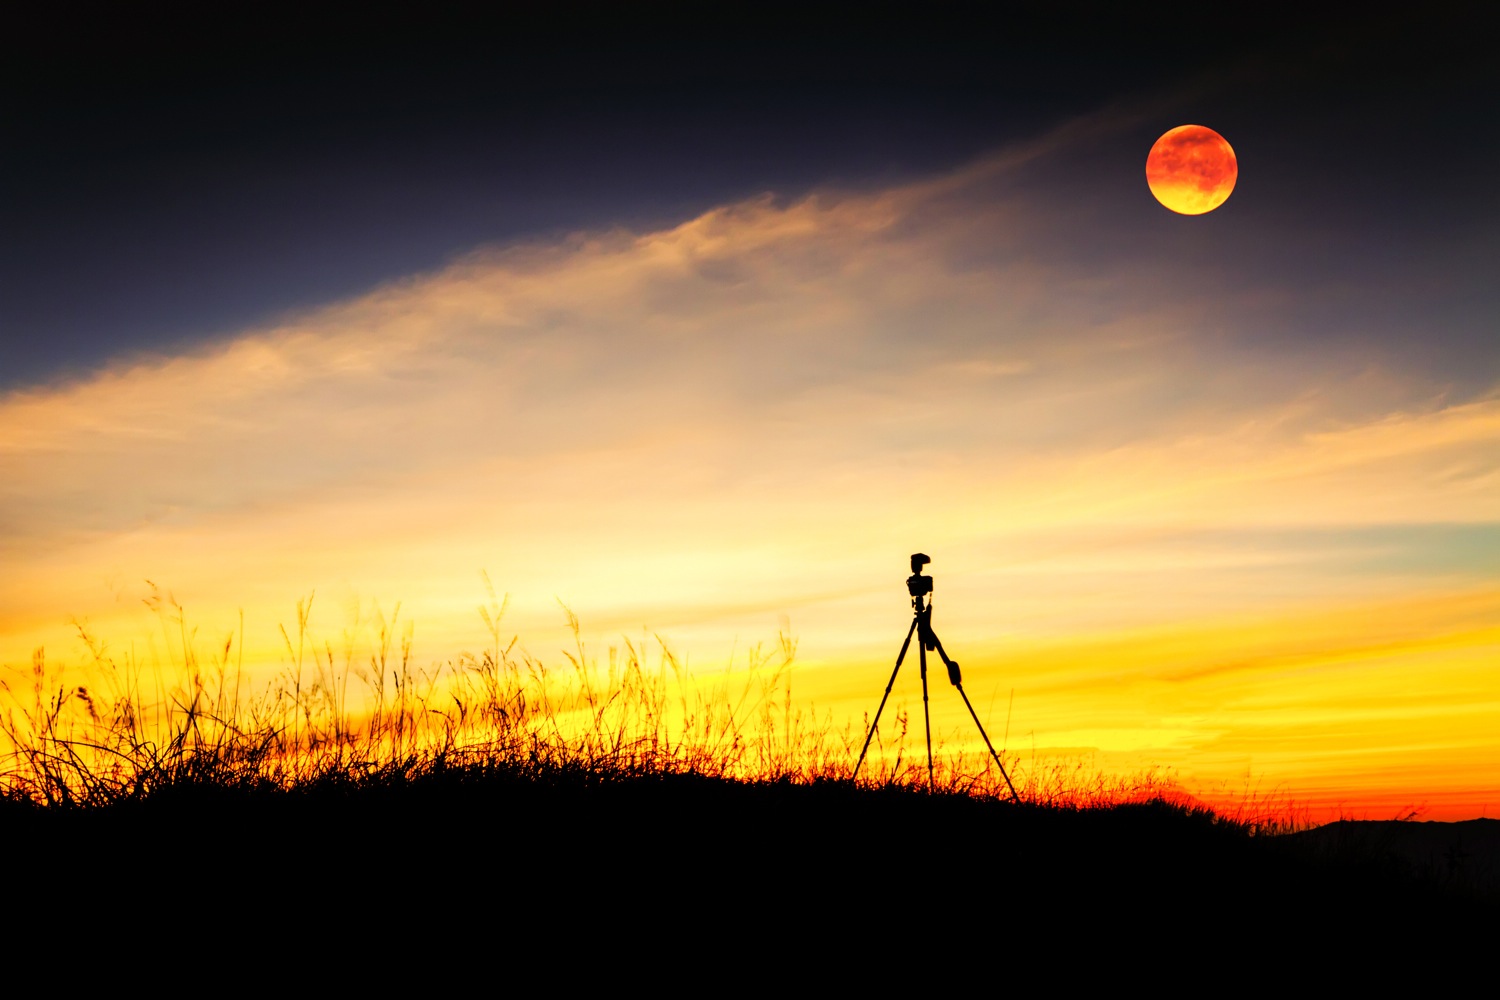
12. Choose the Right Location

Remember that the key element of your composition is the moon, so choose a spot without the abundance of distracting ambient lights. A hectic city center, mall area or even your backyard won’t do.
I suggest going to the remote park or field where nobody and nothing will interfere with the process. If you try to show the contrast between a busy city foreground and magnificence of the background, you need to devote some time to find an ideal lookout spot and take several test shots.
13. Check Weather Forecasts

Photographing the moon is a challenging process itself, and you probably don’t want heavy clouds to make it even more difficult. Therefore, you need to check the weather forecast in advance and decide on the perfect date for your photo session.
When the sky is clear, you can work at your convenient pace, without worrying that haze and moisture will ruin the scene and make details blurred.
14. Create Composite Photos
Photographers, who are aspired to take images of the moon with the foreground included, need to hone their Photoshop skills, as such pictures are actually composite ones and require further processing.
This happens because your camera can’t precisely focus on the moon and the foreground simultaneously, which results in the moon looking like a white blob. So, after you are done shooting, upload your photos to Ps and start combining several shots into one picture.
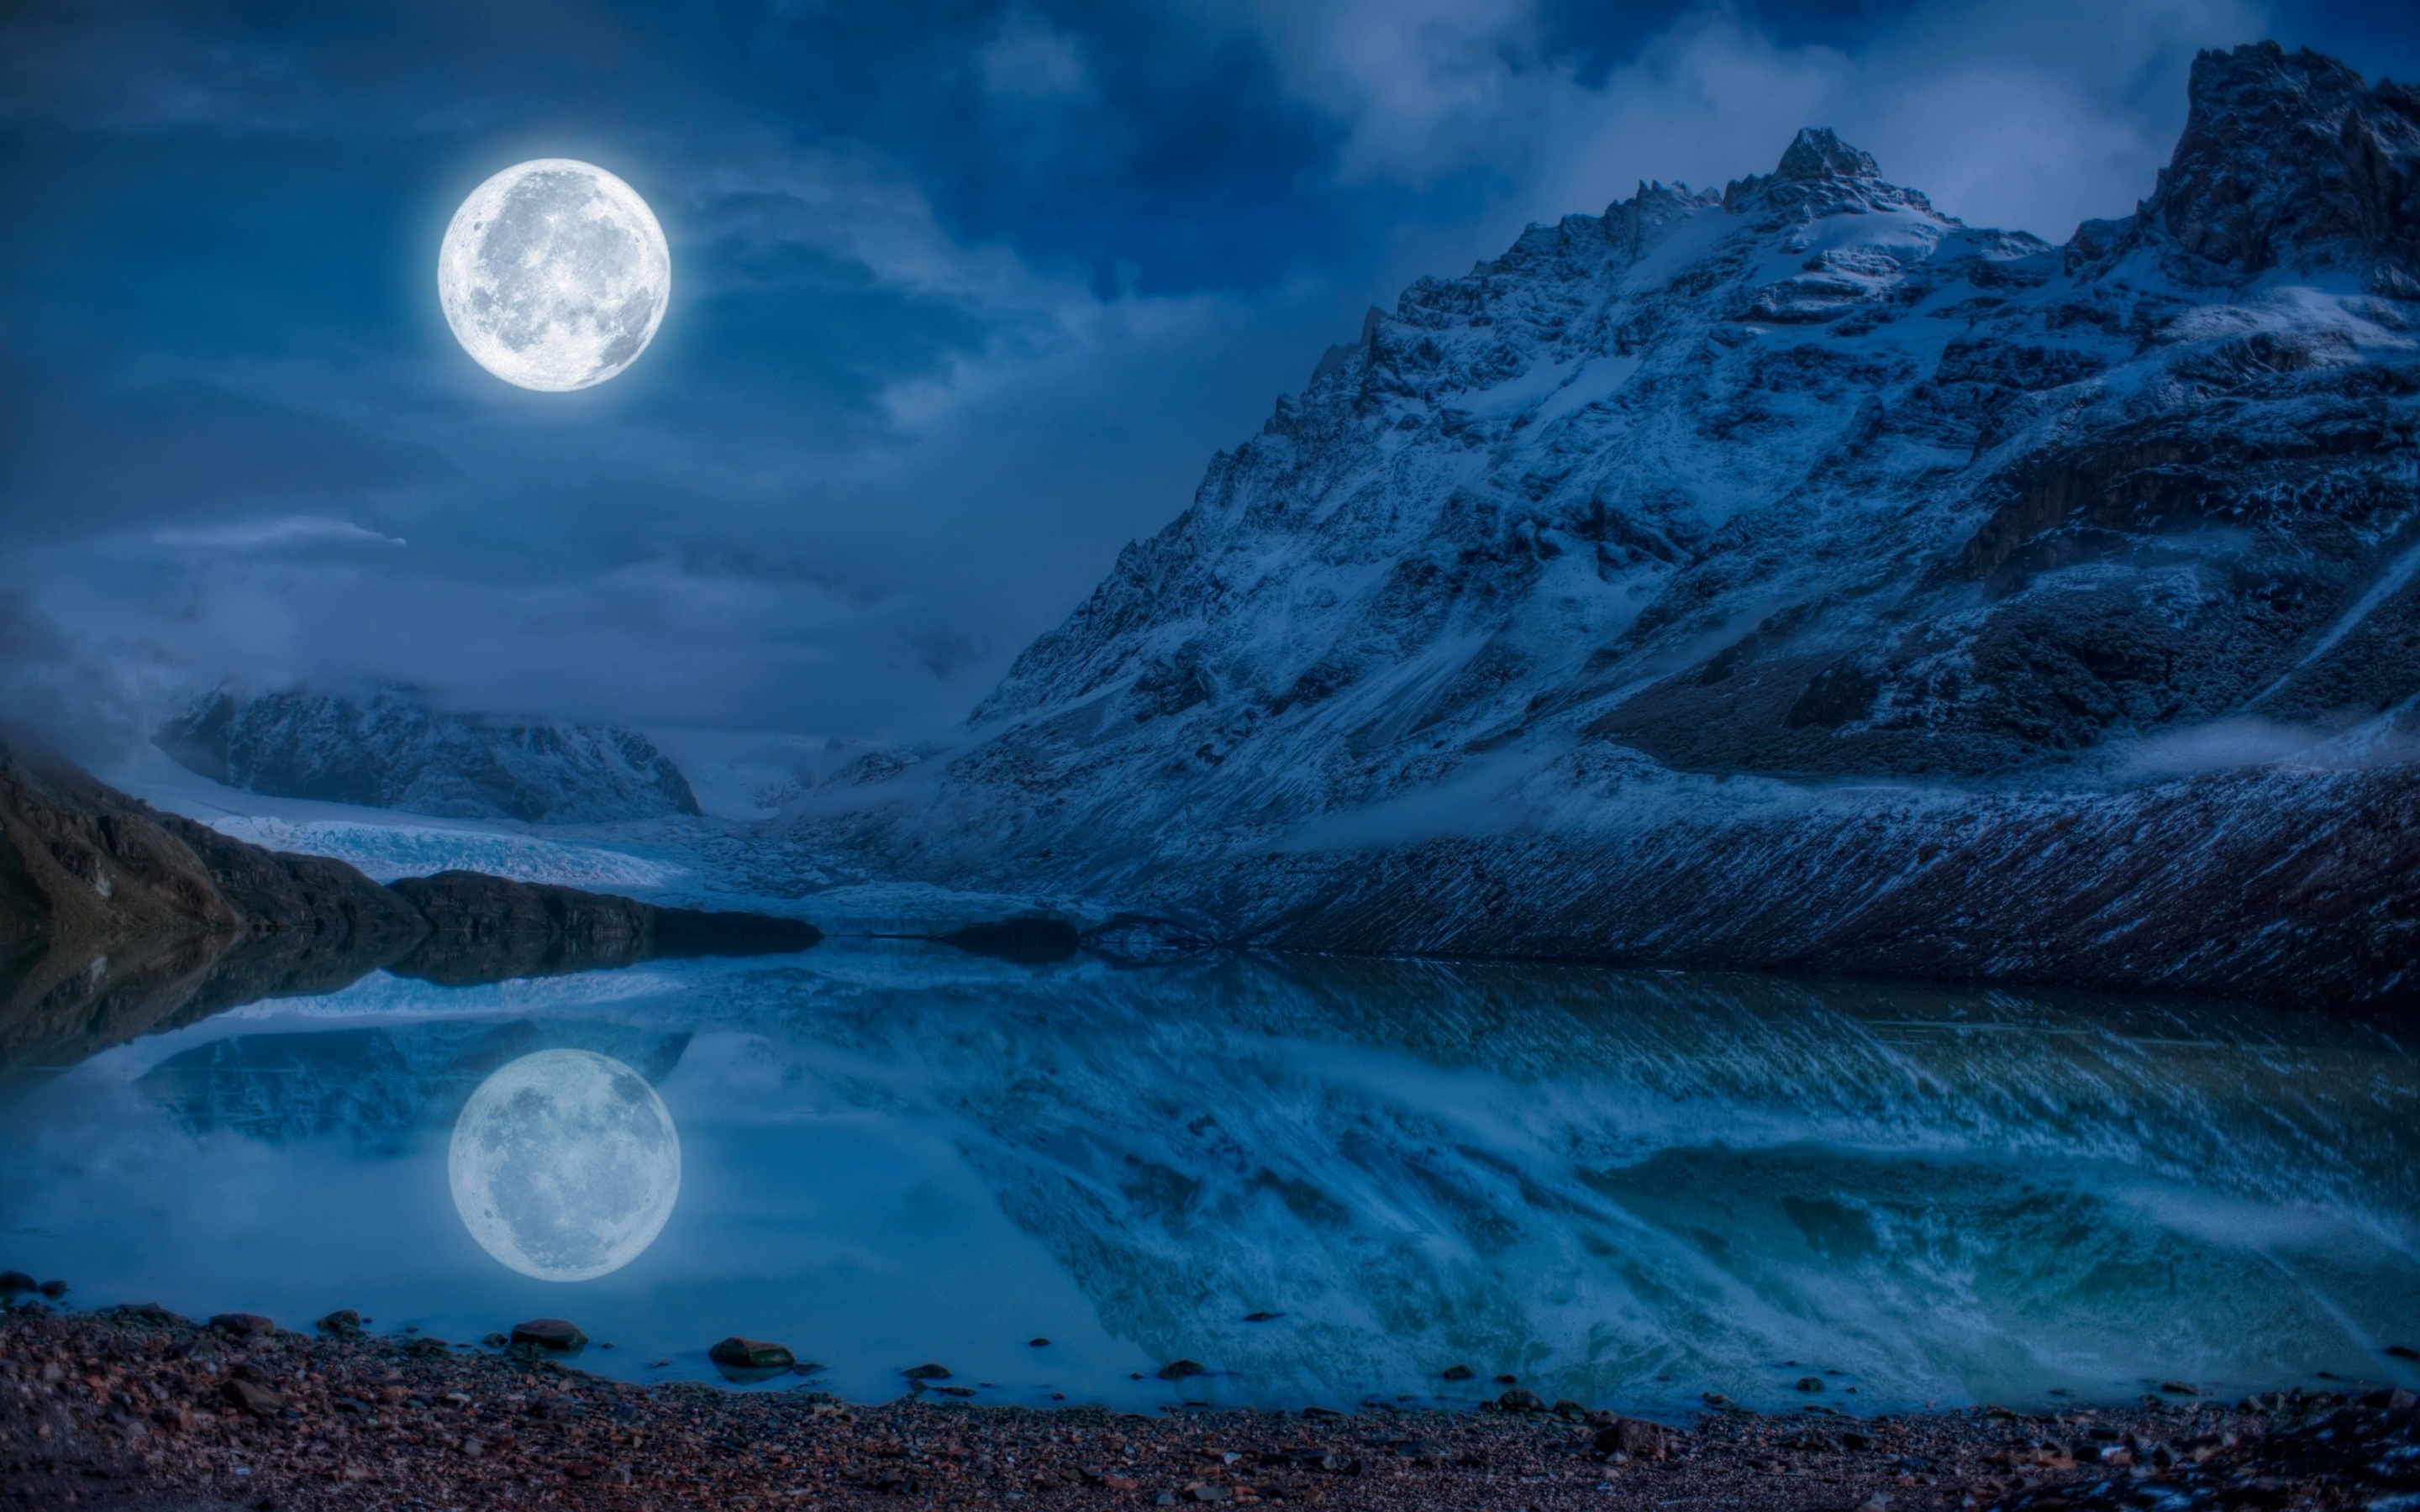
15. Catch the Moon’s Reflection in Water

Rookie photographers, who try to figure out how to photograph the moon, often concentrate on the technical aspects, overlooking the importance of an aesthetic side. Don’t repeat this mistake and show how captivating the moon is.
You can do it by capturing reflections of the light in different water bodies. I recommend choosing a full moon night, when the reflection is the strongest.
16. Capture and Combine All Lunar Phases

Capture all the phases of the moon and combine these pictures into one photograph for an even more impressive effect. The photo above reflects how the moon was changing during 28 days. Photographer took images staying at the same spot and the result looks absolutely fantastic.
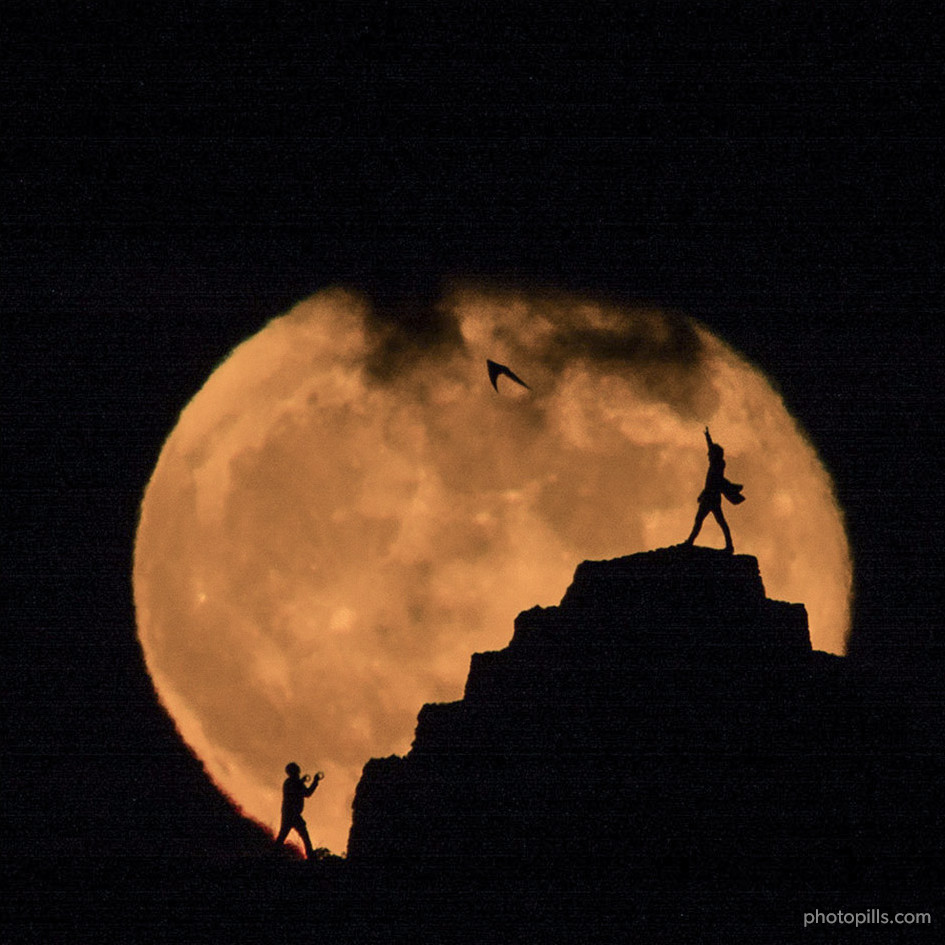
17. Try Forced Perspective Moon Photography
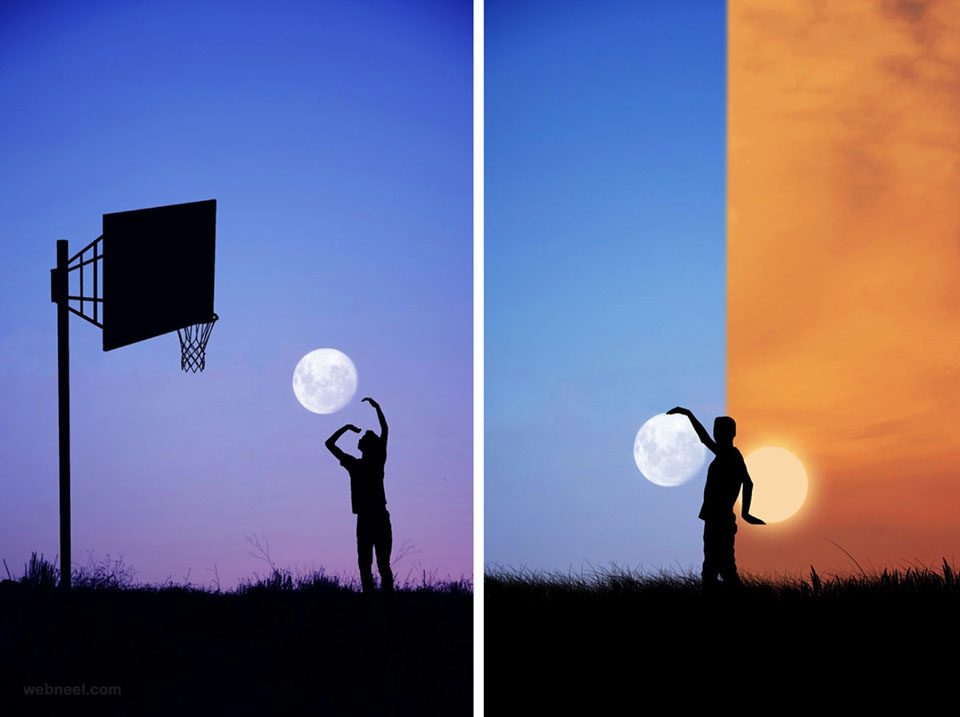
There are lots of forced perspective photos featuring the moon and that’s for a reason. You need a model, who will interact with the moon, while you are taking shots. The concepts are countless – catch the moon, hold or bite it, throw it into the hoop, stay on it or bring to life any other idea that crosses your mind.
18. Include a City Skyline

If there is a picturesque place in your city that looks absolutely stunning at night, why not photograph it with the moon being clearly visible in the sky?
Such photos usually turn out terrific but only if edited properly. I mean you need to take several images and then combine them into one using Ps tools otherwise there will be problems with exposure of the city skyline and the moon.
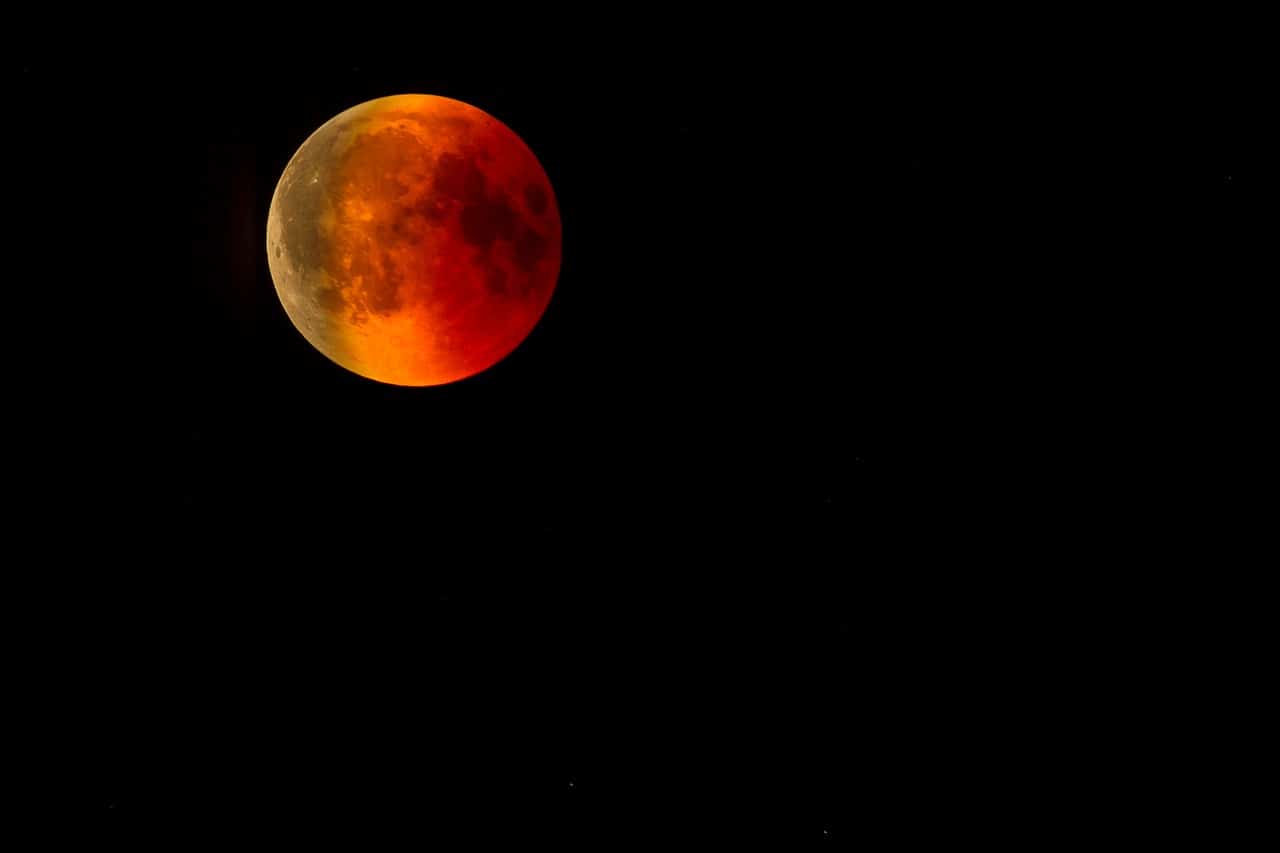
19. Create an HDR Photo
HDR moon photography is becoming more and more popular since it allows achieving the results close to how a human eye sees the moon with crisp details both in bright and dark areas.
Since a regular photo can’t boast such a quality, professionals resort to HDR photography and capture the entire brightness range.
20. Include the Clouds
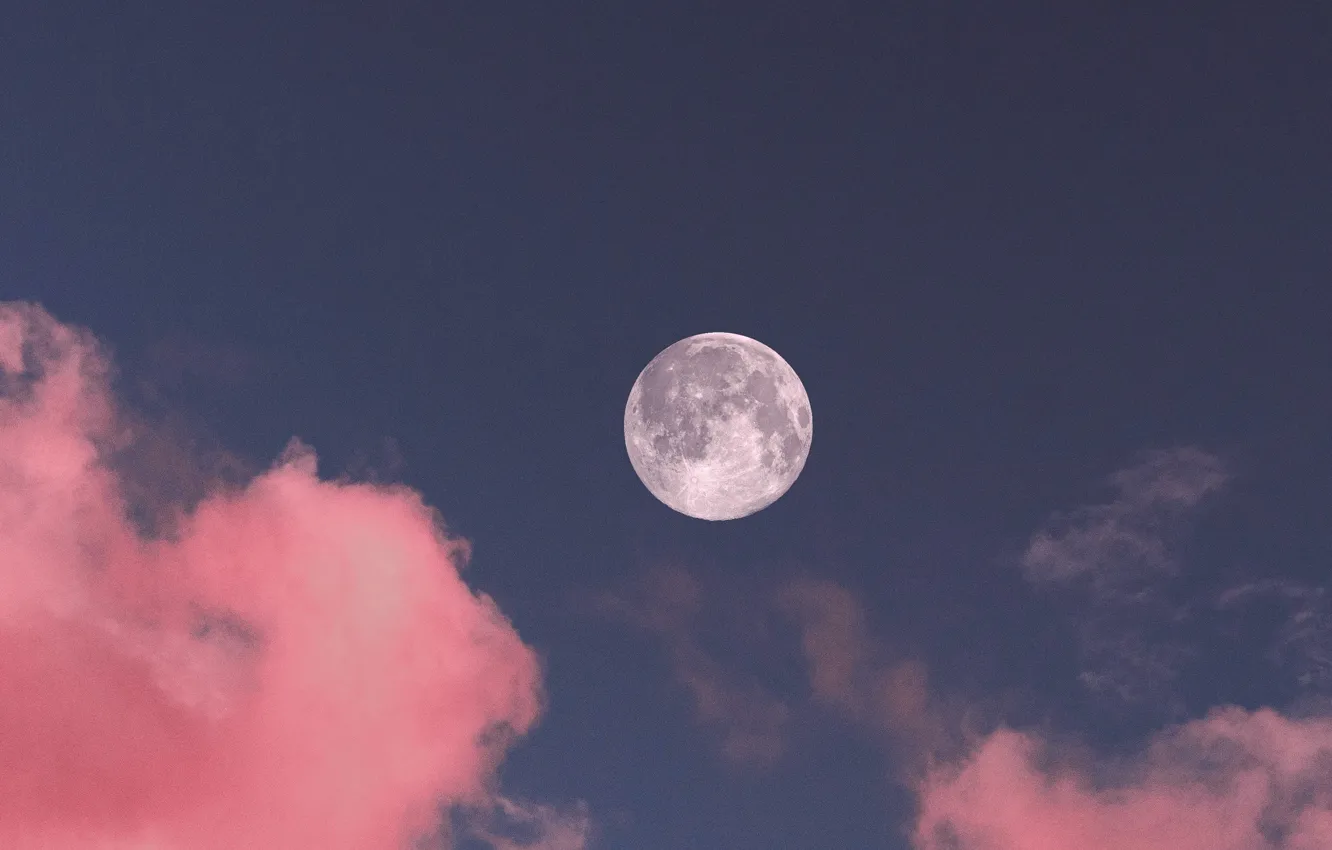
People, who know how to photograph the moon with clouds, are really experts, as it takes some time and effort to frame the shot in such a way that clouds embellish the moon instead of obscuring the view.
The image above is an ideal example of how such pictures should look. The moon is located behind the clouds, thus illuminating them. The finished photo is absolutely spectacular.
21. Create a Monochrome Moon Photo

Black and white photography techniques can be used while photographing the moon. Such images look dramatic and eye-catching when all the rules are followed.
22. Add Foreground Elements

If you keep taking photos in which the moon is the only element, your followers may quickly get bored. That’s why think about adding some interesting items to the foreground, just make sure they complement the composition and don’t divert attention from the key object.
You can choose a location with a beautiful building or a landscape and take an image with the moon glowing gracefully above them. Don’t be afraid to experiment as you never know what brings the best results.
23. Incorporate Negative Space
You can easily highlight the moon in your images, by using the rule of thirds in photography and arranging the negative space. Going this way, you can also create and more engaging composition and locate a separate area for your eyes to rest.
24. Use Silhouettes to Hide Parts of the Moon
To give your shots a mystical vibe, you can use the silhouette technique. In other words, keep some parts of the moon hidden behind an object, e.g. a tree. This is a quick and easy thing to do, and it completely eliminates the need to use separate astrophotography software to achieve such a result.
Photographers engaged in different genres take advantage of this approach, and you can also make good use of it to get rid of different distractions, like strange shadows.
25. Capture the Moon during the Day
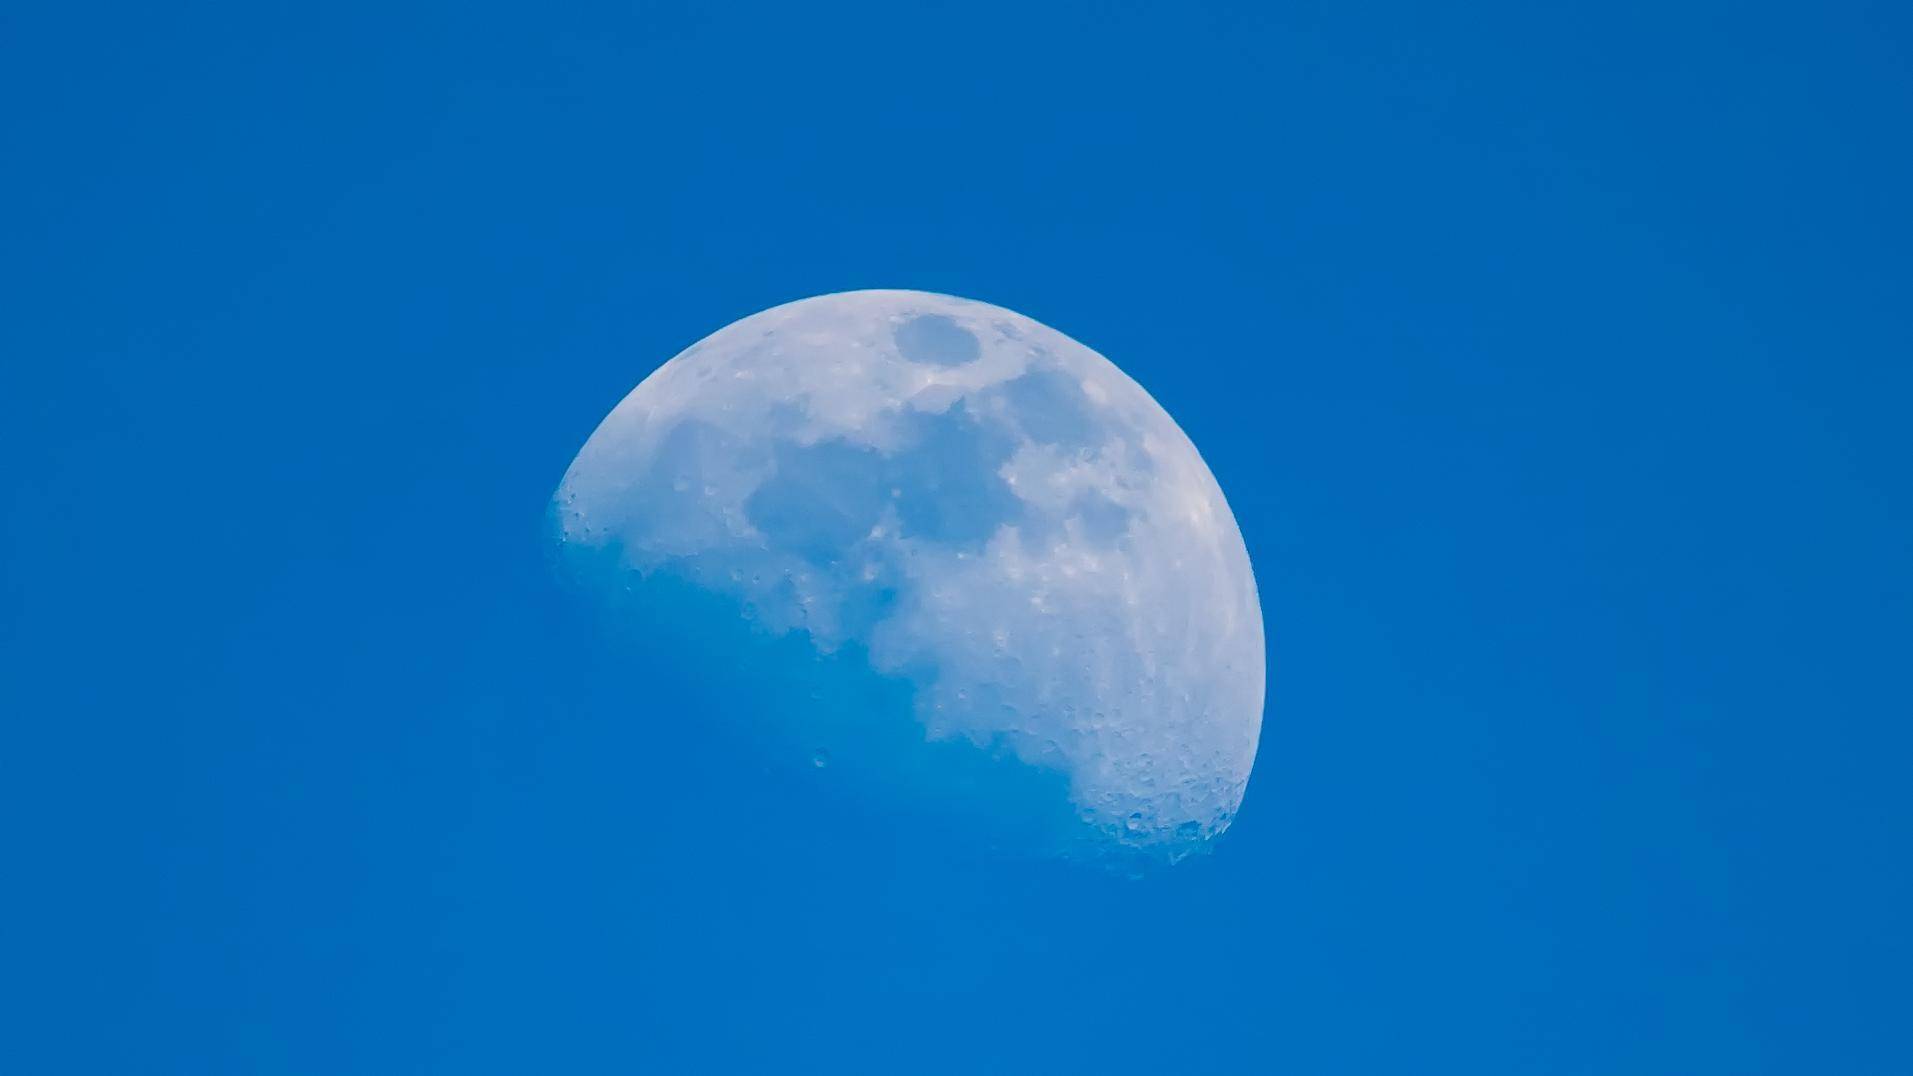
Taking pictures of the moon in the daytime is quite easy. Both the satellite and the surrounding environment are perfectly bright, so you can capture both in a single exposure.
You don’t need to use special moon photography settings – shoot in any mode hand-held, and the results will be great.
Freebies for Moon Photography
When the shooting is over, you need to improve your images in Photoshop and Lightroom. To make the process fast and enjoyable, I have prepared a set of cool plug-ins, which you can download free of charge.
Moon
If you planned a photoshoot, but the sky was cloudy on that day, don’t get upset. You can use this overlay to add a realistic moon to the photo.
A Starry Horizon
This overlay helps beautify the background of your moon photo, scattering dozens of bright stars across it.
Clarity
The Lr preset can help improve dark moon photos, boosting clarity and adding cinematic tones.
Cold Shine
If you want to highlight the moon in your images, you can use this Lightroom preset. It also makes colors deeper and more saturated, especially the blue tones.
Black and White
Black and white moon photographs look awesome. You can easily achieve such an effect, applying this Photoshop action.


