I discovered the photography world 10 years ago. However, though I was very passionate about studying it in detail, I couldn’t afford to purchase high-quality lighting equipment.
Fortunately, that didn’t hold me back. I got creative with everyday household items and affordable bits and bobs to develop a DIY photography lihting kit following YouTube tutorials and Reddit.
Some experiments were hit or miss, particularly when I filled my entire room with plasma balls. But others turned out better than I expected and I even use them nowadays.
Currently, I have a fully equipped studio at my disposal, but I often rely on some of these DIY lighting hacks. So, I can confidently say that you can achieve proper lighting even if you have limited funds. Keep reading to find out how to make good lighting for your photo sessions without spending more than 20 bucks.
Tools and materials needed:
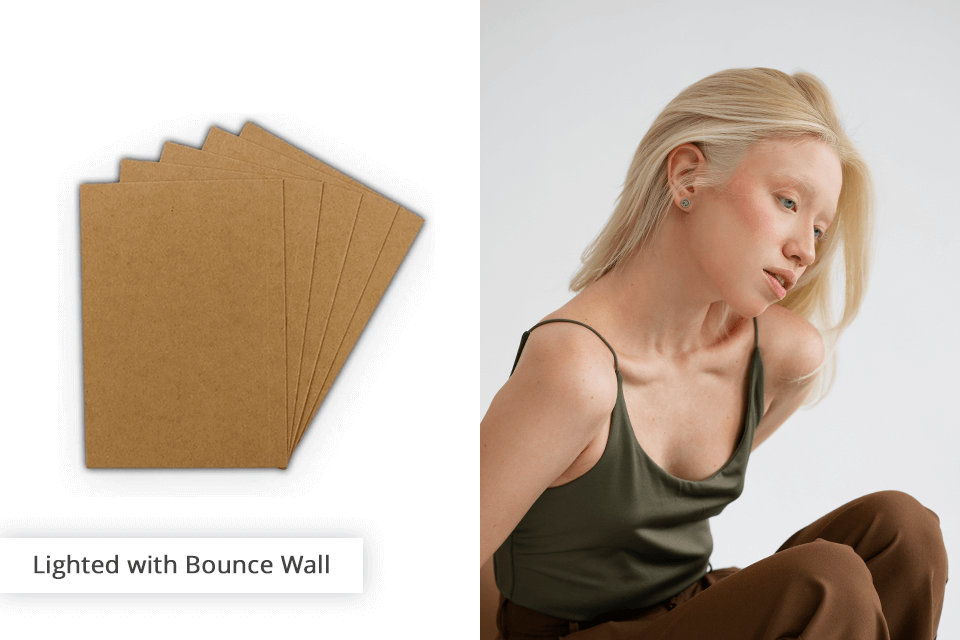
This DIY photography lighting idea presupposes using a screen to bounce the light of your camera flash off. Thus, you will achieve a soft light. When the shooting is over, you can put the screen into a regular camera bag.
Such a DIY light diffuser is small cardboard covered with tin foil. To attach it, get a cheap wire hanger and bend it in the middle, covering each end in tape thickly. Push the tripod screw through the tape and attach the hanger to the camera. Finally, attach the reflector to the free end of the hanger using a clothes peg, adjusting the angle to about 45 degrees.
Tools and materials needed:
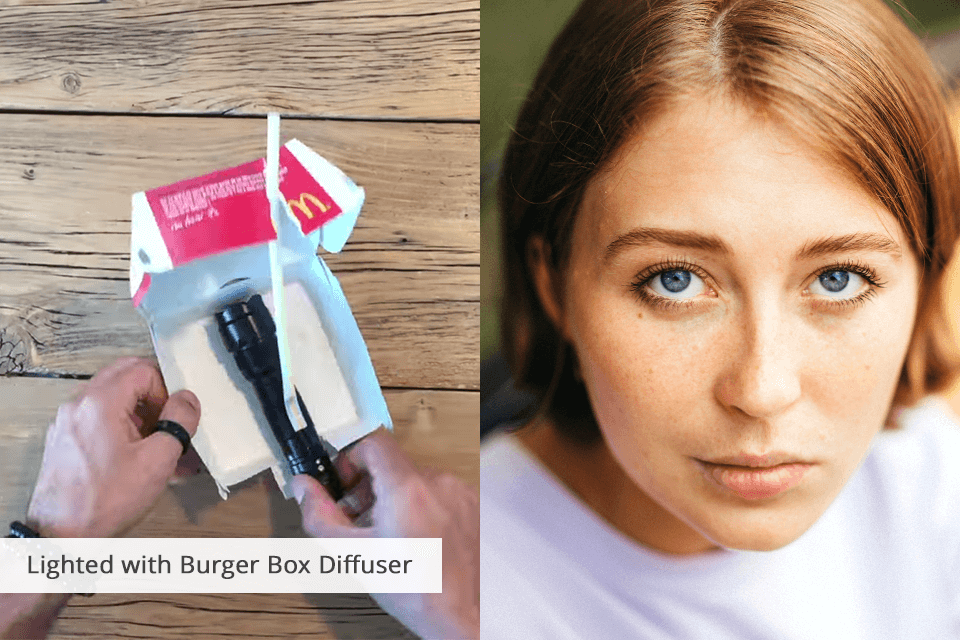
Another DIY photography lighting hack was actually recently invented and used by a French professional Philippe Echaroux, who got interested in photographing strangers.
The challenge he took up was to shoot with his iPhone and use a McDonald’s Big Mac box as a DIY light box. The straw was necessary for keeping the box open.

Tools and materials needed:
Working in a studio, you can take advantage of a snoot to direct a beam of light where you need it. It is often used for highlighting hair, making the model pop from the background, and while taking hotspots.
For such a DIY photography light setup without using a professional photo light box, empty the Pringles can and set the flashgun to shoot right through it. Fixing the two things together with some masking tape should be enough.
Tools and materials needed:
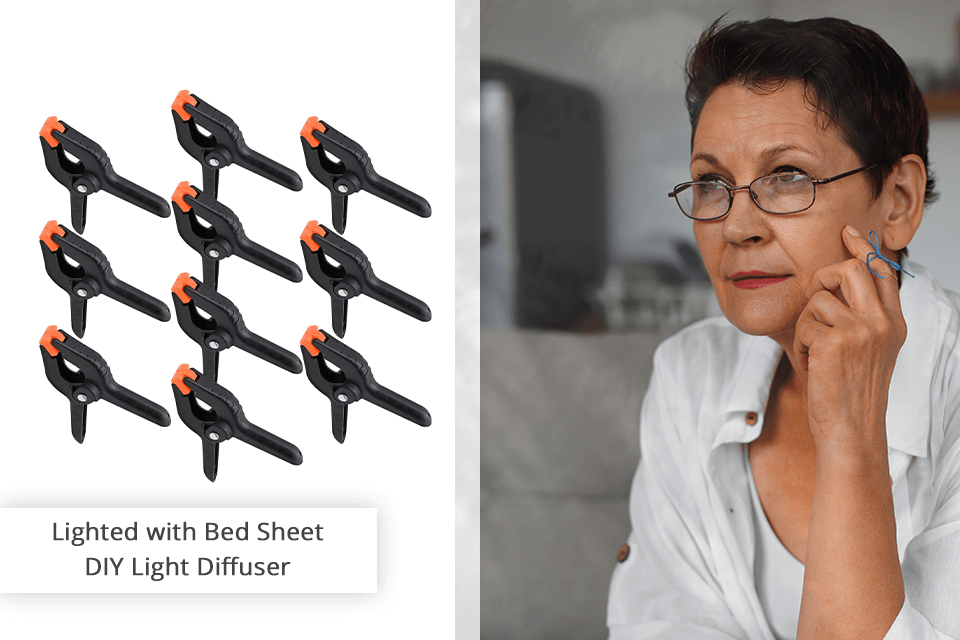
Drape a white bedsheet between your light and the object you're photographing. Fasten the top of the sheet to the wall or ceiling with string or clamps. Smooth out any wrinkles to make sure the surface is flat.
Put your light source behind the bed sheet. It is necessary to diffuse the light, tone down any strong shadows and illuminate your subject with a softer glow. Therefore, you can get a lifelike result.
Tools and materials needed:
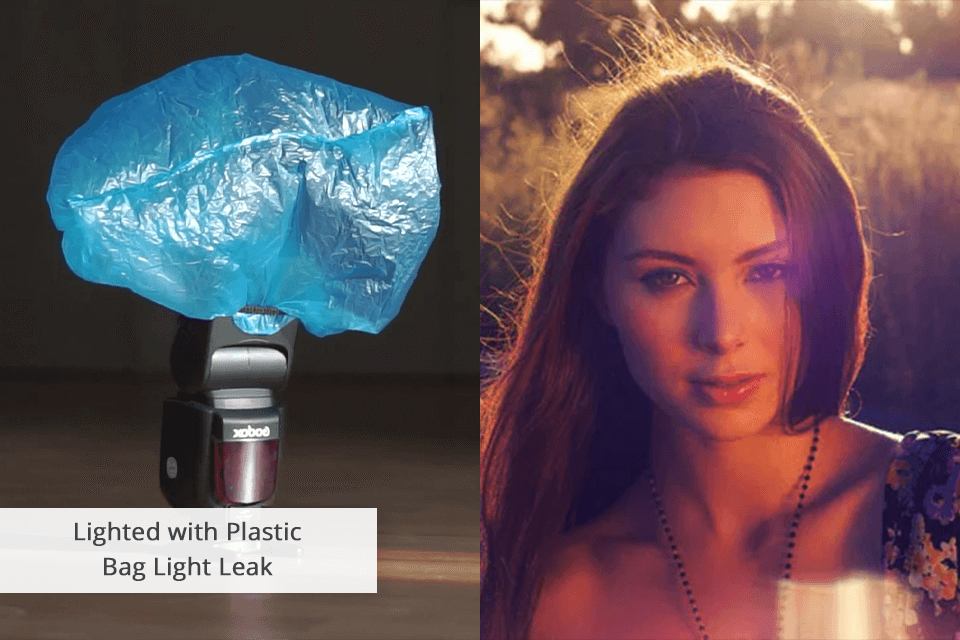
I think it's one of the cheapest methods of how to make studio light at home, using a basic studio lighting kit. You need to get a clear plastic bag and some markers if you want a splash of color. It is perfect for getting a somewhat vintage light leak effect that is a bit more controlled.
The essence of this DIY photography lighting trick is to cut an uneven opening in the plastic bag and then wrap it around the lens in a messy way making sure the center is clear. When you start shooting, shuffle the bag around a little to make the lights play but always keep the plastic away from the center.

Tools and materials needed:
Pour some water into a glass and place it in front of your light source. It can be a lamp or flashlight. The water in the glass will bend and spread out the light, making interesting patterns and prism effects. Such refractions will add a creative and lively touch to your photos.
Tools and materials needed:
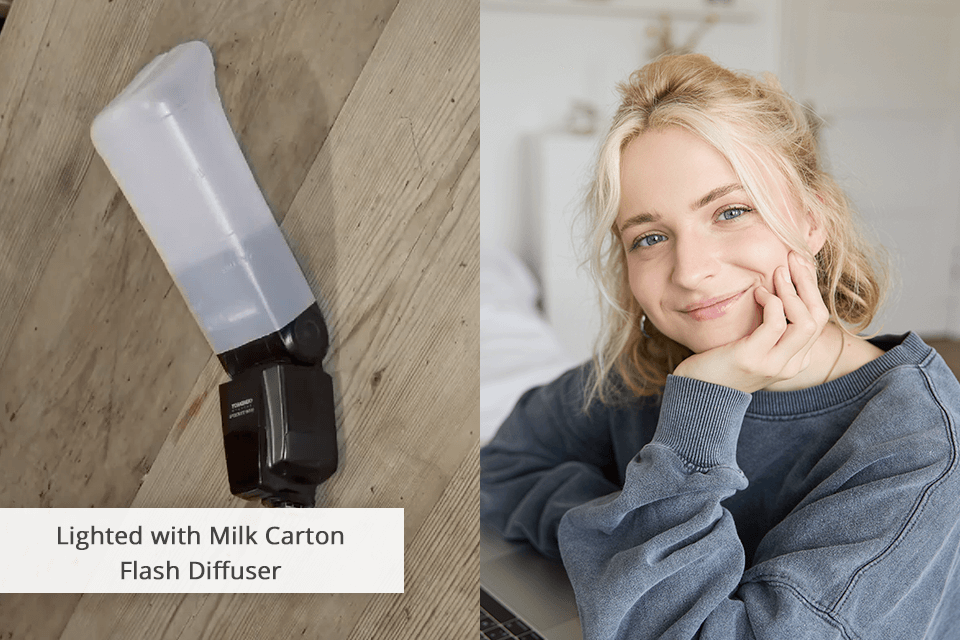
This DIY flashgun diffuser will change the way your photos look, giving them a softer, warmer touch of light. For this purpose, you need the translucent plastic of a regular milk carton, from which you will only use the bottom half.
Before you cut the carton, make sure it’s big enough to go over the flash. Use some tape to fix the carton, about one centimeter away from the flash source.
Tools and materials needed:
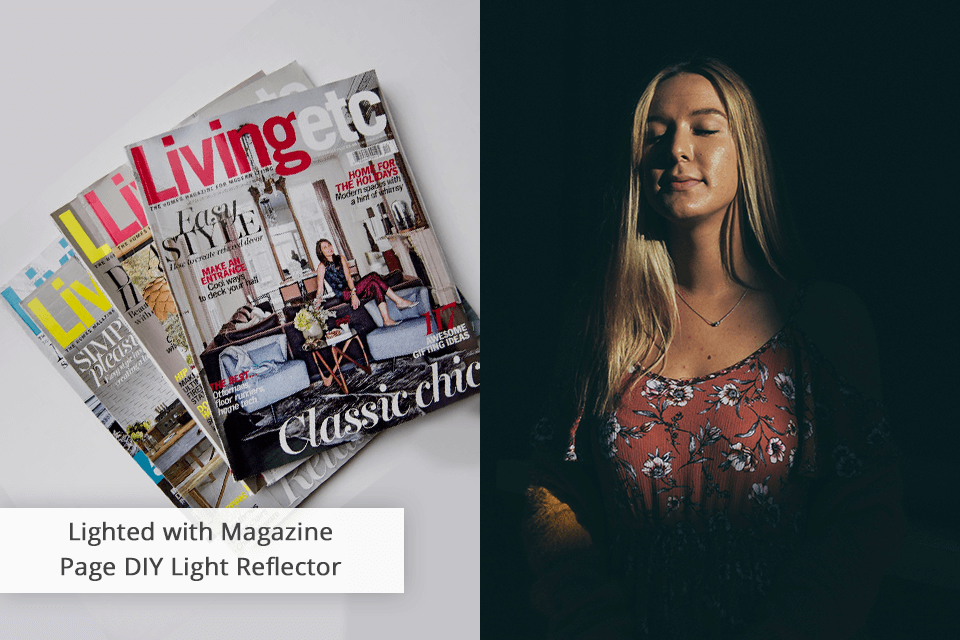
Get some glossy magazine pages and angle them to bounce light onto your subject. Don’t hurry and position them to catch and redirect the light in a proper way. By tweaking the angle, you can see how intense the light is and how it hits the subject. Thus, you can draw viewers’ attention to specific areas, while keeping others less noticeable.

Tools and materials needed:
A common balloon can become a fun homemade light diffuser. Just spend a minute to blow it and then put it over your flashlight.
The effect given by the balloon will change with its size, so blow it up or down to see what works better for the shot. In any case, the narrow beam of light can be easily transformed into a bigger and softer one, also covering a larger area, which makes it ideal for portraits.

Tools and materials needed:
Cover the interior of a pizza box with aluminum foil to craft a reflective base. Place the box strategically to catch the light from your source and bounce it onto your subject. This way, you can amp up the brightness and add depth to your snapshots by throwing in more light from different angles.
Tools and materials needed:
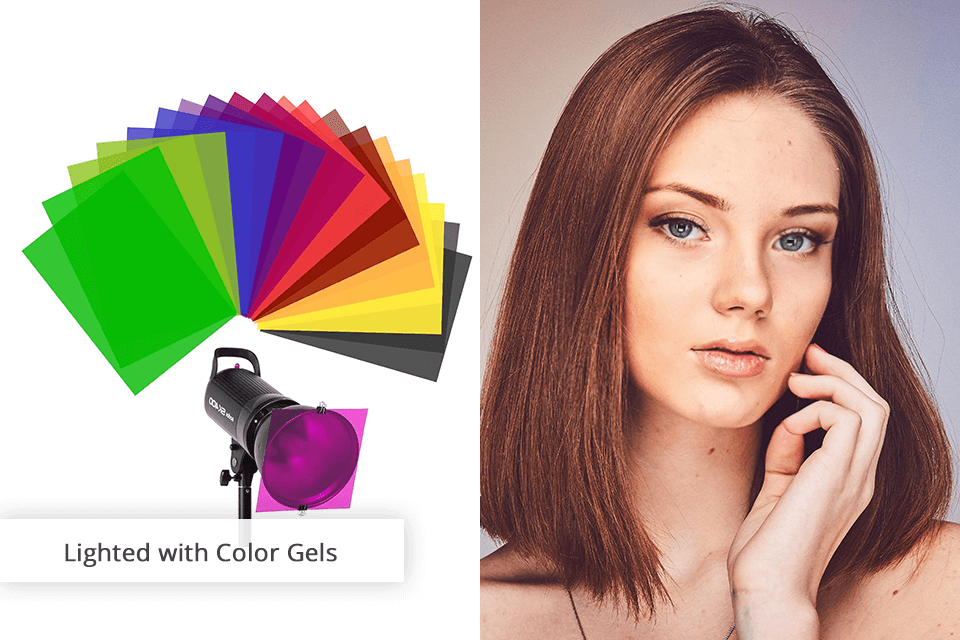
If your budget is tight but you still want to go creative, then the listed DIY home photography lighting tricks are your lifesavers. It is more interesting if you get some color gels, but a cheaper version would be cellophane. When it comes to color rendition, the difference between the two options becomes noticeable.

In any case, combined with a flashlight it can be used as a great homemade photography lighting tool. Put whatever color items you’re using into a clear plastic bottle, stick a flashlight into it and enjoy playing with a new adjustable color mix light source.
Tools and materials needed:
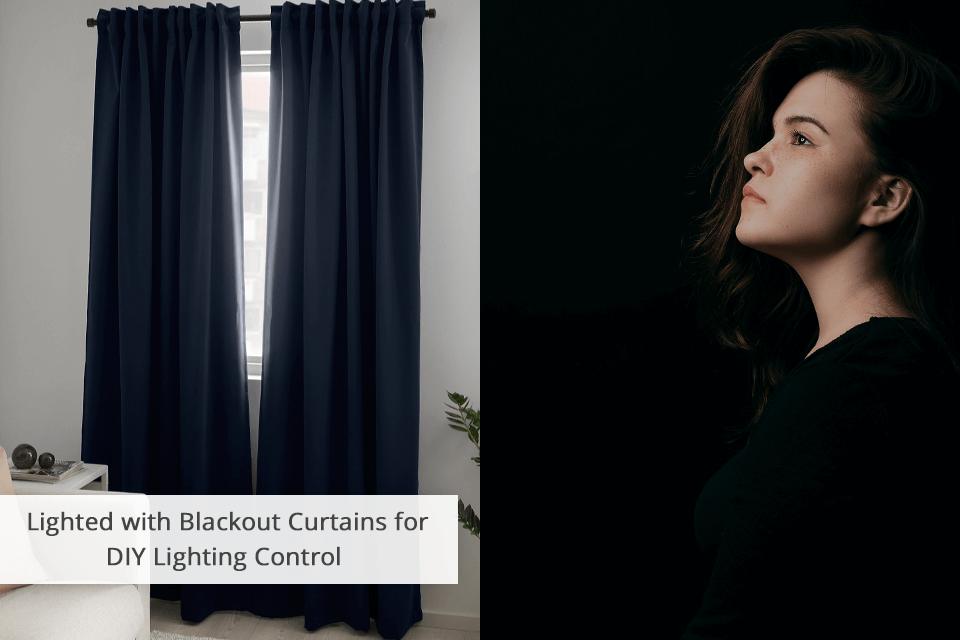
Put up blackout curtains on your windows to block natural light. Thus, you can manipulate lighting in your room more efficiently, adjust artificial light sources and create a specific mood for your images.

Tools and materials needed:
A grid to go over a flash is a honeycomb structure serving mainly to direct the light beams. The light will be focused precisely and prevented from spreading around and going in the background.
You need to cut straws of a certain length and fix them together. Prepare a frame made of black card stock and insert your straws into it. Depending on the length of straws, you can get different DIY lighting effects for photography.
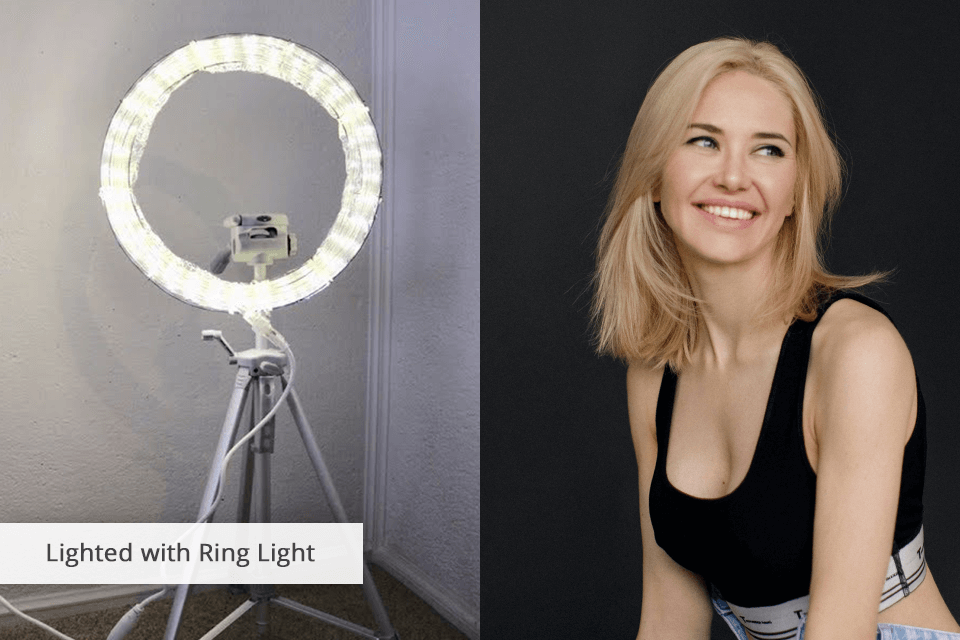
A small secret of self portrait photographers that has a huge influence on the results is a ring light, so it won’t be a bad idea to get one. But if you’re on a low budget, there is no way you’re buying a ring light but there is a choice of making a personal DIY ring light that would give your eyes a lively sparkle and your face a soft glow.
Cover the wire wreath with foil for a shiny finish. Fasten the LED rope light onto the wreath with zip ties. Wrap wax paper around the wreath to scatter the light gently, and secure it with tape. Connect the LED rope light to a power source and place the ring light around your camera lens or in front of your subject to achieve a smooth and uniform illumination.
Below I've also put together a handy table to help you out if you run into any snags while working with DIY lights or any other LED lights for photography. Use my table to avoid potential lighting mishaps. It contains clear explanations of common problems and practical solutions to get you back on track.
| Issue | Cause | Solution |
|---|---|---|
|
Harsh Shadows |
Direct, undiffused light |
Use diffusers like wax paper or softbox |
|
Uneven Lighting |
Incorrect light placement |
Change light angles, use reflectors |
|
Color Cast |
Mismatched light temperatures |
Opt for a daylight-balanced photo light bulb, enable white balance settings |
|
Overexposure |
Too much light or incorrect camera settings |
Lower light intensity, adjust camera settings |
|
Underexposure |
Insufficient light |
Add more light sources, raise light intensity |
|
Reflections/Glare |
Shiny surfaces reflecting light |
Employ polarizing filters, change light angles |

If, for some reason, you couldn't bring my DIY lighting ideas to life, I recommend checking out this free package from our team. By using such professional light overlays, you can quickly solve lighting problems and enhance the visual allure of your images at the post production stage.
They are also suitable for removing harsh shadows and trying out different creative techniques. These effects are compatible with all programs that support layers, like Adobe Photoshop, GIMP, and others.