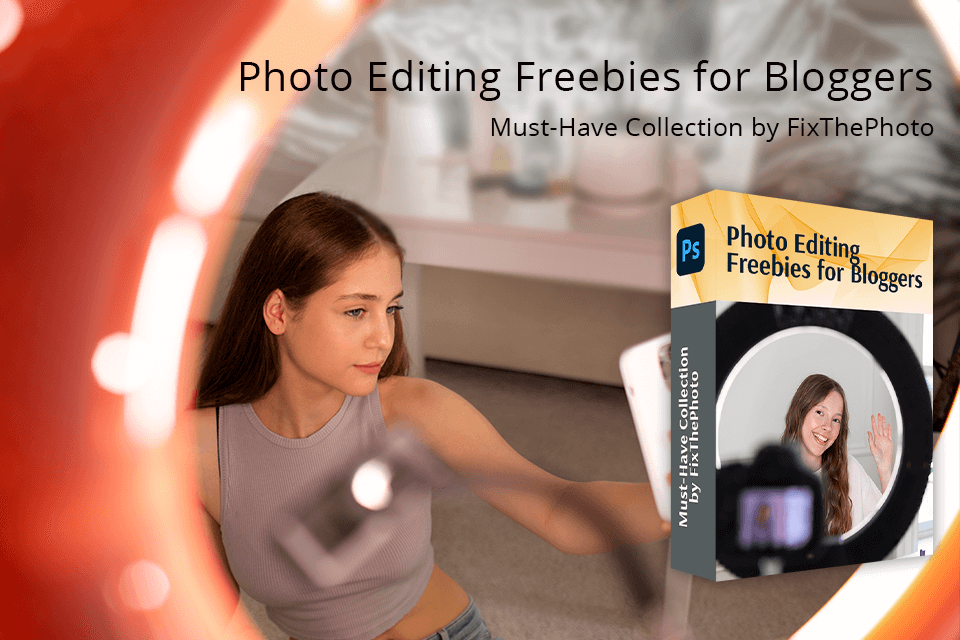
When I started my Instagram blog five years ago, I couldn’t afford professional lighting equipment, but I still wanted to take beautiful selfies. So, I decided to create my own DIY ring light through trial and error. Today, I want to share my experience and valuable tips with you. Keep reading to find out how to get great lighting for your selfies without spending more than 30 bucks.
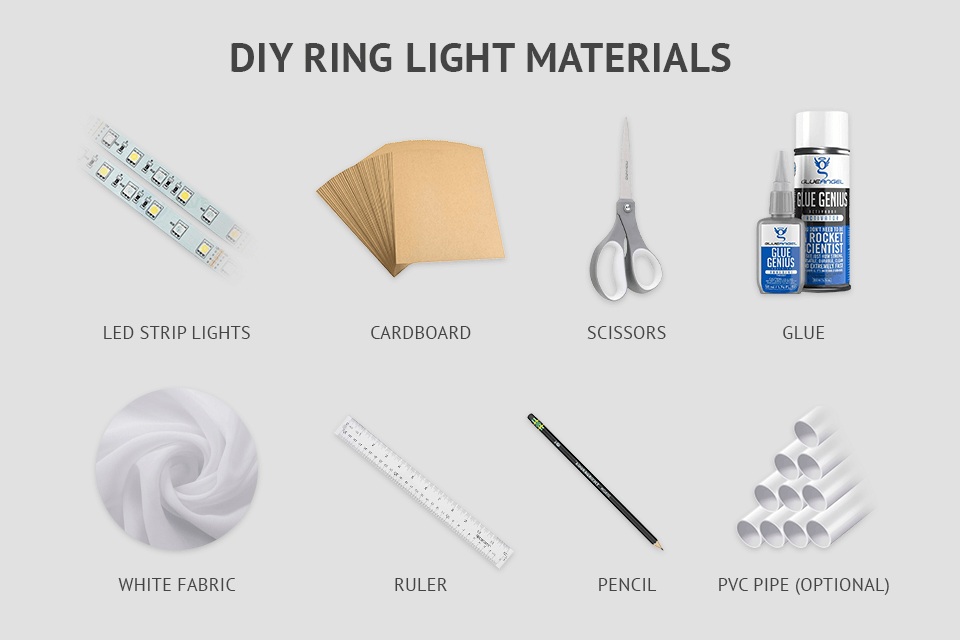
Below you can find a list of materials and tools that come in handy when making DIY photography lighting. Many of them are already in your home, except perhaps LED lamps and cardboard. You can find these and other missing materials in almost any store at an affordable price.
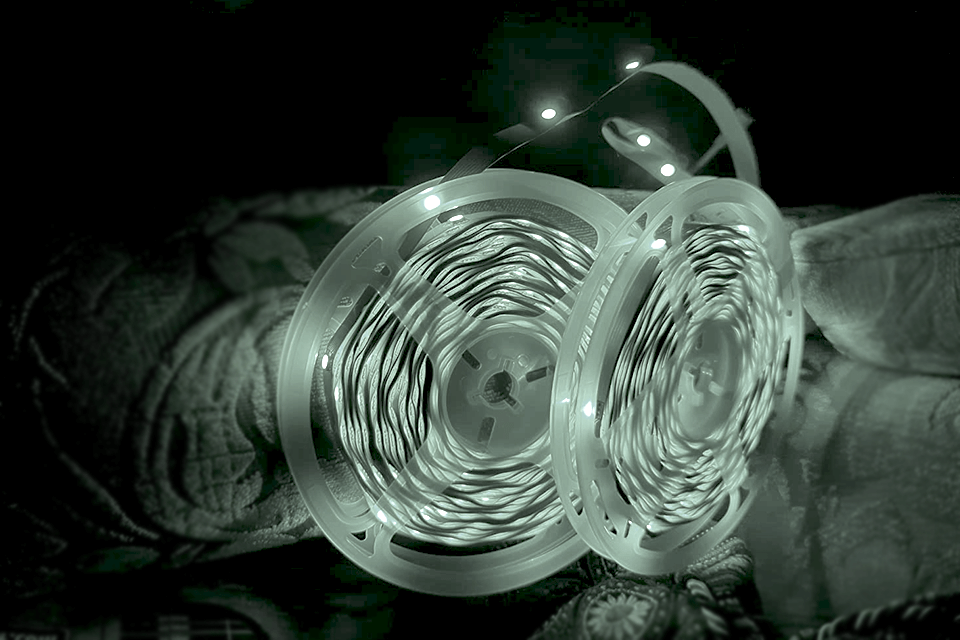
To get started, you need to determine the required length of LED strip for making a ring light for camera. The length of the tape should match the diameter of the circle of your future ring light DIY setup. For the manufacture of a standard type, approximately 2-3 meters will be enough.
When calculating, consider the size of your camera and your expectations for the lamp. After measuring the diameter of your camera lens, add a couple of inches or more to provide extra space. Mark the resulting value on cardboard using a ruler; this will be the diameter of your future lamp.
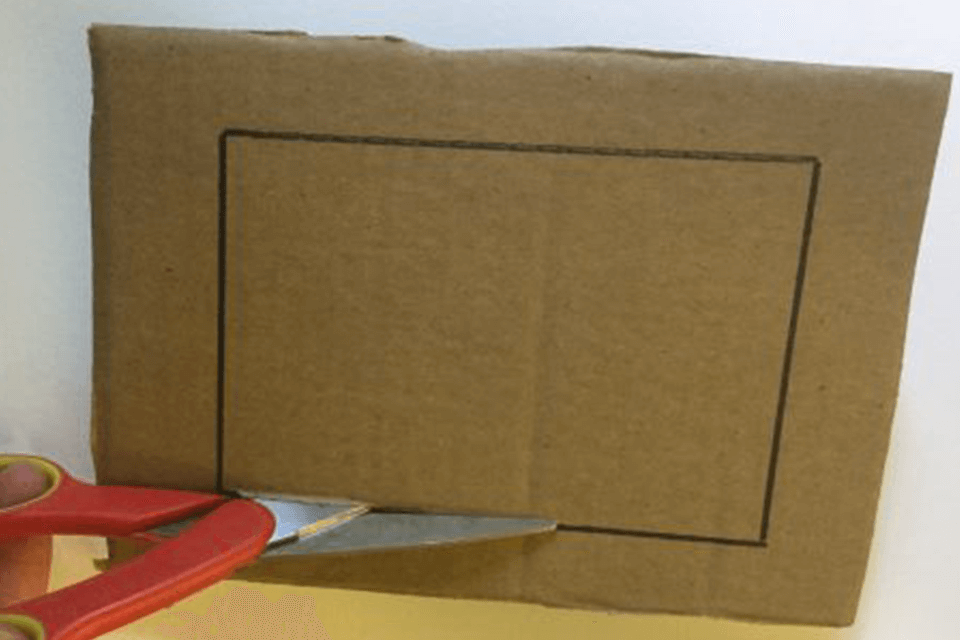
Cut the cardboard along the outlined circle, preparing the basis of your future DIY camera ring light. Do this carefully with scissors or a utility knife, leaving no roughness and bumps.
Look for a sample for a smaller circle to outline it in the center of the first one, for example, a plate or a glass. Make sure the smaller circle fits your camera lens and is exactly in the center of the larger one. When you’re done, cut it out the same way you did the first circle.
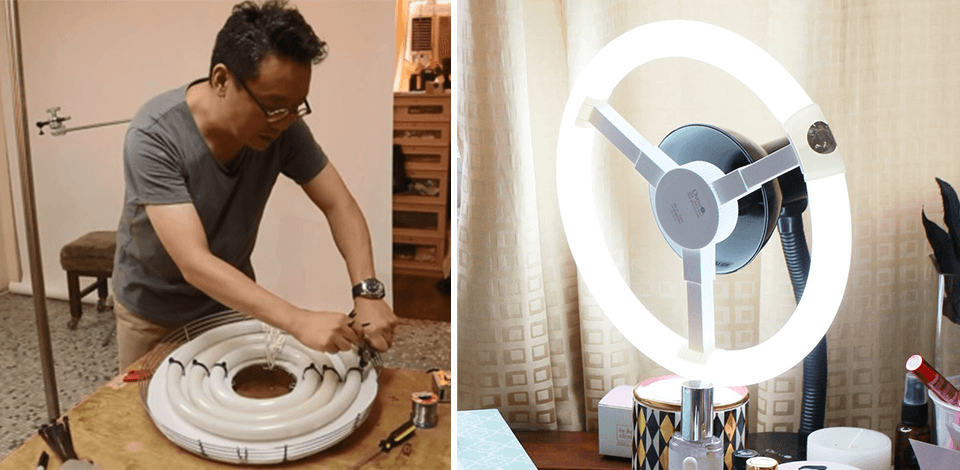
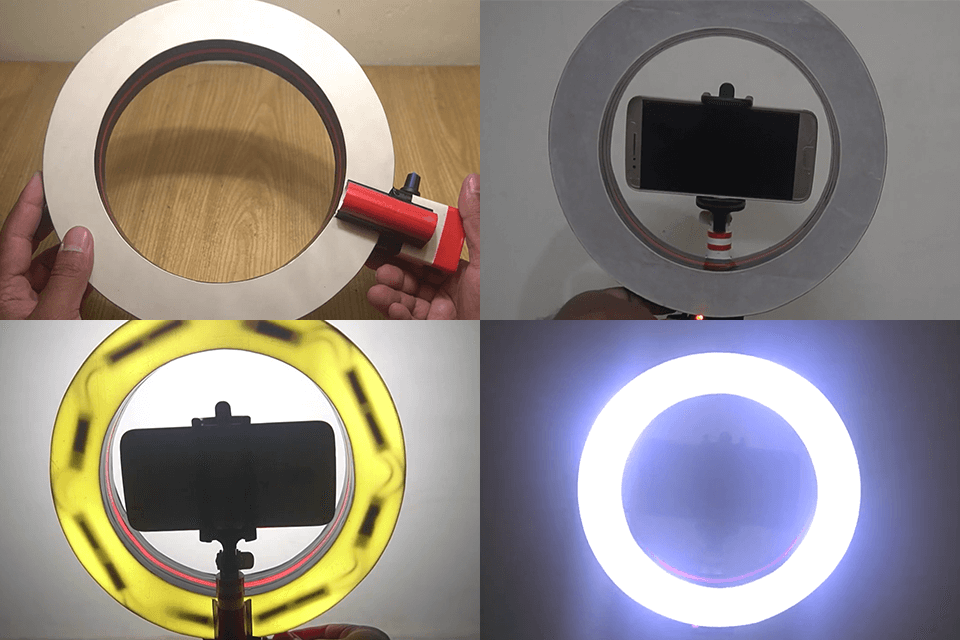
Peel off the LED lights for photography from the backing by sticking them onto your cardboard and foam base. Start from the center outward, sticking the diodes tightly together and evenly.
It is necessary to carefully fill the entire base of your future DIY LED ringlight with diodes.
To make the light from the lamp softer and make your LED light pictures even more compelling, it needs to be diffused. To do this, you will need a white fabric, which also often acts as a DIY photo backdrop. Cut your fabric into a square large enough to cover your entire homemade DIY ring light.
Spread the fabric over the cardboard smoothly and evenly, without creases, and glue it with hot glue. Make sure that the fabric does not wrinkle or sag in the center.
Now that the DIY ring light is almost ready, you may want to use it as a standalone device, which means you need to come up with some kind of cardboard or PVC pipe stand.

The first option involves cutting two cardboard circles out and attaching them to a piece of cardboard or PVC pipe with hot glue. In this case, the lamp should be placed on top of the cardboard circles and secured with tape.
The second option is suitable for those who have a tripod for DSLR. Simply attach your homemade lamp to it with tape or glue. Make sure it fits well and is placed in the center of the camera lens.
All that’s left is to connect the LEDs to a power source. Read the included instructions to do it properly and learn how to use a dimmer switch to make the light more or less bright.
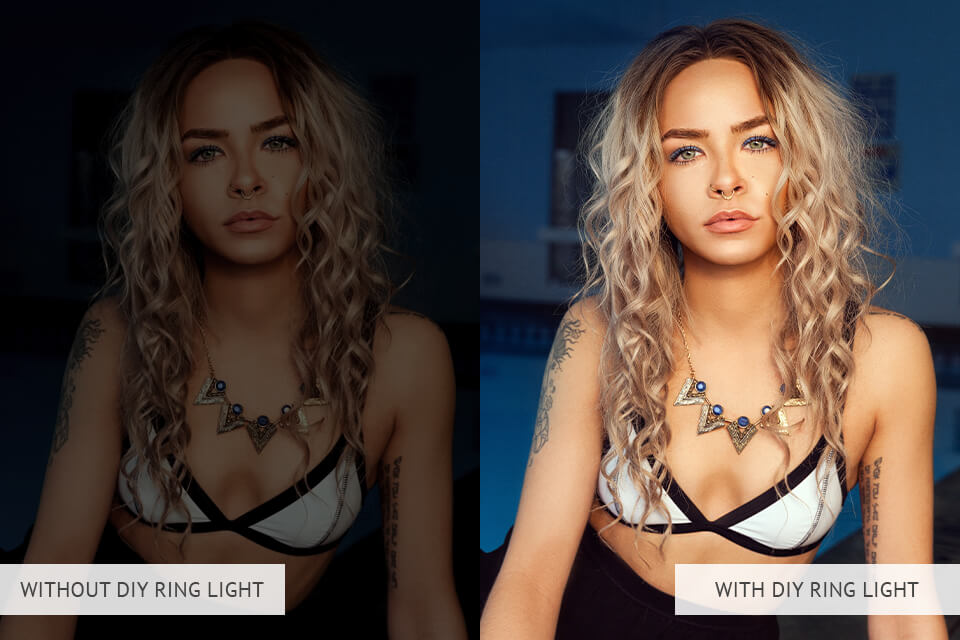
You’re done! Now that you know how to make cheap DIY ring light, you can improve the quality of your photos and videos by playing around with lighting angles and distances to create different effects.
When deciding whether to make your own DIY ring light or buy a ready-to-use commercial one, you should weigh the pros and cons of both variants. DIY ring lights are more favorable in terms of customization and minimum expenses. Commercial products stand out with ease of use and top quality.
I have tried both options and I am ready to provide an unbiased assessment. For easier comprehension, I've created a table that lays out the key differences between commercial and DIY ring lights for camera. Hope, it will be easier for you to decide which option suits your needs, budget, and skills better.
| Feature | DIY | Commercial |
|---|---|---|
|
Cost |
Rather low, often less than $30 |
In the range from $50 to $200+ |
|
Customization |
Remarkable customization to suit specific needs |
Quite limited |
|
Skill Level Required |
Basic modeling skills; Great variant for novices |
None; ready to use out of the box |
|
Time Investment |
Assembling takes 1-2 |
Instant use; no assembly needed |
|
Durability |
Varies; dependent on materials and build quality |
Generally high; designed to withstand active use |
|
Portability |
Can be lightweight for trouble-free transport |
Varies; some models are bulky |
|
Light Quality |
Hinges upon the quality of LED strips used |
Typically high and consistent |
|
Power Options |
Can be adjusted for battery or outlet |
Often comes with both battery and plug-in options |
|
Warranty/Support |
No warranty; self-maintenance |
Warranty and customer support included |
|
Availability |
Accessible materials; DIY whenever needed |
Requires purchase; subject to stock |
|
Innovative Features |
Limited to your ideas and resources |
May boast cool features like dimmers, remote control, adjustable color temperature |
|
Eco-friendliness |
May consist of recycled materials |
Varies; depends on the manufacturer |
|
Learning Experience |
Educational; boost DIY and crafting skills |
None; purely functional |
|
Aesthetics |
Personal and bespoke |
Professional and sleek designs |
Much like crafting a DIY light box, it usually takes approximately 1-2 hours. The time spent depends on your proficiency and how intricate your design is.
Absolutely! Feel free to try out different shapes such as squares or triangles to achieve distinct lighting effects. Nevertheless, keep in mind that a ring shape is optimal to achieve uniform lighting and minimize shadows.
The optimal choice is the daylight or white color temperature, which creates a natural daylight effect. I don’t recommend buying warm or cool effect diodes as they can look yellow or blue in the frame with different camera settings. You can find the appropriate markings on the LED packaging to help you make the right choice.
Yes, you can make ring lights for iPhone. The process is the same as above, with a difference in the size of the circle for your lamp, it should match your iPhone camera lens. I advise you to fix the smartphone and the ring lamp on a tripod for stability. If you don’t have one, make a DIY iPhone tripod – it’s as easy as making a DIY phone ring light.
Certainly! Just buy a battery-powered LED strip or a battery pack compatible with the LED strip. This is a great solution for those who are going to carry such equipment even in a place where there is no way to connect to an outlet, for example, to use the ring light for Tik Tok on the street.
If the user complies with the conditions for the use of LEDs and power supply, any DIY ring light does not pose a danger to him. At the same time, you should be careful when cutting cardboard with scissors or a utility knife so as not to get hurt. It is also important to ensure that your lamp is stable when mounted on a high-end or budget tripod.
When choosing the size of your future ring lamp, you should start with your goals and expectations. If you’re going to make videos outside, then portability is a priority, so the lamp needs to be small enough to be easily transported. If you are engaged in portrait photography, then a larger size will be optimal. Roughly speaking, the diameter of the lamp should be twice the size of the model’s face to create a flattering effect.
Yes. By incorporating different colored gels or filters in front of the light source, you can achieve various artistic effects and color casts. Besides, experimenting with the placement and distance of the DIY ring light can create interesting shadows and highlights, adding depth and dimension to your subject.