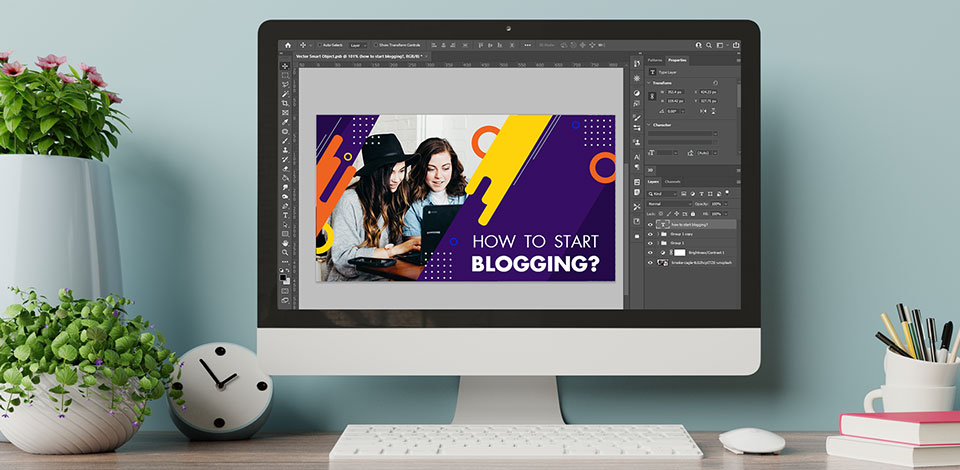
A video thumbnail resembles a cover of any printed media in certain ways. It means that it should be attractive to potential viewers and encourage them to see more. Ordinary thumbnails generated automatically by YouTube are obviously not suitable for this role and usually lead to a decrease in the view count and profit margin of uploaded videos.
That’s when custom Photoshop thumbnails come to the rescue. Here is a comprehensive guide covering all the steps you need to take to build a catchy and appealing custom thumbnail in Photoshop.
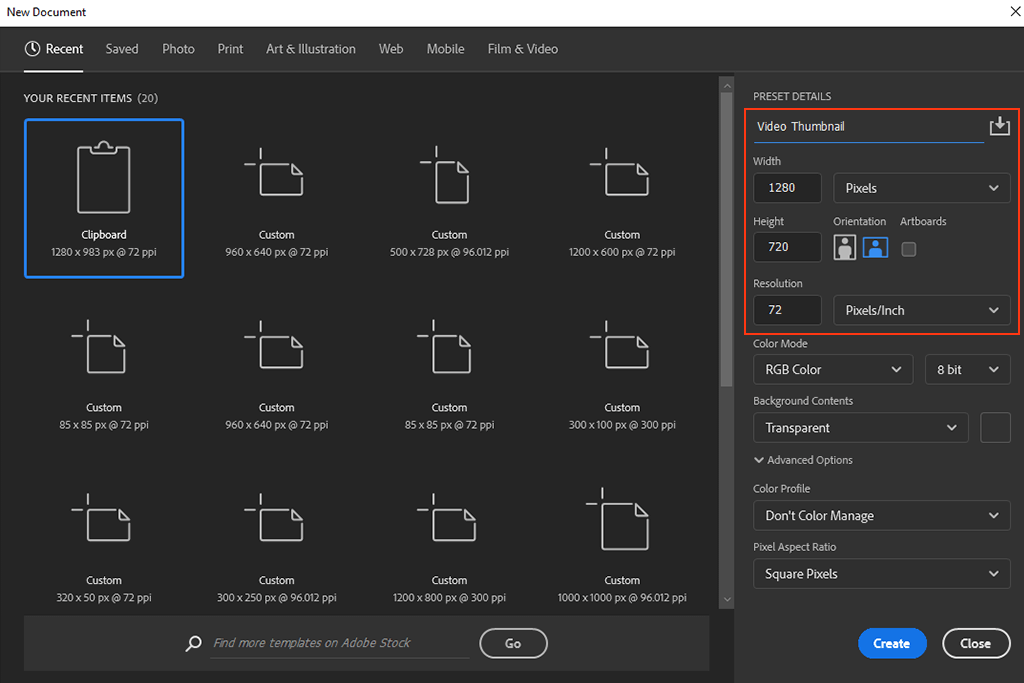
Launch Photoshop and create a new document by pressing Ctrl + N/Cmd + N in case you’re using Photoshop keyboard shortcuts, or by clicking File > New.
The New Document dialogue window will appear. You’ll notice the Preset Details section where you should set the proportions for your future thumbnail. Take into consideration, that the most frequently used thumbnail resolution is 1280x720 with an aspect ratio of 16:9. You should always try to use such settings.
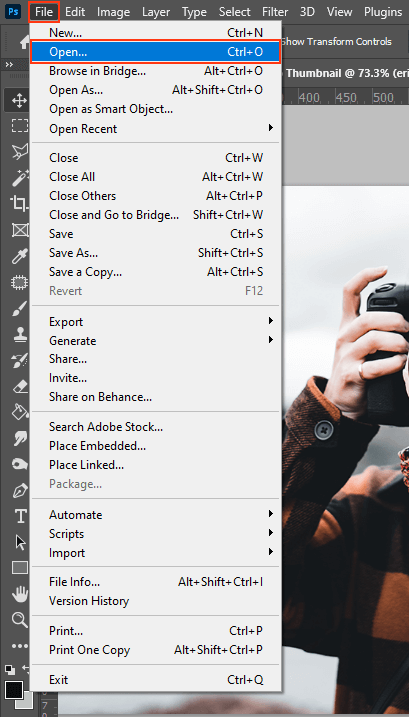
Select a picture that better represents your YouTube video ideas. Click on File in Ps top left corner and select Open, or use Ctrl + O combination on your keyboard. You’ll notice a Browse box where you should find the image you’d like to use, select it, and hit the Open button.
Excellent thumbnail design components include bright colors, photos of people, and uncomplicated objects. This time I’ve picked a photo of a lady holding a camera because I’m working on an image for a photography topic.
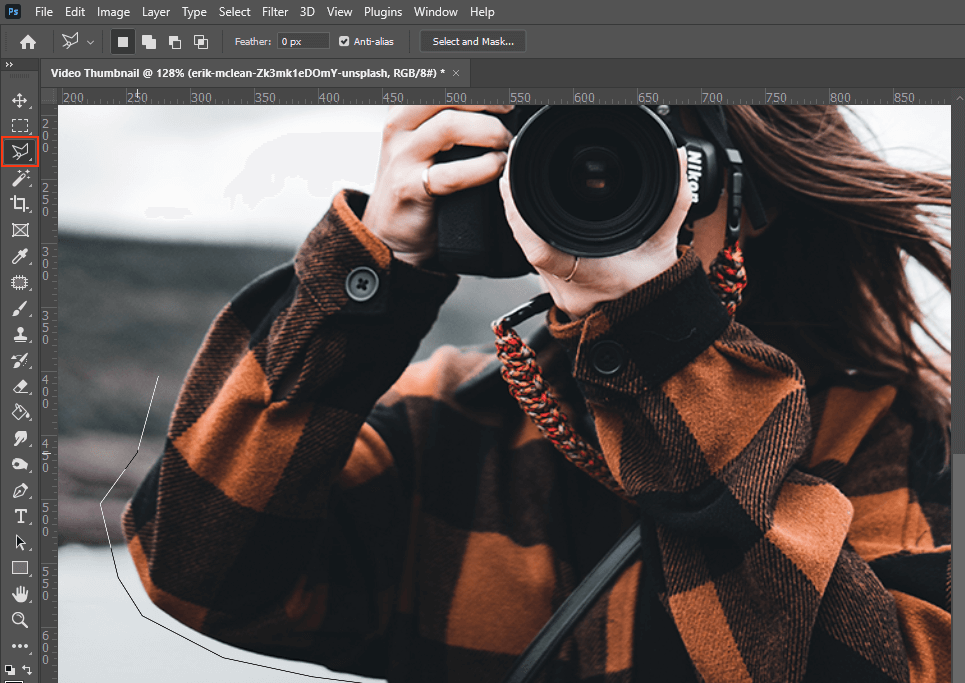
Select the Polygonal Lasso Tool to highlight the image contours. To do this, just go to the Tools panel, click on the Lasso Tool icon, leave your cursor there until a list of different lasso tools appears, and then choose the Polygonal Lasso Tool.
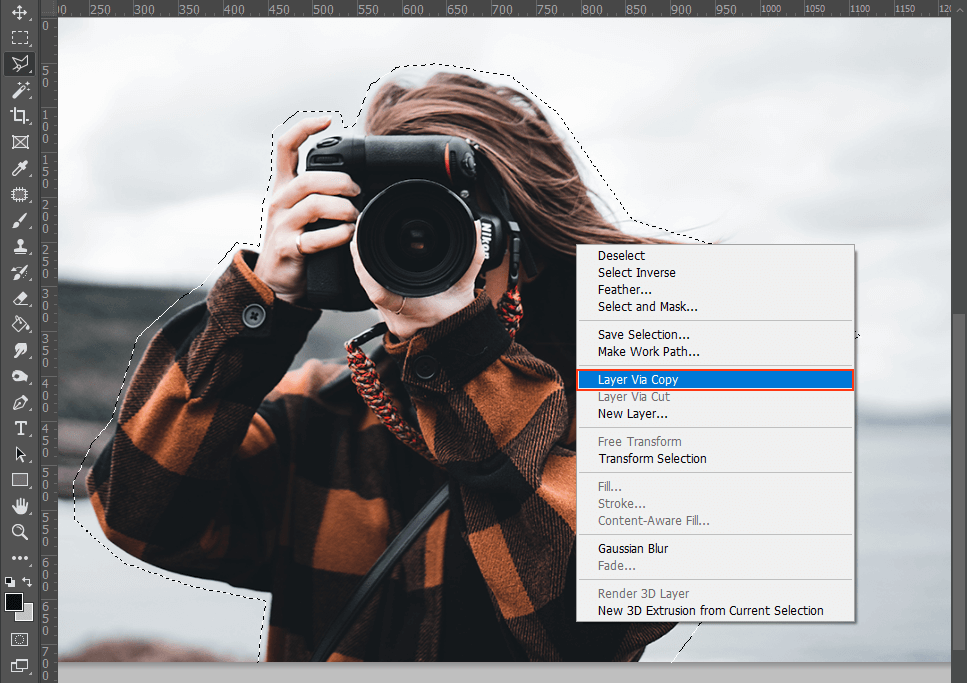
I chose a cutout style for the girl in this PSD thumbnail to make her stand out from the surroundings. Trace over the outer sides of the object for rough highlighting and the tool will automatically cut it around. After the selection is complete, press the right mouse button and choose Layer via Copy.
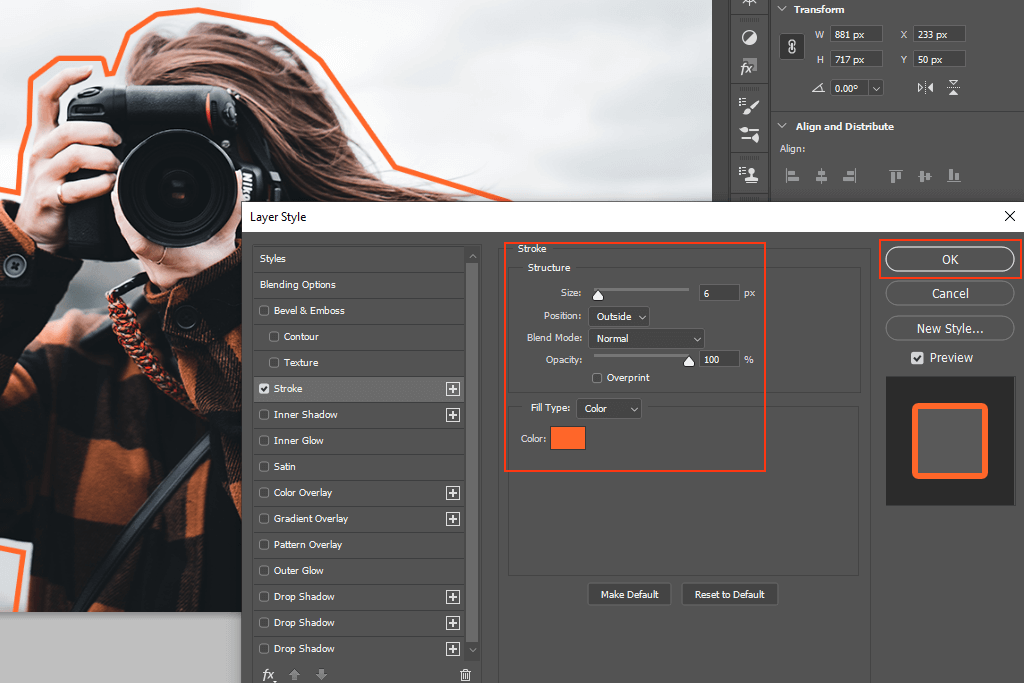
Add an expressive outline to the image in Layer Style panel. First, double-click the recently created layer. The Layer Style window will appear. Find and click Stroke in the list on the left side and pick the color that you want. I’ll use an orange line this time.
If a clear and uncomplicated background is your target, then a gradient is what you need. Go to Layers box, press the Adjustment Layer and select Gradient. Test different gradient styles to find which ones you prefer. For this case, I’ve decided to pick dusty pink to rosy pink, because it complements the original pink background.
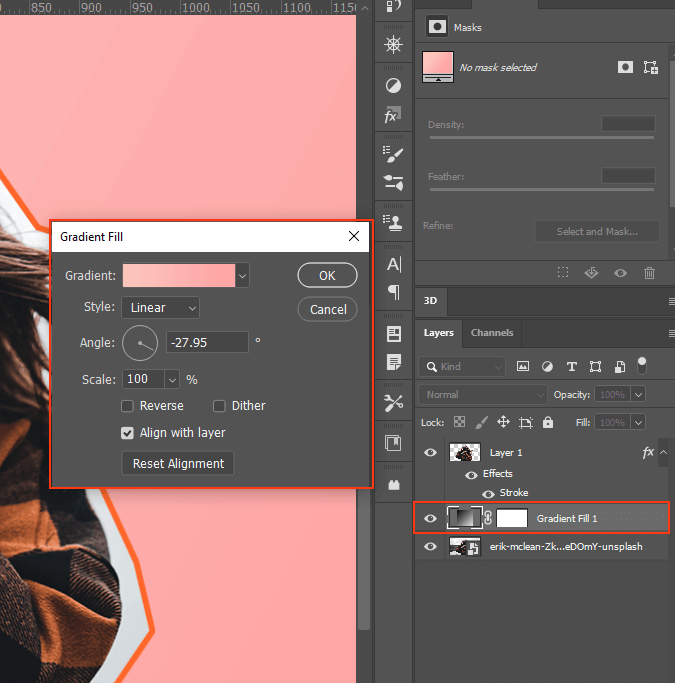
Style determines the gradient form.
Angle determines the gradient’s angle of application.
Scale adjusts the gradient’s rate.
Reverse swaps the order of gradient’s colors, while dither adds some noise to the gradient, making it blend more smoothly.
Align With Layer checkbox is used to match the gradient with the layer on which it’s being applied. You may adjust the gradient’s center by dragging in the picture window. Move the Gradient Fill down until it’s visible beneath the cutout layer.

Hover the cursor over Blend Mode to see how each alternative affects the image you’re working with. This time I chose Liner Burn as it brings more contrast to the presented colors.
I also decided to change the position of the cutout image a bit with the Move Tool.
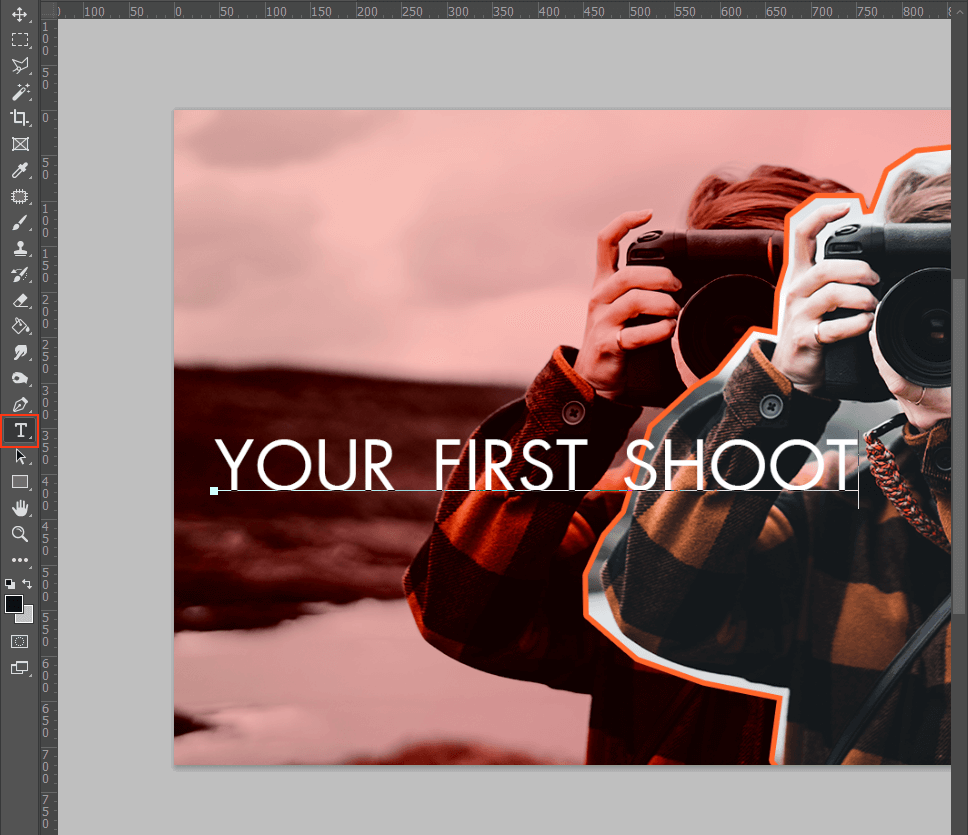
Inserting some text is an effective method to give viewers a hint about the content of your video covers in general terms. Select the Type tool to make a short outlining header. Then choose the text style you liked the most. There’s a variety of fonts available and you can access them by pressing More Fonts.
You can modify parameters like leading and size tracking, responsible for space between lines and letters respectively, or change the color of text in Photoshop.

I decided to turn the bottom-line text bold to draw more attention. The Options bar lets you do this.

Bringing some style and vibrant colors to your header may help it to excel. Select the Rectangle tool and draw a box around the top line of the text. Pick a color that blends well with the picture and drag the rectangle in the Layers panel down so it shows below the text.
If you want to adjust the rectangle sizes, press Cmd+T/Ctrl+T and move the slider; drag and change the position of the rectangle after that. Save the adjustments using Return or Enter keys. I’ve decided to pick an orange color so that it matches the outline I created earlier.
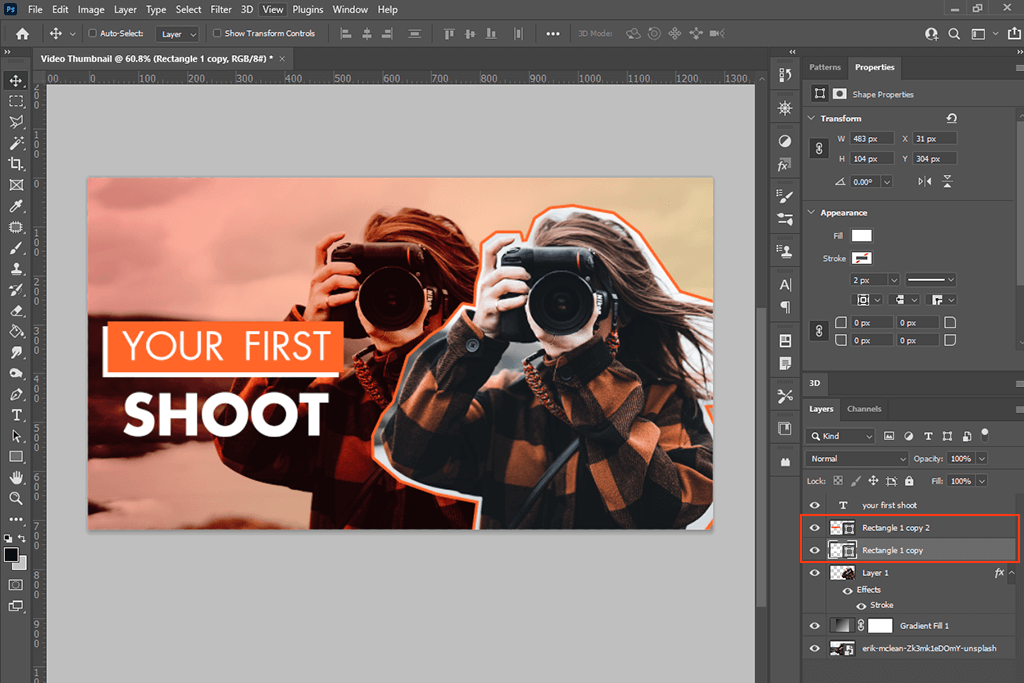
Use Cmd+J/Ctrl+J combinations to duplicate the rectangle. Place it behind the current frame to add a drop shadow in Photoshop. It’s an excellent method to give Photoshop thumbnail header more depth.
Your thumbnail is ready! Remember to save the result, and preferably, do it twice – as a PSD file (so you can easily launch Photoshop and modify it), and as a JPEG file (so it’s ready to be shared on YouTube). Applying the same colors, layouts, and font styles consistently while you’re gathering your thumbnail library will make it easier to bring your channel a cohesive appearance.
If you want to enhance the appearance of your channel even more, then you should make a YouTube Banner in Photoshop.
If you lack Photoshop skills or want to spare some time, contact our team of experts. They can modify your photos in any way you want and turn them into unique PSD thumbnails. We offer a reasonable pricing and fast turnaround.
Would you like to immediately capture the attention of viewers to your thumbnails and make them click the “Watch” button? Then use this set of bright and colorful overlays. It doesn’t matter what YouTube video style you prefer. In this pack, you’ll definitely find what you want. It includes a variety of vibrant effects, such as blossoms, flares, snowy overlays, etc.
The recommended thumbnail resolution is 1280x720, the width can’t be less than 640p, and the ratio should be equal to 16:9. You also need your picture to be smaller than 2MB in order to make it possible to add it on YouTube.
Bebas is a well-known and one of the most widely used fonts for video categories like cosmetics overviews, cooking recipes, etc. This straightforward and attractive typeface is frequently used with dark outlines and white letters. It’s widely used by YouTubers for their banners as well.
The thumbnails may be changed during the video posting process, or after it has been processed. Even after the video has been posted, you still can change its thumbnail. During uploading and processing, there are 3 thumbnail selection options available.
Using thumbnails that have been modified from their original usage with free YouTube thumbnail makers is acceptable under fair use guidelines. The more significant the changes, the greater chances that the court will declare the usage fair.
If the thumbnail is deemed undesirable and irrelevant for users, YouTube may block it. Any thumbnail picture has to comply with YouTube community rules.


