I like to use online camera simulators to practice adjusting camera settings and understand how they work without needing an actual camera. With these simulators, I can see changes in real time and learn about ISO, shutter speed, aperture, lighting, focal length, etc. in any light scenario.
Regular practice with these tools helps me get used to different shooting conditions, like rainy days or bright sunlight.
When picking any online camera simulator on my list below, I looked for ones that have a realistic interface, like a real camera. They should let me adjust settings like aperture, shutter speed, ISO, white balance, and focus. It's also helpful if they offer tutorials, exercises, and feedback to help me learn. Plus, many of them are either free or very affordable, starting at just $1.99.
Aperture. This is a hole in the camera lens that controls how much light gets to the camera's sensor. It's measured in numbers like f/2.8 or f/8. A smaller number means a wider hole, letting in more light, while a larger number means a smaller hole, letting in less light.
Shutter Speed. It decides how long the camera's shutter stays open, letting light hit the sensor. It is measured in fractions of a second, like 1/100 or 1/1000. Quick shutter speeds freeze action, while slower ones make things blurry. In shutter priority mode (Tv), you pick how long the light shines on the sensor.
ISO. This changes how bright or dark your photos are. Lower ISOs like ISO 100 make cleaner pictures with less fuzziness (noise), but they need more light. Higher ISOs like ISO 1600 or ISO 3200 make the sensor more sensitive, which is useful in dark places or for quick shots.
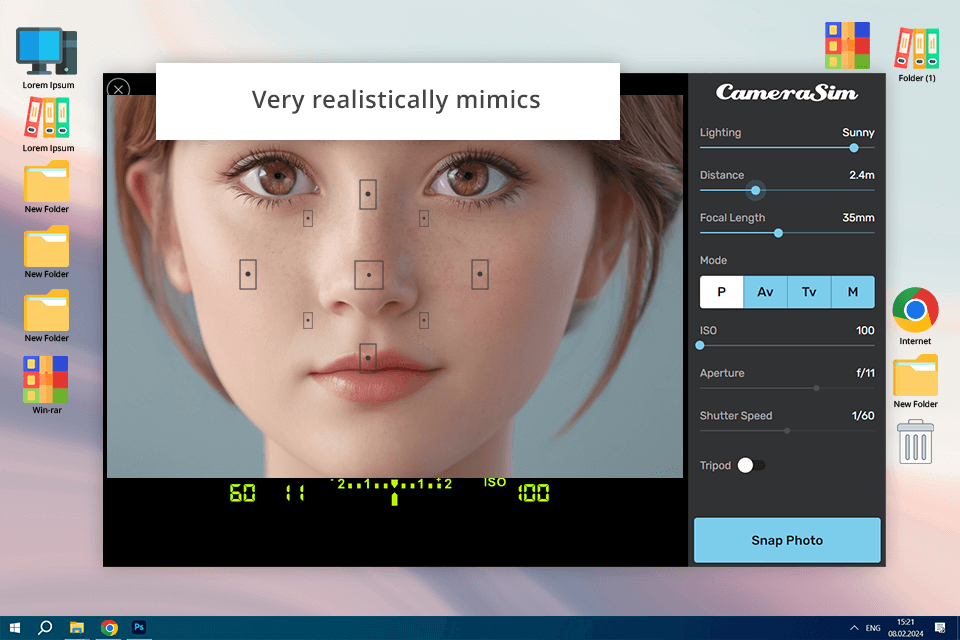
Can measure: Lighting, Distance, Focal Length, ISO, Aperture, Shutter Speed, Tripod mode
Verdict: CameraSim is the only simulator with such a wide range of camera tools. There is also a simulation of camera modes – P, Av, Tv, and manual. The first three modes will lock a device and automatically configure ISO, Aperture, and Shutter Speed. In manual mode, I can adjust all these settings the way I want.
During my test, I recreated a portrait session in a poorly lit room. By adjusting the ISO to 800, setting the aperture and depth of field to f/2.8, and lowering the shutter speed to 1/60s, I captured a well-exposed image with minimal noise. This practical approach helped me understand how these settings interact.
With built-in tripod mode, I can avoid camera shake and take a clearer shot at low exposure. However, the number of pictures I could see at once was limited, so I had to reload the page every 15 images to start over.
You can use the photo simulator for free online, or pay $1.99 for the iOS version, or $9 for the Mac and Windows version called CameraSim. There's also CameraSim Pro, which is a DSLR simulator with cool 3D game features, and it costs $29.
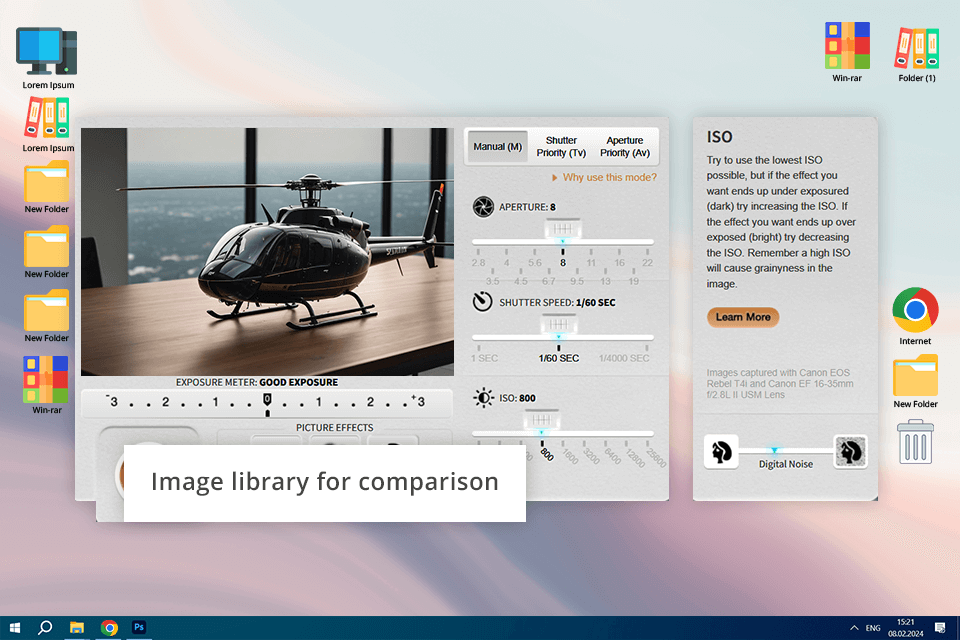
Can measure: Aperture, Shutter Speed, ISO
Verdict: Canon Play offers a less extensive list of tools than the previous online camera simulator. I can discern how a picture looks with the focus on the main subject when the subject is in motion and blurred, and how noise appears in the frame. There are also several modes – manual, shutter priority, and aperture priority. Using these modes, I can fully express my creativity and simplify the process by locking the ISO.
For example, I tried Canon Play's scene with a spinning propeller. I liked that it's online and doesn't need registration. By setting the shutter speed to 1/500s, I could freeze the motion, getting a clear image of the propeller. Lowering the shutter speed to 1/30s added motion blur, showing how shutter speed affects moving objects.
A cool feature is that Canon saves the last three shots side by side, so I can compare how my settings changed the final images. Just like a real Canon camera, there's an exposure meter on the screen. Canon also gives photography tips for beginners in a sidebar and feedback section. If my photo came out too dark or light, the photography simulator will automatically determine which parameter was set incorrectly.
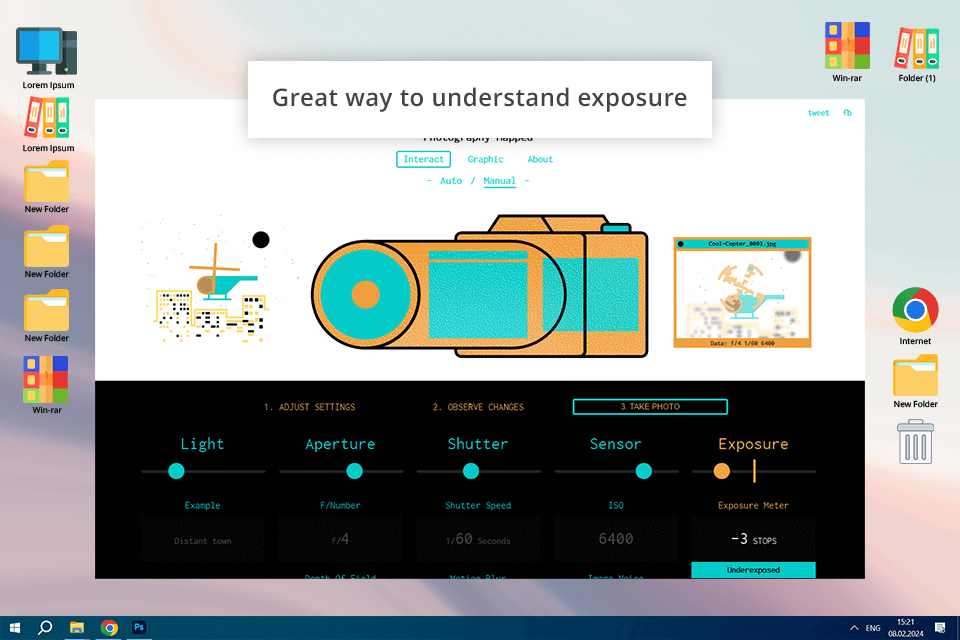
Can measure: Lighting, Aperture, Shutter Speed, ISO
Verdict: Photography Mapped lets me choose my settings and then click “Take Photo” to see a simulated image based on those settings. It shows if my photo will be too bright or too dark, explains depth-of-field, and predicts how much noise there might be.
When I tried it out with a scene featuring a helicopter, I played around with different situations. I made a dark environment by setting a high ISO of 1600, a wide aperture of f/2.8, and a slow shutter speed of 1/30s.
The simulator said the photo would be too dark, so I adjusted the settings. I increased the shutter speed to 1/60s and the ISO to 3200, and then the simulator said the photo would be properly exposed but with some noise, showing the trade-offs of shooting in low light.
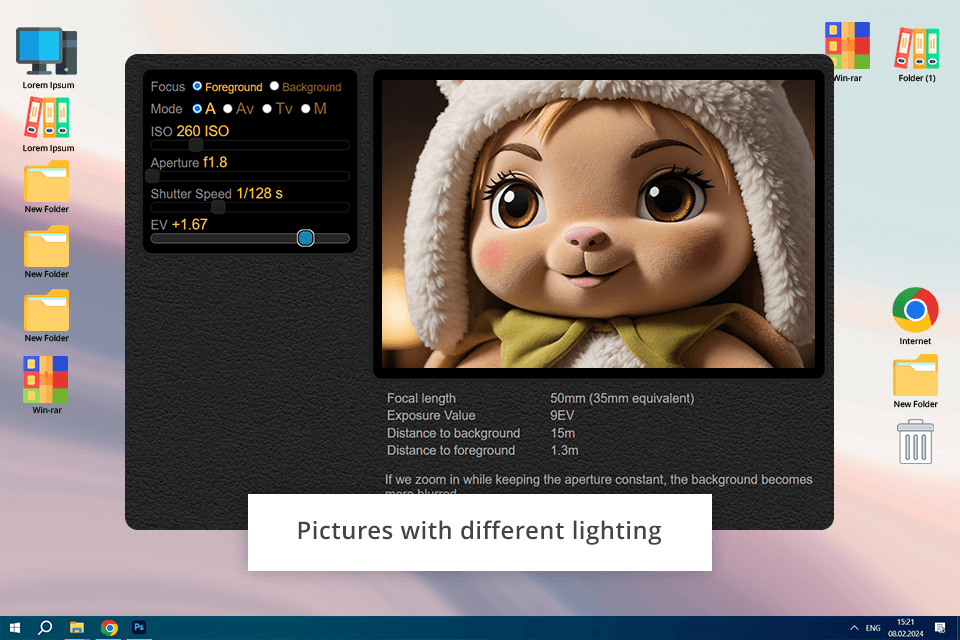
Can measure: Shutter Speed, ISO, Aperture
Verdict: Recently, I tried out Be the Camera and discovered it's a great tool for learning about handling different lighting situations. It mimics varied shooting situations, including bright sunlight, cloudy weather, a bright day, in the living room with a small garland in the background, and more.
This allows me to further understand how ISO, aperture, and shutter speed are interdependent.
In a dimly lit living room, I took a photo that was too dark. With settings at ISO 200, f/4 aperture, and 1/60s shutter speed, the image was underexposed. Boosting the ISO to 1600 made the image brighter, but it also added grainy spots, showing the trade-offs in low-light photography.
Also, in addition to the scene, I can choose camera models with different crop factors or even try to take a high-quality shot in a dark room with a camera phone. I also like that there are explanations of different parameters and how to use them properly. For example, I read about how to reduce noise in a selected frame or how to achieve a bokeh effect.
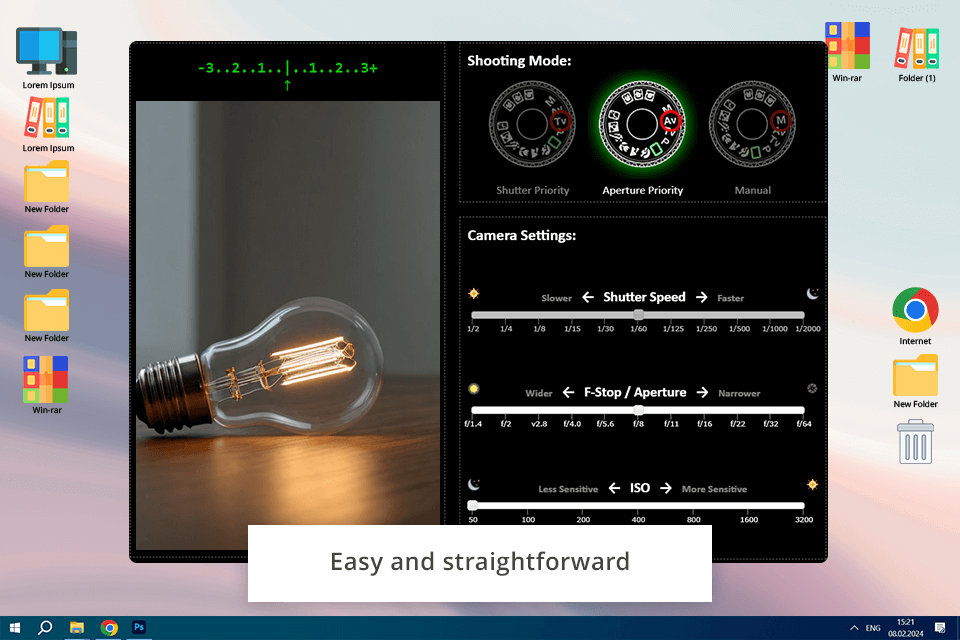
Can measure: Shutter Speed, Aperture, ISO
Verdict: I discovered that Andersen Images' Exposure Simulator is a simple and useful tool for learning about exposure. It offers three shooting modes: Shutter Priority (Tv), Aperture Priority (Av), and Manual. There are also useful graphs, so I can understand that the slower the shutter speed, the narrower the aperture should be, and vice versa.
During my test of the camera simulation software, I aimed to learn the concept of the exposure triangle. In Shutter Priority mode, I chose a shutter speed of 1/125s. The simulator automatically adjusted the aperture to f/5.6 for a well-exposed image. When I switched to Aperture Priority mode and set the aperture to f/2.8, the camera simulator changed the shutter speed to 1/500s, showing how these settings affect each other.
However, this program lacks settings, tips for beginners or features to change a picture. This simulator features a camera dial that looks like the one on Canon cameras. If you want to use a Nikon or Sony camera, you'll need to remember the symbols and shortcuts for those systems.
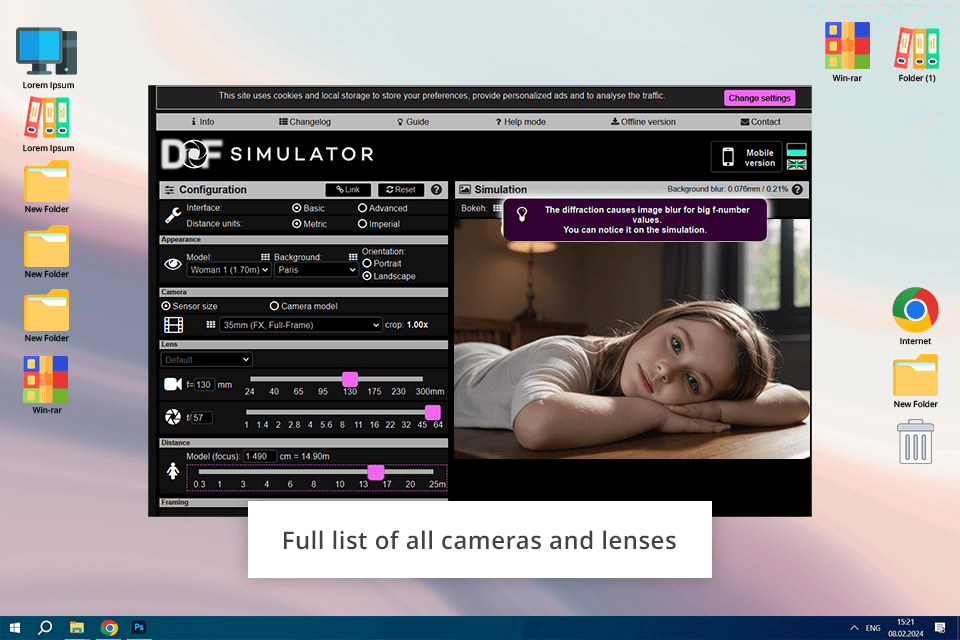
Can measure: Depth of Field, Focus
Verdict: DOF Simulator is an excellent tool for understanding how depth of field and focus work. There are different backgrounds and objects to choose from, so I can create various compositions. In addition, it is the only camera simulator that offers a list of all existing cameras, so I can select a specific camera sensor to see whether it complies with my expectations before purchasing such a model.
Also, with this online camera lens simulator I can choose any serial lens from almost any manufacturer. After that, play with focal length and aperture. The "Distance" tab contains sliders to change the distance between the subject and the camera in the range from 0.3 to 25 m.
For my test, I picked the Nikon camera D6 and a 70-200mm f/2.8 lens. I chose a background with a faraway view and put an object in the foreground 5 meters away. This created a nice blurry background while keeping the foreground object sharply focused.
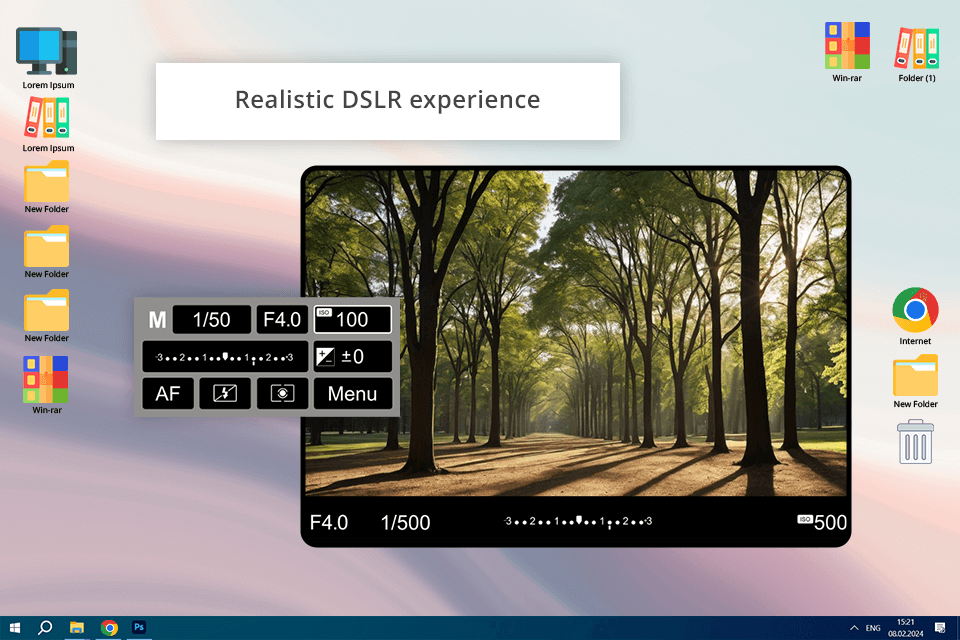
Can measure: ISO, Shutter Speed and Aperture
Verdict: This is a VR DSLR simulator made by Canon. It's like a game you can play with Oculus Rift, where you get to try out different Canon cameras and lenses in a virtual world to practice your photography skills.
The Camera Simulator by Canon Lab lets you pick from three cameras for photography and three lenses. You can control things like exposure and composition. I like how you can try shooting in different scenes, for example, with different lighting or moving subjects.
I tried using higher ISO settings to capture moving things without them looking blurry. The simulator showed me how pictures can get noisier at higher ISOs, helping me understand how it affects image quality.
An online camera simulator is a tool you find online that lets you play around with different camera settings, like ISO, aperture, and shutter speed to help you learn how these settings affect your photos without needing an actual camera.
Using an online camera simulator is great for learning about photography. It helps beginners understand things like exposure, depth of field, and get different composition tips. For experienced photographers, it's a handy way to practice new techniques and try different settings.
Most online camera simulators are free, but some may have extra features you need to pay for or need a subscription to use.
FNaF camera simulator online is a game where you control cameras to keep an eye on things. It's like the camera setup in the Five Nights at Freddy's games.
Online camera simulators try to be as realistic as possible, but they might not feel exactly like using a real camera. Still, they help learn and practice photography skills.
Yes, you can. The things you learn from using an online camera simulator, like composition and exposure, apply to real photography too.
Yes, many do. They are made to work with all sorts of cameras, like DSLRs, smartphones, and compact cameras. Some simulators are generic, while others simulate specific camera brands and models.