Even though Luminar Neo is a full-fledged standalone solution, there are a lot of users who prefer to use it as a plugin while pairing Luminar Neo with other software. If you like to retouch your images in Photoshop but also want to expand its functionality with some tools included in Luminar Neo, you can add the latter as a plugin in a matter of minutes. The tutorial below will comprehensively explain the installation process while breaking it down into simple, easy-to-follow steps.
Begin by launching Luminar Neo. To ensure you don’t run into any unexpected errors, close the host software (Photoshop in this case) before you begin the installation process.
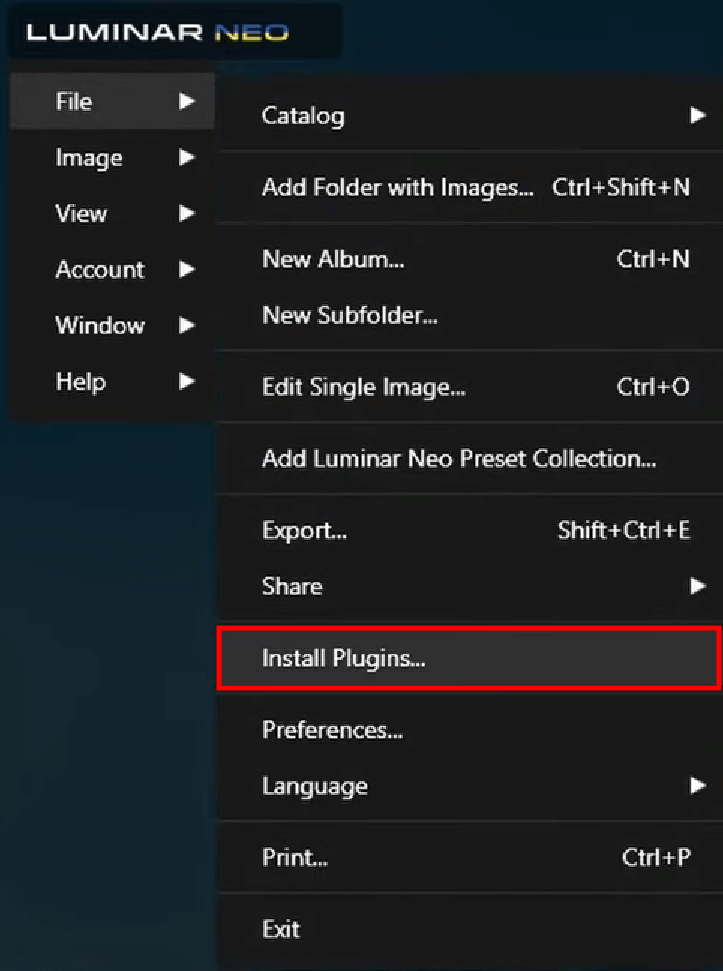
Go to File > Install Plugins (on macOS) or Luminar Neo > File > Install Plugins (on Windows). Select the needed host software in the dialog box that pops up and offers a list of potentially suitable applications that are installed on your system.

Press Install/Uninstall to start pairing Luminar Neo and Adobe Photoshop along with any other applications in which you’d like to use Neo as a plugin.
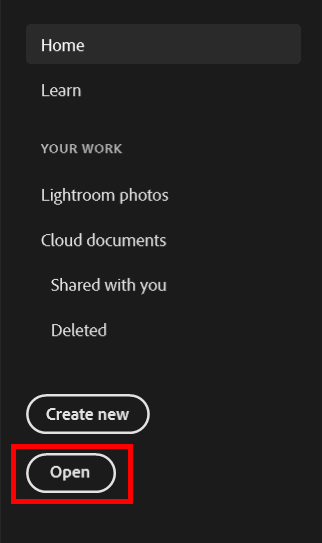
Launch Photoshop. Find and open the photo that you want to edit.
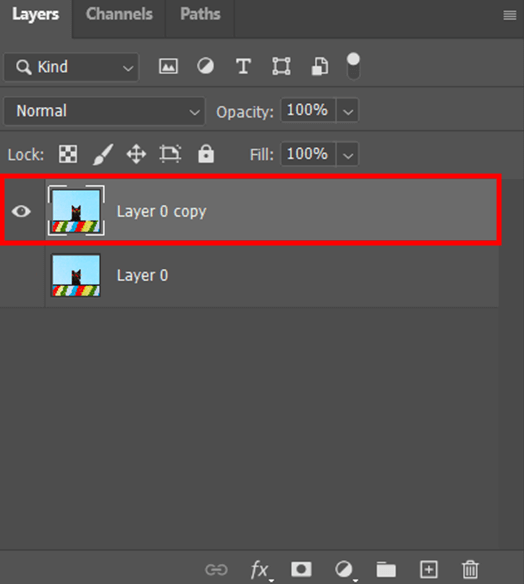
For non-destructive editing, duplicate the original layer by pressing Ctrl+J/Cmd+J.
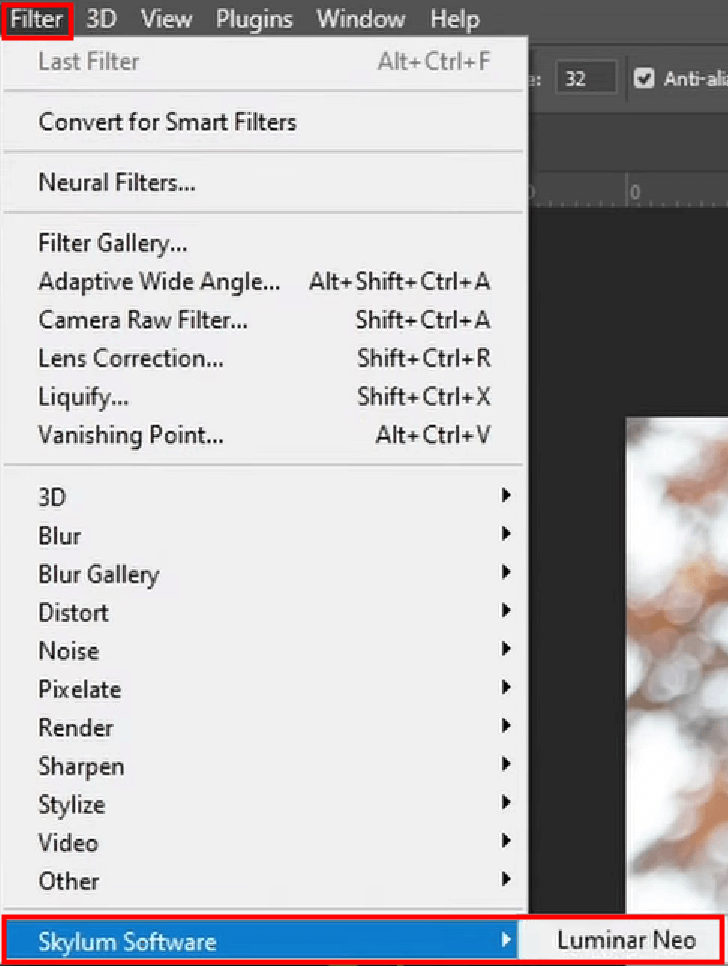
Pick Filter > Skylum Software > Luminar Neo … (a window will pop to confirm that Luminar is launched). Luminar Neo will instantly open the photo you were working on. Whenever needed, press the Luminar Neo icon on your Dock or Taskbar to return to it.
At this point, you can take advantage of all Luminar Neo features while editing your photos and adjusting their various parameters. This software offers a broad range of tools that includes Face AI, Portrait Bokeh AI, and Sky AI, which were also a part of Luminar AI. In addition to those, this version introduces the Mask AI, Relight AI, and Portrait Background Removal tools.
It should be noted that due to Photoshop’s restrictions, you won’t be able to find the Crop AI tool when you use Luminar Neo with Adobe Photoshop as a plugin. This is because Photoshop only allows its plugins to return photos that retain their original shape and pixel count. That said, you can easily crop or align your image in Photoshop before you start using the plugin.
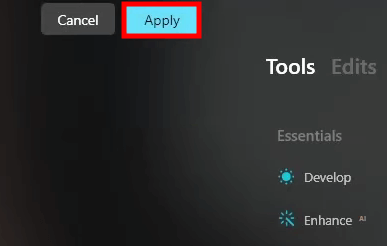
Once you’re done editing photos in Luminar Neo, press Apply to export the edited image to Photoshop. At this point, you can continue making adjustments in Photoshop if needed.
Both applications work great in tandem, as they both provide features that the other software lacks. As a result, you get to enjoy the best of both apps while simplifying the image editing process and relying on AI-based functionality to improve the colors, perform skin retouching, delete objects, and much more.

If you'd like to ensure your images look beautiful and appealing while minimizing the time you spend editing them, you can take advantage of this professionally-made set. These tools will allow you to enhance the colors in your photos in a matter of clicks without any hassle. The primary advantage of this set is its versatility which makes it a great choice for any photography genre you might be involved in.
All Extensions that are applied to individual photos (like the Noiseless AI) are available when you use Luminar Neo with Adobe Photoshop as a plugin. Extensions that deal with multiple images simultaneously (like the Luminar Neo HDR Merge bundle) are only accessible when running Neo as a standalone solution. That said, the ability to open multiple images in plugin mode is one of the things that Luminar’s developers are currently working on.
You can find out the number of supported devices when you’re purchasing Luminar Neo, as it should be highlighted on the checkout page to ensure you make an educated decision. Most plans allow you to use Luminar Neo on either 1 or 2 devices (“seats”). The 2-device plan lets you install and activate Luminar Neo on any system you want regardless of the operational system. Thus, you can employ one seat for your Mac PC and the other for your Windows laptop or computer. Alternatively, you can activate both seats on two devices that run on the same OS.
By employing Luminar Neo as a plugin, you can significantly streamline and simplify the image editing workflow of the host software. Such a pairing lets you completely change the way you approach photo editing, as you can employ Luminar’s AI-based tools to make single-click edits while performing more in-depth retouching in applications like Lightroom Classic (version 6 or newer), Photoshop (version CS5 or newer), and Photos for macOS.
Luminar Neo is supplied with all the trademark Luminar AI features while also introducing new advanced tools that give you previously unseen levels of control over the look of your images. It lets you take advantage of automatic dust and power line deletion, smart exposure adjustments, smart masks, and other handy functions. If you pit Luminar Neo vs Luminar AI, you’ll notice that the former is the ultimate version of what all the previous Luminar editions have been building up to.


