To give your portrait photo an artistic touch, you can make it look as if the bottom part of it were dripping. If you have never done advanced edits before, make sure to learn how to apply a paint dripping effect in Photoshop. Some professional retouchers achieve this effect by creating a mask, while others use more basic techniques to get a similar result. By following the steps described below, you can create a paint dripping effect even without any prior experience in professional image editing.
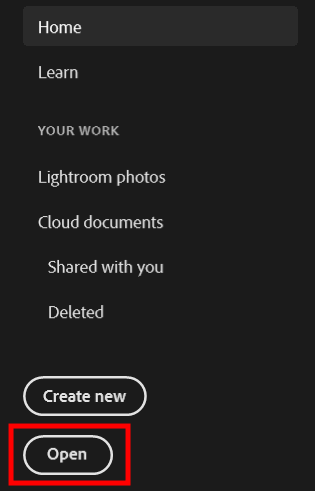
After launching Adobe software, find a photo that you want to enhance and import it. You can do it by going to the File menu and selecting Open.

You can find the tools you need under the Select menu in Adobe Photoshop. Click the Subject option to quickly select the model in the photo. Use shortcuts for creating a duplicate of the selected area (Cmd + C for Mac and Ctrl + C for Windows). Click on the new layer in the dedicated panel to see it. Paste the selected area to this layer (Cmd + V for Mac and Ctrl + V for Windows). Then, double-click on it to rename it as “Subject Cutout.”
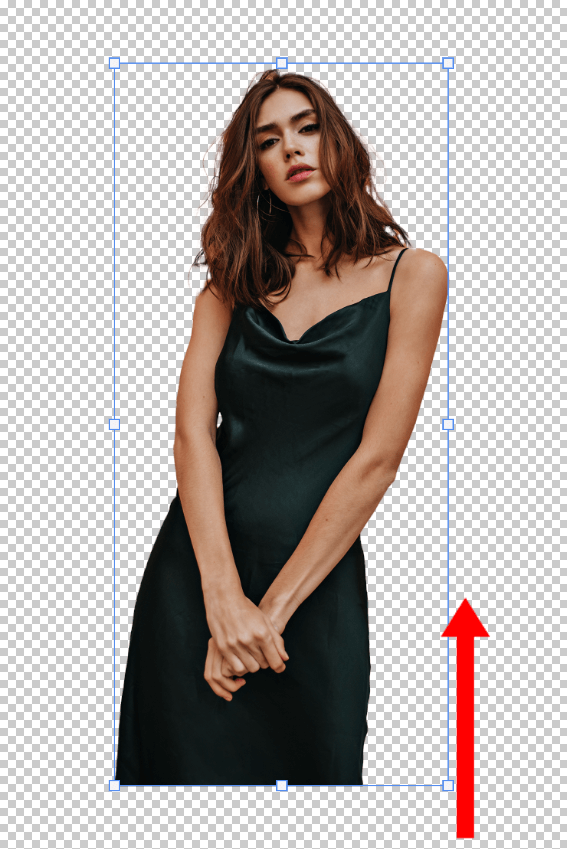
Drag the selected area that you added to the center of your workspace.
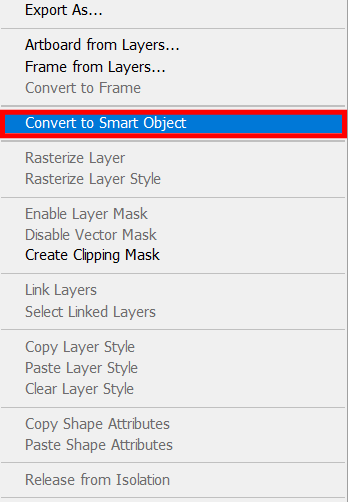
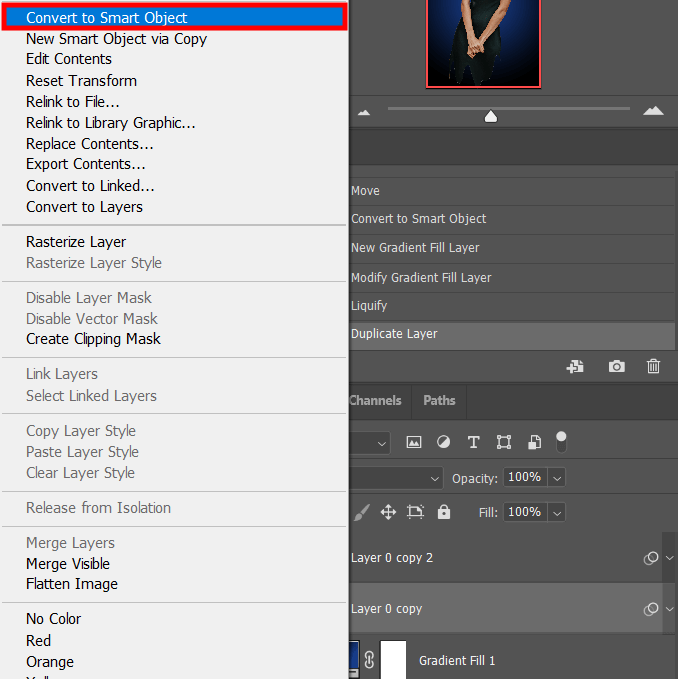
After selecting the Subject Cutout layer, right-click it and pick the Convert to Smart Object option from the drop-down menu. It will allow you to turn your layer into a smart object in one click. As the result, the icon on the thumbnail will be transformed as well.
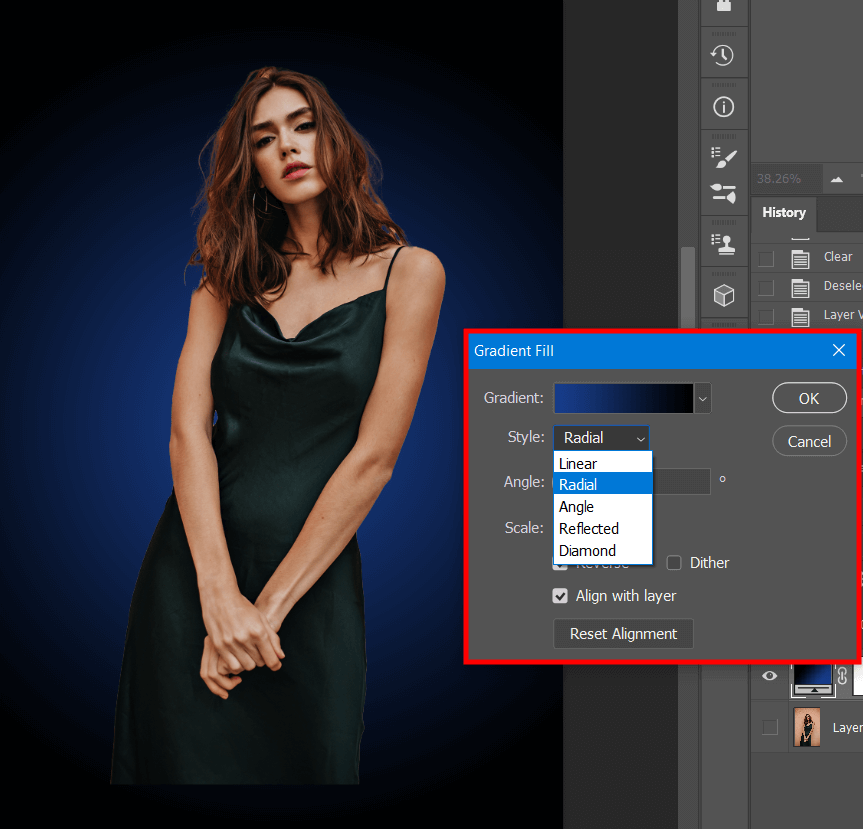
Go to the background layer with your source image. Then, open the Layer menu, select the New Fill Layer option, and click Gradient to see your gradient layer. When a new pop-up window opens, rename this layer as “Gradient Background.” Then, click OK without adjusting other settings.

Another step that you need to take when creating a Photoshop dripping effect in this photo editing software is to select the layer with the Subject Cutout. Then, open the Filter menu and select Liquify. If you don’t want to spend a lot of time editing your photos, read on to learn how to use the Liquify Tool in Photoshop.
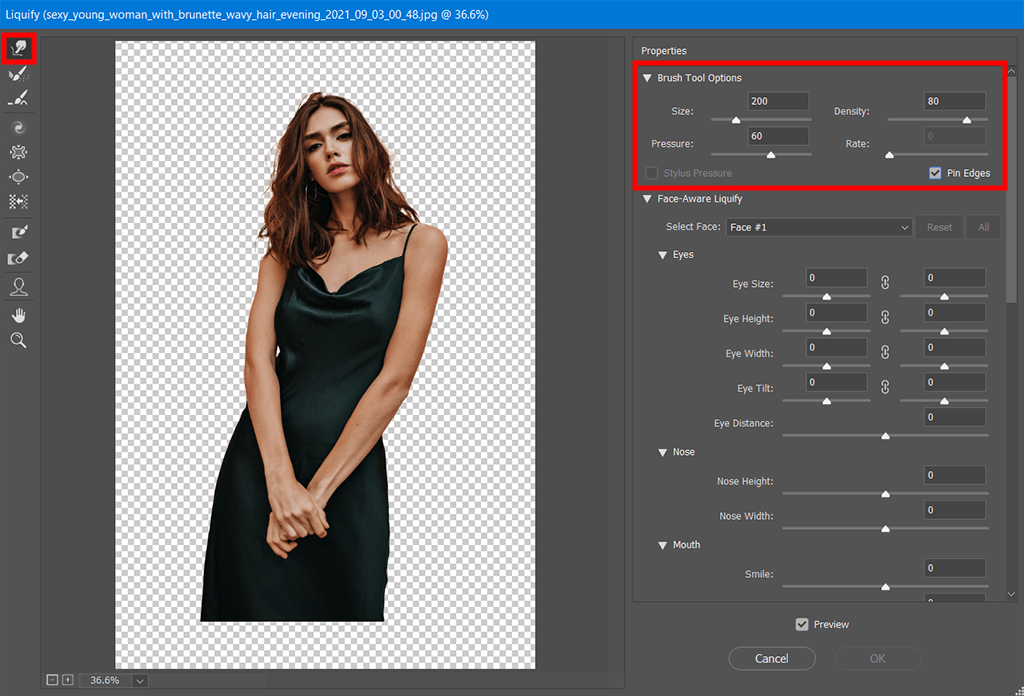
The next thing that you need to do is to set the Size of a brush to 200 or more. If it’s necessary, you will be able to further adjust it later to make the effect more realistic. For a better result, set the Density value to 80. The Pressure should be set to around 60. After adjusting the settings to your liking, check the Pin Edges box.
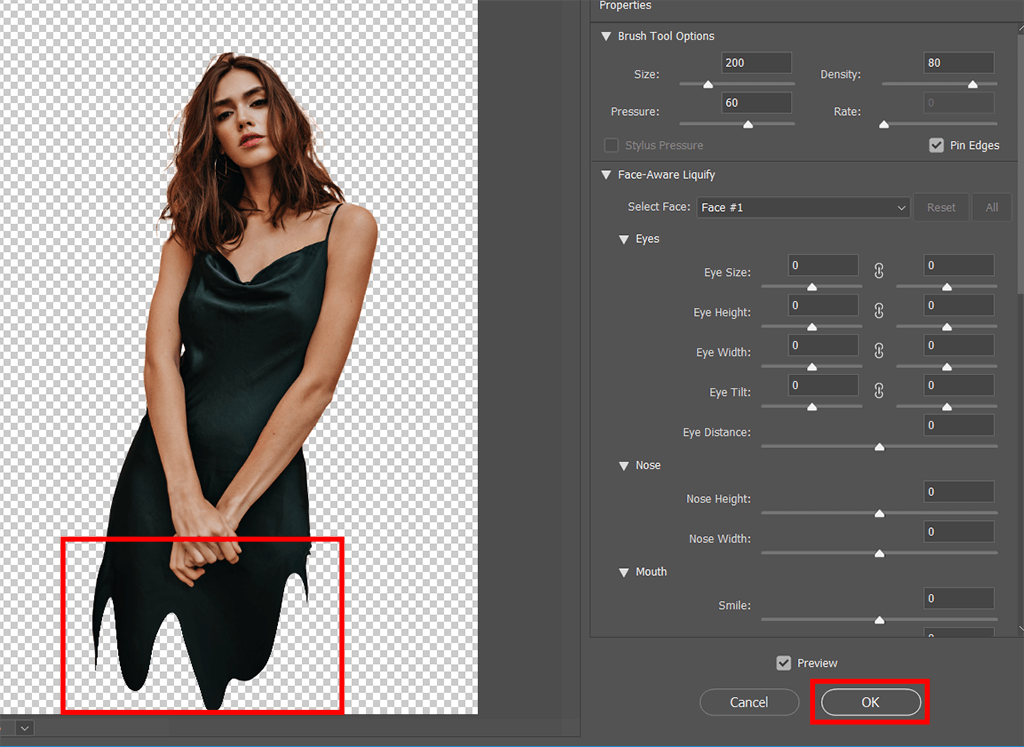
With the help of the Forward Warp Tool (W), you can move some parts of your picture down. If you want to extend the length of the drip, select any section that you need to make longer and push it lower. When you are fully satisfied with the result, click OK to confirm the edits.
Go to the Layers menu and create a copy of your Subject Cutout layer. To do it quickly, you just need to right-click the layer and select the Duplicate Layer option. Then, you can click twice on the name of the layer and type “Subject Cutout Front” to rename it.
To preserve the liquifying effect, you need to convert the Subject Cutout layer into a smart object. Right-click this layer to select it and choose the Convert to Smart Object option.
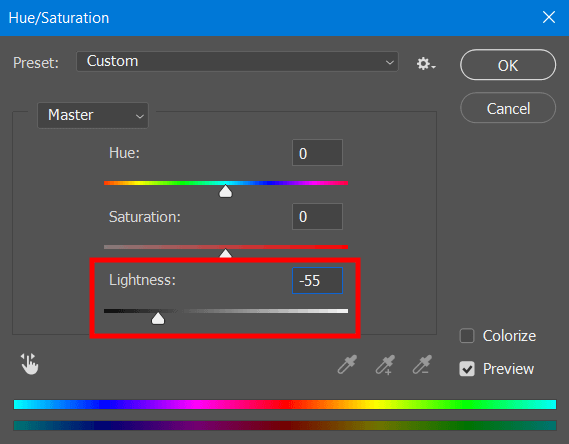
Click on the Subject Cutout layer to select it and go to the Hue/Saturation settings. To save time, you can use shortcuts, such as Cmd + U for Mac and Ctrl + U for Windows. When adjusting Lightness, select the -55 value. It’s advisable not to move the Hue and Saturation sliders. Finally, click OK to confirm your edits.
Make sure that the Subject Cutout layer is selected, then, open the Edit menu, click on Transform, and select Flip Horizontal. It will allow you to give your Photoshop drip effect a professional feel by creating the back of the drip.
After you do this, you will see two cutout pictures on the screen. With the help of Move Tool (V), you need to align your layers so that their bottom parts are as close as possible.
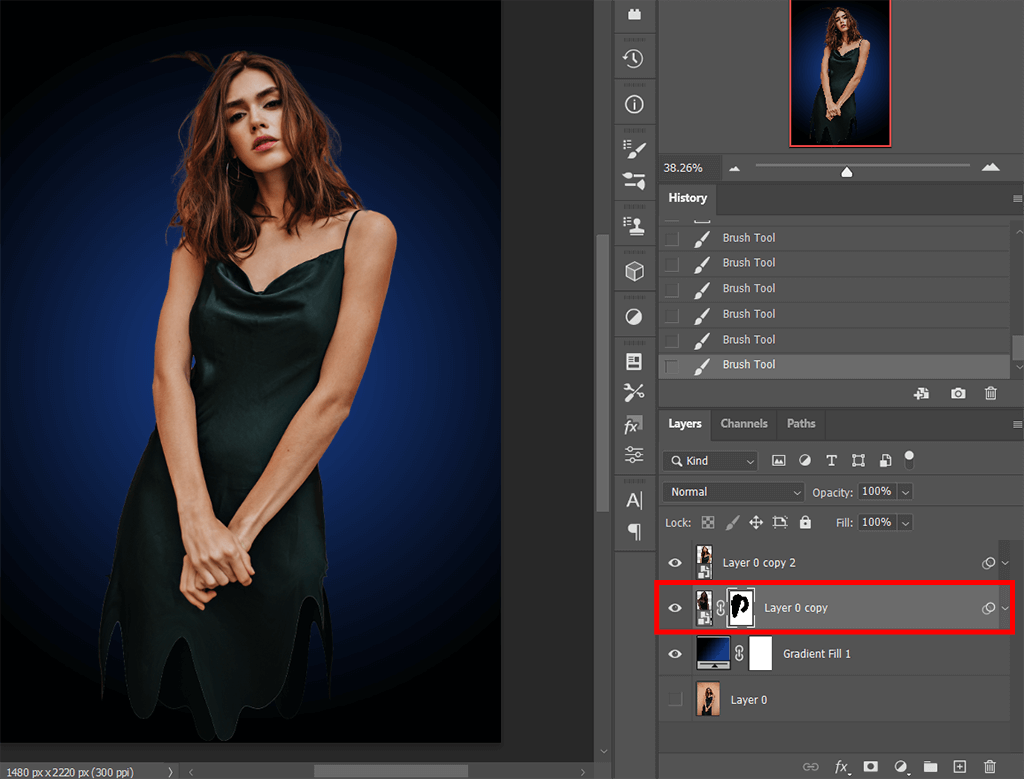
To achieve a more mesmerizing paint dripping effect Photoshop, you need to make drips in both pictures visible. However, it’s better to delete the copies of the head and arms of the model. If you want to make them invisible in the frame, open the Layer menu, select Layer Mask and pick the Reveal All option.
Go to the Subject Cutout layer and click on the mask thumbnail to select it. Then, select the black color (#000000).
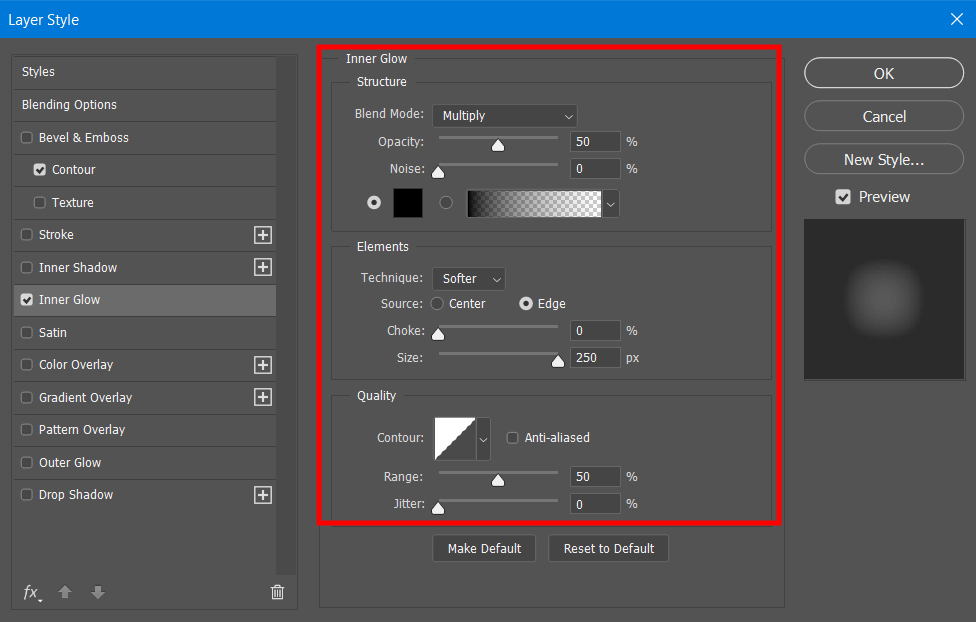
While the mask of the layer with Subject Cutout remains selected, go to the Layer menu, select Layer Style and click on Inner Glow. Alternatively, you can go to the Layer panel, select the Add New Layer Style option and choose Inner Glow.
After opening the Layer Style dialog window, you need to select a suitable Blend Mode. After clicking on Multiply, set its Opacity to 50%. To access the color picker, double-click on the special box. Then, select the black color (#000000).
Go to the Elements section, and select the Softer Technique. It’s better to choose the Center option in the Source section. Set Choke to 0, and adjust the Size value by setting it to 250px. To achieve a more striking effect, you need to set the Range value to 50%. By clicking OK, you can save your edits. These actions will enable you to add a shadow to your drips to give them a more realistic feel.
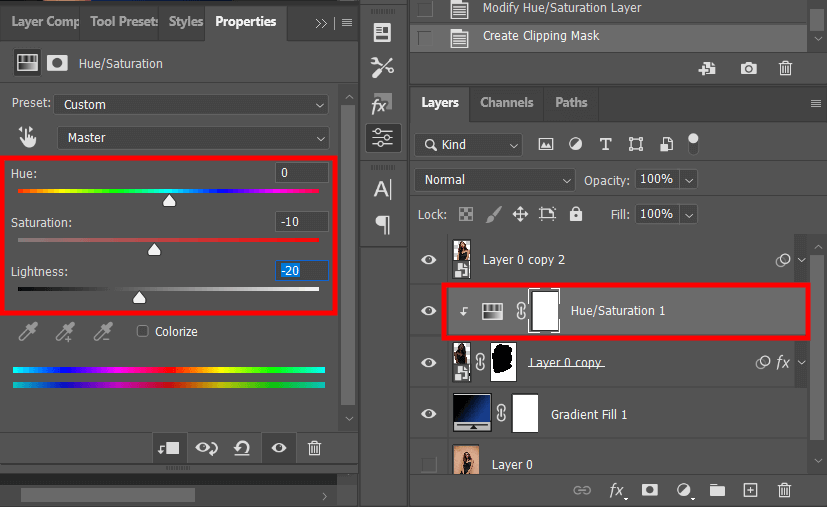
The next step you need to take is to open Layer > New Adjustment Layer > Hue/Saturation and click OK in the pop-up window. When adjusting Hue/Saturation values, it’s better to select 0 for Hue and -10 for Saturation. Lightness should be set to -20. To proceed, find the clipping mask button below other settings and click it.
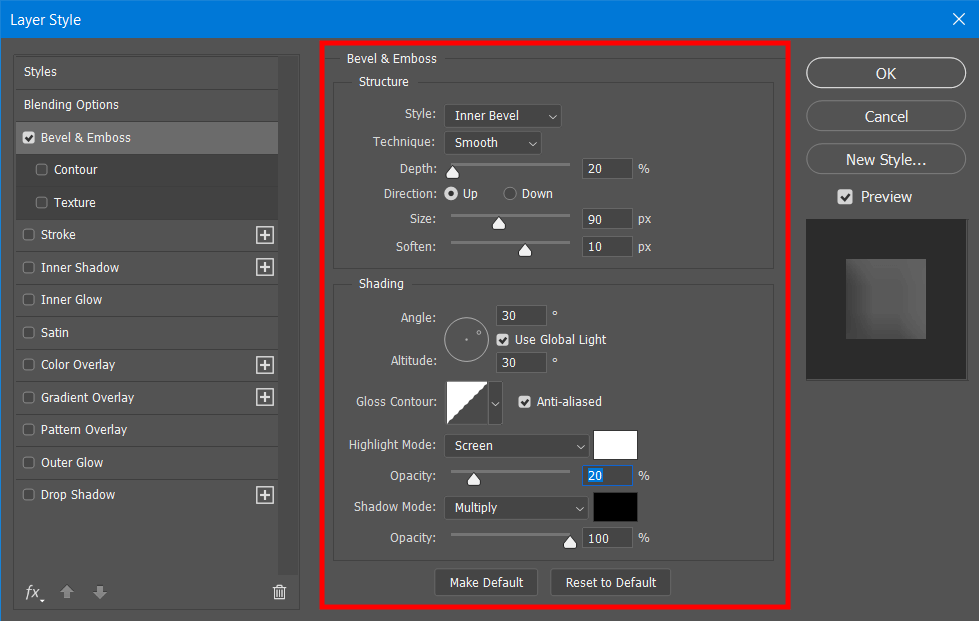
Go to the Layers Panel and find the Subject Cutout Front layer. Then, you need to click the Add a Layer Style and select Bevel & Emboss. In the Style menu, select Inner Bevel, set Technique to Smooth, and adjust the Depth value by setting it to 20%. Click the Up direction option. The Size should be 90px, while the Soften value should be set to 10px.
In the Shading section, adjust the Angle to 90 degrees and set the Altitude to 30 degrees. When selecting Highlight Mode, click on Screen. It’s recommended to select the white color (#FFFFFF) and use 20px Opacity. In the Shadow Mode section, choose the Multiply option and make sure that black color is selected (#000000). The Opacity should be 100%. Then, click OK to confirm the changes.
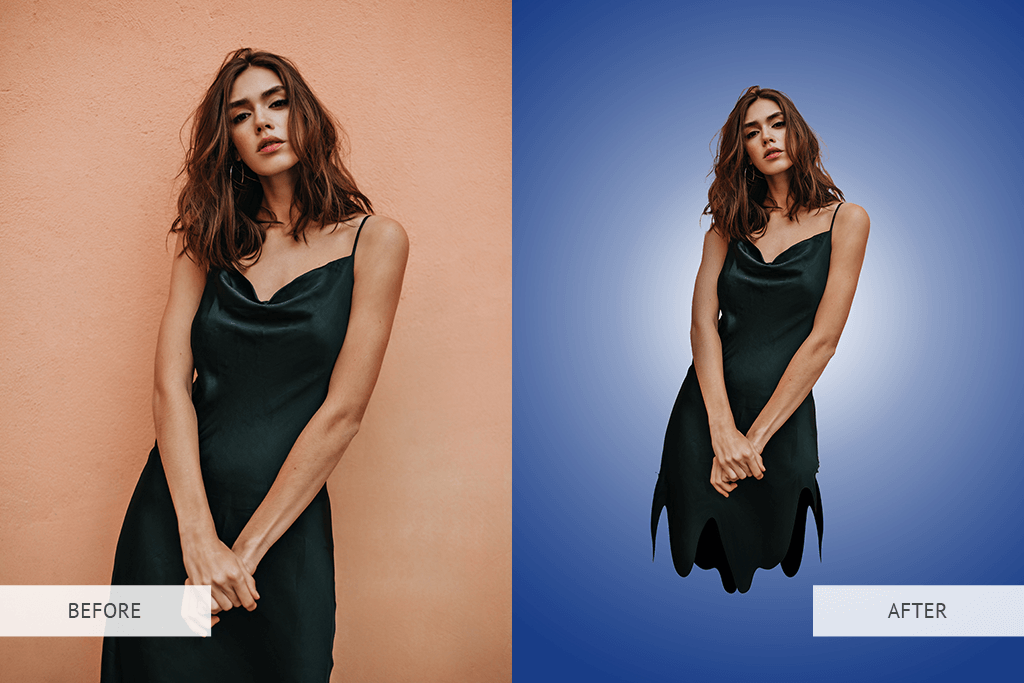
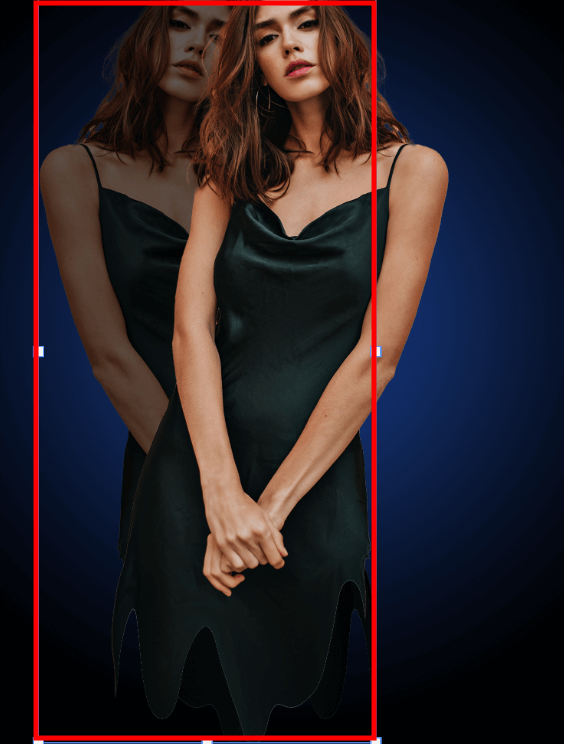
After following these steps, you will get a beautiful picture with a Photoshop dripping effect applied to it.
In case you have never applied such effects before and want to edit your portrait photos without wasting a lot of time, you can outsource this task to the FixThePhoto experts. They will make the colors pop, apply special filters, give your photos a vintage look and make other complex edits to ensure that a photo fully meets your requirements.
Yes. Photoshop is compatible with different operating systems. Keep in mind that a licensed version allows you to install this software on two devices.
If you are wondering whether you need to pay for Photoshop and other similar apps included in the Creative Cloud package, you can pay for Creative Cloud. After testing out its features, you can pay for the All Apps plan to access the full version of all the apps covered by this subscription.
Yes, you can install the mobile version of the software on your iPad. It will allow you to edit your photos and create graphic designs on the go. The app supports large files, which enables you to create composites, perform top-level retouching, and apply a range of effects to your photos. Thanks to the version for iPad devices, you can work on a variety of devices and synchronize your edits via the cloud.
Cloud documents are the new type of documents created by Adobe that you can access wherever you go. They are available online and offline. You can access them from different devices and edit them knowing that all the edits will be saved in the cloud.
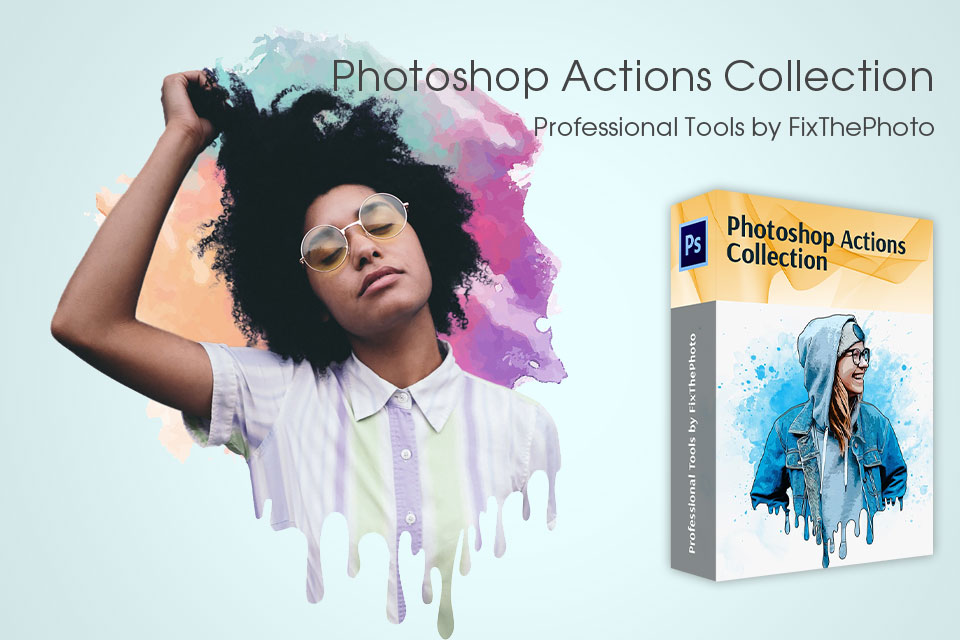
Using the actions from this bundle, you can make your photos look like watercolors without wasting a lot of time. You can select a variety of color effects and apply different textures to the background to create a magical atmosphere in your photos. Besides watercolor actions, this collection includes handy brushes and patterns that will make your pictures look more creative.
These effects are compatible with Photoshop CS 4-6 and Photoshop CC. If you have never used them before, make sure to find out how to install Photoshop actions and use them to enhance your photos.


