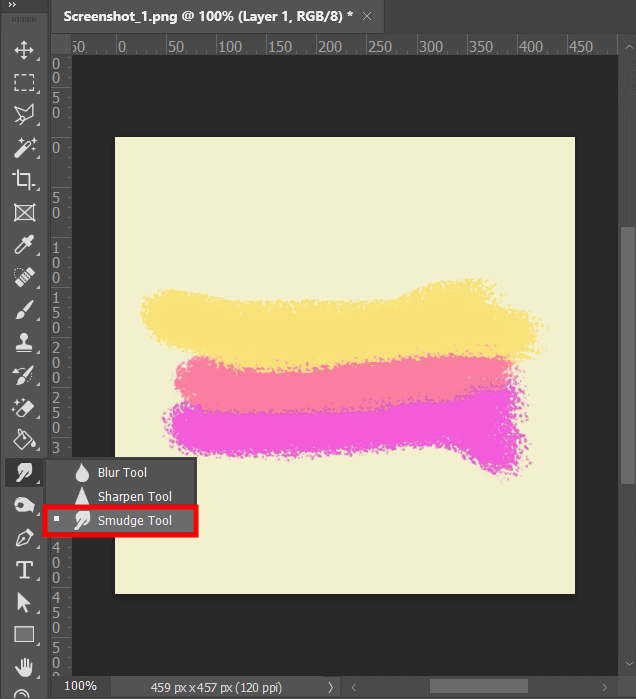
Open your JPEG or RAW image in Photoshop. Select the Finger tool in the left part of the toolbar or activate it by clicking R.
When you create a smudge in Photoshop, it resembles the effect you get when dragging a finger through wet paint. The instrument picks up the color where the stroke begins and pushes it in the direction of your finger.

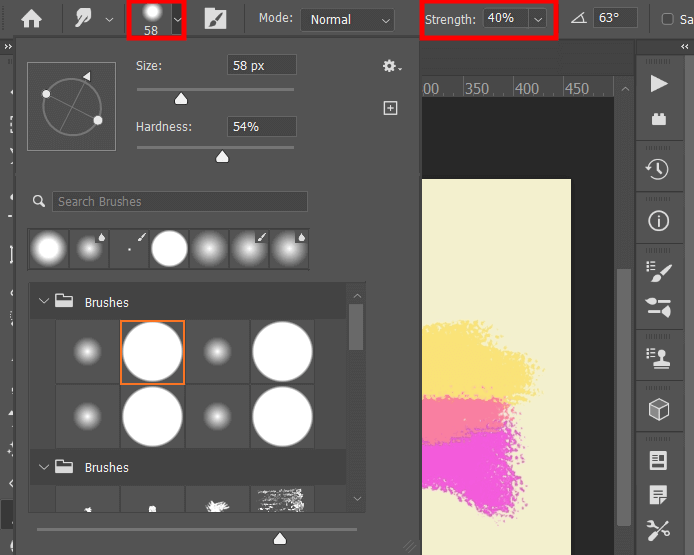
There will appear the menu, where you need to choose the brush tip suitable for your current task. You should also specify the Blending Mode and its Options in the Options Bar (сheck out the screenshot). Choose the needed sizes based on the background you want to blur.
Keep in mind that you can zoom in or out to work with fine details when using Smudge Tool Photoshop. To do this, press Ctrl and "+" or "-".

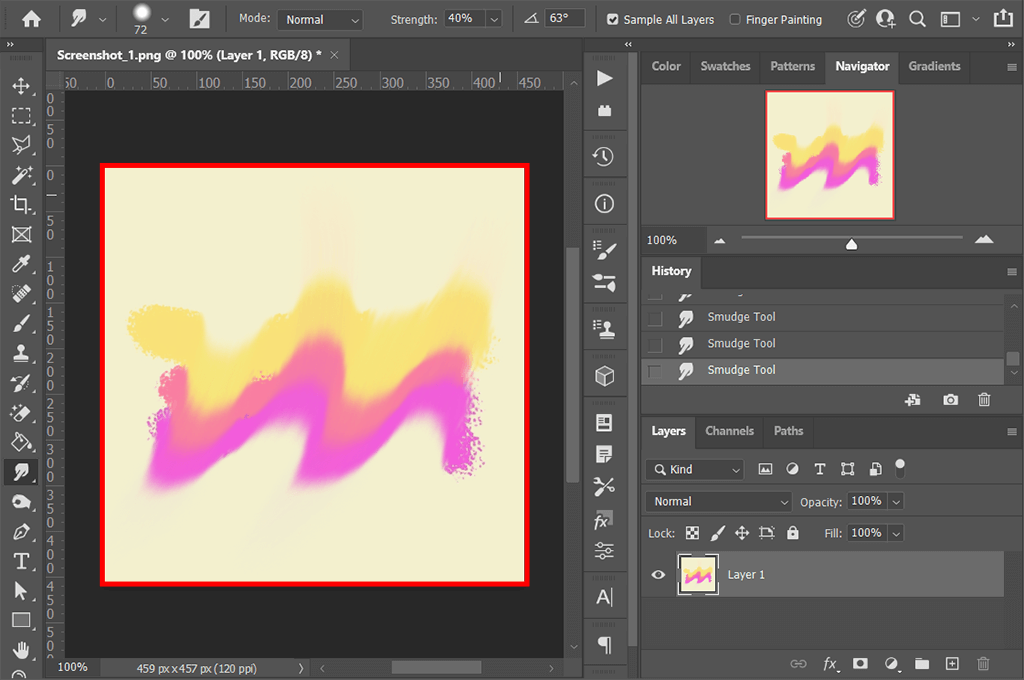
Check the “Sample All Layers” box at the top of the toolbar as in the sample. This way, you can use color data from all visible layers for smudging.
If you want to use only the colors of the active layer, uncheck this box.

Select "Finger Painting" in the Options Bar to smudge the foreground color at the start of each stroke.
Uncheck "Finger Painting" to use the color under the pointer at the beginning of each stroke.

Once you set up your brush, you can start blurring the background of your image. Place the brush on the desired area and drag it smoothly to blur pixels.
You don't need a third-party brush to smudge colors. However, if you want to create an artistic drawing instead of the usual wall-like background, you can use special free brushes by FixThePhoto.
You may be using an outdated version of Photoshop. To check if you have the latest version of the software, do the following: macOS: Choose Photoshop menu > About Photoshop. Windows: Choose Help menu > About Photoshop. The current version of Photoshop is 23.1.0.143 or higher. If you’ve learned you use an outdated version of the editor, e.g., CS5, you can check out my guide on how to update and get the latest version of Photoshop for free.
To undo or redo an operation, choose “Edit” > “Undo” or “Edit” > “Redo”. To cancel an operation, press and hold the Esc key until the operation is canceled. Also, you can use the "Ctrl + Z" key combination to cancel an operation in some versions of Photoshop.
Yes. First off, you need to create a blurry background on a blank white sheet and save it as a transparent image. Then check out my tutorial on how to quickly remove the background of a picture in Photoshop and merge these 2 images into one.
This may happen because your RAM is overloaded or you’ve installed the program incorrectly. Also, try clearing your computer's cache by restarting it. If these basic troubleshooting methods did not work for you, you can learn about all existing Photoshop lagging issues.