Nowadays, creating beautiful images becomes easier as many defects and distracting elements can be removed during editing. So, if you have taken a photo and noticed a big flash concealing the main object after the shooting, don’t get despaired. In this guide, you will find several effective methods of how to remove flash from pictures. Instructions are underpinned with screenshots, so you will surely grasp the process.
Wonder about how to remove glare from photo without doing manual tweaks? Then this approach is a sure way to go. However, keep in mind that it works best for images with solid colors and repeating patterns. The whole essence of this method is to take advantage of content-aware in Adobe Photoshop to enjoy the automated process.
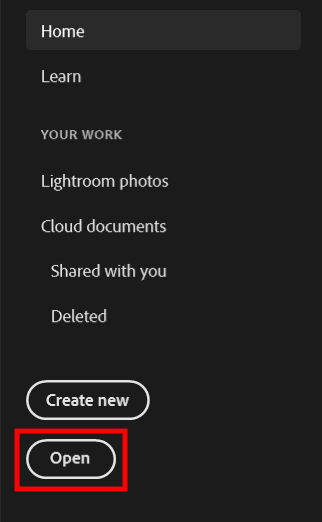
Upload an image you want to improve to the program. Do it by clicking the Open button or using Ctrl + O combination.
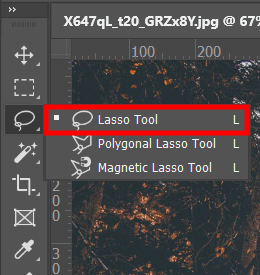
Select the Lasso Tool from the menu. You can also make it active by clicking Ctrl + L. This tool allows users to remove glare from photo Photoshop in a quick and straightforward way. In fact, you simply need to draw around the spot you want to zap.
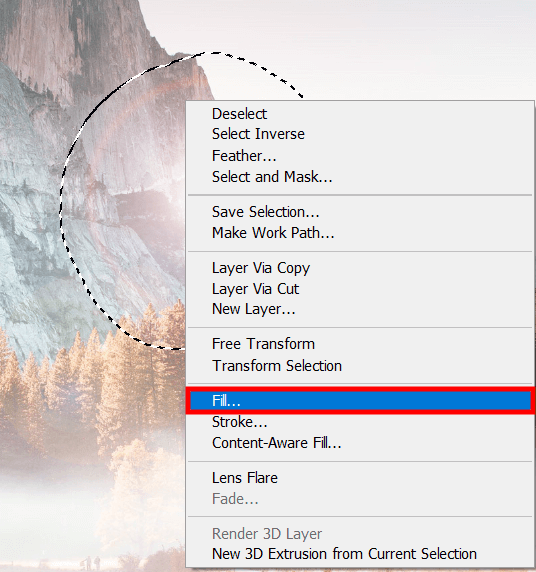
Use the Lasso Tool to make a circle around the spot. Right-click on the selection > choose Fill.
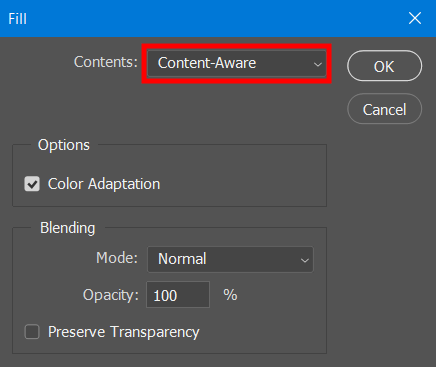
There will appear a new window. In the section “Contents”, choose Content-Aware. You need to do the same for all spots you’d selected.
If you just learning how to remove light streaks from images but need to cope with the task lickety-split, we highly recommend delegating the task to experts. They will not only fix such a defect but will also make all the needed improvements.
In case your pictures look hazy because of a lens flare, it is better to use a special Dehaze feature in Camera Raw.
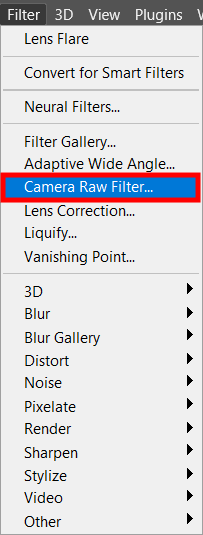
You will see a Filter menu. Choose Camera Raw Filter there.
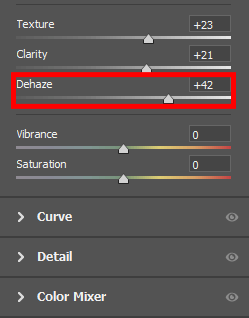
There will appear a new window with different sliders. You need to use the one called Dehaze. Drag it to the left or to the right till you get a perfect result. You may adjust other parameters as well.
Removing lens flare is also possible with the help of the Clone Stamp tool. The process actually boils down to “concealing” the glare using source points, which, in this case, refer to areas without glare. Photographers frequently use this instrument when they need to eliminate bright spots and even large areas.
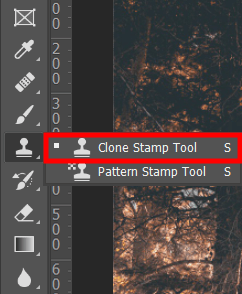
Select the Zoom Tool and click Alt/Option to zoom in a bright area in order to see the finest details. Next, you need to use Clone Stamp tool.
By pressing and holding Alt/Option on the keyboard, you change the cursor icon. It is necessary for choosing glare-free spots. Click on the spot and release the key.
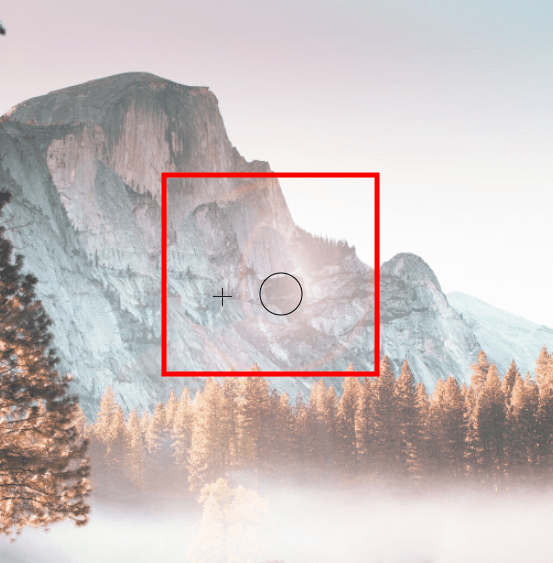
The selected spot is now displayed in the Clone Stamp cursor circle. Thus, you can clearly see what you will paint over. This is also helpful if you are going to remove objects in Photoshop. If not, click Window in the upper menu and choose Clone Source. Check “Show Overlay” in the new window. Paint over the glare and make readjustments if needed.

Experimenting with tools and editing methods presented in this Photoshop tutorial, you can achieve fantastic results.
Of course, it makes sense to start with flash removal from images and then proceed with color correction. Doing that is faster if you have top-notch actions at hand. This collection consists of many artistic effects that can give your images a specific mood.
This is one of the basic editing challenges you are likely to face quite often, so it makes sense to learn how to do it properly. However, sometimes a glare becomes an artistic element of a photo, and ditching it will totally ruin a fancy look. So, evaluate the photo and then make a choice.
If a lens flare occupies a large part of an image and conceals the main subject, you should remove it without hesitation. However, if you are after cinema-inspired photos and there is glare in a source shot, you should leave it intact. In fact, some photographers and videographers even add such an effect during editing.
It is necessary to get rid of bright light sources in a picture and do all possible to prevent light rays from reaching the lens. When taking shots in daylight, keep the lens hood to minimize the amount of sunlight getting in the front part of the lens.