The clone stamp tool is perfect for removing items from a photo or duplicating them. This tool takes a sample of the photo and then paints out another part of the photo with this sample. If you need to replace some defect in an image with another fragment of it, use this option.
When using Adobe Photoshop, you need to indicate the target area and the source area.
To get started, go to Adobe software, click Open on the home screen, and then choose an image or PSD file that you want to edit.
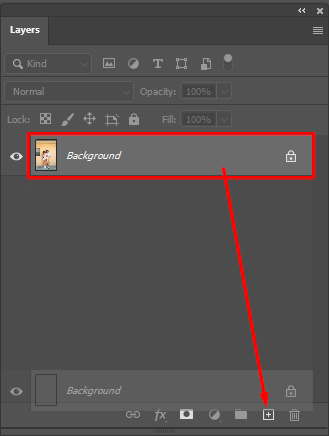
Before you start editing your image, duplicate the background layer. To do this, simply right-click on the layer and then choose Duplicate Layer in the pop-down menu.
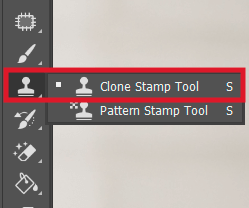
After opening the photo, find where is the Clone Stamp in Photoshop. Go to the Tools panel. Usually, it is located on the left. If you can’t find it, go to Window > Show Tools. This tool is on the 10th line by default.
To use the Photoshop cloning stamp, you need to zoom in to edit your image. I recommend full zoom – 100% and above.
By zooming in, you can separate the area that you need to enhance. It will help you make more accurate edits. By carefully working on the necessary zoomed-in section of the image, you will obtain an excellent result.
Here are two options for quick zoom: when holding the Alt/Option key, scroll the mouse wheel to zoom in or out; or press the + or - keys on your keyboard while holding down Ctrl/Cmd key. Each of these methods will speed up the zooming process.
You will find the Brush menu in the upper left corner of the screen. Its icon will look like the brush you are currently using. The default is a dot or a circle. Open the Brush menu.
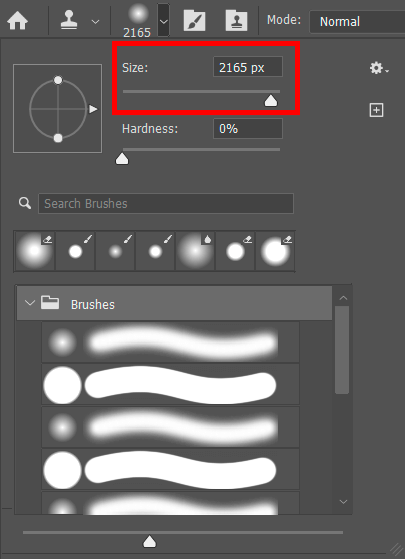
To choose the brush size, move the Size slider. The bigger you need the sample selected by the Photoshop cloning stamp, the bigger the brush should be.
Another way to change the brush size is to press "[" and "]" on the keyboard.
If you prefer to work with a stylus from your computer’s touch screen or a tablet, there is another way to set the brush size. In the upper toolbar, select the icon with a pencil and a large circle containing a small circle. It will allow you to adjust the brush size depending on the pressure. This means that the harder you will press the stylus on the screen, the bigger the brush will be, and vice versa.
Adjust the clone stamp tool to a size that matches the size of the object you want to erase.
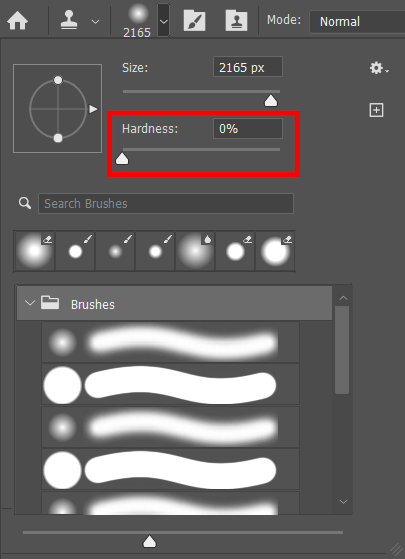
The parameter determining the sharpness of the clone stamp is called the brush hardness. By setting its value to 100%, you will get well-defined spots.
When using the clone stamp, I prefer soft brushes. This makes the borders of the mark blurry and helps them blend in with the background more naturally.
It’s advisable to set the hardness value to 0%. It makes it easier to mask an unwanted object. There are situations when the optimal value is about 50%. For example, when retouching clear-cut edges. Higher hardness levels can ruin your shot since sharp lines will be easy to spot.
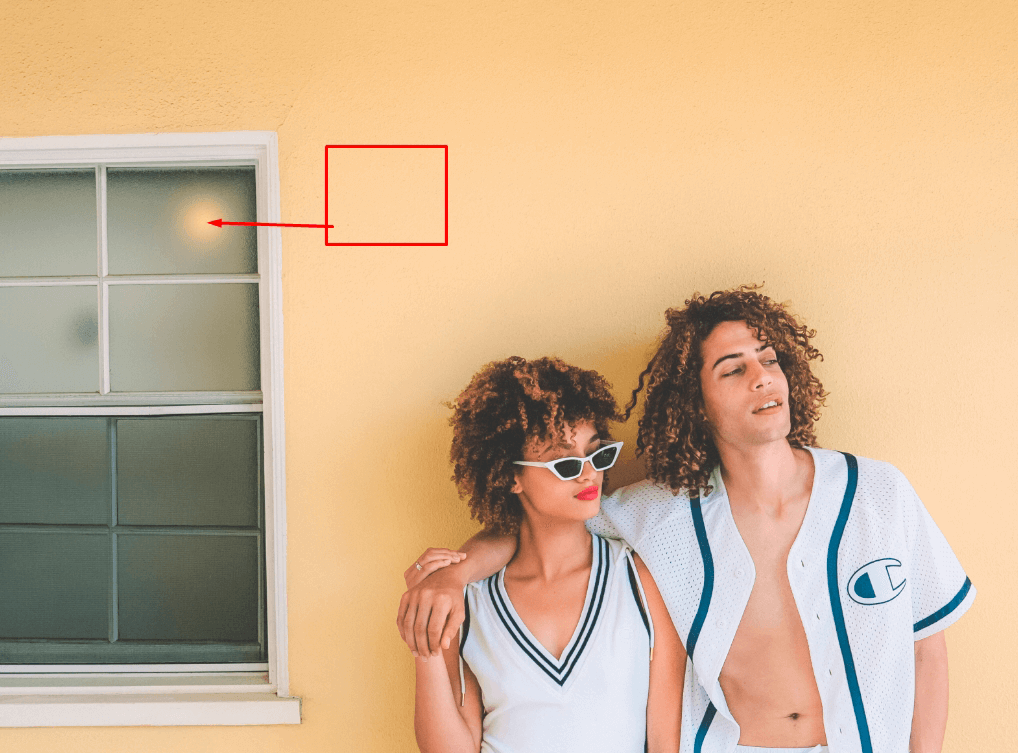
In some cases, you might need to use patterns in the cloning process. For instance, you might need to paint over people standing in front of a building. In this case, you can use a part of a similar building as a cloning source.
However, often this method can spoil the picture. If you need to clear the sky of birds, for example, then cloning the same clouds will be obvious. Such pictures will look overly edited, and it will be clear that you have used the clone stamp tool.
Here’s a simple tip to solve this problem – change the source area as often as possible. Just select one fragment and clone the required part with it, then another fragment for another part, and so on. Continue cloning with frequent changes of source areas until the very end, and the result will please you.
The source area is the part of the photo where the replacement pixels come from.
To select it, place the cursor on the suitable fragment and click while holding the Alt/Option key. Holding this button turns the cursor into a target.
While holding the Alt/Option key, click on the part of the image you need to select. This will be the fragment you stamp on another part of the image.
I suggest you choose the section that is next to the area that you want to paint over. This will help you make the edited fragment as natural as possible.
Now proceed to paint over the object you need to erase. It should be impossible to notice that it’s just a duplication of another part of the photo.
The more often you change the sample, the better. You shouldn’t count on the align tool, since the more clicks you make, the more beautiful your photo will be.

If you need to enhance your images quickly, make sure to contact professional retouchers.
If you are satisfied with the result, it’s time to save your photo. Go to File > Export > Export As. You can save the image in PNG or JPEG formats.
First, press S to access the tool, then click on the tool icon on the settings box located at the top.
In a pop-up window, find the gear icon and click on it.
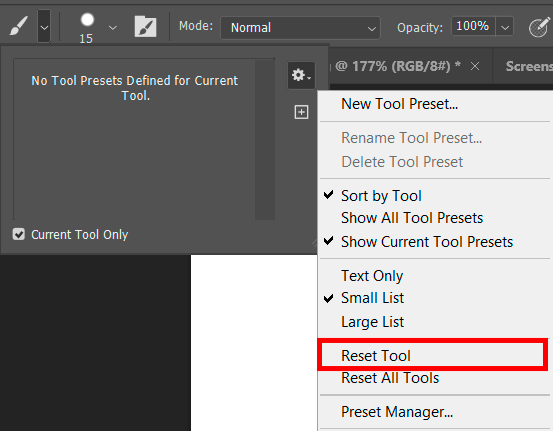
Find and select the Reset Tool.
The Photoshop cloning stamp is now set to default, and your custom settings have been deleted. This way, you can get rid of the settings that interfere with the proper operation of the tool.

After a photoshoot, you have a lot of cool shots to edit. To speed up this process and edit your images in a consistent style, try using actions. They contain various filters that work great with images for fashion catalogs, wedding photoshoots, even everyday photos, etc.
Read how to install Photoshop actions and use them to create brilliant shots. You can always customize them, which will save you a lot of time during retouching.


