If you want to increase your sales and drive more clients to your eCommerce website, you need to create an illusion that customers can you see your product in real life. Since it’s impossible to touch your products online, you need to provide your potential customers with detailed visual information about their key selling points.
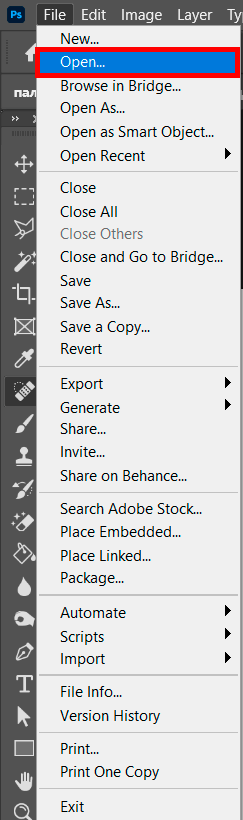
First, run Photoshop and click on Open to select the product photos you want to use. You can also go to File > Scripts > Load Files into Stack. To find a folder where you keep your product photos, you can click on the Browse option. Then, hold down Shift, select the images and click Open.
To confirm that you want to import these files, click OK. It will enable you to create a file with multiple layers. In this article, I will show you how to make a GIF from product images in a few simple steps. You will need to use 14 photos taken by an instant camera. When you add them to one file and loop your animation, it will create a 360-degree view of your product.
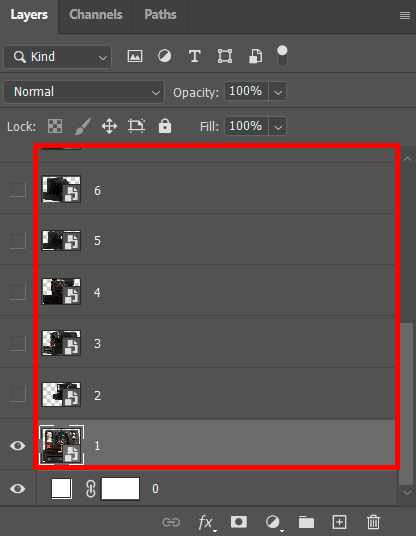
You will see your photos as the layers of a single file. If the order looks wrong, you can click on any layer and drag it to anywhere. The first frame that you want to be played should be at the bottom of the layer list.
These layers will be converted into the frames of your animation. If you have never edited product photos before, make sure to read how to remove the background of a picture in Photoshop to get professionally edited images with a white background.
Before creating GIFs from images, it’s important to enhance your product photos. If you don’t have extensive editing experience, you can outsource this task to professionals. The FixThePhoto team will quickly edit your photos for an affordable price and make them meet the standards of the eCommerce industry.

Create frames on the animation timeline. To cope with this task, you just need to go to Window > Animation, or Timeline, depending on the Photoshop version that you are using.
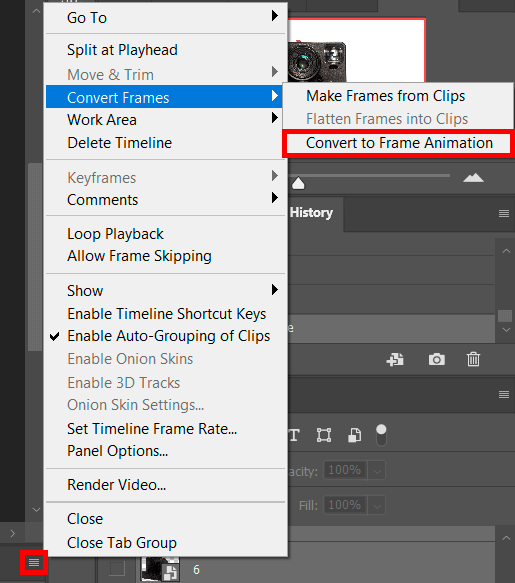
Find the Menu icon in the top right part of the Timeline panel and select the option Convert Frames>Convert to Frame Animation. It will allow you to convert the layers that you can see in the Layers panel into the frames of your future GIF file.

If you go to the top drop-down menu, you can select the Select All Frames option and adjust the duration of all frames. You can also click on the value number under each frame to set the duration of each of them separately. Besides, you can select the Other option to select a custom duration.
You can edit the settings of each frame as you see fit. For instance, if you want one of the frames to be played for longer, you can choose a longer duration. For a more seamless playback, it’s better to select the same duration for all the frames.
Now that you know how to make a GIF from product images, you just need to take a few more steps to create a loop animation. You can adjust the settings of your file and indicate how many times you want it to be played.
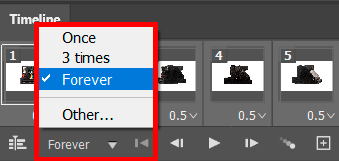
It’s better to use continual animation as it will make your products look more appealing to potential customers. Go to the Repeat Menu in the lower part of the Timeline and click on Forever to loop your animation.

To see if everything is played correctly, click on the Play button on the toolbar below the Timeline panel. If you want to save time and often use Photoshop keyboard shortcuts, you can press the Spacebar.
Tip
If you want your GIF to be played in reverse, go to the Timeline menu and click on the Reverse Frames option.
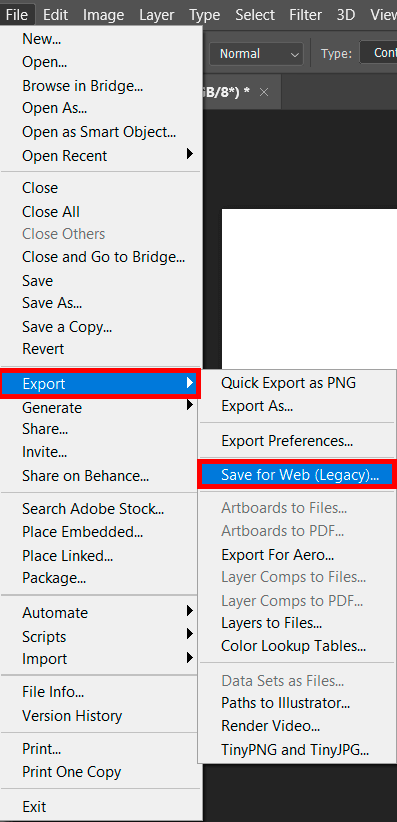
After selecting the best order for your frames and adjusting their duration, you can save your animated file for further use. To do it, go to File > Export > Save for Web.
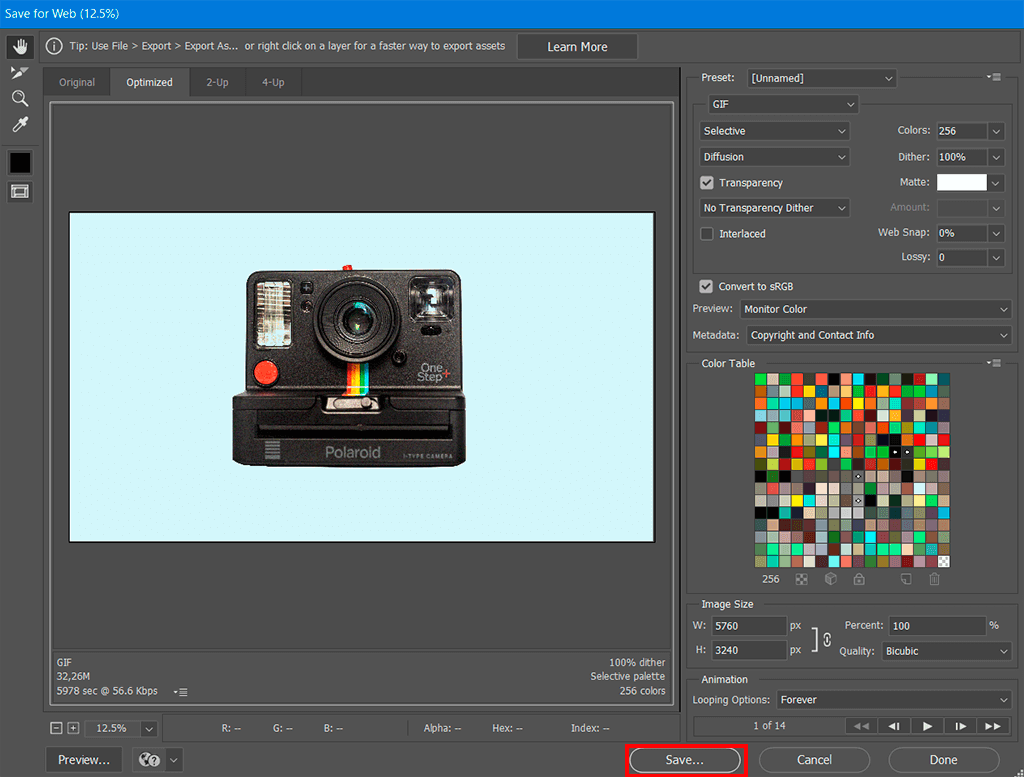
Make sure to select the right settings on the “Save for Web and Devices” screen. They should meet all your requirements. I advise you to select 256 in the Colors menu and set Dither to 100%.
When creating GIFs from images for your site, you may need to limit their size by adjusting their Width and Height in the Image Size section. You can also select Forever in Looping Options.
If your animation will be played in web browsers, it’s better to select the Convert to sRGB option to get accurate colors.
To see how your animation will look in a browser, use the Preview option in the bottom-left part of the Export window. If you are satisfied with the result, you can select a folder and Save your GIF to it.
After taking these steps, you should get your GIF file. Once you have saved it, you can open it in your browser or right-click on it and select Open With > to open it with any software of your choice.
If everything plays correctly, it means that you have succeeded. Now, you can send your GIF to your friends, share it on social networks or post it on eCommerce platforms.
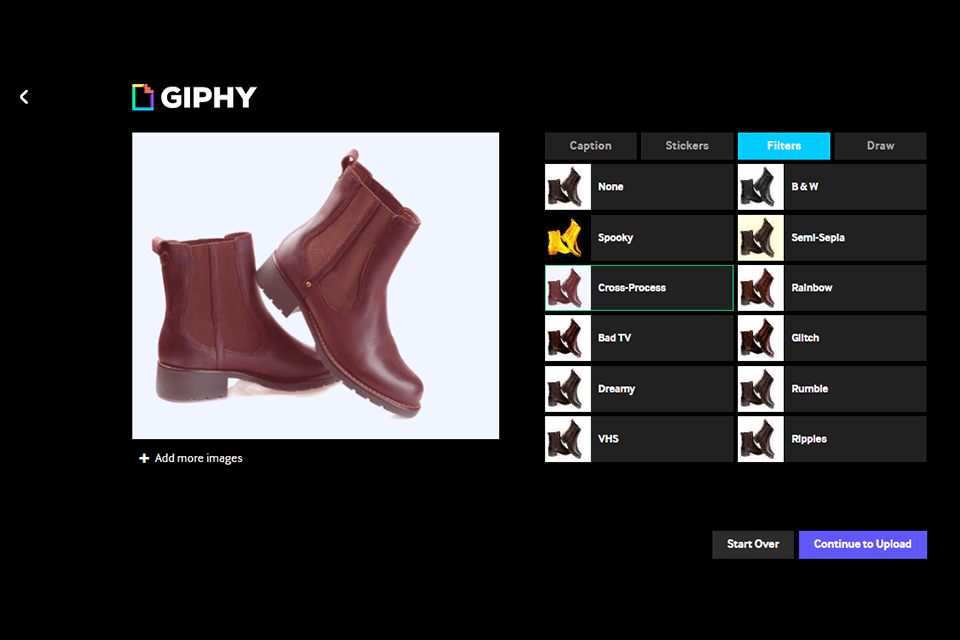
If you have never worked in Photoshop or don’t have enough space on your storage drive to install a dedicated software, try using free GIF makers for creating animations in a few clicks. Those who are looking for the best free GIF makers with no watermark can use such solutions as Giphy, Gifmaker.Me, and Aspose. All of them allow you to convert your media files into GIFs with little to no effort.
When creating GIF files, you can select any animation speed, custom size, and repeat times. In some programs, you can also add filters, stickers, captions, and various effects to your files to make them more attention-grabbing. While these programs don’t have such extensive functionality as Photoshop, they can be used even by beginners and allow you to create GIF files without wasting a lot of time.
Before making a GIF from images, make sure to enhance your product photos. With the help of these tools, you can fix various lighting issues, tweak colors, improve contrast and WB, make shadows smoother, etc. In a few clicks, your photos will get a professional look and become more appealing to your potential clients. If you have never used them before, make sure to read how to install Photoshop actions.


