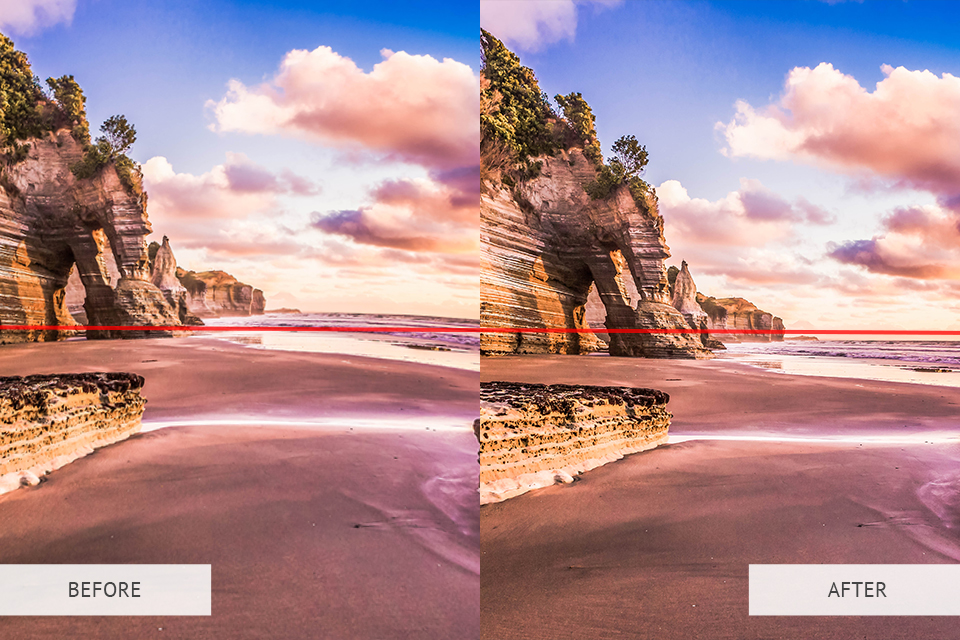
Few things can hurt a perfect photo more than an uneven horizon line and even a regular person can quickly notice such a flaw when looking at it. A crooked horizon is a huge distraction that can rarely be ignored.
Meanwhile, an even horizon line makes both portrait photos more impactful and visually pleasing. The post below focuses on alignment photography and will help you learn what tools and techniques you can use to keep the horizon even and how to easily fix crooked images.

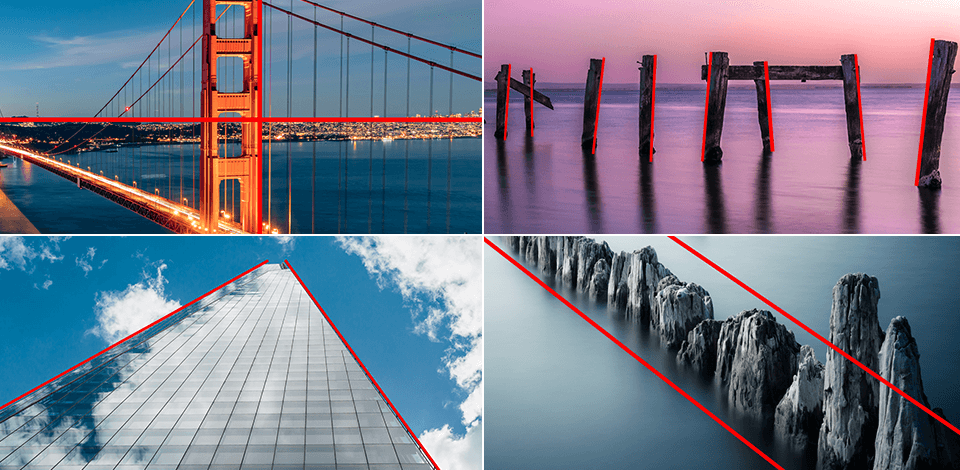
In some cases, locating the horizon line when doing landscape photography or trying to align the scene can be quite tricky. You can deal with that issue by establishing visual guides (pavement edges or fences) that you can use for aligning the photography horizon line.

In other situations, you’ll have to guess the horizon by looking at distant details like forests or mountain ranges. When working indoors, you can use the floor or ceiling as your guide.
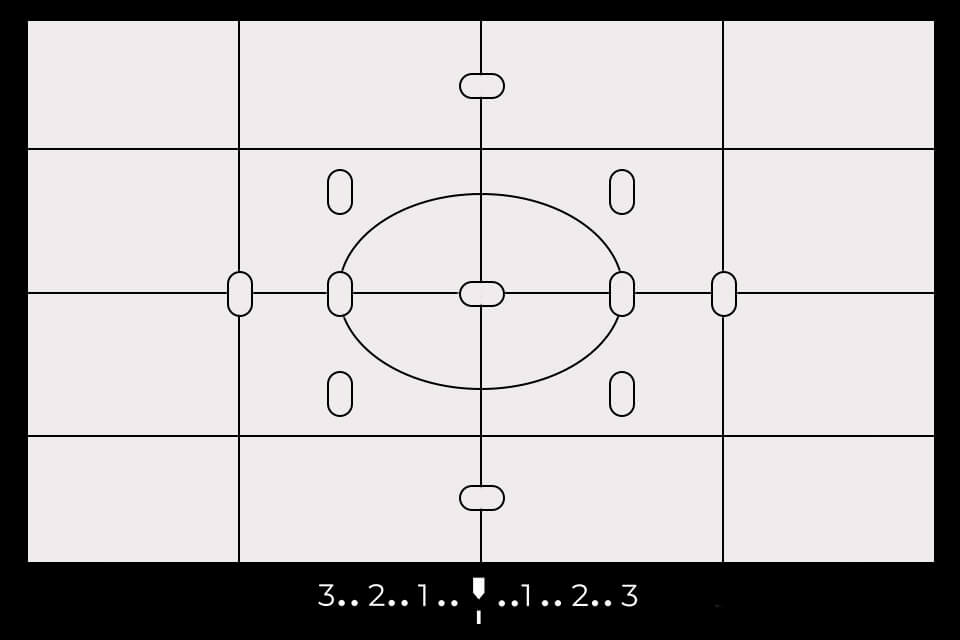
If you find yourself regularly having trouble with uneven horizons, then your go-to solution should be using the viewfinder. Most modern cameras allow you to enable various types of visual aids within the viewfinder, with gridlines being the optimal tool for this job. You can turn them on by going to Custom Setting>Menu> Shooting/Display>Viewfinder Grid Display.
Even though this method isn’t as precise as some of the other horizon line photography techniques that will be discussed later, it’s still useful for aligning the details in the scene that have to be fully horizontal or vertical. Moreover, the gridlines are barely noticeable and don’t obstruct your vision, which is why most landscape photographers have them turned on all the time.

If your camera’s EVF is small, the task of maintaining an even horizon line becomes a bit harder, but you can still get around it by employing the provided LCD screen. The majority of new cameras can provide a graphic that lets you know if the camera is tilted or even. This graphic is added on top of the live view footage.
The straight lines are used as an indicator that adopts different colors (changing from red to green) depending on how even the camera is. You can adjust the result by shifting the camera’s position or tweaking the tripod knobs. Once the indicators are green and the horizon is even, you can tighten the knobs to lock the position and angle.

If you ended up with a crooked horizon anyway and you don’t have any editing experience or you simply want to save time, reach out to our professional service. Our experts will align the horizon, perform color correction, and bring out the details in your photos while adjusting their contrast, white balance, exposure, and much more. Our service is available for reasonable prices and guarantees a fast turnaround.

Nearly all camera types: DSLR cameras, mirrorless cameras, and even smartphone cameras have a grid feature. You can turn it on whenever you’re taking landscape photos and want to ensure the horizon line in the shot is even.
The grid is also useful when trying out various popular photography composition techniques. For instance, if you pick the 3x3 grid, you’ll see a pair of horizontal and vertical lines that split the shot into 9 parts, which are essential for following the rule of thirds in photography.

It’s nearly impossible to keep your camera still and even for a long time, which is why a tripod is an essential tool for anyone who wants to take an even horizon photo. Handheld shots are easily ruined even if you managed to set the horizon line perfectly a second before releasing the shutter.
A tripod allows you to focus all of your attention on composing the shot. If you want to ensure the tripod is easy to carry, consider getting one of the available travel tripods, from popular tripod brands like the Peak Design Travel Tripod. Another factor to remember when picking a tripod is that it should be made of sturdy materials so that it doesn’t fall over from a slight breeze.
Otherwise, the tripod has to allow you to add weights to it to deal with potential stability problems, which is the case with most carbon fiber tripods. The Manfrotto MT190CXPRO4 is a solid option to consider if you want to ensure sturdiness and stability is never an issue.
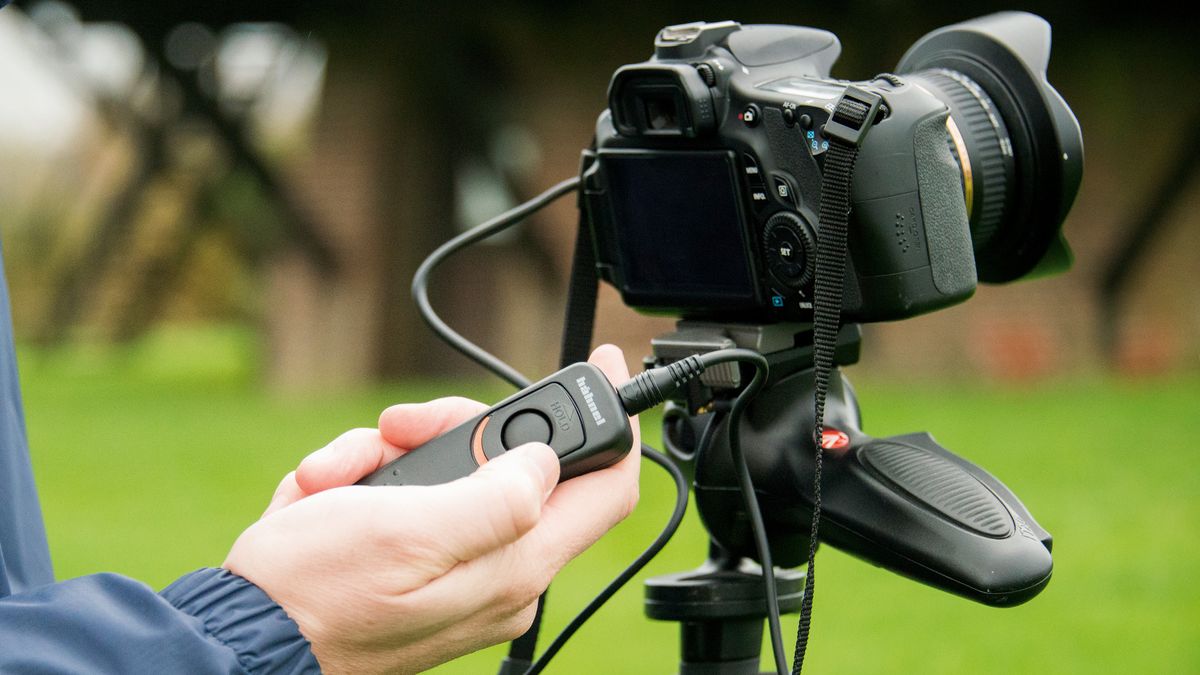
If you want to ensure you get the best alignment photo result possible, it’s recommended you use a camera remote for releasing the shutter. If the tripod is standing on sand or another unstable surface, then the pressure you put on the camera to take the photo can already affect the horizon line.
Meanwhile, a remote cable release guarantees the camera remains in place and helps you achieve an aligned horizon level. Feel free to pick between a wired remote and wireless remote trigger according to your needs.

A Bubble Level is near the top of the list of cool photography gadgets that should be at the disposal of every photographer. You can get it for just a couple of dollars and it can be mounted to the hot shoe of any camera. You can choose between a single axis spirit level, which is the most popular option, a two-axis, or a three-axis spirit bubble level. The latter option offers higher accuracy compared to the first type.
The air bubble that you see inside the gadget lets you know how aligned your camera is. Once the bubble is straight in the center, it’s time to take the photo. Keep in mind that this technique only offers accurate results when the camera is placed on a tripod and is fairly unreliable when taking handheld photos.
Occasionally, you can notice that a photo looks crooked even if the horizon line is aligned perfectly. This is caused by the barrel distortion that is created by most lenses and makes some parts of the shot sag while others appear curved. This drawback is particularly prevalent when shooting with wide angle lenses.
Thankfully, you can nullify this flaw by employing software to correct lens distortion like Lightroom. Simply find the feature titled Lens Corrections and add a checkmark next to Enable Profile Corrections.
This will ensure the software automatically corrects all distortions caused by the specific lens you’re using. In some cases, you might have to specify the brand and model of your lens in case the software doesn’t detect it automatically.
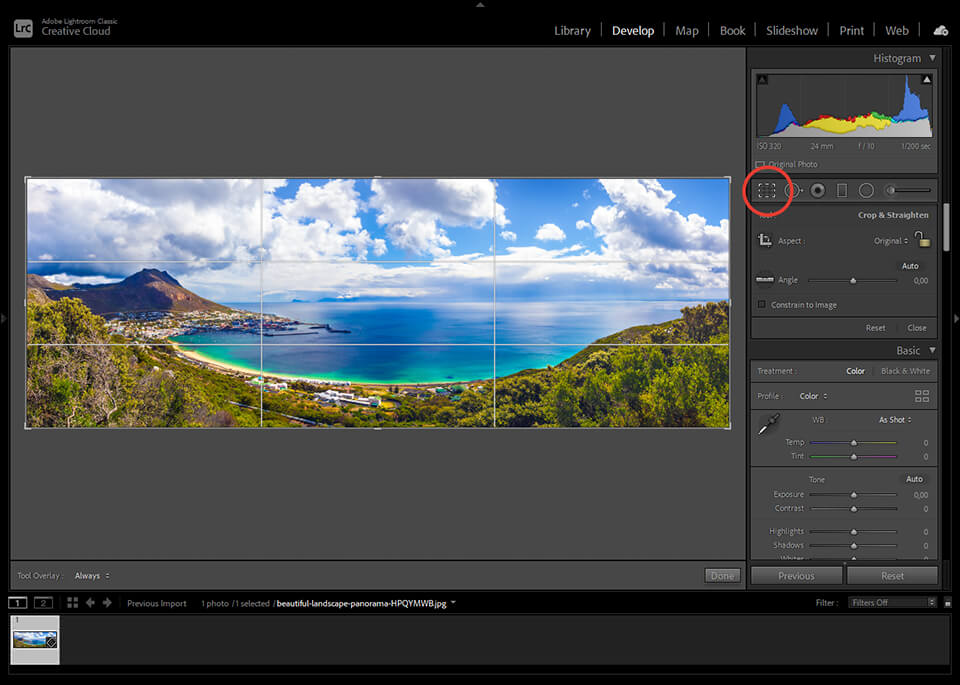
Lightroom provides a pleasantly straightforward and efficient tool for doing horizon alignment photography. If you own Lightroom, launch the software and do the following:
Enter the Develop Module and press the Crop Overlay icon to expand the Crop & Straighten menu.
Next, press the icon that resembles a ruler and then move the angle tool across the horizon in your photo. Once you do that, the software will align and crop the photo for you.
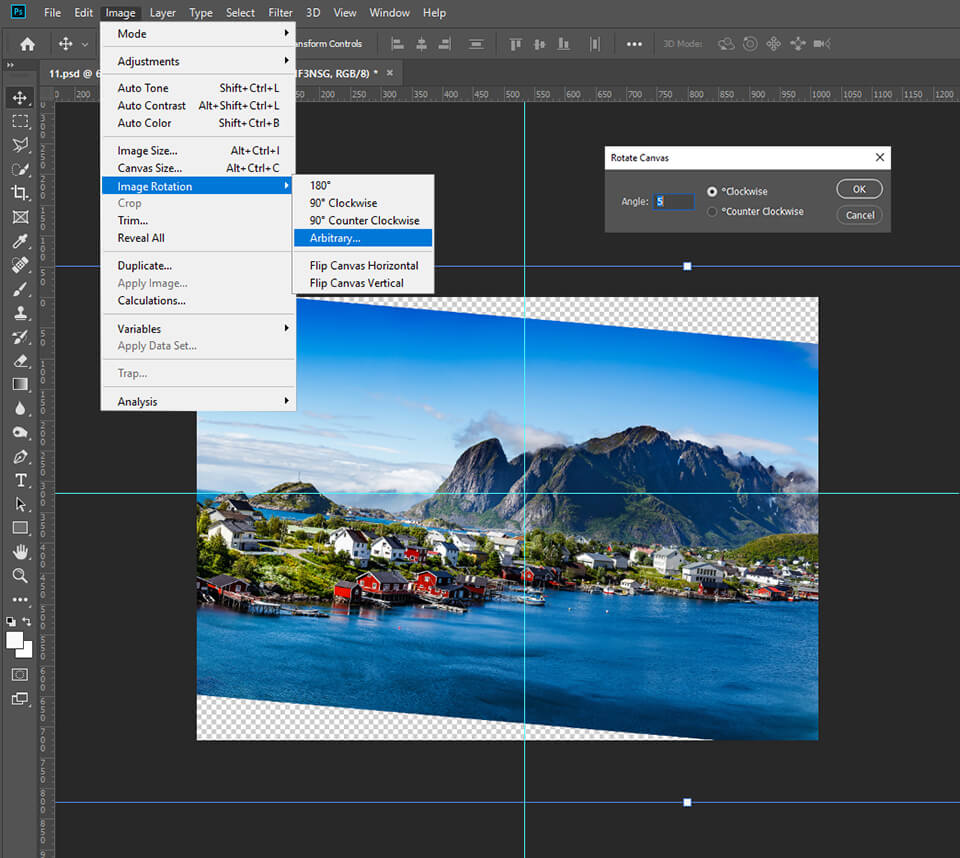
If you would rather use Photoshop to correct the horizon line in photography instead of Lightroom, there are a few steps you can take. Once you’ve opened the photo, select the Ruler Tool and drag it across the uneven horizon.
Next, click on Image>Image Rotation. Now, pick Arbitrary, keep the default angle, and press Ok. The horizon should now be aligned perfectly and the only thing you still have to do is crop an image in Photoshop to your liking.

Aligning lines is not the only thing you should be paying attention to in your photos. Without appealing editing your photo is likely to be overlooked. Try this must-have bundle for Lr for improving colors in a number of scenarios. Learning how to install Lightroom presets on Mac & Windows is pretty simple, so you’ll be able to start applying the effects straight away.


