Think that trees photography is one of the easiest genres because the object of the shooting is almost stationary and quite predictable? Anyone who has tried it at least once knows how many pitfalls it hides, especially depending on the season.
The variety of trees that surrounds us is really vast: a loan oak in the field, a young sapling in the park, or majestic pines in the mountains. In each time of the year, they look differently providing new opportunities for original pics.

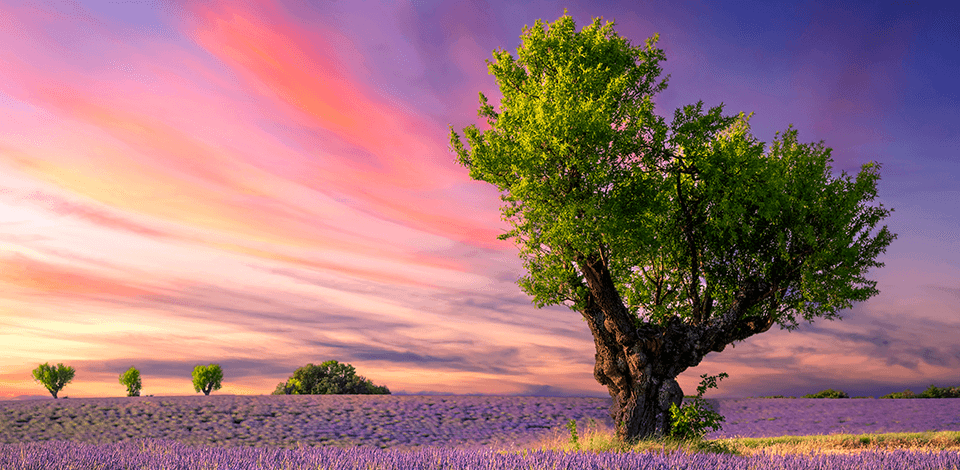
Lone tree. A lonely standing tree against an endless sky or wide-open field creates a mesmerizing view. As a natural focal point, a lone tree can evoke different emotions like a sense of isolation, resilience, or peace. I recommend shooting on a foggy morning or sunset to capture the contrast the tree creates against a colorful sky.


Trees that stand in threes. There is a special magic in this number, even in photography. Like the rule of thirds in photography, shooting three trees standing in a group makes the overall composition more balanced and harmonious. This is an effective trick to guide the viewers’ attention across the frame naturally.

Framing. Another piece of advice is to add depth and context to images by using a tree as a natural framing in photography. Usually, I point my camera so that branches or trunks frame the main subject, which can be a distant mountain or the sun rising above the lake. This makes the scene more eye-gabbing to viewers and involves them in the setting making it more intimate.

Leading lines. Paths or streets lined with streets create natural leading lines and draw the viewers into the photographic composition. If you come across a beautiful path with trees on the sides, shoot it from a low angle or take a pic from a distance to bring the focus on the lines intercepting in the background.
This technique is quite versatile and suitable for all-season photoshoots. However, I like to use it most for autumn tree photography.

Scale reference. To make a photo more scalable and underline the mightiness of a tree, add a person, animal, or building to a shot. I especially recommend trying this technique when you are shooting ancient or massive trees. By doing so, you can easily add a touch of motion to the scene and provide viewers with a point of reference.

Golden hour (sunrise & sunset). Light in the early morning or late afternoon is the most flattering as it casts a warm glow that makes an object look more attractive. Highlighting textures, this golden shine showcases old trees with gnarled bark or autumn trees with warm colors in all their beauty.

Overcast days. Soft, diffused light on a cloudy day does not cast shadows, therefore it is ideal for young tree photography where a person needs to capture intricate details of budding branches or exquisite ornaments on the bright greens.

Low light for Xmas trees. To capture the festive spirit and the beauty of holiday lights, I recommend conducting a Christmas tree photoshoot in dim light with longer exposures.
In such a way, you’ll manage to highlight the warm lights and decorations without competing with other light sources. As my experience shows, when it comes to Xmas tree photography, there are never too many garlands, so if you think you have enough lights, add another 3 strings of lights on.


Low angles for tall trees. Point your camera upward to accentuate the height of the trees and the awe-inspiring feeling they can give. Low angle, which allows for creating a sense of scale and wonder, is the best for shooting the world's most beautiful trees like redwoods or towering pines.
Close-ups for texture. Take a macro shot of bark, leaves, or branches to highlight the texture and detail of old trees. Also, I often take close-up photos of winter trees photography to capture original patterns created by snow-covered branches.

Wide shots for context. Occasionally, a single tree in a natural setting like the one that stands in a snow-covered field or the autumn tree surrounded by pines or other evergreens can tell a captivating story. In spring or summer, a wide-angle shot featuring branches in bloom can make your images cheerful and more alluring.

From above. This is one of my favorite angles, as shooting downwards from a high vantage point (using a drone for a birds eye view photography, a ladder, or a hill) allows capturing the unique patterns and shapes, which are not accessible from other perspectives.

Spring trees. Fresh blossoms and soft greenery are what we usually associate with spring. Organize the photo shoot in the early morning, as the light at this time of the day is soft and allows for capturing vivid colors without harsh shadows.
Overhead shots let you make the bright blue sky the backdrop of a pic to highlight a wonderful sense of freshness and energy brought by the spring. Of course, my spring picture ideas also include close-ups of budding flowers and young leaves, bringing the focus to their delicate colors.

Summer trees. Summer trees photography allows you to demonstrate the vibrancy of the season through the interplay of light and shadow. At this time of the year, I like experimenting with filters or polarizers to emphasize the green tones or shoot beneath the canopy of trees where sunlight can filter through the leaves, creating a natural speckled effect.
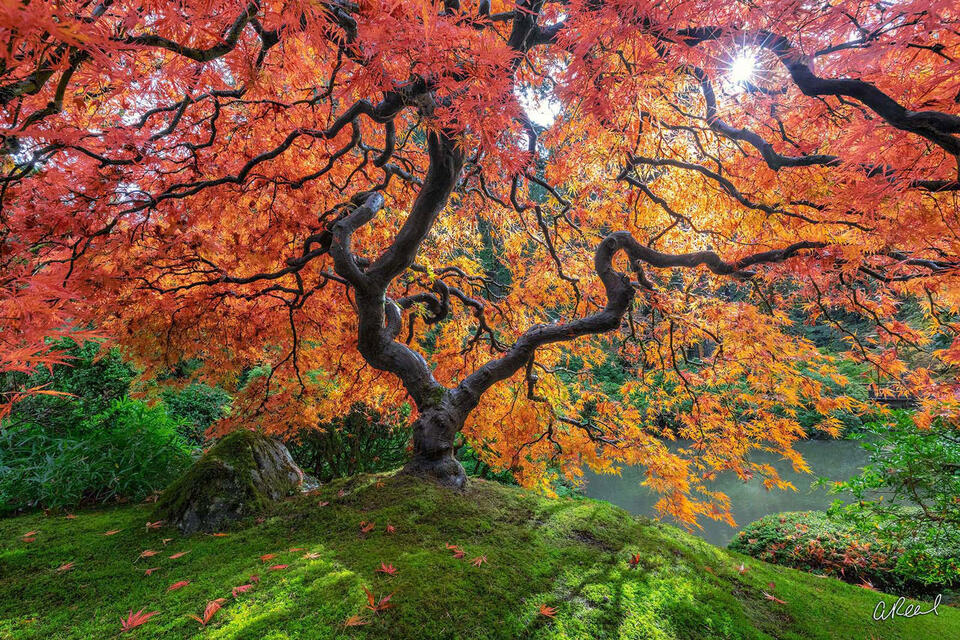
Autumn tree. As fall offers rich colors and eye-grabbing contrasts, this is the most popular shooting for photographers. No matter what time of day you conduct a fall photoshoot, you can capture the full range of their colors.

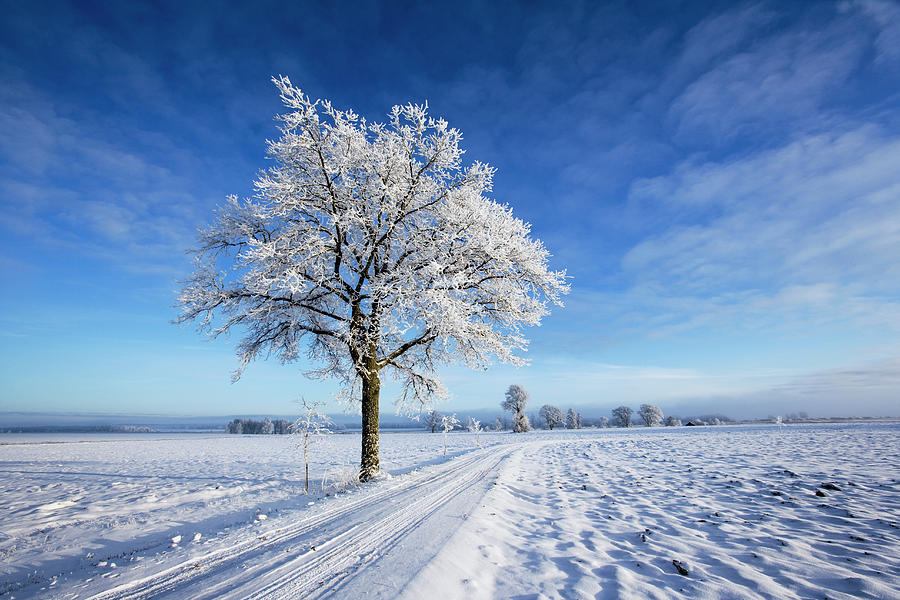
Winter snowy trees. When I get an opportunity to shoot snowy trees, I try to organize a session early in the morning to capture untouched snow and mesmerizing scenery that looks awesome under soft lighting.
Winter’s starkness is also ideal for minimalistic compositions featuring a lonely street in the field covered by snow.


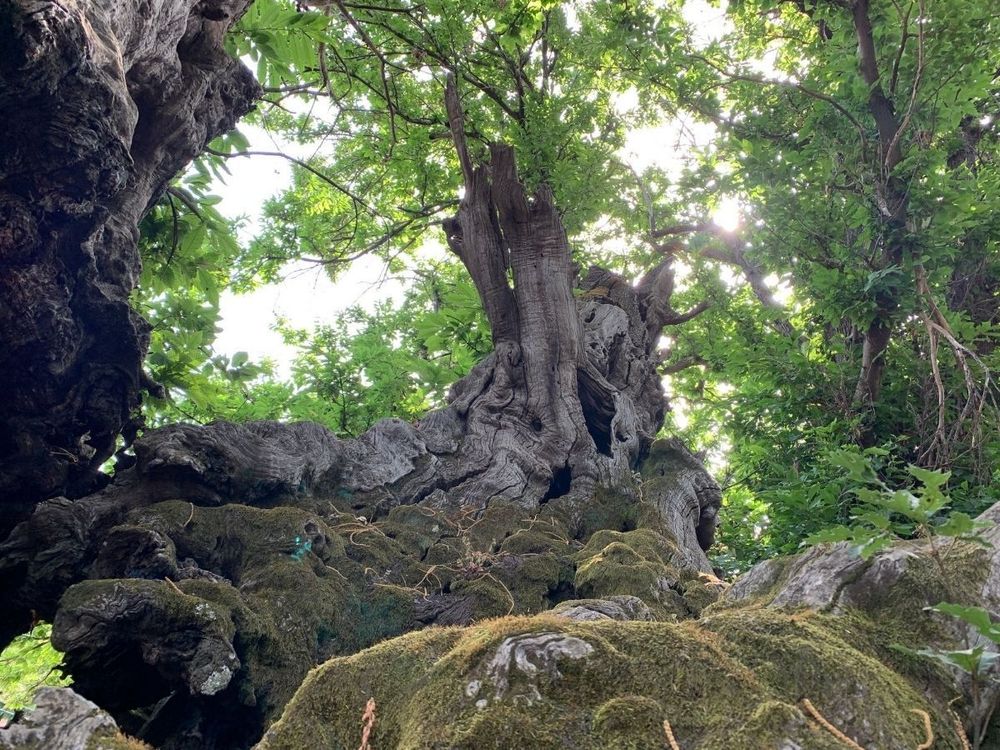
Wild trees. One of the most successful photography composition tips is to capture other elements like rocks, moss, or vines to demonstrate the natural setting of the will trees. Wider shots better work for such photos, as these pics can show the tree’s surroundings, emphasizing its ruggedness and natural beauty.

Old trees. Old trees photography is extraordinary and some of them have lived for thousands of years, linking us with our history and culture. The texture of such giants is great for creating dramatic compositions.

Tree silhouette. If the trees you are going to shoot have beautifully shaped branches, this technique is the best fit. Organize a session around sunset, point your camera so the tree is framed against the bright sky, and expose it to the brightest part of the scene.

Refraction shot. Bring a lensball, set it up in front of the tree, and shoot through the glass. Within the little glass sphere, you'll see an intriguing inverted image.
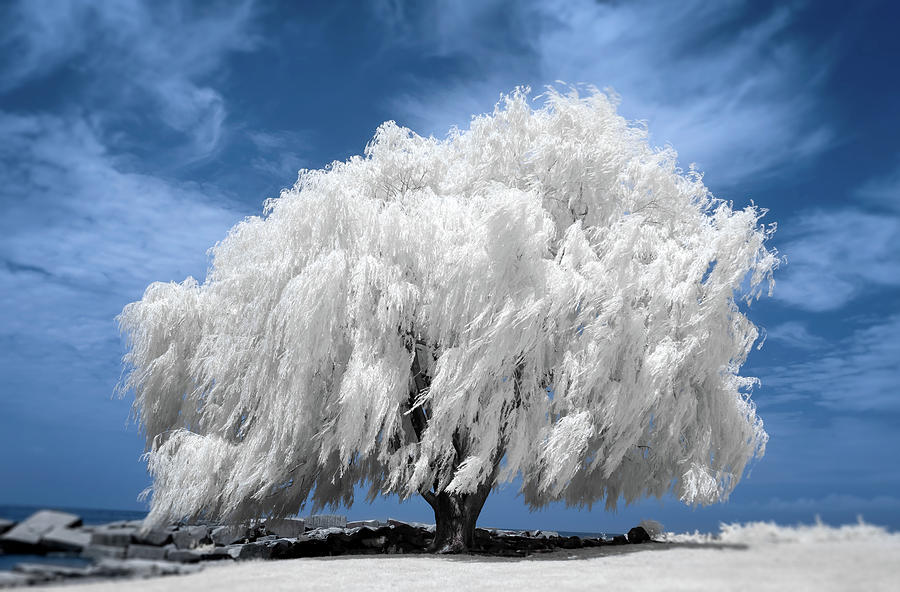
Infrared photography. Take pictures on a bright summer day when there are some clouds in the sky. Use an IR-converted camera or an infrared filter, and look for a tree with plenty of green leaves. You'll get a stunning dreamscape picture, but you might have to play about with the settings.

Long-exposure photo. If you are going to capture some trees near the river or framed against a partly cloudy sky, you can benefit from an opportunity to create a beautiful long exposure photography blur.

Leaves. Bring a focus on one of the leaves and shoot with a wide aperture for a captivating bokeh photography background.

Bark. Trees also attract photographers with their bark texture. So, take a close-up pic and use a deep depth of field for intricate details.

The trunk. Discover the patterns you may photograph at the tree's base and examine the root system surrounding the trunk.

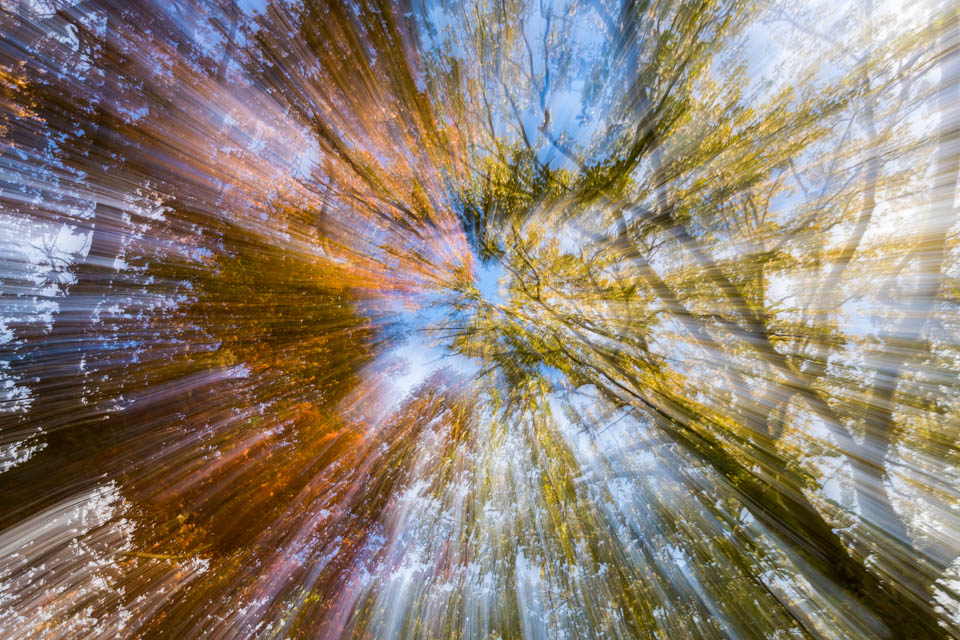
Branches. Glance upward to explore the beautiful patterns formed by interlocking branches, which look really stunning especially when silhouetted against a bright sky.
Location: Sequoia National Park, California, USA

The General Sherman Tree, which stands at a height of over 275 feet, is the largest tree in the world by volume. The size of this majestic sequoia and its original bark texture awe-inspiring.
Location: Pebble Beach, California, USA
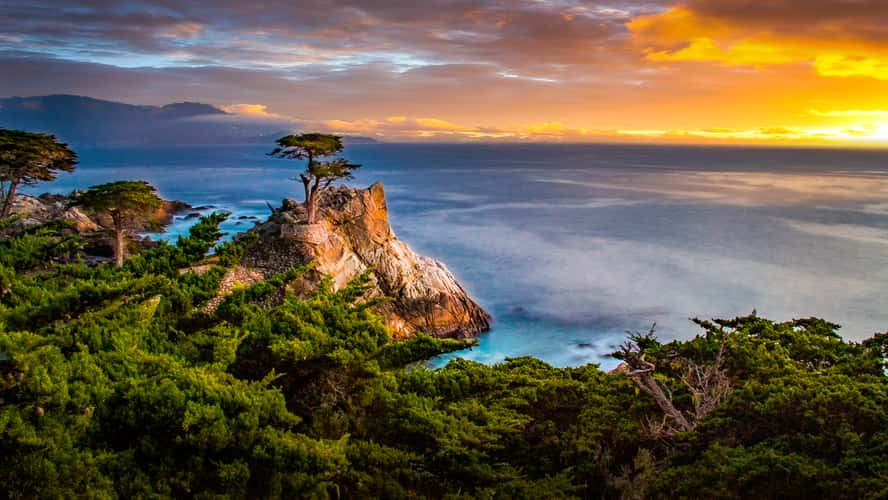
Standing solitary on a granite cliff with a view of the Pacific Ocean, the Lone Cypress is a well-known symbol of tenacity. A lovely view is created by its dramatic setting amid breaking waves.
Location: Various locations in the USA (e.g., Washington D.C., Portland, Oregon)

Location: Hawaii and parts of California, USA

The Rainbow Eucalyptus is an eye-grabbing attraction for wild trees photographers because of its vibrant, multicolored bark that peels away in strips, revealing bright green layers underneath.
Location: Anuradhapura, Sri Lanka
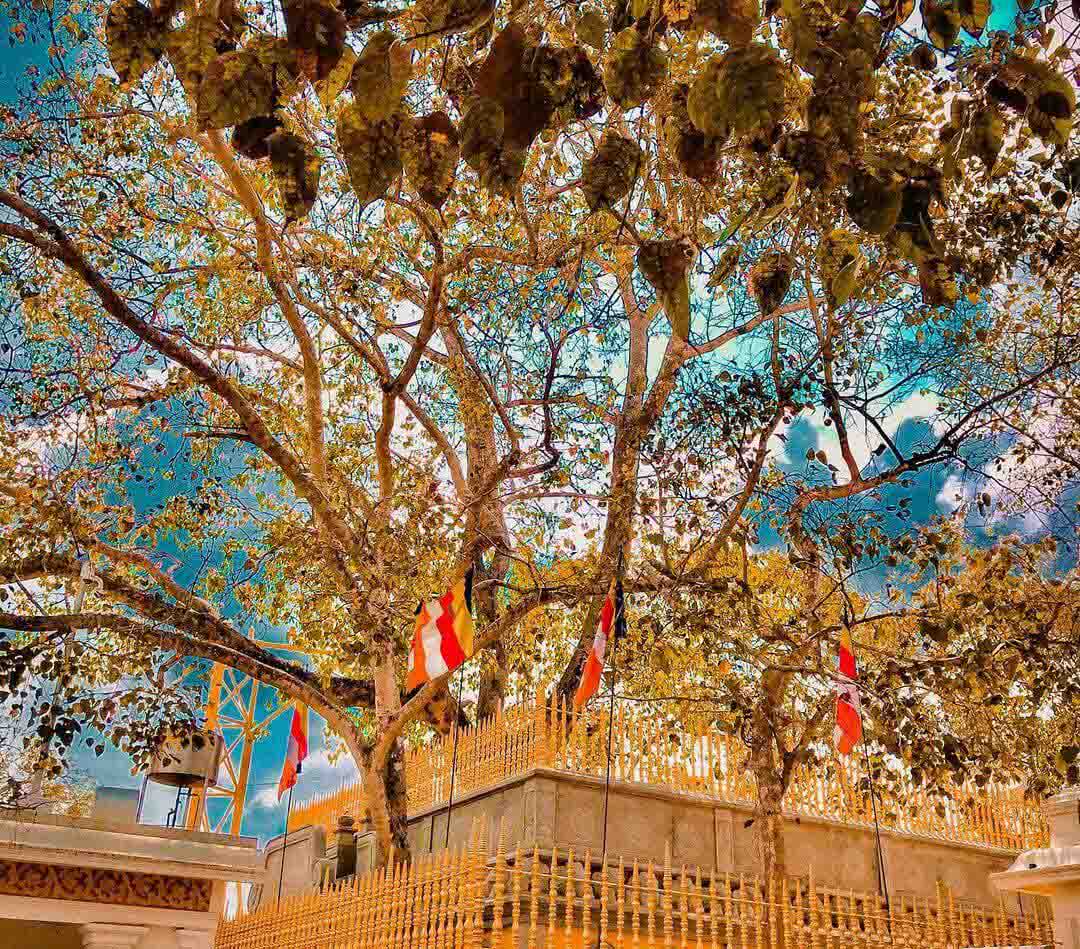
Respected in Buddhist tradition, this sacred fig tree is one of the oldest living trees in history planted by a human. However, it is not in the USA. If you happen to visit this place, shoot pilgrims and worshippers praying under the fig to showcase its spiritual significance.
Location: Yakushima Island, Japan

The estimated age of Jomon Sugi cryptomeria tree ranges from 2,170 to 7,200 years. It is a captivating object for photographers because of its enormous trunk and lush greenery.
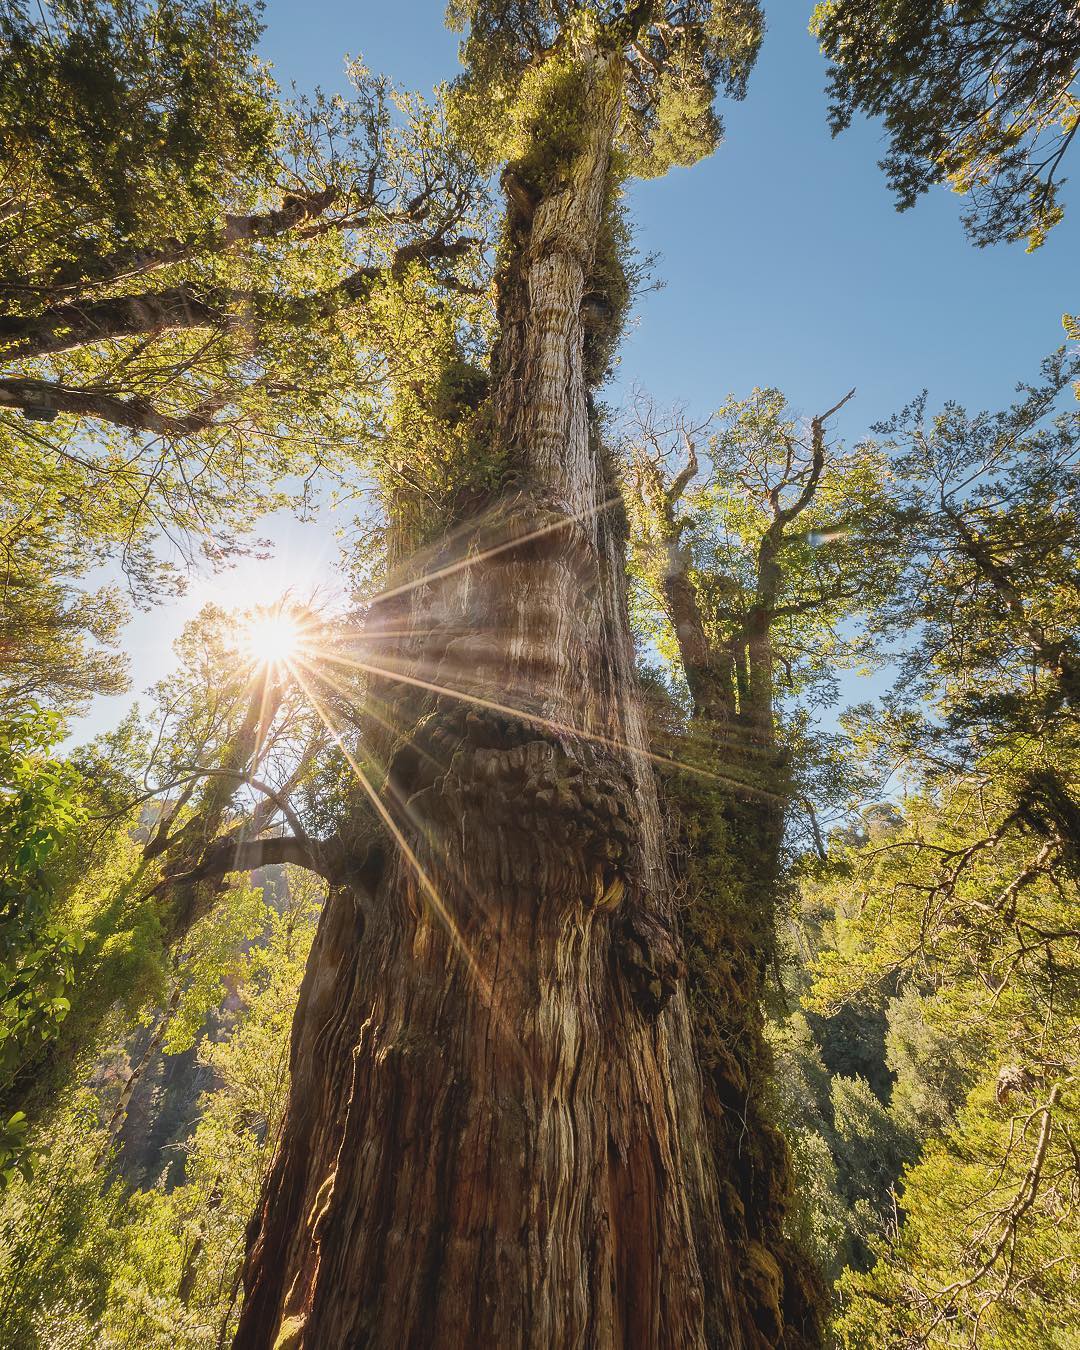
Location: Alerce Costero National Park, Chile
Location: Mount Etna, Sicily, Italy
Recognized by its massive trunk and sprawling branches, this ancient tree is considered to be between 2,000 and 4,000 years old. Its legendary status will make the images more appealing to viewers. I like to combine this tree with portrait photography to highlight its immense size.
Start with RAW files. When shooting trees photography, go for RAW format. RAW pics keep more detail and are more flexible when it comes to post-production, letting editors tweak the exposure, WB, and other settings preserving the original image quality.
Basic adjustments in Lightroom. Tinker with the exposure settings to make the image brighter or darker. Increase the contrast to make the tree more vivid in the background.
By dragging the clarity slider, it is easy to configure mid-contrasts properly to add depth to the bark and leaves. Whereas the texture slider lets you highlight the details keeping the overall composition nicely soft.
If you need to adjust any color casts, try to correct WB property. For warm sunlight, you can add more golden hues by increasing contrast.
Color enhancement. Keep in mind that oversaturated images look artificial in nature photography. It is better to use vibrance to boost the colors of the specific image section without affecting skin tones or already vibrant areas too much.
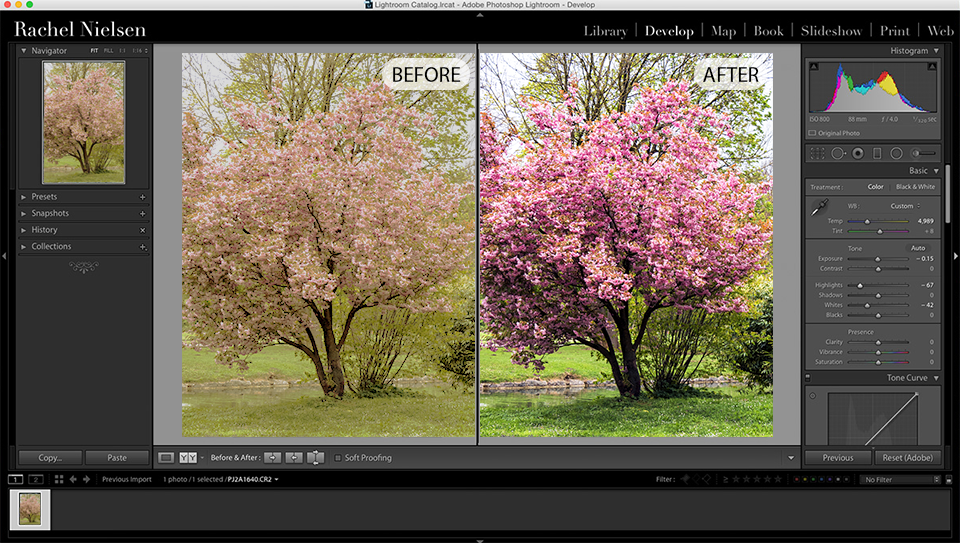
Go to the HSL (Hue, Saturation, Luminance) panel to correct specific colors. For example, you can refine greens for foliage or tinker with yellows and oranges in the images of autumn trees.
Use of filters. Decrease glare on wet leaves or correct the sky contrast to mimic a polarizing filter effect and make the clouds pop against a blue sky.
When post-processing trees photography, apply gradient filters to achieve a well-balanced exposure between bright skies and darker foregrounds.


