Want to make letters thicker but the chosen font has no bold option available? Don’t worry, as you can easily simulate this effect regardless of the font you are using. I will show how to make text bold in Photoshop step by step.
Among different Photoshop text effects tutorials, this one allows achieving the desired result in the quickest way. You mainly need to use the Character Palette to make any text bold.
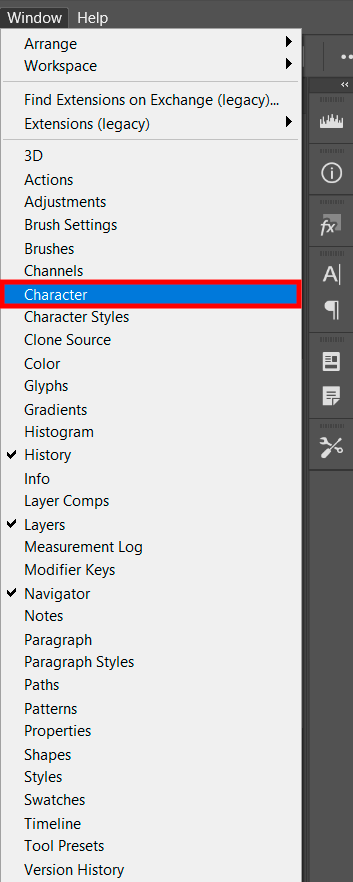
Open the Character Palette to get access to additional text settings. You can activate it by going to the Window menu in the Menu bar and selecting Character from the list of presented options.
If there is a checkmark near the corresponding panel, it is already activated to find it on the screen. Alternatively, you can click on the small Character and Paragraph panels toggle icon in the Options Bar with the Type Tool.
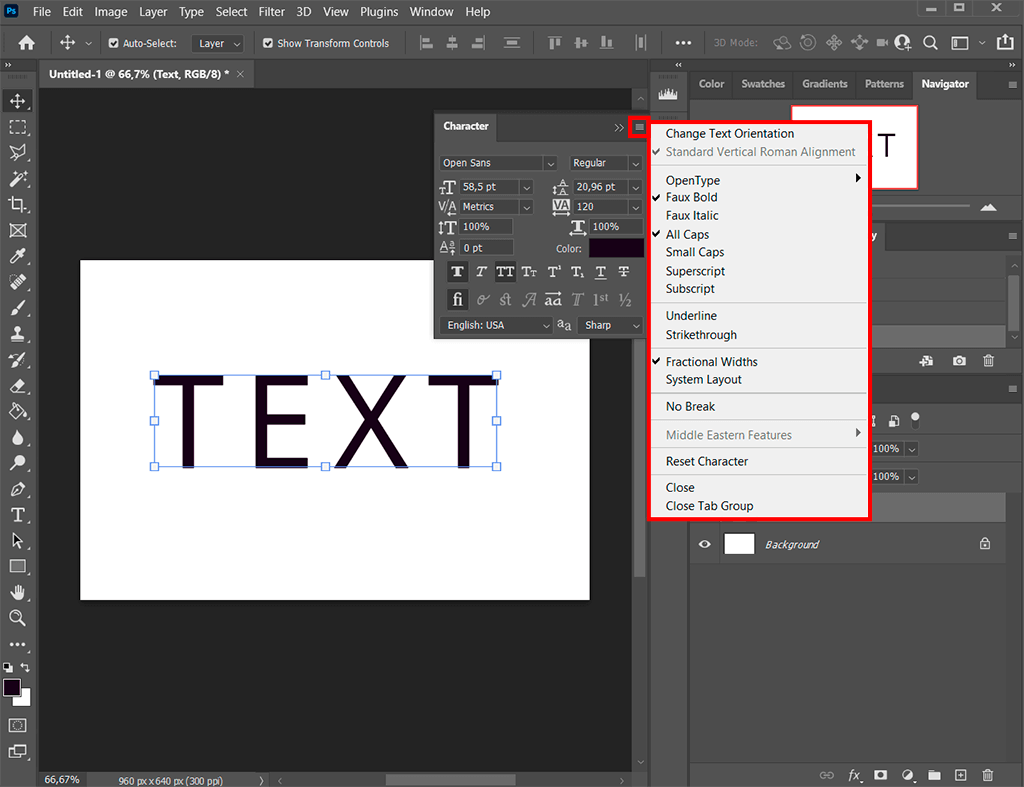
This panel resembles the Options Bar but with more options. Here you can find settings for font, font type & size, and more.
Go to the toolbar and select the Type tool there. You can activate it faster, using Photoshop keyboard shortcuts, namely pressing the T key. Typically, the Horizontal Type Tool is selected by default. It is needed for adding text horizontally. Change the color of text in Photoshop, picking a suitable variant.
In case you want to add text vertically, use the same tool but pick Vertical Type Tool from the context menu. Type the text and highlight the needed words/sentences. Go to the palette menu > find the menu icon in the upper right corner > click on it.
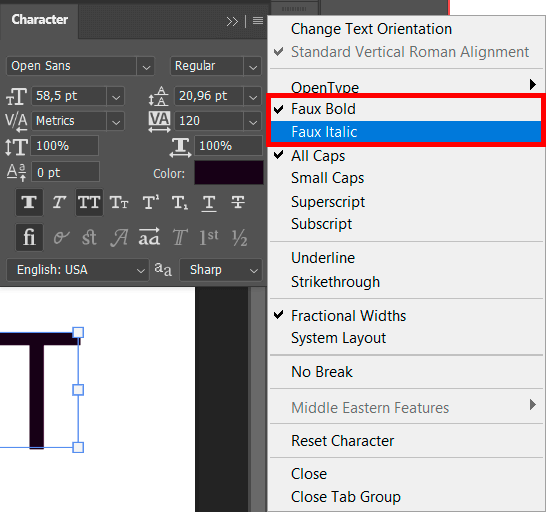
There will appear such variants as Faux Bold and Faux Italic, which are intended to create corresponding fake styles if a font doesn’t include them by default. Choose a suitable option or both at once.
If you select Faux Bold formatting, you can’t warp type or text to shape. You will see a notification - Could not complete your request because the type layer uses a faux bold style. In this case, you should Remove attribute and continue.
Simply put, it is still possible to warp the text, but it won’t appear in bold. Fortunately, you can undo the Faux Bold in an instant. Just click OK in the warning box and your text will become normal again.
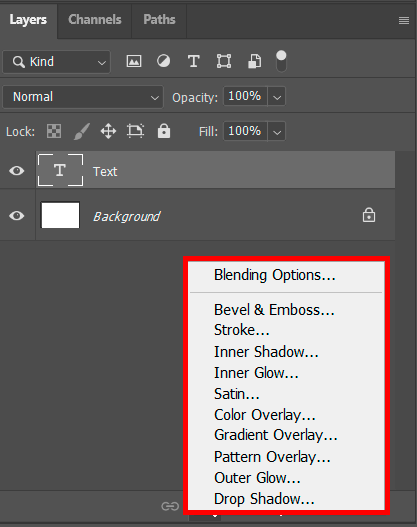
If a text in bold font Photoshop isn’t as thick as you need, open the Layer Style panel. Go to the Effects panel and select Layer Styles from the category menu. Here you can outline text in Photoshop.
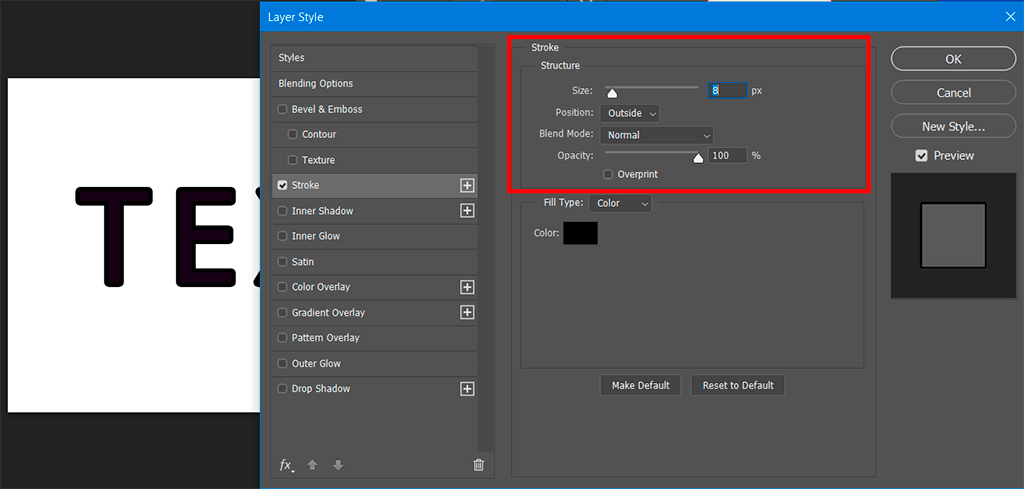
Open the Stroke tab. This parameter is truly the most comprehensible to work with as all the changes you make are immediately displayed on the canvas. Start with increasing the size of the stroke and adjusting the color so that it matches the color of your text.
There is also a position drop-down list with such options as Outside, Inside, and Center. Thus, you can control how your stroke is aligned in relation to the layer it’s meant for. With the Outside option selected, the stroke will begin at the edge of the shape and grow outwards, away from the object.
Now you know how to make text bold in Photoshop. Once you’ve achieved your goal, make sure to turn your selection off. There are lots of other handy tutorials you can take advantage of to make a text even more pleasant to the eyes. For instance, you can learn how to make gold text in Photoshop, or how to make 3D text in Photoshop.
If you are facing difficulties while creating this effect or need professional assistance with more complicated text manipulations, don’t hesitate to address experts from the FixThePhoto team. No matter what idea you have in mind, they will realize it in a quick way and at a moderate cost.
Making designs and photos unique has become even simpler thanks to an extensive collection of fonts. We have gathered premium fonts that were developed by skilled designers, so you can be sure you get top-notch products. The best part is that you can download all the fonts absolutely for free! Don’t believe us? Then click the “Download” button and check it yourself.