My colleagues and our clients often ask how to remove one color in Photoshop without changing the rest of the picture.
Not long ago, I had a big discussion with a coworker about how best to get rid of a green background from a portrait. One of us liked the Color Range tool, and the other preferred the Magic Wand. We even asked our intern, and he only knew one way and wanted to learn more options.
That’s why my team at FixThePhoto and I decided to test different tools and share with everyone which method works best. In this guide, I’ll explain three main methods (plus a few extra ideas) for removing a single color in Photoshop. We’ll also share tips from our own work and show which projects each method works best for.
Removing one color from a picture can help in lots of situations. For example, you may want to delete a background when it’s a plain solid color, or you may want to fix a color tint on someone’s skin or clothes.
Overall, there are four main ways to erase a color in Photoshop: Color Range, Magic Wand, Magic Eraser, and Replace Color. Each one has different strengths depending on the picture.
This is my favorite tool for removing colors in Photoshop when working with product photos or simple backgrounds. The Color Range Photoshop tool lets you pick one color in the image and automatically selects all pixels that match it. Then you can delete them or hide them with a mask.
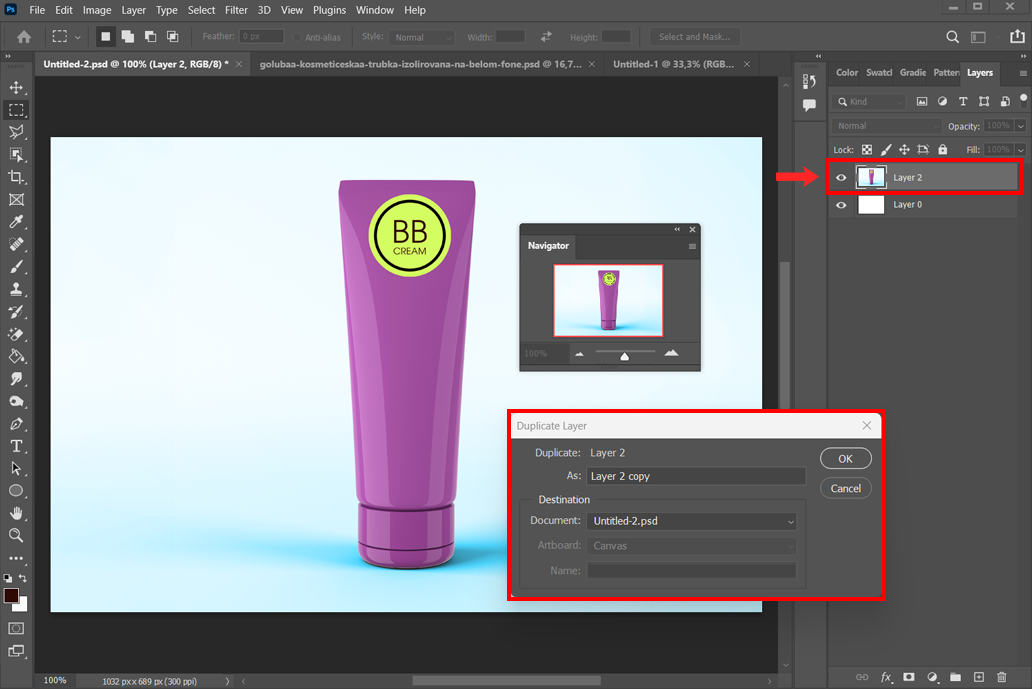
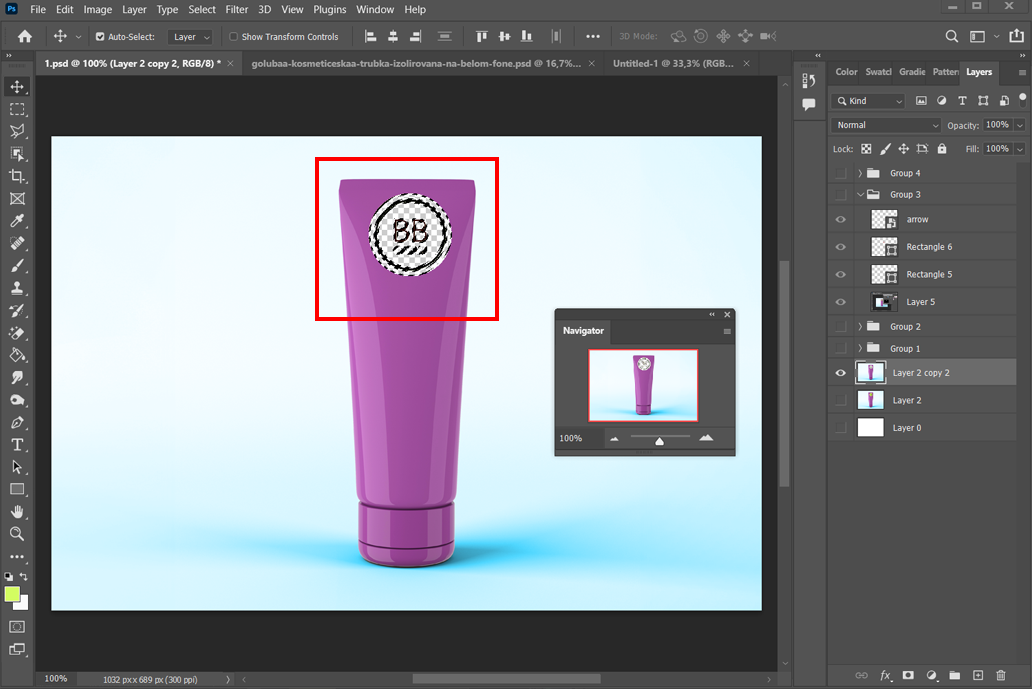
Step 1. Open your photo and make a copy of the original layer (press Ctrl+J on Windows or Cmd+J on Mac). This way, you won’t damage the original picture. If the layer is locked, unlock it first.
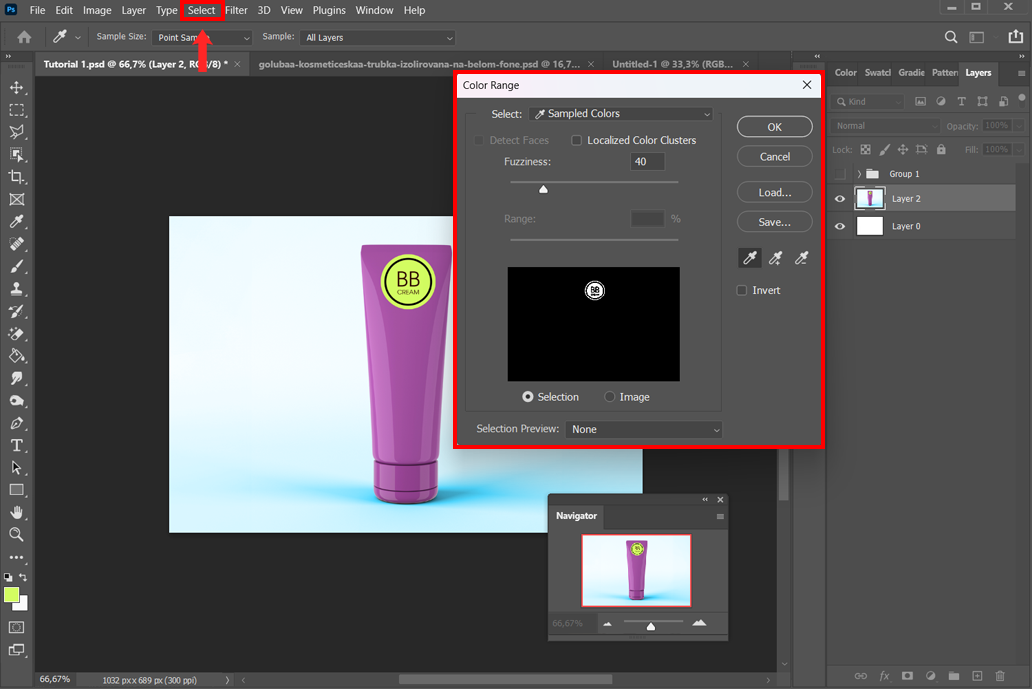
Step 2. Go to the top menu and click Select > Color Range. A new box will pop up. Use the eyedropper tool inside that box to click on the color you want to remove. You’ll see a preview where white areas show the selected color.
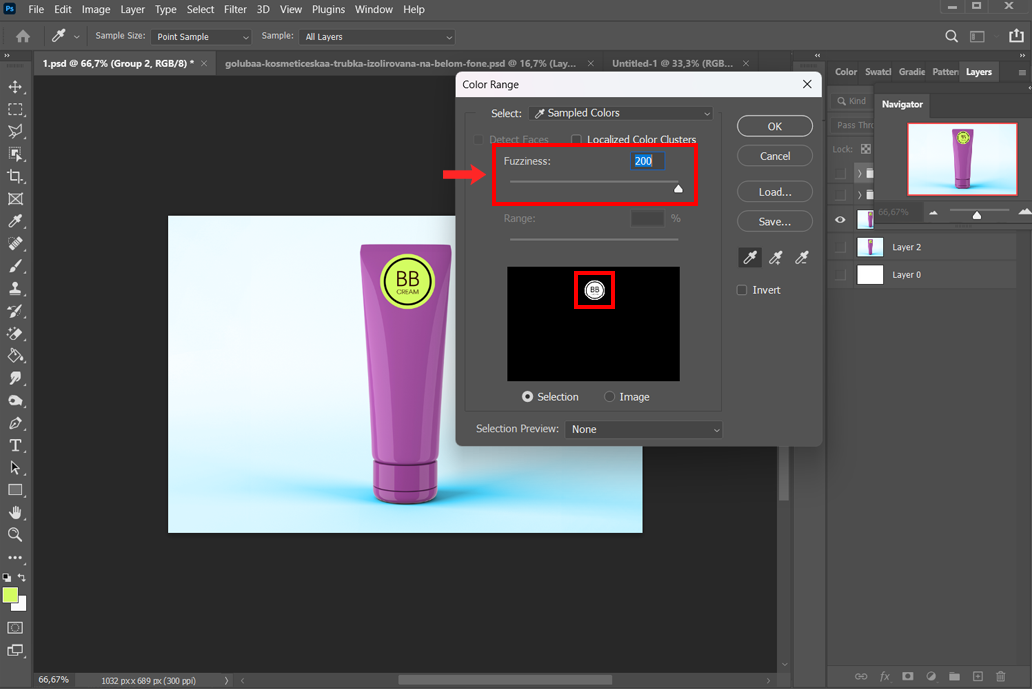
Step 3. Adjust the Fuzziness slider to change how many shades around that color will also be selected. A higher fuzziness includes more shades; lower fuzziness includes fewer. If you see white in the preview, it means that the colour is selected. Watch the preview until it covers the color you want to remove.

Step 4. Refine the selection (if needed). If parts of the color are missed or too much is selected, you can use the “Add” or “Subtract” eyedropper to fix it. You can also check Localized Color Clusters if you only want certain parts (like removing the blue sky but keeping blue clothes).
Step 5. Delete or mask the selection. Once you’re happy, press OK to close Color Range. The color will now be outlined with the “marching ants” selection. To remove it, press Delete (Backspace). Photoshop may ask what to fill the space with – choose Transparent. If you prefer a non-destructive edit, click the Add Layer Mask button instead to hide the color.
Step 6. Deselect. When you’re done, press Ctrl+D (Windows) or Cmd+D (Mac) to deselect in Photoshop. The color you wanted to remove should now be gone.
From experience, I think the Color Range tool works best when the color you want to remove is solid and even, like a green-screen background or a wall painted in one shade.
For example, you can use this tool when changing the background color in Photoshop. First, remove the original color, then place a new fill layer underneath to give the picture a different background color.

The Magic Wand tool is another way to remove colors in Photoshop. It’s especially good when the color you want to delete is grouped in one area.
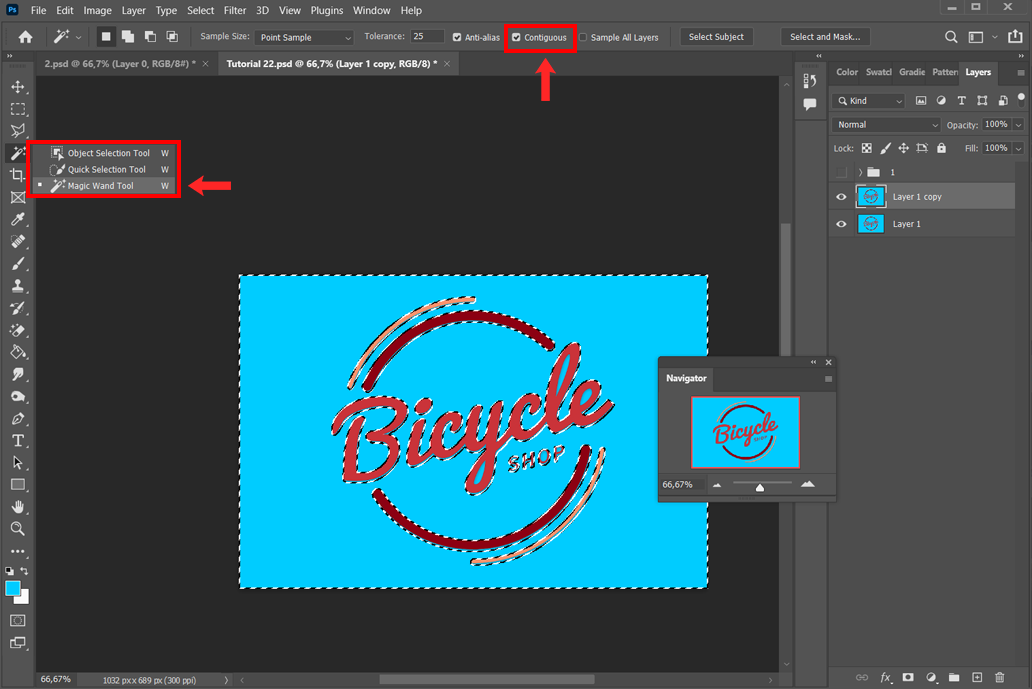
Step 1. Choose the Magic Wand Tool. Open your photo, pick the right layer, and select the Magic Wand Tool (shortcut: W). Look at the options bar on top: if you check “Contiguous,” the tool will only select the color next to where you click. If you uncheck it, it will select that color everywhere in the image.
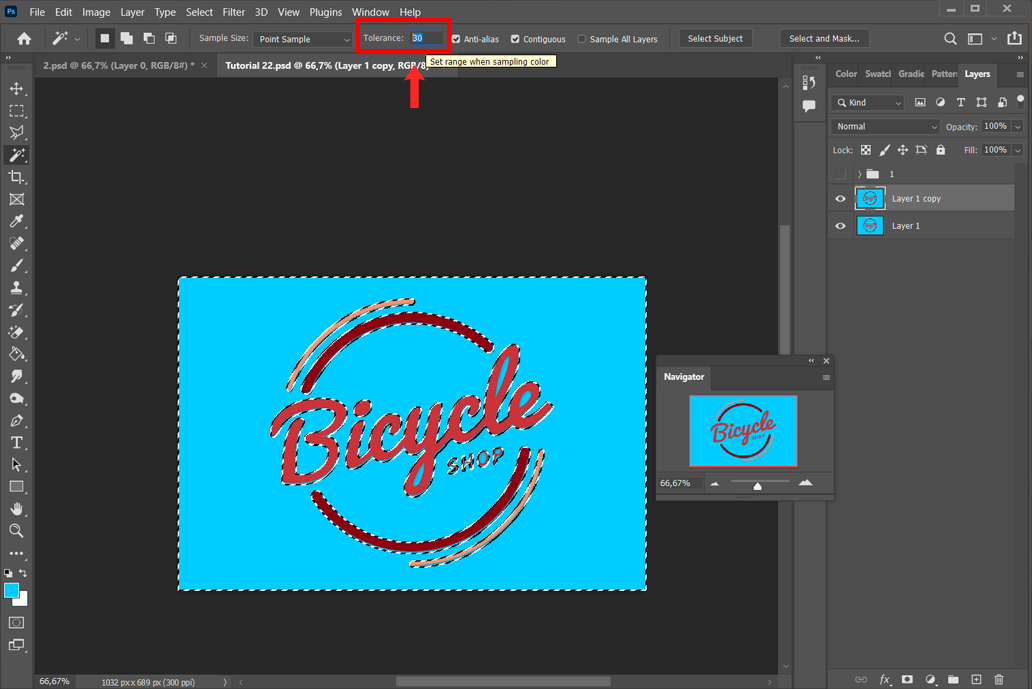
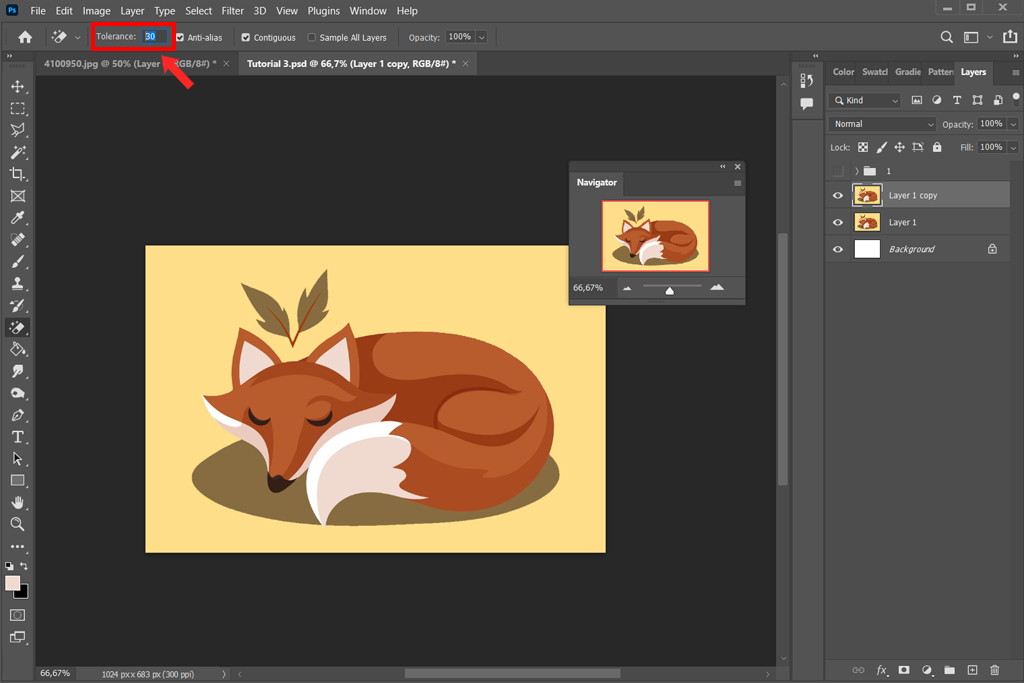
Step 2. Set the Tolerance value to around 10-35 at the top. A low number means it only selects colors very close to the one you clicked. A higher number selects a wider range of shades. For most photos, a setting around 30 works well.
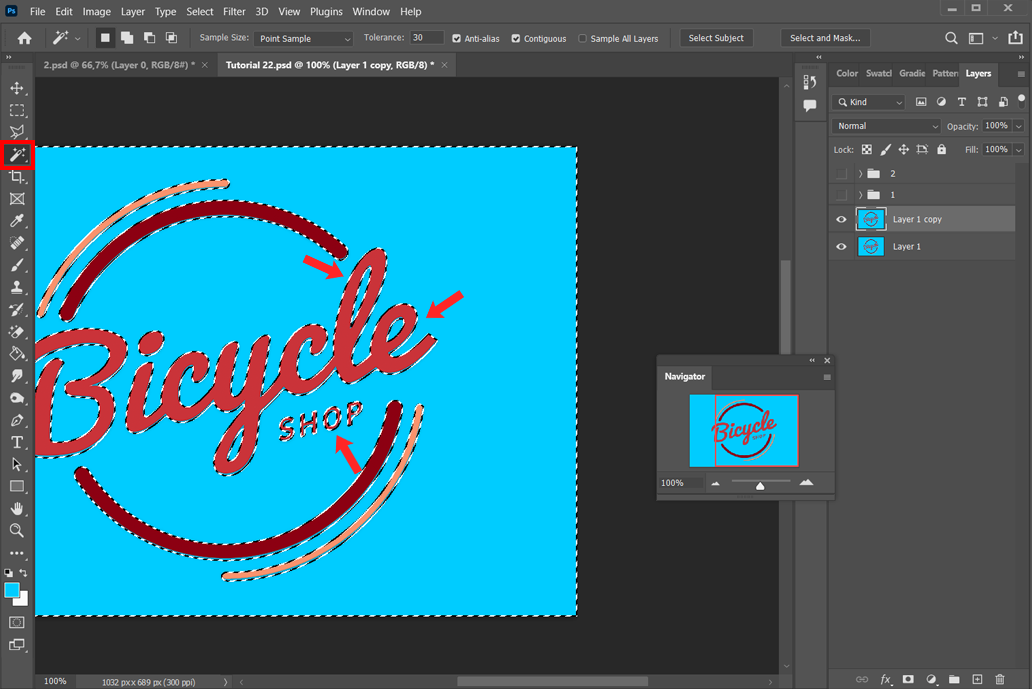
Step 3. Click on the color you want to remove. The Magic Wand will choose all pixels that are close to that shade. If you need to add more spots, hold Shift and click again. To take away areas, hold Alt (Windows) or Option (Mac) and click. If the selection looks off, adjust the tolerance or use Quick Mask mode to refine it.
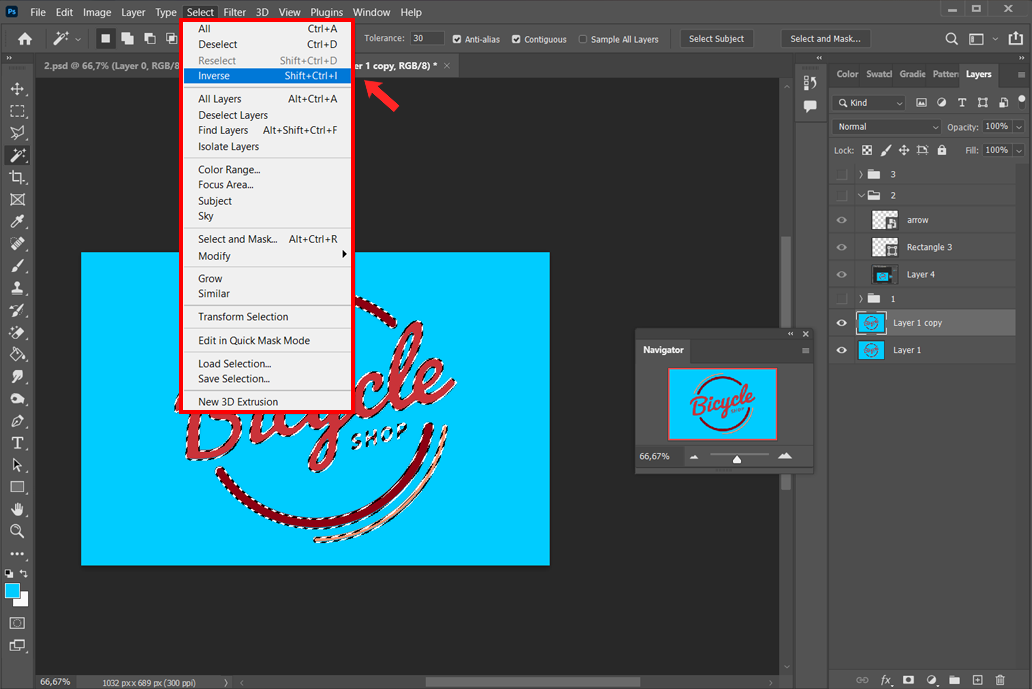
Step 4. Invert if needed. Sometimes, the tool might select the wrong part (the area you want to keep). In that case, just invert the selection with Shift+Ctrl+I (Windows) or Shift+Cmd+I (Mac). This flips the selection, so the unwanted color is the one highlighted.

Step 5. Press Delete to erase the selected color. If you inverted the selection earlier, this would remove just the color you didn’t want. If you prefer not to delete pixels, you can click the Add Layer Mask button instead to hide the color without removing it permanently.
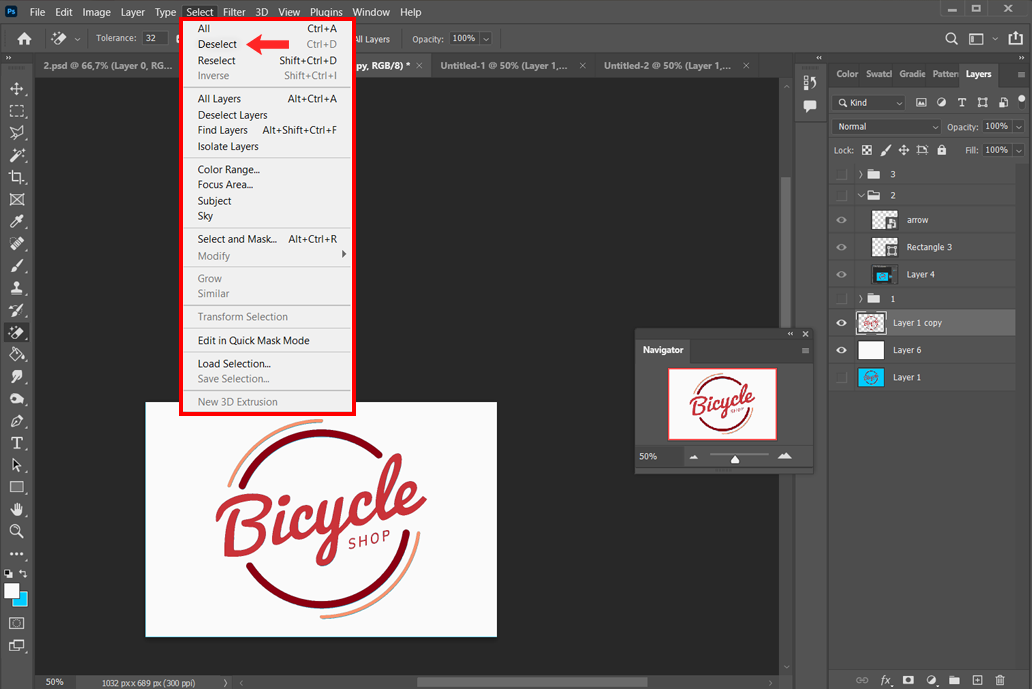
Step 6. Deselect. Press Ctrl+D (Windows) or Cmd+D (Mac) to deselect when you’re finished.
The Magic Wand is basically a fast “click-and-remove” tool for colors. It works especially well when removing large patches like a blue sky or a plain logo background.
Just remember that this tool erases pixels by default, so it’s safer to keep a copy of your original layer.
If you want to remove the background of a picture in Photoshop, and your background is only one plain color, the Magic Eraser Tool is the fastest way to do it. Think of it like a smart eraser that knows which color to erase.
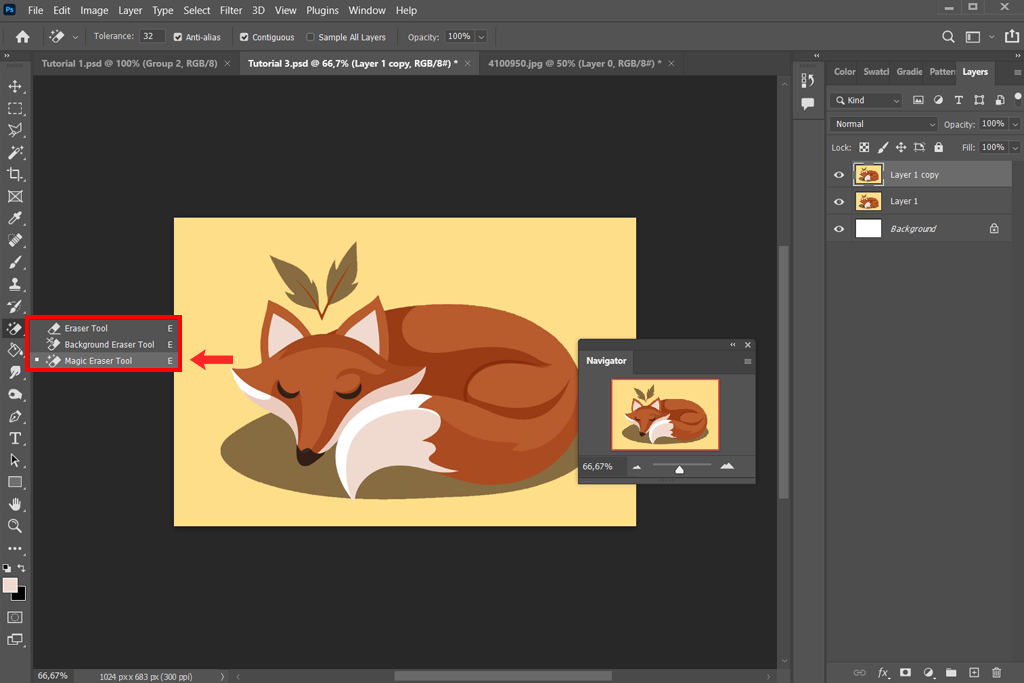
Step 1. Pick the Magic Eraser Tool. Find it under the Eraser flyout (shortcut: E, then choose Magic Eraser).
Step 2. Set Tolerance. In the options bar on top, put the value around 25–30. This controls how close in shade a pixel must be to the one you click for it to erase.
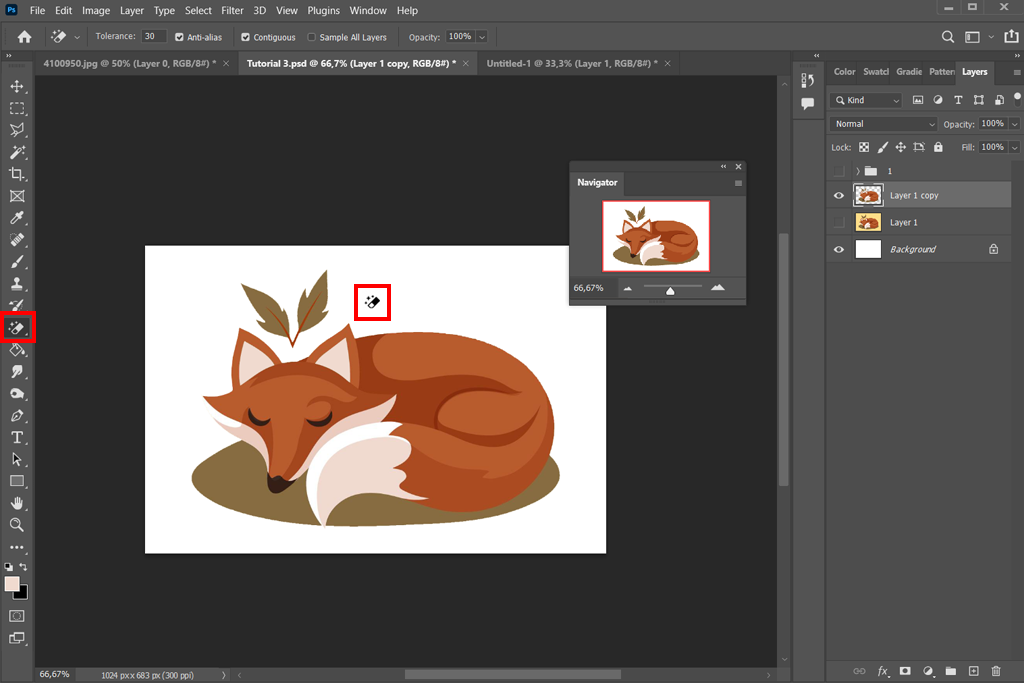
Step 3. Click on the color you want to remove. Once you click, Photoshop instantly erases all nearby pixels of that shade, based on the tolerance. You don’t need to press Delete afterward, as it happens right away.
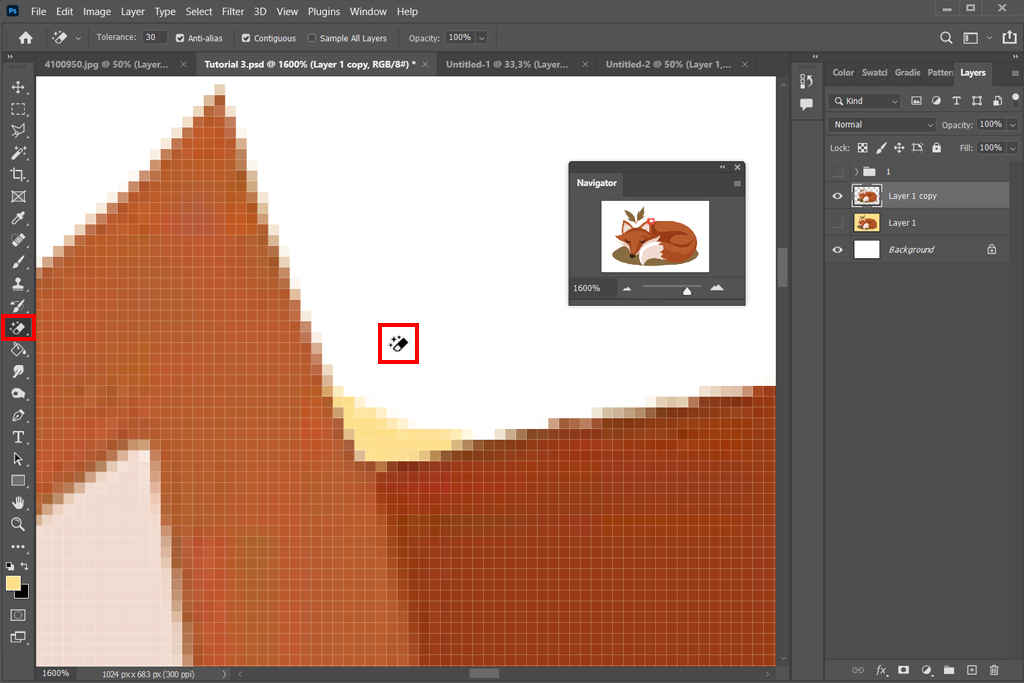
Step 4. Repeat if needed. If the background isn’t connected everywhere, you might have to click in other spots until the whole color is gone.
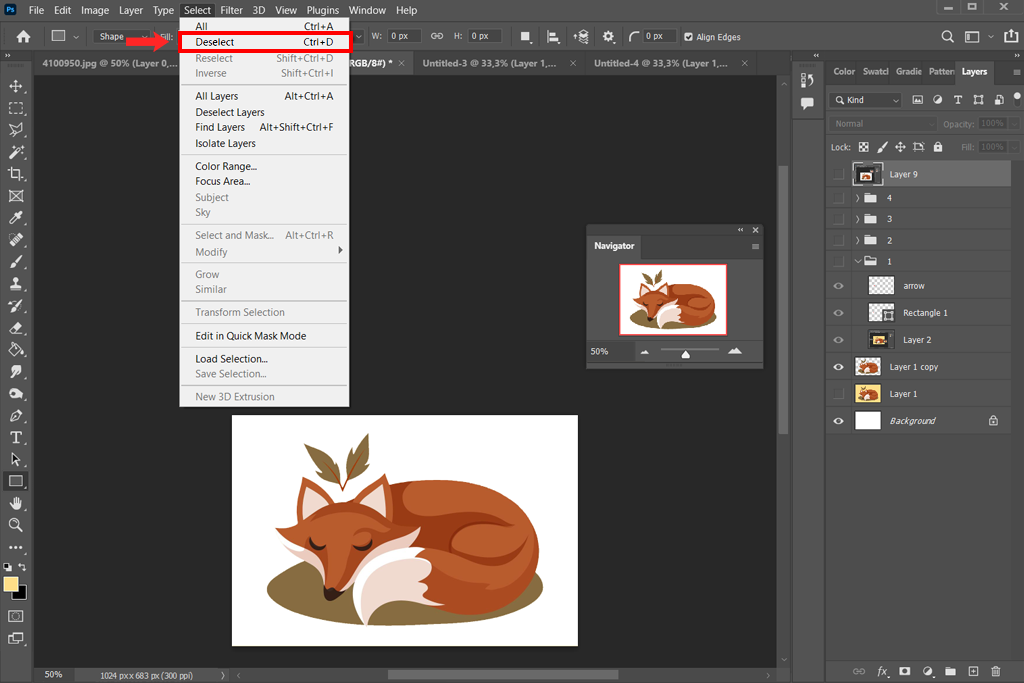
Step 5. Deselect. This tool doesn’t keep a selection active, but just to be safe, press Ctrl+D (Windows) or Cmd+D (Mac).
The Magic Eraser is great for clean, flat backgrounds like product photos on white or green screens, clipart, logos, or screenshots. Unlike the normal Eraser, this method to erase one color in Photoshop automatically finds the matching color for you.
If the background has shading or multiple colors, Magic Eraser may leave behind little speckles, so it’s best when the area is completely uniform.
Sometimes you don’t want to erase one color from a picture, but instead change or tone it down. Photoshop has tools that let you remove specific color tone from the entire picture while keeping it intact:
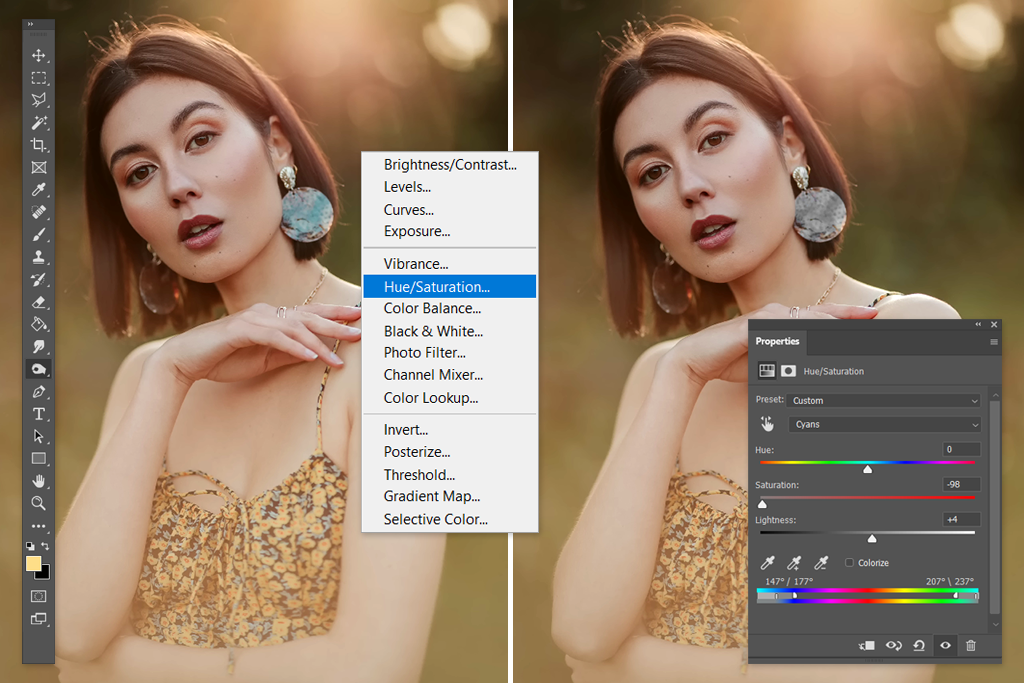
Hue/Saturation Adjustment. This method lets you reduce a specific color’s intensity. For example, if you want to turn a green wall into gray:
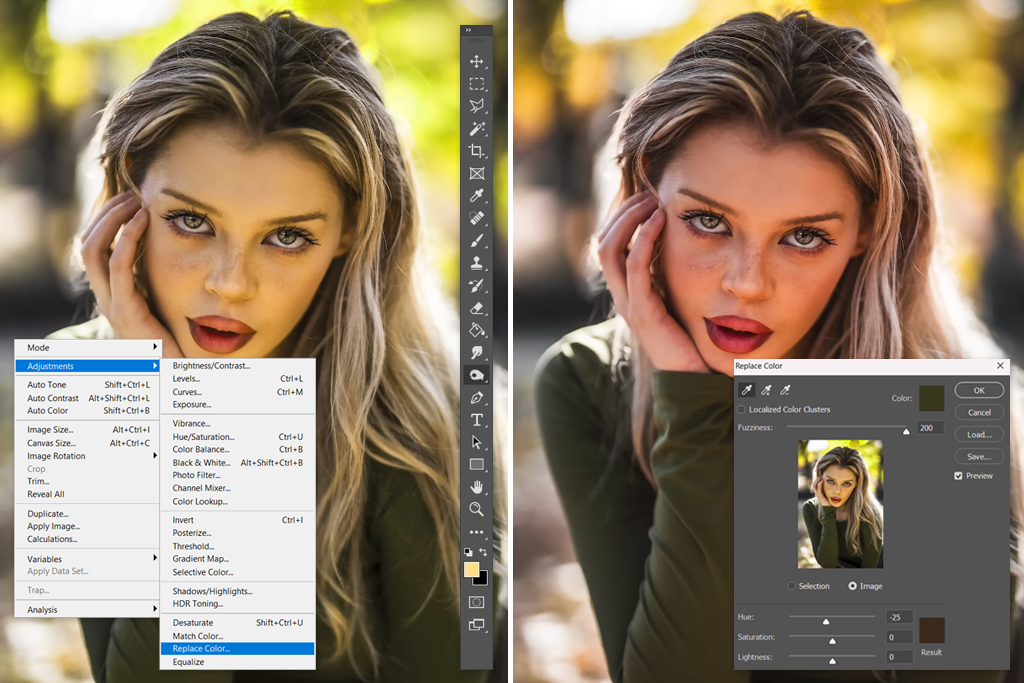
Replace Color Command. This swaps one color for another on one layer:
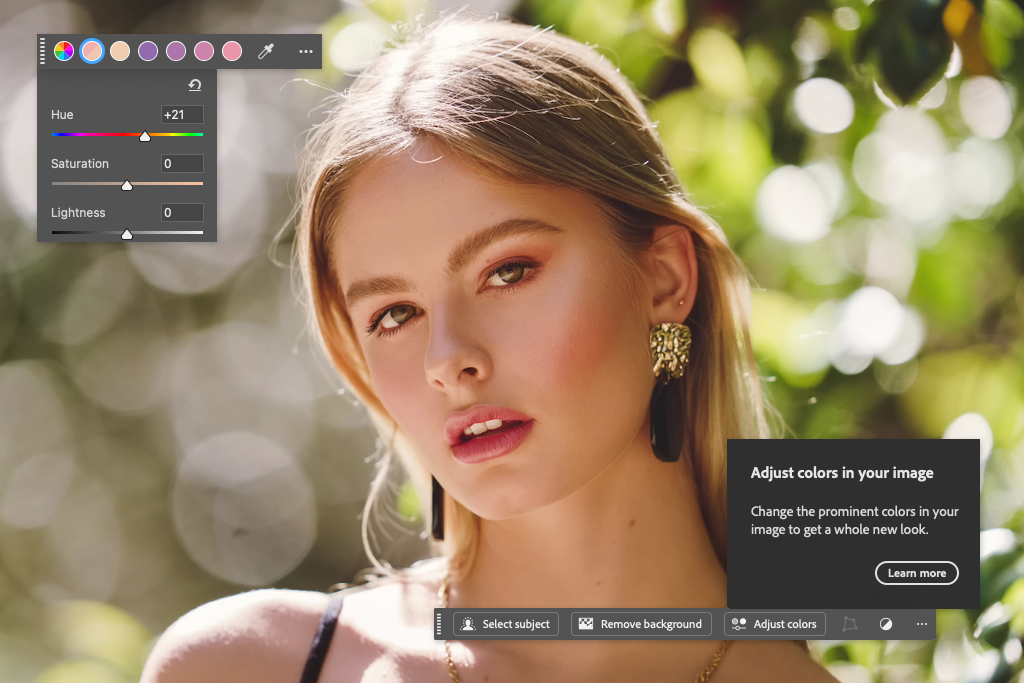
Targeted Masking. You can also paint a mask on the area you want to change, then apply an adjustment (like Hue/Saturation or Curves) only to that mask. With Photoshop’s new Adjustment Brush tool (2024 update), you can select and edit at the same time with one brush stroke.
These methods don’t erase pixels – they’re non-destructive, so you can change the color of an object in Photoshop and then undo it later without ruining the original photo.
They work best when you need subtle changes, like fixing a yellowish tint on skin, balancing colors in a portrait, or editing printed graphics where transparency isn’t needed. For example, if skin looks too green under certain light, you can target the green color with Hue/Saturation and desaturate it.
Besides the classic methods to get rid of one color in Photoshop, here are some newest features and tips that can save you some time:
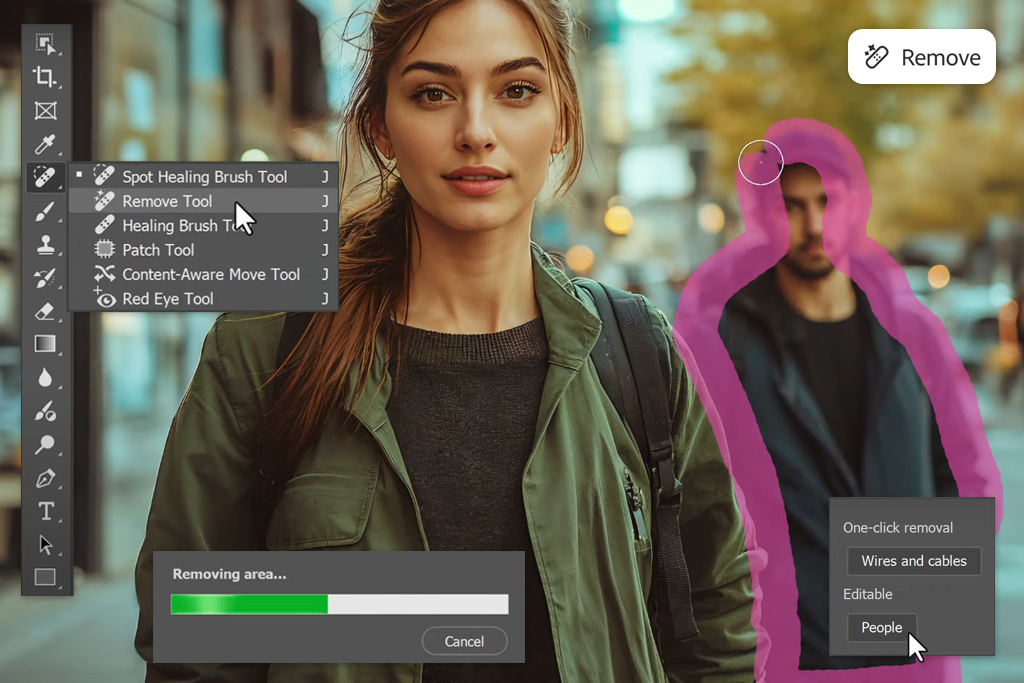
Remove Tool (Distraction Removal). Photoshop now includes a Remove Tool in the Contextual Task Bar, which is meant for removing objects in Photoshop.
Although it’s not made for color removal, you can use it on objects with a strong color (like a red sign) to delete them. It uses AI to fill in the background automatically, but it won’t erase every pixel of a color across the whole photo.
Layer Masks. Instead of deleting colors, you can hide them with masks. For example, after using Color Range, click Add Layer Mask. The chosen color will disappear, but you can bring it back by painting on the mask, which is helpful if you want flexibility later.
Blend If Sliders. For trickier edits, double-click your layer to open Blending Options, and under “Blend If,” you can drag sliders for specific channels (like red or green) to hide certain shades. If you hold Alt/Option while dragging, the sliders split, giving softer blending.
Keyboard Shortcuts. Learning Photoshop keyboard shortcuts can save a lot of time. Here are some useful ones:
Using these makes color editing much faster.
By combining these methods, you can handle almost any color problem in Photoshop. The tool you pick depends on your goal: do you want to make the background transparent, or do you want to recolor an object?
When we write a how-to guide for the FixThePhoto blog, we don’t just explain the theory – we test everything ourselves. For this topic, my FixThePhoto teammates and I tried every method we could think of for removing a single color in Photoshop.
I led the testing, but it was a group effort. We had retouchers who mostly edit portraits, product-photo editors who work on online shop images, and real-estate retouchers who deal with rooms and buildings. This mix was important since a method that works perfectly for a clean studio product photo might fail on a portrait or a room with tricky lighting.
We tested both the regular tools and the newest Photoshop features to remove a color from the picture. We even tried different step orders, like whether it’s better to mask first or desaturate first, since the order can change how clean the edges and textures look. Here’s how we set up the test:
To evaluate each method fairly, we scored them on these points:
Edge quality & halos. Are the edges between the subject and the removed color clean, without glowing outlines?
Color spill & contamination. Does the method actually remove the unwanted color, or does some tint remain on nearby areas like hair or clothes?
Texture preservation. Do details like skin, fabric weave, or product surfaces still look natural afterward?
Non-destructive flexibility. Can we go back and edit the result easily using masks or adjustment layers?
Speed & workflow fit. Is the method quick for a single image, and can it be repeated easily for a batch of photos?
Reproducibility. If another teammate follows the same steps, will they get the same outcome?
The testing process took about three weeks. We did lots of side-by-side comparisons and feedback sessions with our teams. Overall, everyone agreed that there wasn’t one “best” tool to get rid of one color in Photoshop. Instead, we found the right tool for the right situation, and that’s what this article explains.
Use Select > Color Range to choose the color and delete it. You can also use the Magic Wand Tool, set a tolerance, click the color, and then press Delete. Both methods select pixels of the chosen color and remove them.
If the background is one plain solid color, the Magic Eraser Tool is the quickest. Just pick it, click the background, and Photoshop will erase that color right away. If the background isn’t perfectly solid, you can use Magic Wand or Color Range instead.
First, select the color you want to remove with Color Range or Magic Wand. Then delete it on a duplicate layer (so the original is safe). This leaves transparency where the color used to be. Hide or delete the original background layer, then save the file as PNG (not JPEG), so the transparency is kept.
Fuzziness controls how wide the color selection is. A low fuzziness means only colors very close to your sample are selected. A high fuzziness includes more shades. Adjust it until the preview shows the unwanted color covered properly.
If you want to edit text layers, just change it in the Character panel or double-click the text layer thumbnail to pick a new color. If the text is rasterized, you can use a Hue/Saturation adjustment or a Replace Color adjustment. Another fast way is to apply a Color Overlay layer style to change the text color.
Yes. The new Remove Tool (in the Contextual Task Bar) can automatically detect and erase objects like wires, people, or other distractions. It’s not mainly for color removal, but if you select a colored object, it can remove it and fill in the background. For removing colors across an image in Photoshop, though, you’ll still use Color Range, Magic Wand, or Magic Eraser.


