Adobe Connect 2026
At FixThePhoto, my job is to find tools that help me create better tutorials, webinars, and guides for photographers and designers. That's why I performed thorough testing and created an Adobe Connect review, analyzing a popular platform for online classes, team meetings, and professional training.
I switched to Adobe Connect when we needed a more professional platform for our photo editing tutorials and client webinars. While Zoom and Google Meet worked for basic calls, I wanted better customization like permanent virtual rooms, polls, and flexible screen layouts.
Adobe Connect won me over with its unique “pods” system, letting me arrange each session perfectly for our workflow.
One feature I valued most was the custom meeting rooms, which were especially helpful when walking clients through editing steps. I could load videos, images, and documents beforehand and organize the room to follow the session's flow, making everything smooth and professional.
Saved room layouts eliminated the need to rebuild from scratch each time, saving hours of work. Adobe Connect is available in twelve languages.
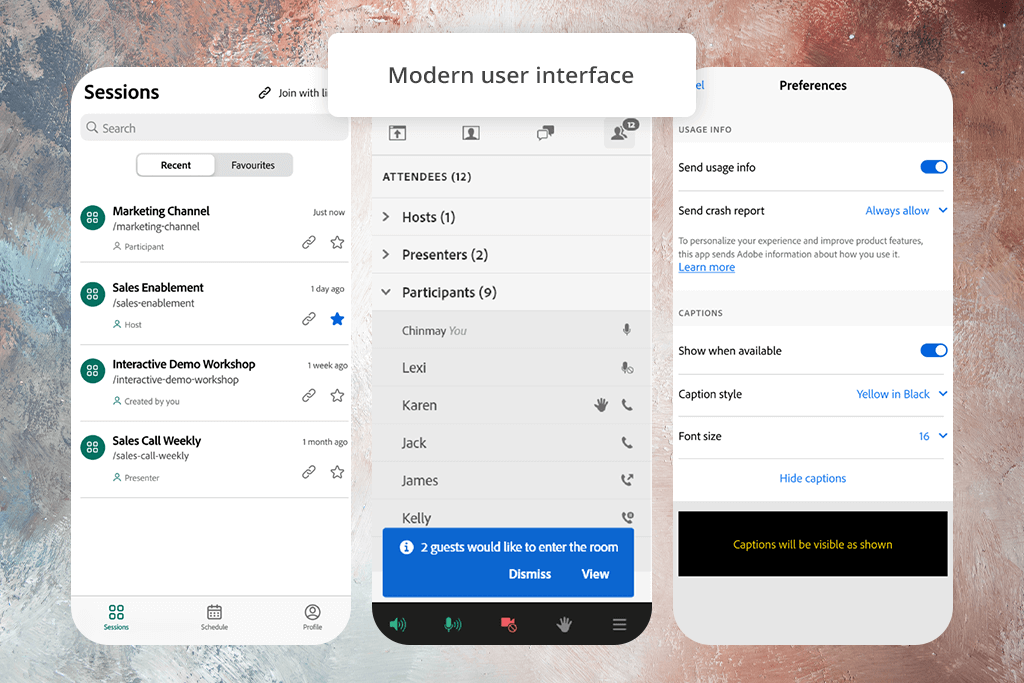
However, I did encounter some problems. The interface appears dated compared to newer webinar tools. Older versions depend heavily on Flash, leading to compatibility issues until we fully transition to HTML5.
New users frequently found it confusing initially, and mastering the pod and layout configuration required more time than I'd anticipated. The mobile version has limitations - phone users can't access all interactive features.
To start, I used Adobe Connect's 30-day free trial to assess its suitability for webinars and training sessions. Following this evaluation period, I opted for the Premium Plan priced at $290 annually per host. This package provides 10GB of cloud storage and includes the Training Pro Pack, making it an ideal solution for my specific workflow requirements.
This video conferencing software has pricing plans for different team sizes. The Standard Plan is $190 per year per host, and the Enterprise Plan is $390 per year per host and offers bigger meeting rooms and unlimited storage. You can buy add-ons like Pro Packs for $600 more per host annually to get extra features.
Adobe Connect offers upgrades for teams needing bigger meeting rooms or more storage. You can expand room capacity to 500 attendees ($2200 per year per host) or 1,500 attendees ($4900 per year per host). Storage upgrades range from $99 per year or even up to 1 TB for $1999 per year.
Though Adobe Connect costs more than competitors like Zoom, its flexible customization and storage solutions make it ideal for advanced training and webinar requirements.
The newest Adobe Connect update has added valuable improvements that enhanced my workflow, particularly after past difficulties when Adobe Connect did not work properly. Frequent problems included failure to launch, sudden crashes, or unresponsive meeting rooms.
I regularly use Adobe Connect for virtual meetings, webinars, and training sessions. Its powerful features help me create professional and engaging sessions. Here are some of the tools I find most helpful, with real examples from my work.
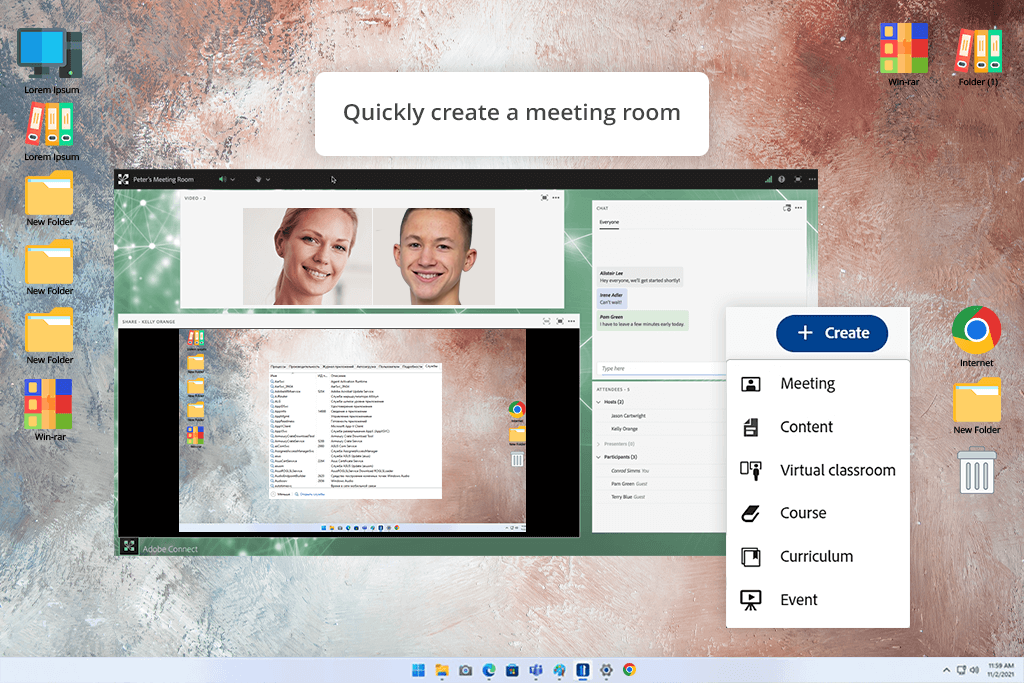
Adobe Connect helps me create fully customizable virtual meeting spaces that adapt to any collaboration need. I can tailor each room with specific layouts, branding, and tools - whether I'm conducting an internal team discussion or presenting to clients.
For instance, when reviewing designs with a client, I'll prepare a room equipped with video chat for face-to-face discussion, a whiteboard for real-time brainstorming, and screen sharing to walk through concepts visually. This all-in-one approach keeps meetings productive while maintaining a professional atmosphere.
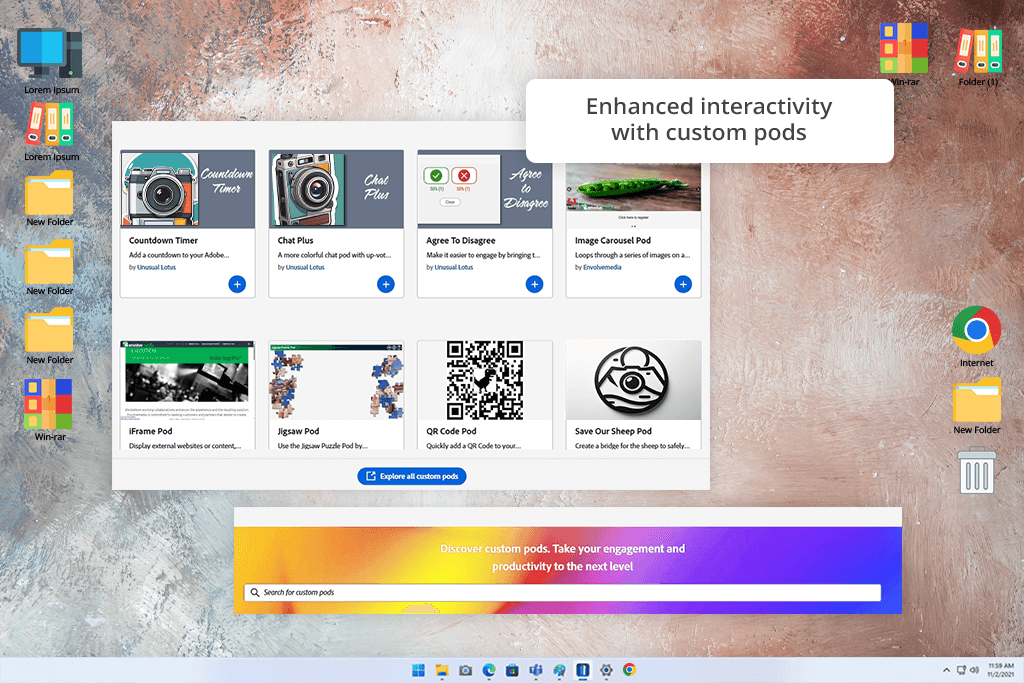
The multiscreen dashboard has been invaluable for managing content during live sessions. I regularly use multiple pods to display different materials simultaneously - like presentation slides, video content, and participant chats - all within a single unified view.
For instance, during a recent product demonstration, I was able to keep the video pod showing the live product demo, a file-sharing pod with supplementary materials, and an active chat pod for audience questions - all visible at the same time without toggling between windows. Just remember to get the most recent Adobe Connect downloads to access these features.

Adobe Connect software makes screen sharing smooth for any situation - from design reviews to step-by-step tutorials. I regularly rely on it as my screen sharing software when teaching photo editing or sharing video project progress with clients. The excellent resolution means nothing gets lost, keeping the whole team synchronized.
When working with multiple colleagues, I use Adobe Connect to create smaller discussion groups where each team can concentrate on specific tasks. After these focused sessions, we regroup to share the results with everyone. This method keeps conversations structured and makes our collaboration more productive.
It's ideal for preserving important meetings and client discussions that I may need to revisit later. I frequently use this during design reviews - recording the conversation allows me to carefully review feedback and capture detailed notes afterward.
The feature also works perfectly for developing shareable content - whether that's instructional videos, training materials, or educational sessions.
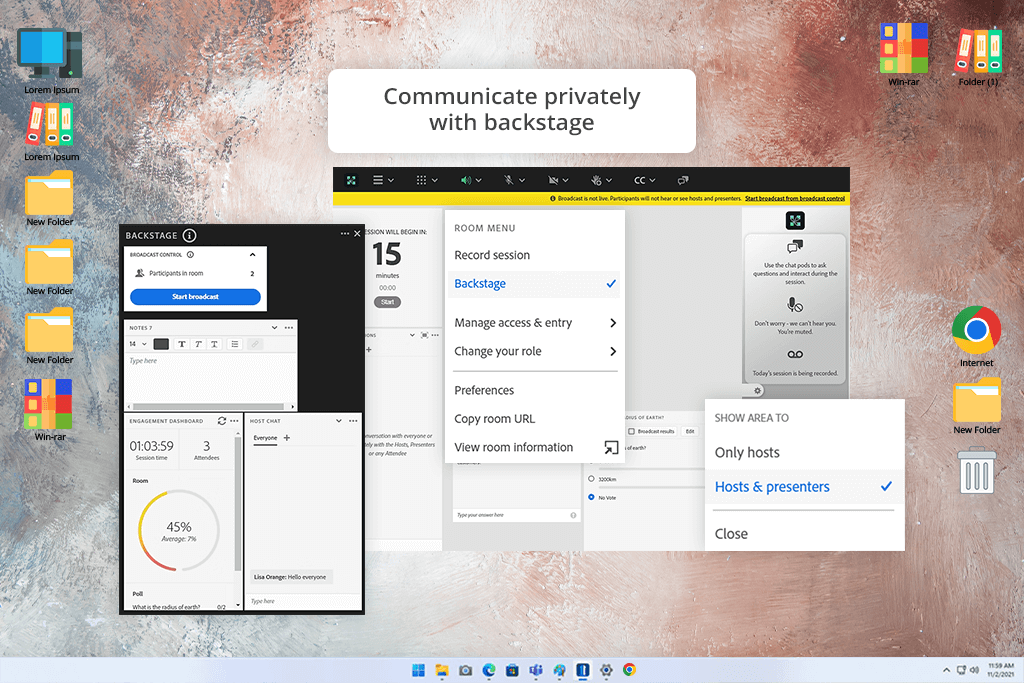
I love how Prepare Mode lets me get everything ready privately before participants join. And this is especially useful when I have other hosts helping. The backstage feature allows us to plan together without interrupting the session.
I use the same meeting room setup every time for my regular training sessions. This way, I don't waste time rebuilding the room each week. For example, my new employee training room is always ready - I just open it and start teaching!
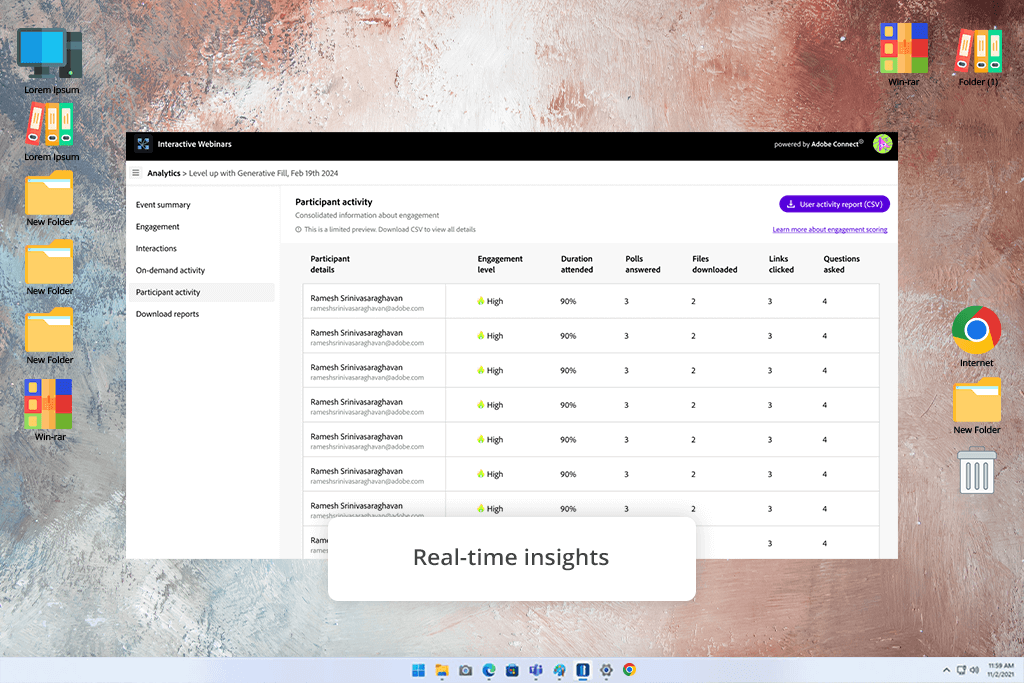
The engagement dashboard shows me how attendees are participating, so I can tweak things in the moment if needed. Later, I dive into the reports to see what kept people engaged, helping me improve for the next sessions.
With Adobe Connect Webinar, I can easily share files right during meetings. It doesn't matter if it's a design draft, video, or marketing material - I can upload and show content right in the conference room.
This saves me from switching between email and cloud storage since everything works in one webinar software. For instance, when talking with clients, I can immediately share images for their comments or show them finished video versions for approval.
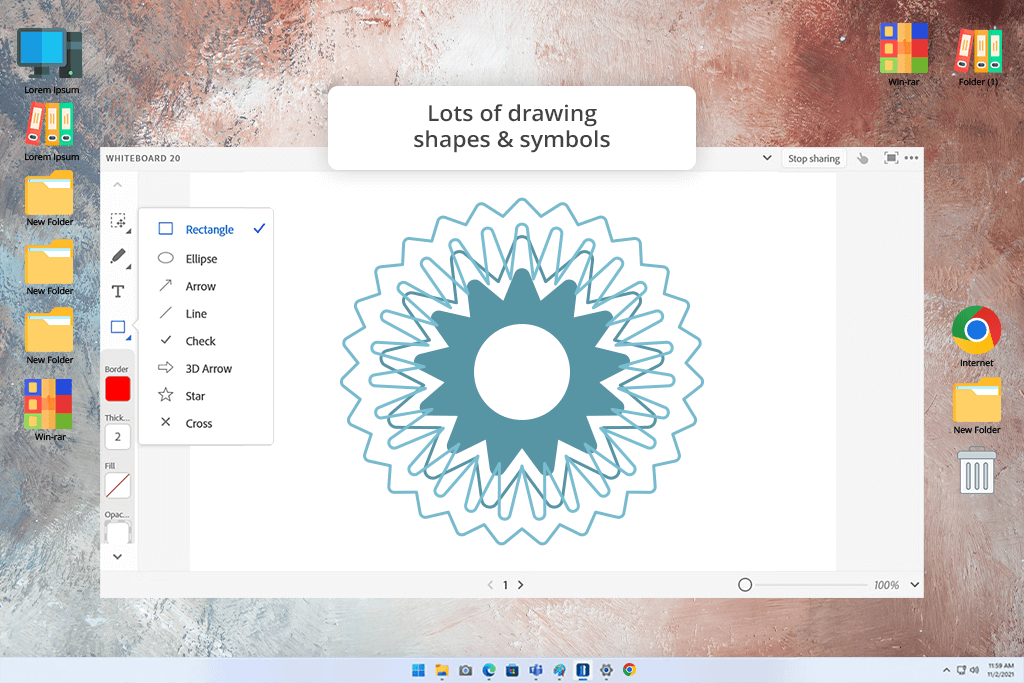
The whiteboard tool is great for explaining tricky design ideas. I can draw, write notes, or mark up files while everyone watches. This is super helpful when giving feedback on photos or videos. For example, if a client wants changes to a video, I can quickly draw the new layout right on their screen so they understand exactly what we'll do.
What's really helpful is how Adobe Connect works with other programs I use every day, like Google Drive, Dropbox, and Adobe Creative Cloud. This makes sharing and working on files together much simpler, especially with clients who already use these tools.
For example, I can open files straight from my Creative Cloud and show them in the meeting without having to change between different apps.
Step 1. Signed up. First, I visited the Adobe Connect website. I clicked “Free Trial” and signed up with my email address. I picked the free trial to test the platform before committing.
Step 2. Installed the add-in. Next, I installed the plugin. Right after logging in, the site asked me to add the Adobe Connect extension. The download and installation took only a few minutes. Once installed, I could access all the meeting tools directly from my computer.
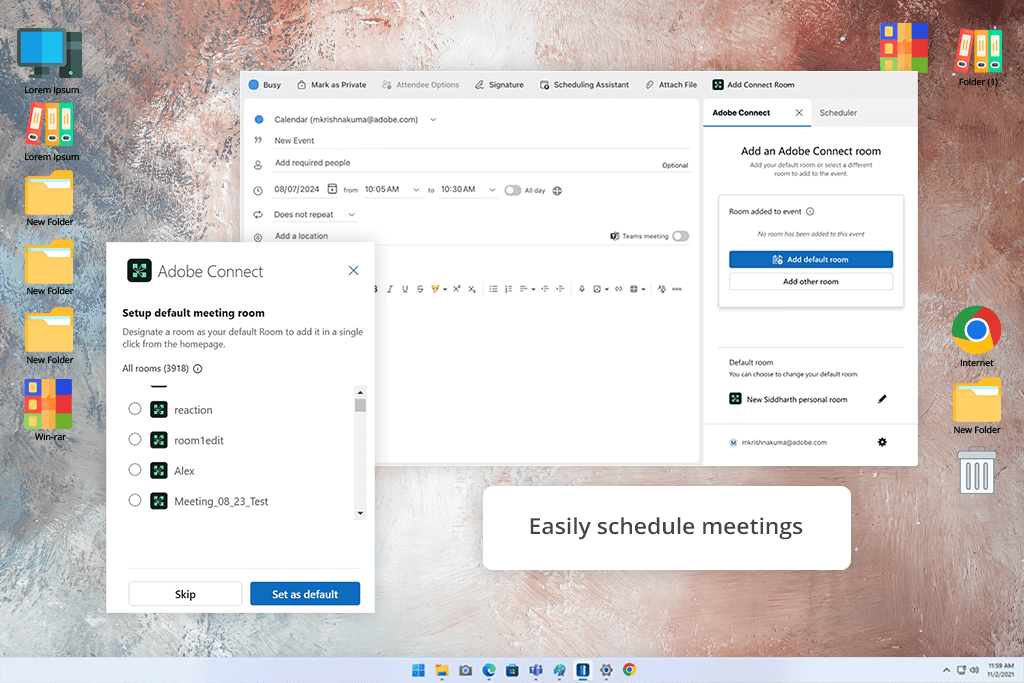
Step 3. Created my first Meeting Room. I went to my dashboard and selected Meetings > Create a Meeting. I gave the room a name, chose the date and time, and set up the access so participants could join without trouble. After saving, I got a special link for the meeting.
Step 4. Invited participants. I copied the meeting web address and emailed it to my client. I clearly explained that they could join directly through their internet browser without having to download any software.
Step 5. Joined the meeting. I joined the meeting by clicking the link, then checked my microphone and camera to make sure they worked. Once inside, I used the Share feature to display a project file and demonstrate a photo editing process by sharing my screen.
Step 6. Used interactive features. I used the Whiteboard tool to quickly draw ideas and get instant feedback from clients. At the same time, the Chat feature lets us share comments without disrupting the conversation.
Step 7. Recorded the session. Next, I recorded and edited video using Adobe Connect. To start, I went to Meeting > Record Meeting to capture the entire session. The recording was then saved automatically in my account under the “Recordings” section.
Step 8. Ended the meeting. After finishing the meeting, I clicked End Meeting. All my room settings were saved automatically, so I can reuse the exact same setup for future sessions.
I also used the free Adobe Connect mobile app (available for both iPhone and Android) when I had to join a meeting while away from my computer. Revamped Adobe Connect mobile app page works well and is user-friendly, though it has some small differences from the desktop version.
What it lacks:
What works well on the Adobe Connect app:
Even with its limits, the mobile app is great for joining and taking part in meetings when I'm away from my desk. For hosting meetings or using more advanced tools, I still prefer the desktop version.


| Action | Windows Shortcut | macOS Shortcut |
|---|---|---|
|
Increase UI size
|
Ctrl++ or (Ctrl+Plus)
|
command++ (command+Plus)
|
|
Decrease UI size
|
Ctrl+- (Ctrl+Minus)
|
Command+- (Command+Minus)
|
|
Show list of available keyboard shortcuts
|
Shift+?
|
Shift+?
|
|
Focus on the app menu bar for navigation
|
Ctrl+Shift+SpaceorCtrl+Shift+F2
|
Command+Shift+SpaceorCommand+Shift+fn+F2
|
|
Move focus to the next pod
|
Ctrl+F9
|
Command+F9
|
|
Move focus to the previous pod
|
Ctrl+Shift+F9
|
Command+Shift+F9
|
|
Open pod menu
|
Ctrl+F8
|
Command+F8
|
|
Send a message
|
Enter
|
Return
|
|
Close or cancel a dialog box
|
Esc
|
Esc
|
|
Open a new instance
|
Ctrl+N
|
Command+N
|
|
Mute or unmute microphone
|
CTRL+SHIFT+M
|
CTRL+SHIFT+M
|
We tested Adobe Connect to see how it works in actual creative projects. As a content creator, I tested it by joining different meetings and webinars on both desktop and iPhone. I focused on how well it managed media-rich content like PowerPoint slides, PDFs, video files (MP4), and animated GIFs.
I evaluated interactive features, including chat, Q&A, polls, breakout rooms, and status indicators (like “Raise Hand” and “Agree/Disagree”) to assess their ease of use and responsiveness. For audio testing, I compared both the built-in microphone and a noise cancelling Bluetooth headset to examine sound quality in different configurations.
Eva tested Adobe Connect by hosting actual webinars to see how well it worked in real situations. She set up complete webinar sessions from start to finish, managing invites and attendee permissions while using interactive features like live polls, file sharing, and chat.
She also explored tools like breakout rooms, whiteboards, and recording. Her main focus was on understanding how easy it was to run live events and whether the platform could handle large groups effectively.
Kate tested Adobe Connect's mobile app on an Android device during an actual client review meeting. She checked how well it displayed shared materials, including presentation slides, PDF documents, and video files, and how smoothly she could participate using the chat and status update features.
She tested both the mobile and desktop versions side-by-side, noticing the mobile had fewer features, like no screen sharing or full hosting controls.
By testing Adobe Connect as a team, we had an opportunity to check its performance from all angles – as hosts, participants, and mobile users. This helped us understand both what it does well and where it falls short.
![]() Yes, Adobe Connect is an excellent choice if you need a professional platform for webinars, online training, or client meetings.
Yes, Adobe Connect is an excellent choice if you need a professional platform for webinars, online training, or client meetings.
It works especially well for organized sessions requiring interaction, thanks to features like breakout rooms, file sharing, and reliable HD video/audio.
![]() Maybe not. For quick, informal meetings, tools like Zoom or Google Meet are easier.
Maybe not. For quick, informal meetings, tools like Zoom or Google Meet are easier.
Adobe Connect is designed for professional-grade interactive sessions and requires some training to use effectively.


![11 Best Facetune Alternatives [Free & Cross-Platform]](/placeholder-450x300.svg)


