Working as a photographer and retoucher at FixThePhoto, I sometimes notice issues in my photos that aren’t easy to fix. The heat distortion effect is one of the most challenging problems I have to deal with, as it is difficult to remove even during post-processing.
Whether I take lifestyle photos outdoors, practice wildlife photography, or capture long-range urban shots, heat haze significantly degrades the quality of my photos and makes them look blurry.
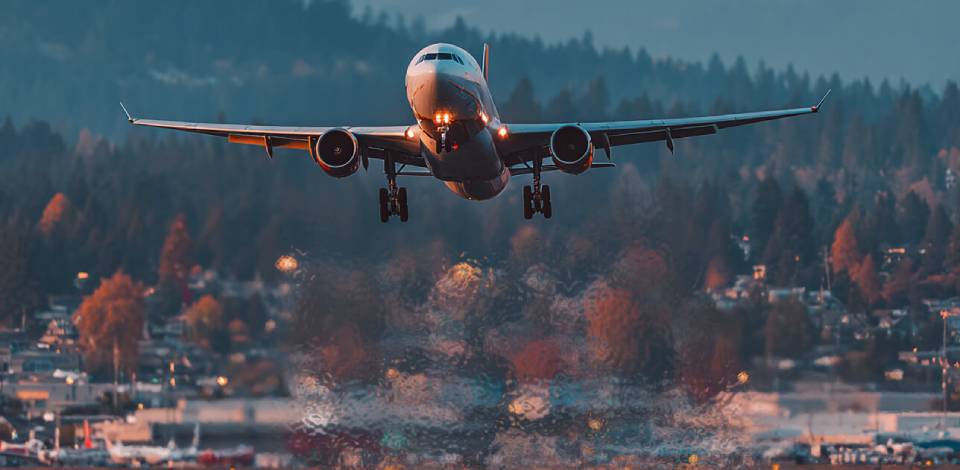
Experienced photographers know that heat distortion effect often occurs when they shoot footage over long distances and have to deal with sun-heated surfaces, including asphalt, desert sand, or water. Here are the most common situations when you might deal with heat distortion:
When taking photos of a model on the beach, I often notice that the heat radiating off the sand makes her lower body blurry. After zooming in, I often notice that a model’s body shape looks distorted.
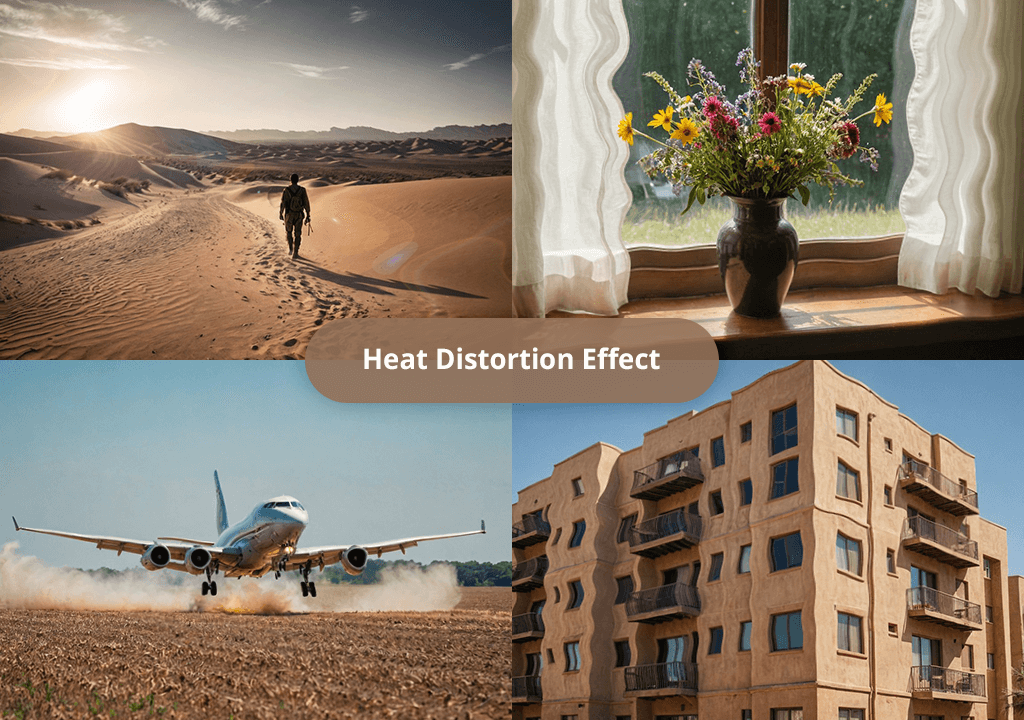
Wavy or warped details. You may notice that roads, fences, or buildings bend a bit or ripple. This effect becomes more noticeable near the ground or horizon.
Shimmer or flicker. You will notice a visible shimmer, as if you were looking at your subject through a heatwave or over a flame. When shooting a video, this effect is quite distracting.
Softness or blur that wasn’t caused by poor focus. Even if you focus with high precision, the parts of the image that are closer to the background will have some softness about them.
Color fringing or subtle ghosting. You may notice some subtle chromatic aberrations or double contours. These issues will be especially noticeable on high-contrast edges. They occur because of light that bends when going through air.
Mirage-like effects. When it’s very hot outside, the road surface or sand in the desert reflects remote objects, so that they look like they are floating. This optical illusion occurs because of heat layers that reflect objects like a mirror.
Even though it’s impossible to remove the heat distortion effect by adjusting camera settings, you can make it less noticeable. Here are some tips I personally use:
Heat distortion is caused by hot weather, not the lens, but you can still find some camera accessories that might make it less noticeable.
Shoot during the cooler hours. When I worry that heat distortion may be an issue, I schedule the shooting session early in the morning or later in the evening. You can follow the golden hour photography rule and take photos during the last hour before sunset and the first hour after sunrise. When the ground is cool, there won’t be any heat distortion.
For instance, I achieved perfect results when taking editorial photos on a beach at 7 AM. When shooting in the same location at 2 PM, I did not manage to avoid blur, and it was impossible to fix the heat distortion effect using Photoshop.
Consider lenses. Telephoto lenses are perfect and allow you to zoom in on an object. However, they also worsen the haze. If there is a lot of air between you and your subject, you may notice significant distortion.
I have learned to ask myself whether I could approach my subject to avoid zooming. It often happens that you can get closer to the subject when taking photos of people, wildlife, or architecture.
Consider the terrain. When shooting on flat, open surfaces, you will face a lot of distortion issues, as they often cause this effect. Open fields, rooftops, large bodies of water, and asphalted streets are the main things to avoid. I had a lot of problems when trying to shoot across the lake.
Do not use the car hood as a tripod. I used to think that it would suffice to put my camera on the hood of my car to stabilize it when shooting outside. But then I noticed that the trees in the frame looked shimmering, as if they were submerged underwater. The heat from the engine hood and windshield distorts images and worsens their quality.
To avoid the heat distortion effect, I prefer to use a Manfrotto tripod or shoot in handheld mode instead of using rocks or metal surfaces, as I know that they can cause a lot of issues on hot days.
Overcast sky works best. When the sky is overcast, it’s easier to shoot high-quality footage even when surface temperatures are rather high. I have captured plenty of sharp visuals from a long distance on cool days in the ambient light.
Experiment with angles and perspective. In some cases, the distortion might be more visible due to the wrong angle. I prefer to experiment with different positions and try to find angles by climbing higher, lowering the camera, or taking a few steps aside. Even a small shift may help you avoid the heat distortion issue.
Use environmental shields. I have discovered that trees, fences, and other objects can serve as heat shields. They help me prevent the heat distortion issue, as they block the hot air rising from the earth.
Know when to pause and wait. Sometimes, it might be a good idea to take a pause and wait until a cold breeze stabilizes the air, or the sky becomes a bit overcast.
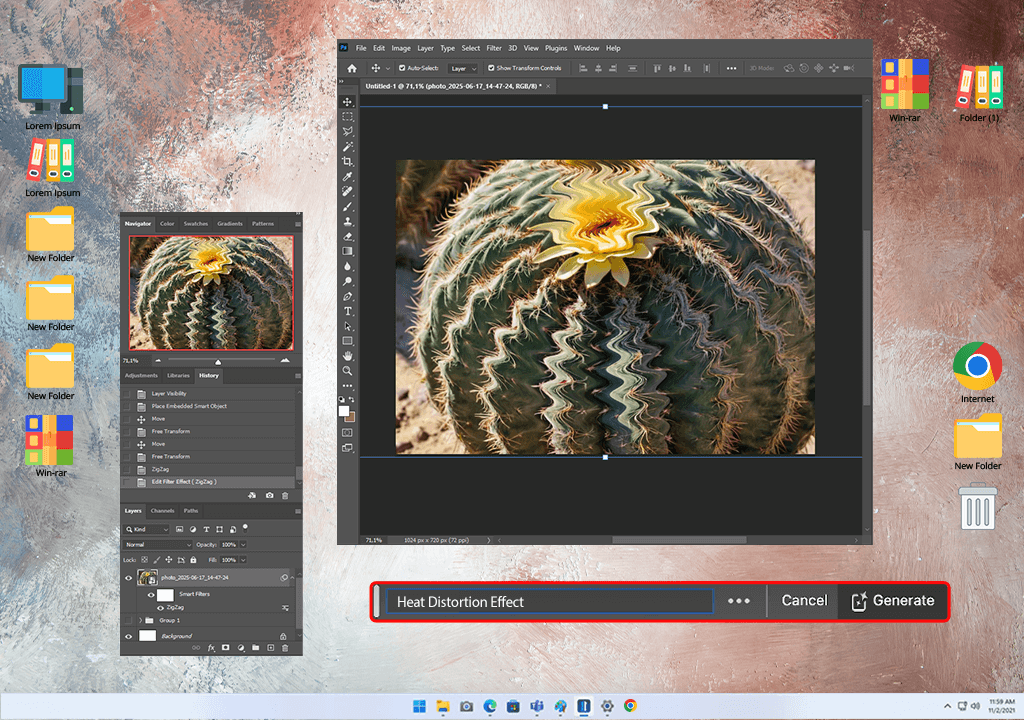
It’s impossible to completely fix the heat distortion effect, but you can minimize this effect using retouching techniques:

The heat distortion effect might become quite noticeable in motion footage. When taking photos, you might see one or two pics with distortion. You can quickly edit them afterward. However, it’s much more challenging to fix the distortion issue in videos due to dynamic flickering and ripples.
What it looks like in the video: The Shimmer in the background is somewhat similar to a water ripple effect. Your subject may seem melted or warped due to the distortion caused by hot surfaces. The waves of hot air rising from the ground are especially noticeable in drone footage or longer shots capturing sports events.
Example: When you capture footage of a city skyline with a telephoto lens in summer, you might notice that the buildings seem to be swaying a little because of heat shimmer. Even if your camera has good in-body image stabilization or you edit the output footage, it might be impossible to remove this effect.
Why is it worse in the video:
My pro tips for diminishing heat distortion in video:
When working on my projects, I typically strive to minimize heat distortion. However, I occasionally need to apply this effect to give my videos a more creative feel.
By applying a subtle heat distortion effect, I can transform the atmosphere in the frame and make my videos more realistic. Whenever I need to recreate the effect of realistic heat waves when working on a video or animation, After Effects has everything I need to complete my projects in time.

1. Duplicate the footage. I create a copy layer to distort it, while the base layer will remain unaffected. It allows me to control the intensity of the effect.
2. Create a Fractal Noise Map. The next thing I do is create a Solid Layer and add the Fractal Noise effect. I go to the Effects tab, choose Noise & Grain > Fractal Noise. It allows me to create a heat map to apply the distortion. I adjust these settings:
These parameters allow me to achieve a natural, random shimmer effect that you can see on hot roads or behind jet engines.
3. Apply Displacement Map. I add the Displacement Map effect (Effects > Distort > Displacement Map) to the copy of the original footage and use the Fractal Noise layer instead of the map. When working on my projects, I use the following parameters:
These settings allow me to create an optical wave effect without warping the whole frame.

4. Mask and feather. I wanted to apply the heat distortion effect to a specific segment of the scene, so I created a mask to isolate certain areas, including the road and the background horizon. I applied the feather effect to the mask to ensure that the transition remains smooth.
5. Add Turbulent Displace (optional). In some cases, I would add a Turbulent Displace effect (Effects > Distort > Turbulent Displace) to make the waves more realistic. However, I prefer to keep this effect subtle. I use a value of 5-15 to achieve a more natural effect.
6. Fine-tune with Opacity & Blur. I reduce the opacity of the distorted layer or use the Directional Blur effect to create a natural shimmer that will blend perfectly with the rest of the frame.
You may also use other software besides Adobe After Effects to achieve the heat distortion effect. We tested several popular programs and discovered that you can also use Blender, Unreal Engine, Fusion, or Premiere Pro to create custom shaders, displacement maps, and FX when working on 2D and 3D projects.
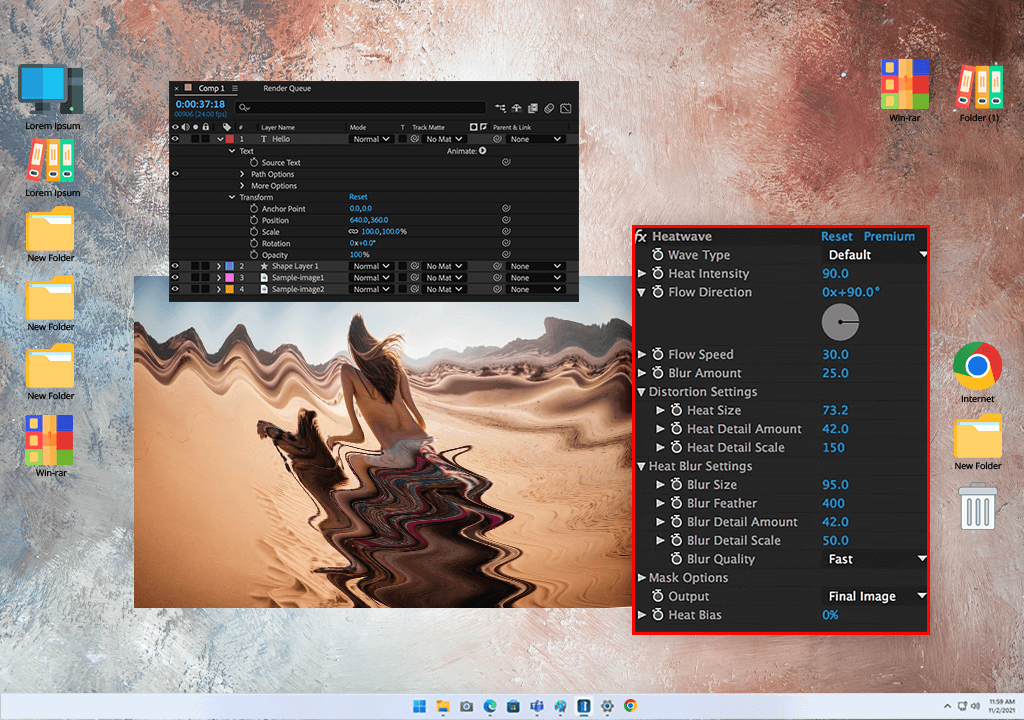
Even though Adobe After Effects is suitable for creating a heat haze effect, sometimes I need to achieve a more dynamic and realistic result, especially when I work on professional video projects or commercials. This is when I use extra plugins. However, keep in mind that these heat distortion After Effects plugins are paid.
Yes, I prefer to use the heat distortion effect to add a surreal feel to my works, create engaging music videos, and apply cinematic transitions. It allows me to transform the atmosphere in the frame, apply a motion effect, and give my content an emotional feel. You can increase this effect to create dream-like sequences or reduce its power to achieve a more realistic result.
Blur looks less dynamic. For instance, lens blur and Gaussian blur look quite uniform. In contrast, the heat distortion effect has a dynamic feel. It warps the fragments of an image unevenly and creates a shimmering motion effect that makes a person think about rising heat.
You won’t be able to capture realistic distortion unless you capture footage in extreme heat. However, you can apply video filters and use apps to recreate this effect. Consider the apps that have FX tools like “Turbulence,” “Warp,” or “Haze.”
To apply the Unity heat distortion effect, use a custom shader to subtly adjust the position of pixels based on various textures. You can choose between two approaches: use GrabPass shaders to perform screen-space distortion or apply Shader Graph UV distortion. If you want to subtly enhance fire, exhaust, or visualize desert heat, add a scrolling noise texture to the shader and apply.
They have a similar origin, as they are caused by refraction in hot and cold air layers. A mirage occurs when heat distortion creates the illusion of water or reflection caused by light bending.
If you cannot find a heat distortion After Effects plugin available for free download, do not worry, as the Turbulent Displace effect is an excellent choice for creating a wavy motion. Heat Wave plugins are perfect for creating a realistic heat shimmer effect, as they support temperature-based gradients and allow you to recreate the effect of distortion caused by a camera.


![Ripped Paper Effect in Photoshop [+FREE Bonus Tools]](/placeholder-450x300.svg)


