
Shooting in 2 point perspective photography totally transformed how I view buildings, rooms, and cityscapes. As a photographer, I’ve tried everything from spontaneous street portraits to sweeping landscapes, but focusing more on real estate and architecture made me pay closer attention to lines and depth in my shots.
The first time I used 2 point perspective photography for a luxury home shoot, I was amazed at how much livelier and more polished my photos looked. What I love is how this method combines art and geometry. You're not just capturing a space, you're shaping it with your camera, adding depth and dimension that grabs attention and makes buyers pause and really notice the shot.
If you're truly passionate about real estate or architectural photography or just want to challenge yourself creatively, learning two-point perspective will completely transform how you shoot. It’s a game-changer for making your images look more professional and intentional.

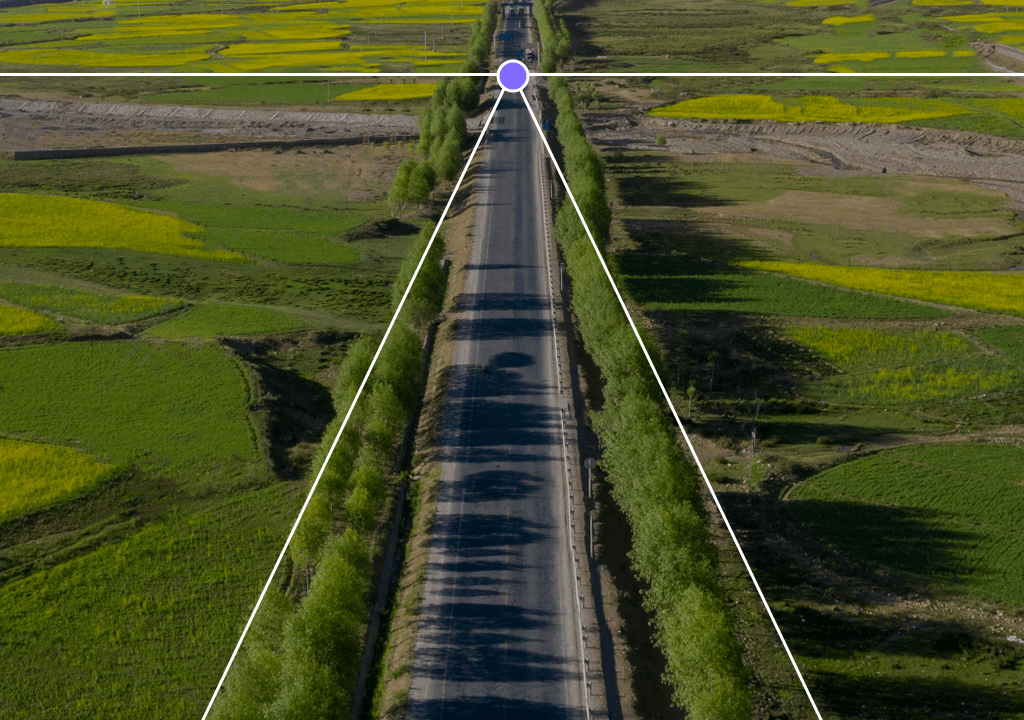
See how lines that should run parallel (like streets or walls) slope toward two separate points in the distance. This trick creates a sense of depth, pulling you into the image.
This method isn't the same as one-point perspective, where all lines lead to a single spot on the horizon. That simpler approach naturally draws your eye to the main subject - that's why it's great for shooting straight-down hallways or perfectly balanced rooms where you want everything to point toward one central focus.
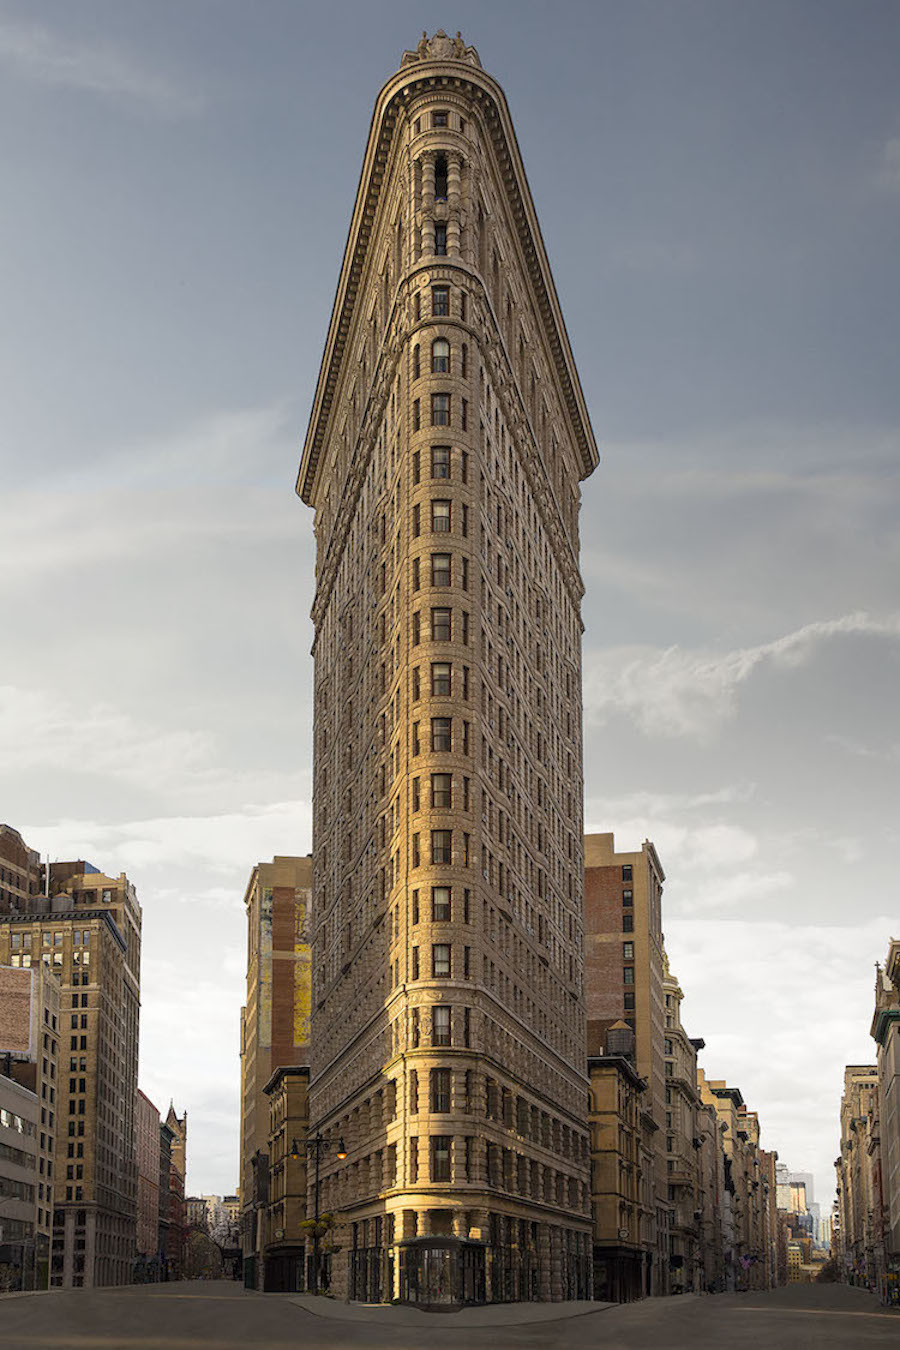
When you shoot a building or room from its corner using 2 point perspective, both sides appear to slope away into the distance. This makes the image feel more lively, deep, and true to life compared to flat, straight-on pictures. Here's why 2 point perspective is particularly powerful for architectural and real estate photography:
When you photograph a building from its corner using the 2 point perspective method, you capture both sides of the building sloping back into the distance. This makes the picture look more exciting, natural, and lifelike than if you just took a plain photo straight at the front.
Once you practice, 2 point perspective feels natural. Soon you'll notice building corners everywhere and automatically stand in the perfect spot to make those sloping lines look just right.
Some types of photography become truly special when using two-point perspective - it brings incredible energy and helps tell visual stories in every frame.

When I turned to 2 point perspective building photography, I discovered how this technique makes structures pop – it transforms flat walls into dynamic images bursting with depth and character.
By shooting from a corner angle, you capture both the building's strong lines and its true three-dimensional form, creating photos that feel alive rather than static. This simple technique turns ordinary architectural shots into striking images that showcase a building's full personality.
When photographing any building, from modern downtown towers to classic museums, using a corner angle makes the architecture feel grand and meaningful. This approach better showcases the building's unique design and helps showcase what makes it special.

I always favor real state 2 point perspective photography, as it makes homes look bigger and more welcoming. When you shoot from a corner, it shows how rooms connect and helps buyers imagine living there. The angled walls draw the eye through the space, making layouts look their best. This technique is perfect for interior designers or Airbnb hosts who want their listings to shine.

I once took photos of a modern house using this trick. The realtor said those pictures alone brought in three times more interested buyers than usual! Sometimes I make the photos even better by combining sub framing photography in composition using doorways or windows to add depth and guide people's eyes through the picture in a really pleasing way.


When I’m shooting in the city, whether at sunrise or during golden hour, 2 point perspective adds life and order to my urban photos. It draws viewers into the scene, leading their eyes down streets and up tall buildings.

This 2 point perspective cityscape photography is great for highlighting city lines, grids, and striking reflections on glass skyscrapers. I love using it at busy intersections or downtown corners, as it instantly makes them look more dramatic, like a movie scene.

2 point perspective city photography adds a storytelling charm. It pulls the viewer into the scene, whether it's a tight alley or a busy market road, making even simple places feel dynamic and full of life.

I also love this technique for industrial areas; the sharp lines of warehouses and machinery stand out, turning them into dramatic, almost theatrical scenes. It’s a perfect way to transform rough urban edges into something beautiful.

You might not expect it, but 2 point perspective works amazingly for landscapes, too. Picture forest trails, mountain ranges, or rugged ocean cliffs stretching away in two directions.

This technique makes nature scenes feel grander, more immersive, and almost magical. I've used it to pull viewers deeper into hiking paths or emphasize the bold shapes of rock formations. It’s a great way to blend nature’s wild beauty with clean, structured lines.

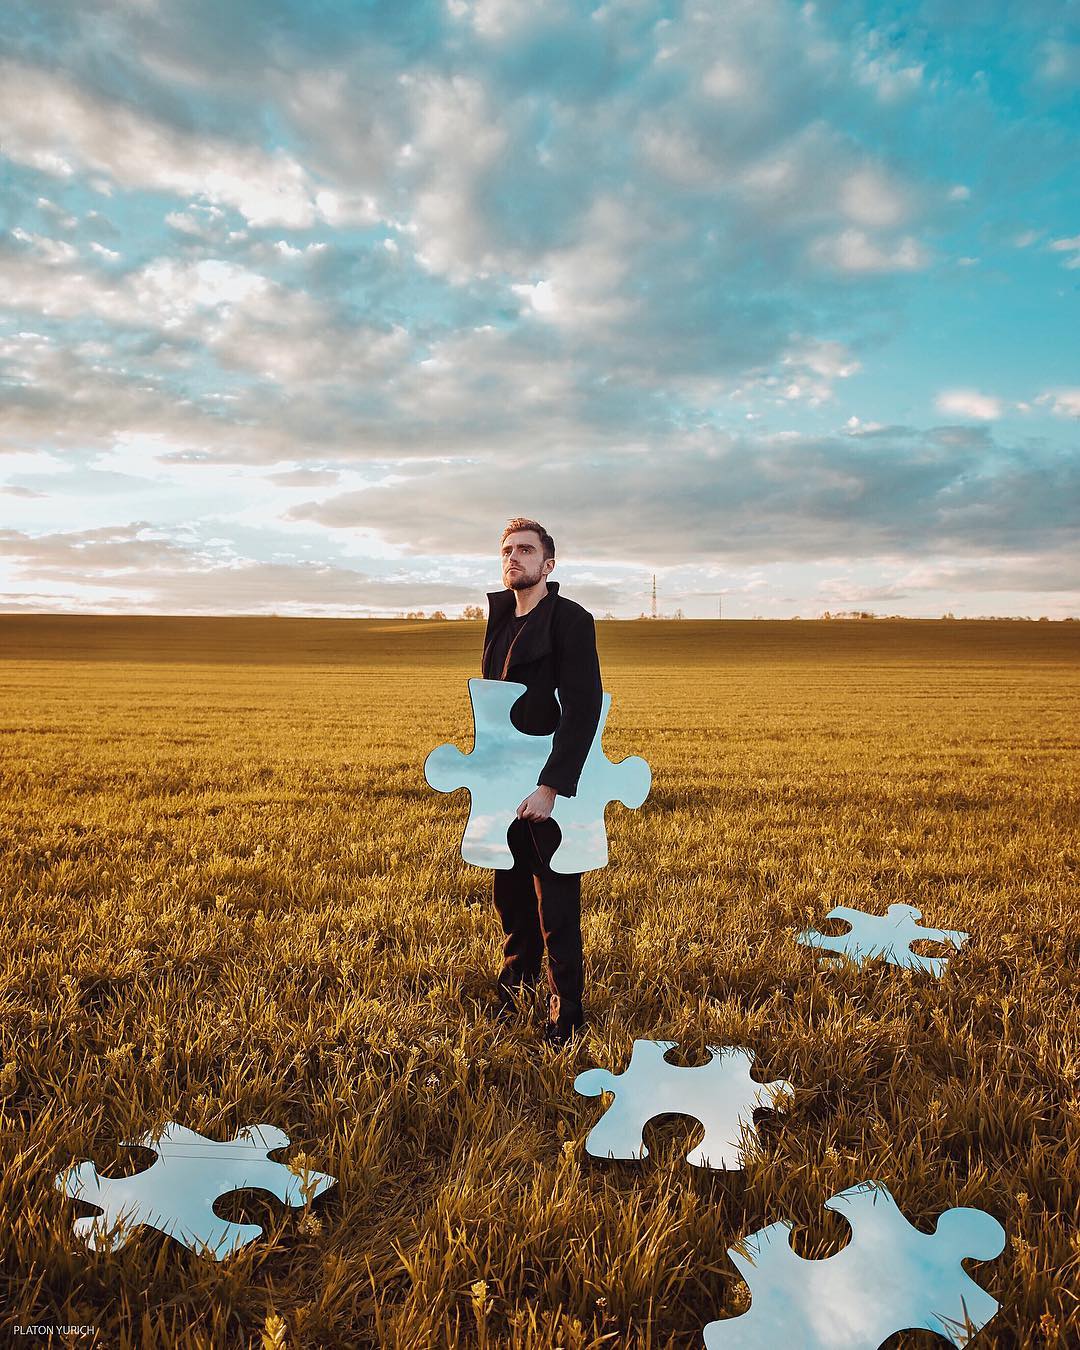
When I want to think outside the box, I use 2 point perspective for artistic shots. By experimenting with angles and vanishing points, I can create unreal, dreamy images that twist reality and spark curiosity.

Whether I'm shooting a designed indoor scene or an outdoor art piece, this method helps me break creative limits and gives my photos a polished, exhibition-worthy look.

Product photos don’t need to look flat and boring. Using 2 point perspective, I can emphasize the form and design of things like furniture, gadgets, or even vehicles.

This adds energy and structure to the product, helping it pop in ads or online listings. Clients appreciate how it looks more high-end and less generic.
While it's not the usual approach, 2 point perspective can bring real drama to portrait photography. I love positioning subjects near bold architectural lines or inside hallways, letting the converging angles naturally draw focus to them.

This technique shines in fashion shoots or creative branding sessions where you want to move beyond plain backdrops and add depth to the story.

When I began trying 2 point perspective photography, I learned it's more than just shooting from a corner – it's about guiding the viewer's eye through the photo. Here's my simple step-by-step method.
I always look for subjects with clear, straight edges – whether it's a modern building, an old shop, or even big furniture. These clean lines make the perspective effect really stand out. Box-shaped subjects work best, especially when you're learning.
For 2 point perspective building photography, I choose corners with interesting details (like brick patterns or glass walls) because they add depth. For interior photography, the best spots are where two walls meet at a sharp corner – like where a kitchen counter connects to cabinets.
Getting the right angle is key. I always walk around my subject first, searching for that perfect spot where both sides stretch away from me evenly, like open arms pulling the viewer into the photo.
In street or cityscape photography, I often shoot from the middle of an intersection (safely!) or a pedestrian island to capture both sides. When shooting indoors, I'll position myself in doorways or tuck into corners to show multiple walls and create a natural flow through the space.
After positioning myself, I always use my camera's grid to keep vertical lines perfectly straight – even a slight tilt can make buildings look like they're leaning.
I place the subject's corner near the center, but not always dead-center. While centered shots work, sometimes moving it slightly to the side, using the rule of thirds in photography, creates more energy.
For product photos, an off-center position looks more magazine-worthy than a stiff, perfectly centered shot.
I always check what's in front of and behind my subject. Lines from roads, fences, or even floor patterns can boost the 3D effect and pull eyes toward my main focus. A winding trail or dramatic rock edge works just as well for creating depth in outdoor shots.
After taking test shots, I ask myself: Can I see two clear vanishing points on the horizon? If not, I adjust my position – sometimes just stepping forward or backward completely changes the photo's impact.
Camera & Gear Tips

Camera Settings Tips
Lighting Tips

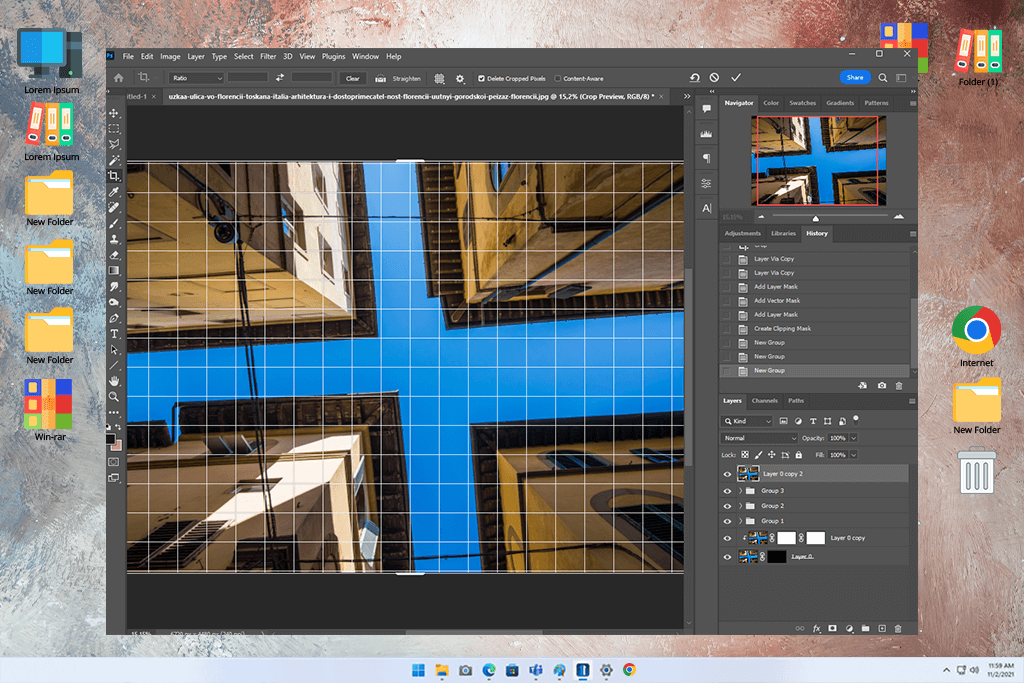
Editing & Post-Processing Tips
It's a technique where you create depth in photos using two vanishing points on the horizon. You position yourself at a corner so both sides of your subject appear to angle away from you.
The main principles are to keep vertical lines perfectly straight (use a tripod and camera grid), position your subject so both sides recede evenly, and keep vanishing points near the horizon line. Remember, it's not about perfect geometry, but creating natural-looking depth that guides the viewer's eye.
For natural-looking shots of buildings and interiors (like real estate or architecture photography stick with 2 point perspective. Use a 3-point when you want dramatic height, like shooting skyscrapers from below for that exaggerated, comic-book style effect.
Check for two sets of lines that appear to vanish at separate points on the horizon. You'll typically see a corner facing the camera with sides angling away to each side - this classic "fanning out" effect is a sure sign.
This technique shines when photographing buildings, home interiors, city views, and even some products or posed portraits. Any situation where you want to create convincing depth and make spaces feel real benefits from this approach. It instantly makes your photos look more professional and lifelike.
It's not ideal for very small spaces or when you need completely symmetrical compositions (one-point perspective works better here). If you're not careful, objects near the edges might appear stretched or bent. The method also requires careful attention to keeping all your lines perfectly straight, which can be challenging when you're first learning architectural photography.
Locate a clear corner or edge! Before adjusting your camera, identify a spot where two distinct sides angle away from you - this creates the essential framework for your composition.
While there's no exact measurement, each side typically angles between 30-60 degrees from your viewpoint. The ideal angle depends on your lens and how dramatic you want the depth to appear. Experiment by moving around to find the most natural yet impactful view.
Position yourself at a corner, carefully straighten all vertical lines, choose a lens with minimal distortion, and compose your shot so both sides clearly lead toward separate vanishing points on the horizon.


![Most Wanted Photography Editing Styles [Fixthephoto’s Version]](/placeholder-450x300.svg)


