In case you see that the composition of your photo requires improvement, you can crop your picture using a variety of techniques. It will allow you to improve the overall look of your photo. In this article, I have rounded up 12 ideas that you may use to crop your photos.
For this purpose, it’s better to use such apps as VSCO and Snapseed.
In case you have a desktop computer or laptop, use Photoshop or Lightroom. Read on to learn more about cropping in photography and discover how to make the composition in your photos more attention-grabbing. I will also tell you which ways of cropping it’s better to avoid.

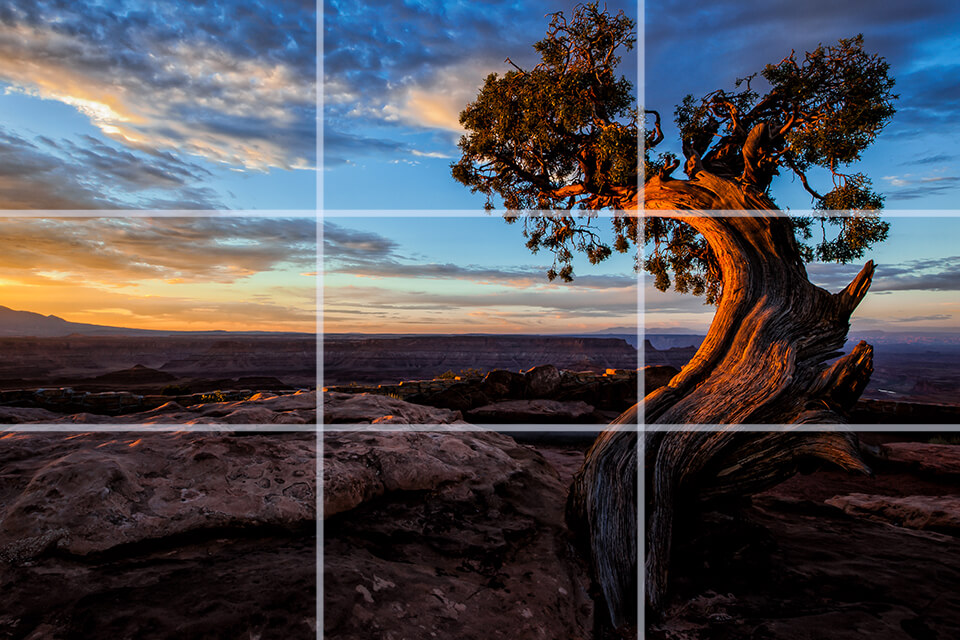
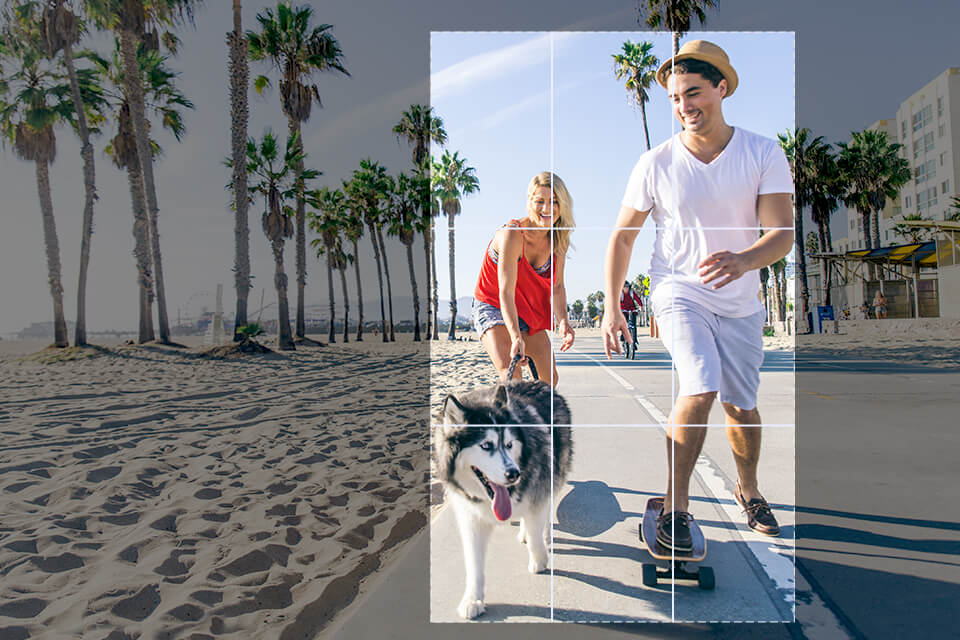
To take professional photos, you need to master the photography composition basics first and only then start to experiment with more complex techniques. There is no need to place your subject in the center of your photos. Experts advise beginner photographers to use the rule of thirds in photography and divide your frame into 9 parts using horizontal and vertical lines.
To use this technique, you need to place your subject in the intersections or along the invisible lines. This way, your composition will be perfectly balanced. When a viewer takes a look at your photo, their attention will be immediately drawn to the subject.
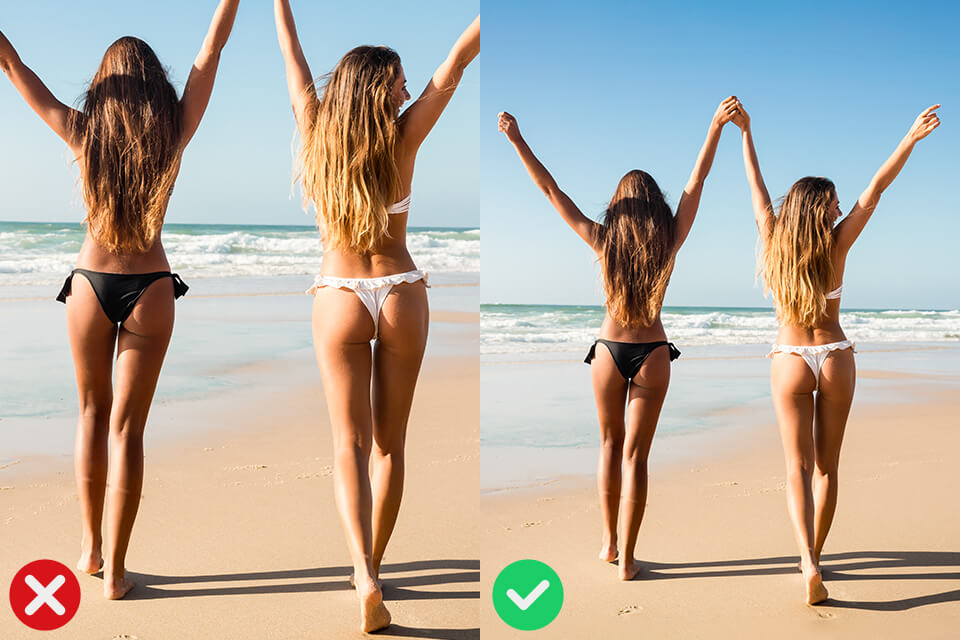
The worst mistake that you can make when cropping a photo is to make the limbs of a model look cut off. Make sure not to crop a picture at the toes, ankle, wrist, shoulder, or elbow. If you really need to crop some parts of your image, you may crop at the thigh, the middle of the arm, shin, or torso. When seeing at least a part of the limb, it will be easier for a viewer to imagine the rest.
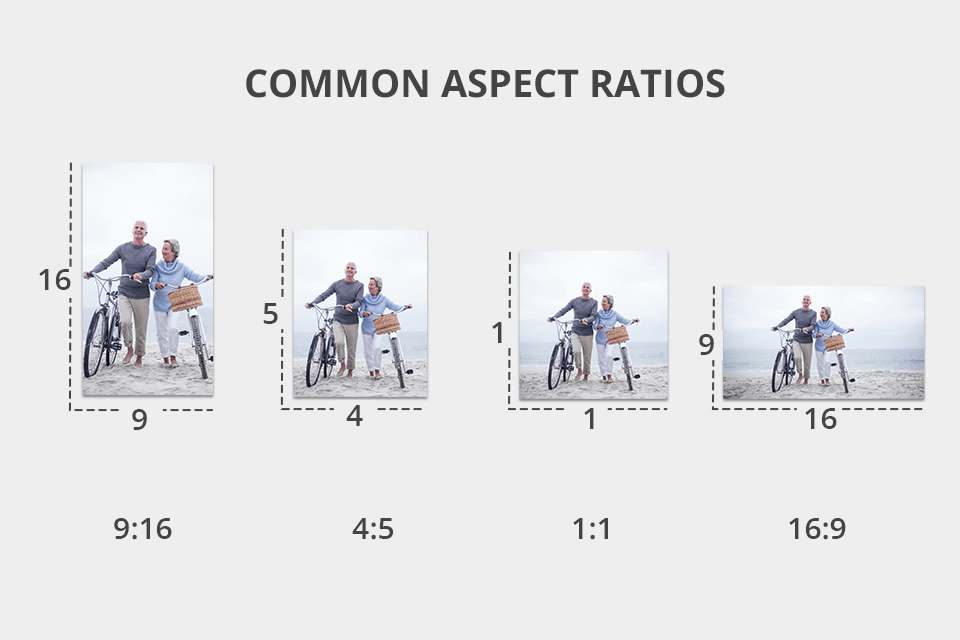
Aspect ratio is used to describe the relationship between the width and height of a picture. There is a lot of social media for photographers that have different image requirements. When uploading images to them, it’s crucial to select the right aspect ratio. If you want to upload photos to Instagram or Facebook, use a square format. For YouTube, it’s better to use photos in a landscape format while Pinterest accepts photos with a portrait orientation.
In case you want to use different channels, make sure to create several cropped versions of your photo. The most popular aspect ratios are 3:2 and 5:4. However, if you want to take photos for social media, use the 4:5 aspect ratio.
What makes the crop tool so convenient is that you can use it to change the orientation of your photo. By adjusting the aspect ratio, you can fully transform what your photo looks like. The effect will be especially noticeable if you remove large areas of your photo. It’s better to use high-quality RAW images, otherwise, you might get a poor-quality image.

Make sure to delete unwanted elements that might distract a viewer’s attention from the main subject of your photo. While photobombs might be funny, such details will keep the attention away from your subject. You might notice such distracting elements along the edges. Such issues happen when someone gets into the frame and a photographer is too late to react.
Passers-by might take the attention away from your model. Besides, text in the frame might be quite distracting as well. It’s better to remove such details quickly. You can either crop your image using basic tools available in basic editing programs or, if the task is more complex, remove objects in Photoshop using the Clone Stamp Tool.
If you want to take a photo of a moving subject, don’t capture it when it’s in the center of the frame. Leave some space ahead to create a sense of movement.
It will allow you to emphasize that the vehicle or the person you have captured is moving towards the empty space. Cropped photographs will be more eye-catching than uncropped photos.
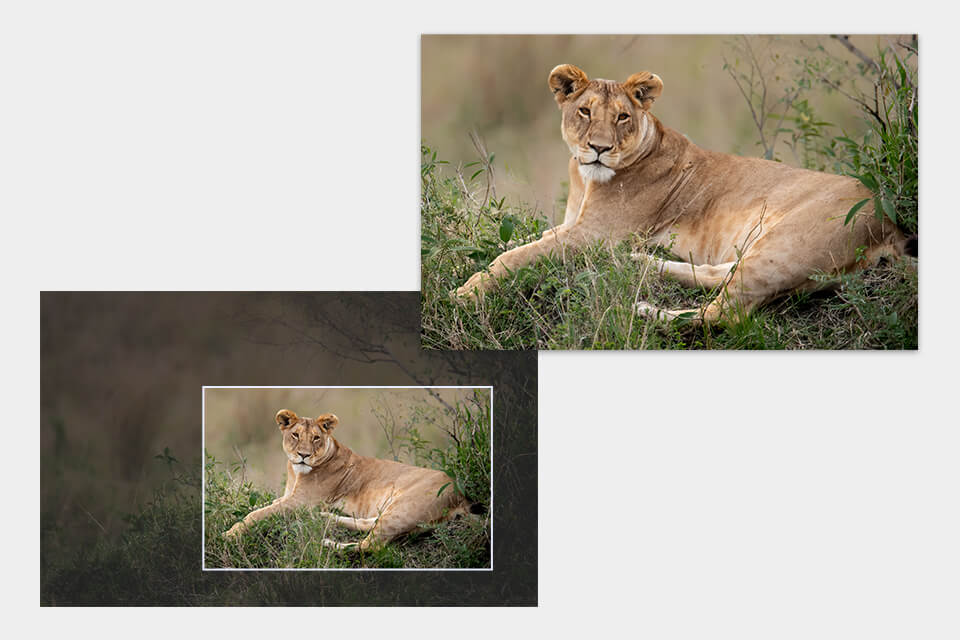
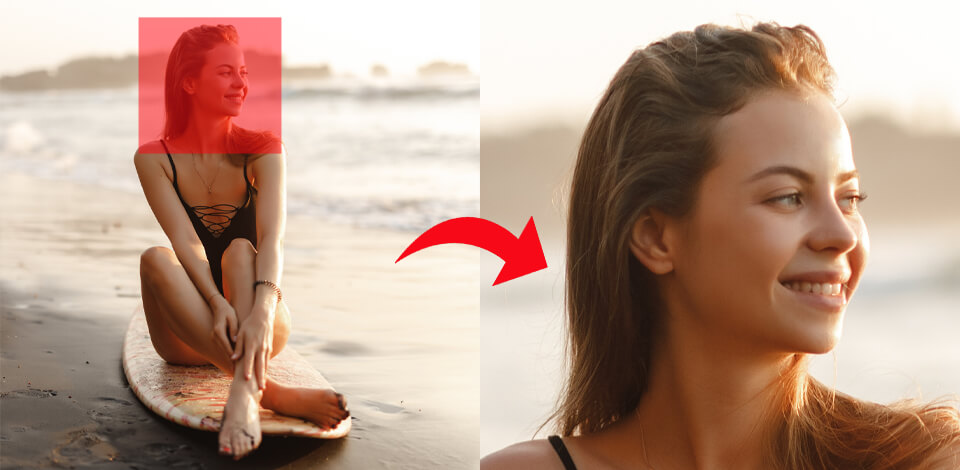
To create a well-balanced composition, it’s important to learn how to use negative space in photography. However, if there is too much empty space, it might be better to remove it. It’s especially true for portrait photos. By removing empty space, you can emphasize the facial features of your model, or subject and give your portrait a dramatic feel.
When you crop a face, all the features become more visible. Thus, a viewer can see the emotion on the face of the model clearly. Professional photographers use this technique to emphasize the eyes and give their photos a more expressive feel.
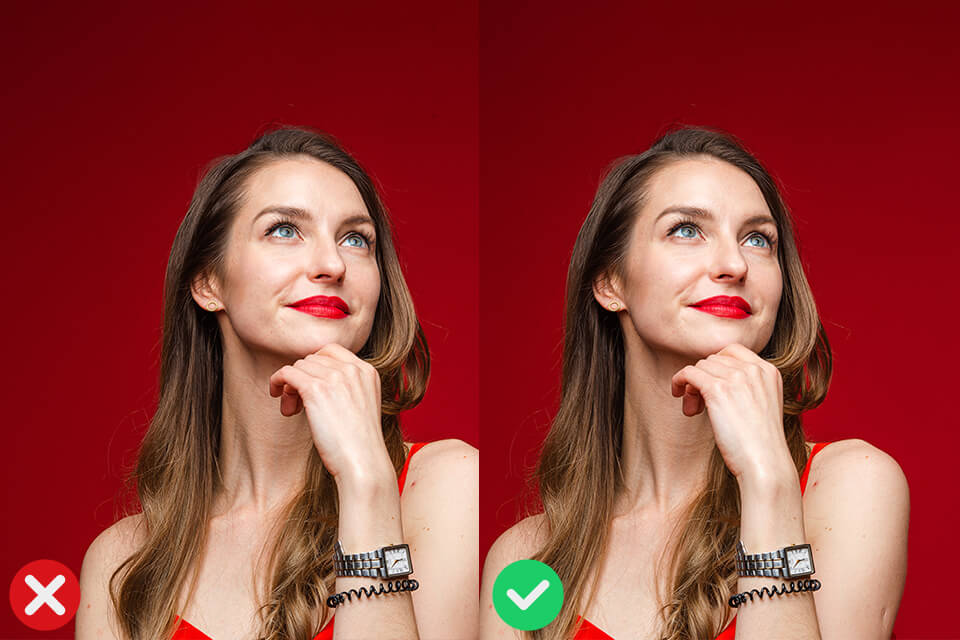
When using various cropping photography techniques, it’s crucial to leave some space in front of the face of your model. If the subject is looking to the right, there should be plenty of space in front of them. It will make your photos look less claustrophobic and better balanced. They will have a more relaxing feel as your subject won’t be constrained by the frame.

You need to be especially careful when cropping selfies and portrait photos. By cropping your picture too close to the hairline, you risk making your model look bald. Besides, you may incidentally crop a part of their forehead.
It’s better to avoid cropping hair too much, as it might distort the overall composition. Leave some space between the hairline and the edge of a photo to emphasize the face of the subject.

If you want to give your cropped picture meaning that it didn’t have before, make sure to create a copy of a source photo and crop it in different ways to see how the composition can be improved. It will allow you to select the most suitable way of cropping it. After removing specific areas, you will notice how the overall look of your photo will change. By experimenting with your images, you can achieve more impressive results.
Some photographers prefer cropping photos at various angles. You may also rotate the image to give your photo a dynamic feel. By cropping faces in half, you can make your pics look like surrealist paintings. In some cases, it makes sense to leave some strange details in the background to make your image more attention-grabbing.

The famous photographer Henri Cartier-Bresson opposed the idea of cropping photos. He believed that a photographer should create a well-balanced composition that would eliminate the need of image cropping.
Now that you know more about composition and cropping techniques, it will be easier for you to frame your subject. If you take a perfect shot, there won’t be any need to crop it afterward using photo editing software for PC. Besides, it will allow you to save a lot of time during post-processing.
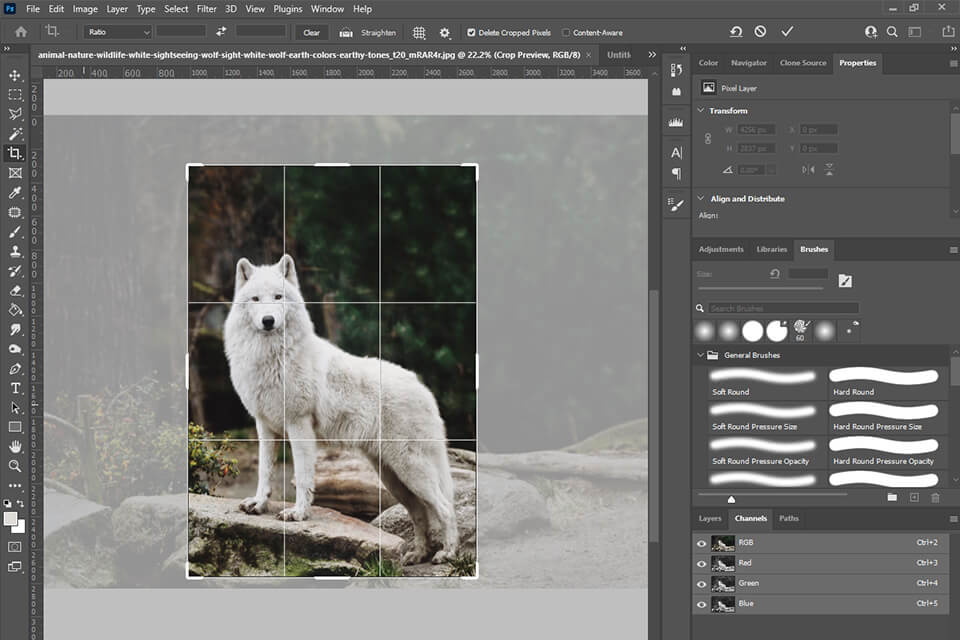
The good thing is that it’s fairly easy to crop your photos regardless of the program you are going to use. I prefer using Photoshop and Lightroom to quickly crop my images to the desired size. When using these programs, you just need to select the Crop Tool and decide which parts of your photo you need to remove.
You can adjust the selected areas by using handles. After adjusting them, confirm the selection and crop your image. You can also crop a photo using one of the available aspect ratios. It will make it easier for you to quickly crop an image in Photoshop.
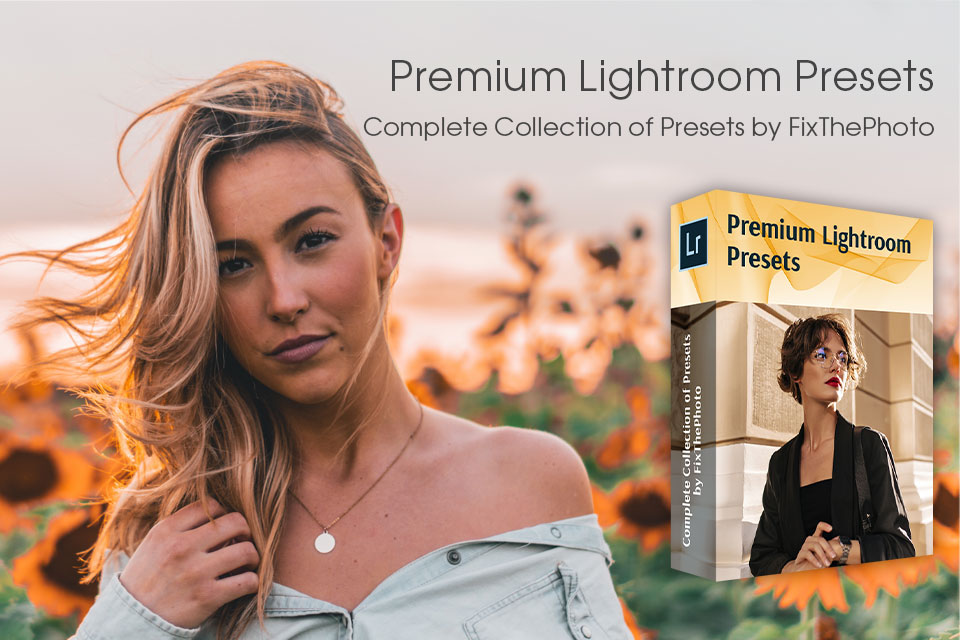
Cropping is the first necessary step for enhancing your photos. However, unless you tweak the colors, your images are unlikely to grab the attention of your audience even if they look perfectly cropped. Download this set if you want to improve your images even further and speed up editing. It will come in handy for those who need to edit many images at once. You may need to find out how to install Lightroom presets on Mac & Windows to use the filters from this pack.


