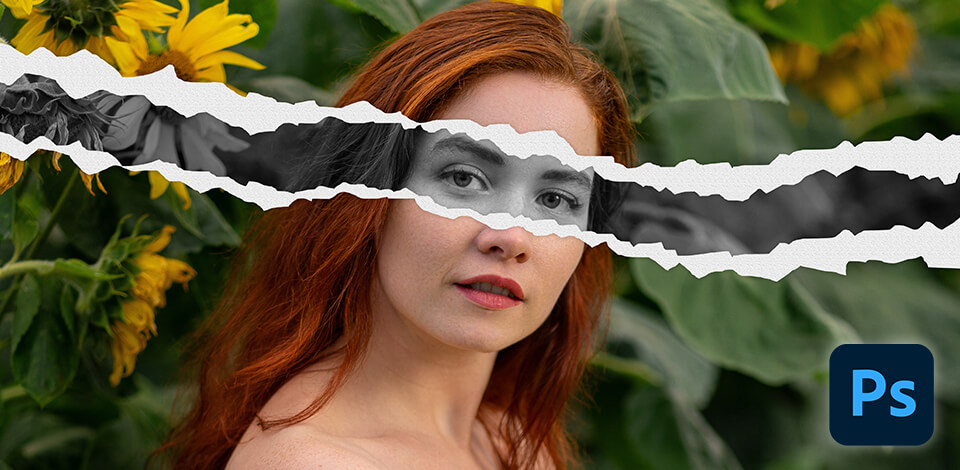
Creating a ripped paper effect in Photoshop is a popular design style used in branding, fashion, social media, and digital art. You can use it on posters, social media pictures, collages, or ads.
This effect makes your designs look modern but with a handcrafted, edgy feel. The best part is that you can create it in Photoshop without needing to touch real paper.

The ripped paper Photoshop effect imitates the paper that has been torn, cut, or ripped. It gives uneven, irregular edges that feel realistic. Unlike clean shapes or sharp graphics, torn edges add texture, depth, and a handmade look to your digital designs.
This effect does more than make something look torn. It adds personality to your design. A ripped paper layer can:
The ripped paper effect can be made with free Adobe software. It is very flexible, which is why it is used in so many creative areas. It makes digital designs feel more handmade, eye-catching, and memorable. Here are the most common areas where designers and brands use this effect:

Music industry & entertainment:

Fashion & editorial design:

Social media & content creation:

Advertising & marketing:
Art & digital collage:

Education & presentations:

Branding & packaging:


Step 1. To start this Photoshop manipulation tutorial, open the photo you want and use the Crop Tool to cut the edges of the picture so it’s easier for you to work with.
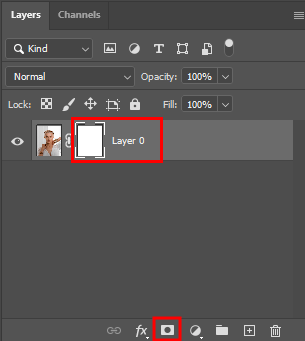
Step 2. Add a Layer Mask to your photo.
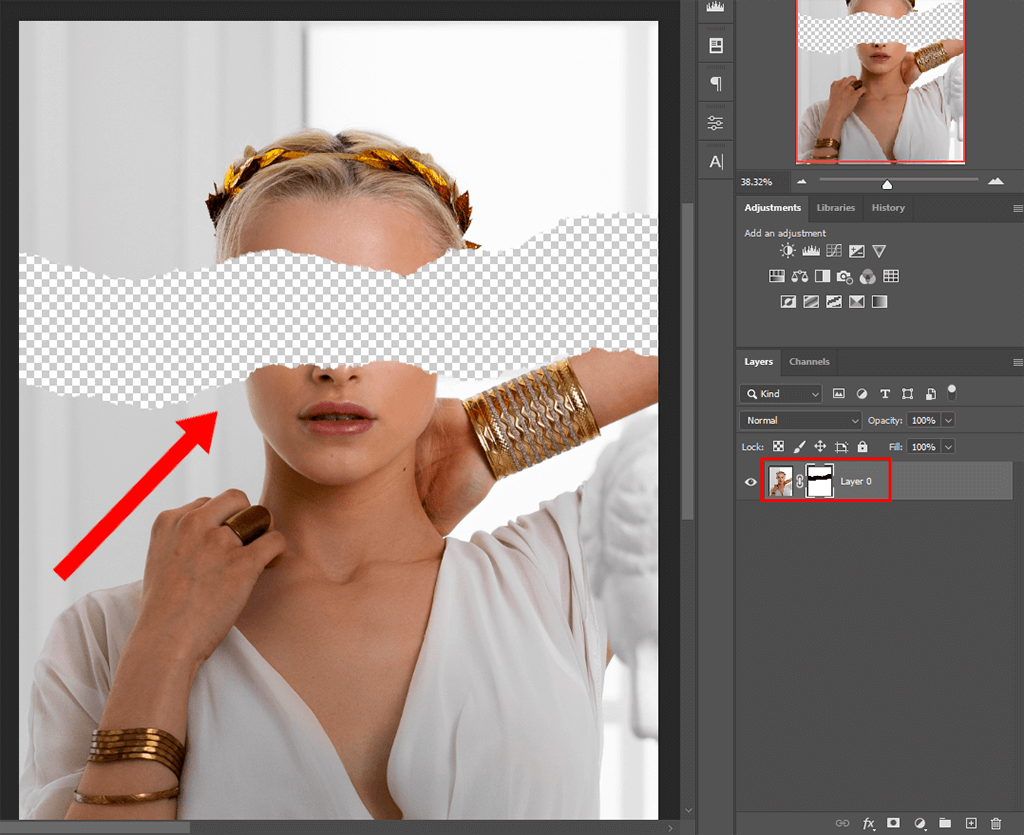
Step 3. Choose a black torn-paper brush and place it on the picture where you want parts of the photo to look cut out. If you don’t have this brush, you can download it from designer websites, or you can use free Photoshop brushes that were designed by FixThePhoto professionals.
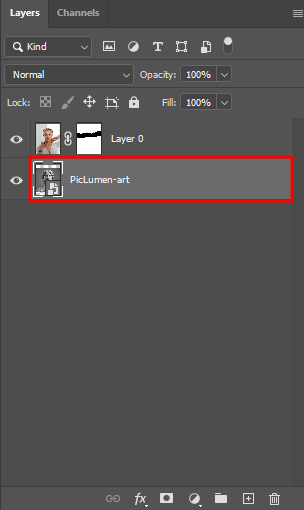
Step 4. Now, add another picture to the file. Go to Place Embedded, choose your new image, and drag it below the first layer.
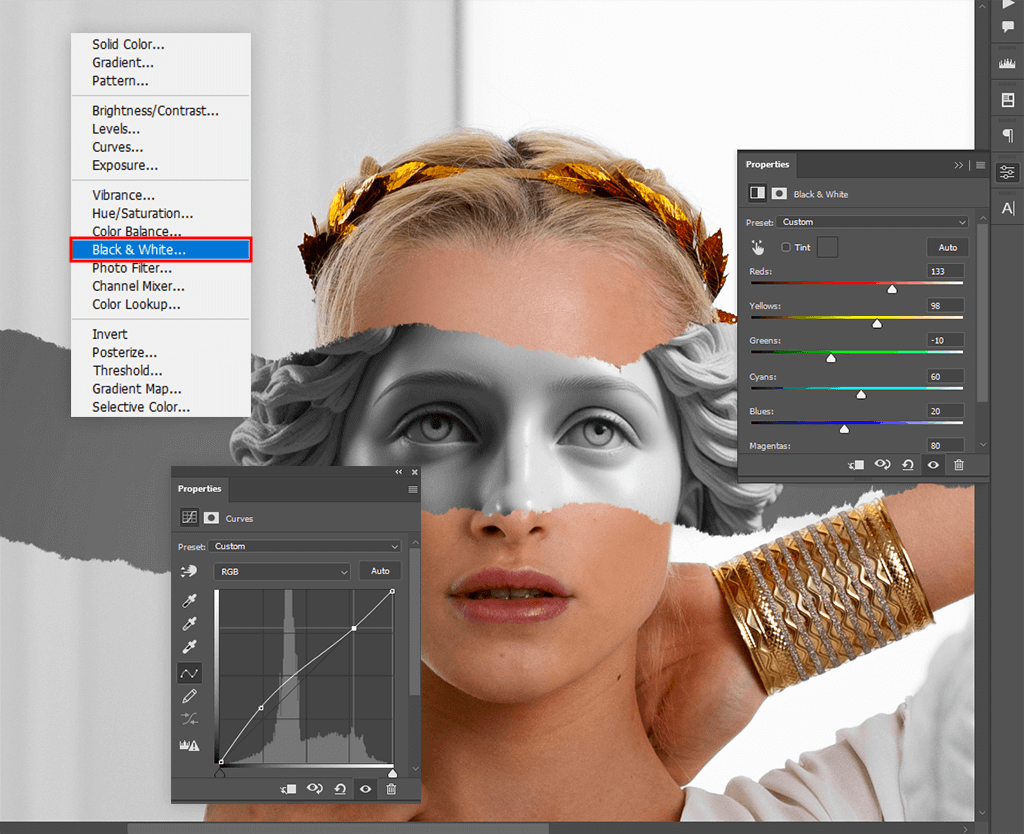
Step 5. Add a Black & White Adjustment Layer and adjust the settings until you like the look. Then add a Curves Adjustment Layer and adjust the brightness and contrast.

Step 6. The next part in this Photoshop tutorial is to make a new layer, fill it with white (Edit → Fill → White), and then add a black Layer Mask (hold Alt/Option while you click Add Layer Mask).
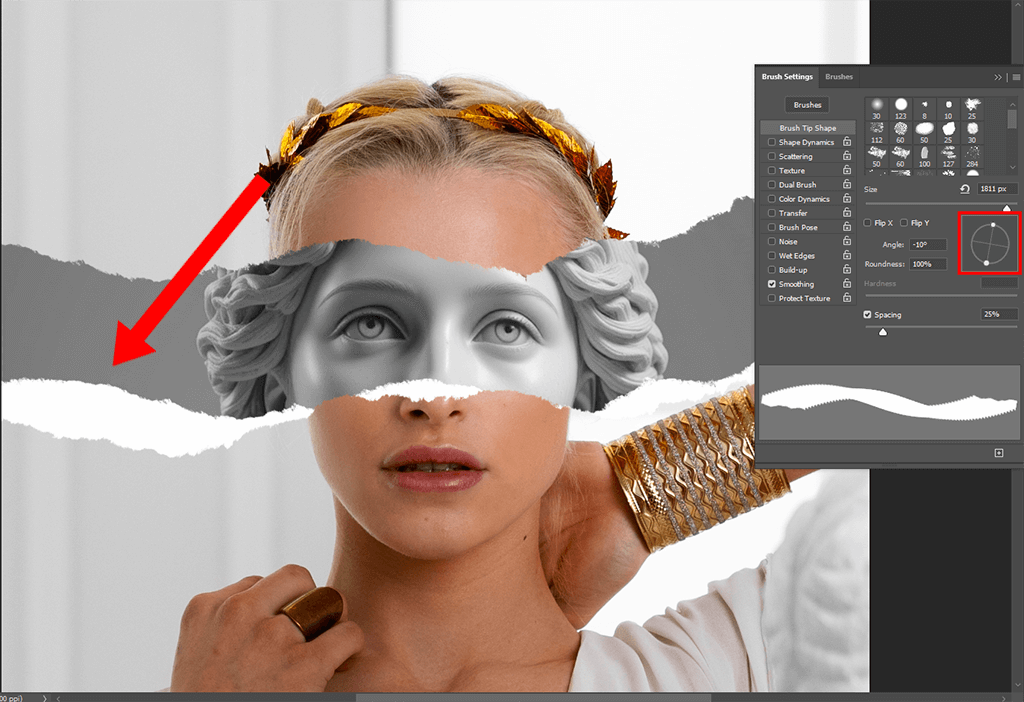
Step 7. Pick the torn-paper brush again but make it a little smaller. Change the color to white and paint on the Layer Mask. This will bring back the white areas with a torn edge effect. Don't forget to rotate the brush as you paint.
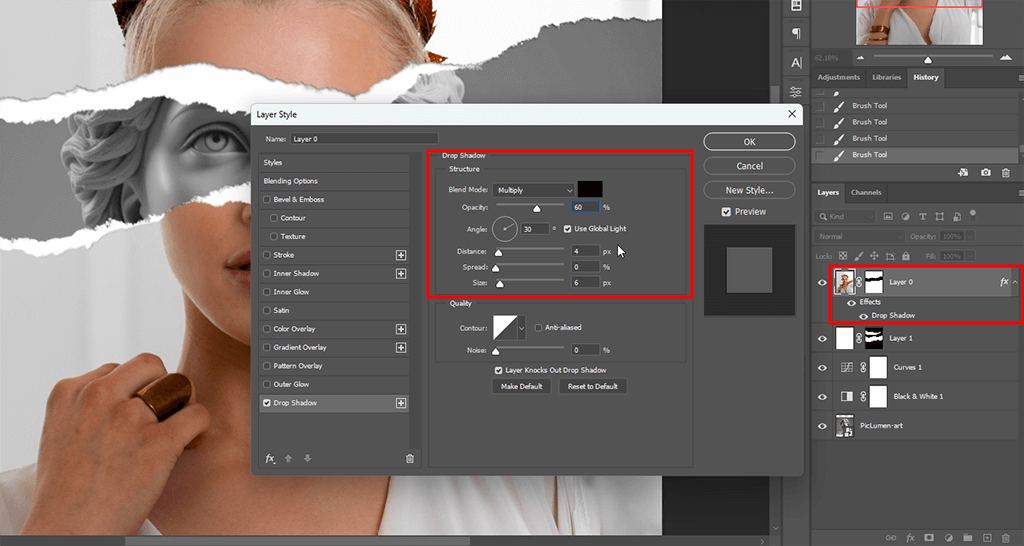
Step 8. Now go back to the main photo and add a Drop Shadow. Use these settings:
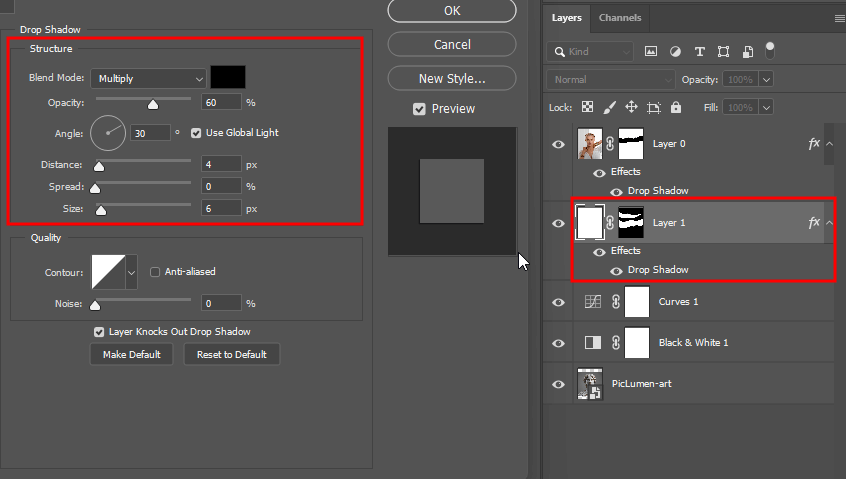
Step 9. Do the same shadow effect for the layer with the torn paper edges.
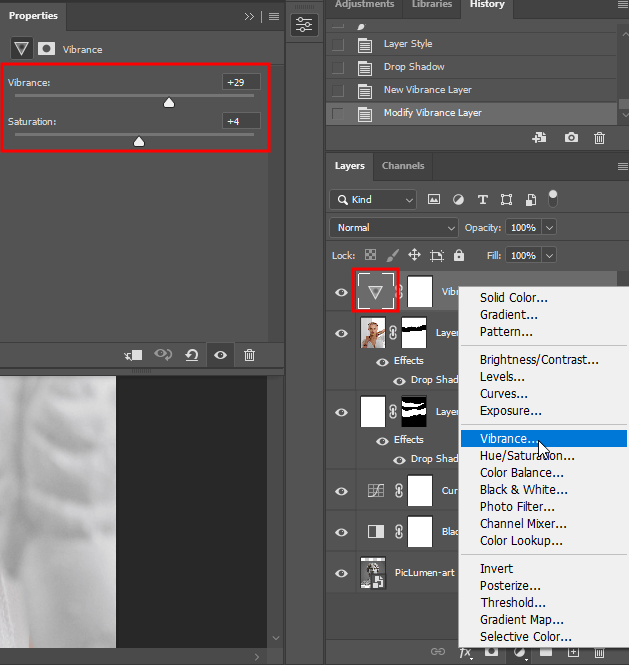
Step 10. On top of all layers, add a Vibrance Adjustment Layer and change the settings to make the whole picture more saturated.
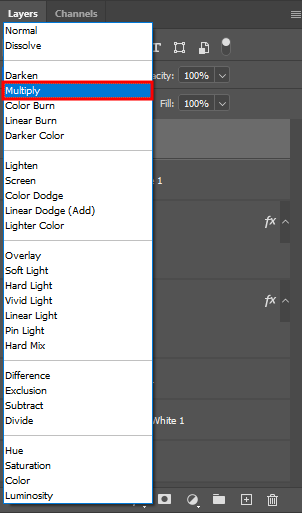
Step 11. For the final touch, place a paper texture on top of everything (Place Embedded → choose texture). Set its Blend Mode to Multiply and lower the Opacity so it blends nicely.
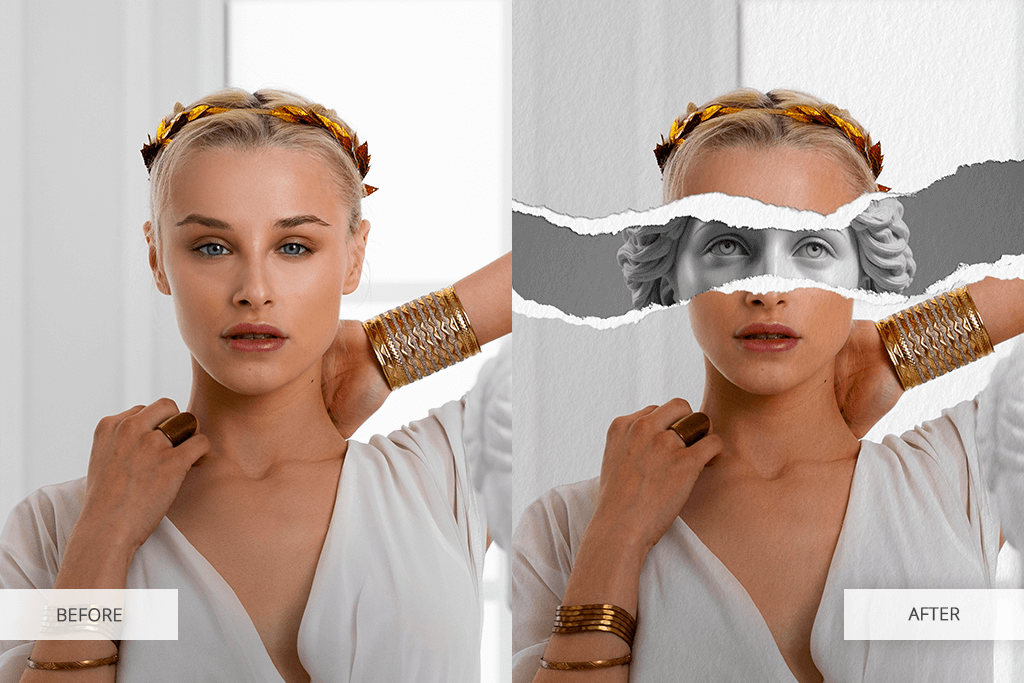
Now your torn paper Photoshop edit is finished!
“Stack different layers of ripped paper to create a collage look.”

“Mixing ripped paper with grunge brushes or film grain to give your work a retro style.”

“Try smooth magazine paper next to rough craft paper: the contrast makes the design stand out.”

“Add bold text inside the ripped areas so it catches people’s attention.”

“You can change blending modes, like Multiply or Overlay, so the paper looks like it naturally belongs in the picture.”

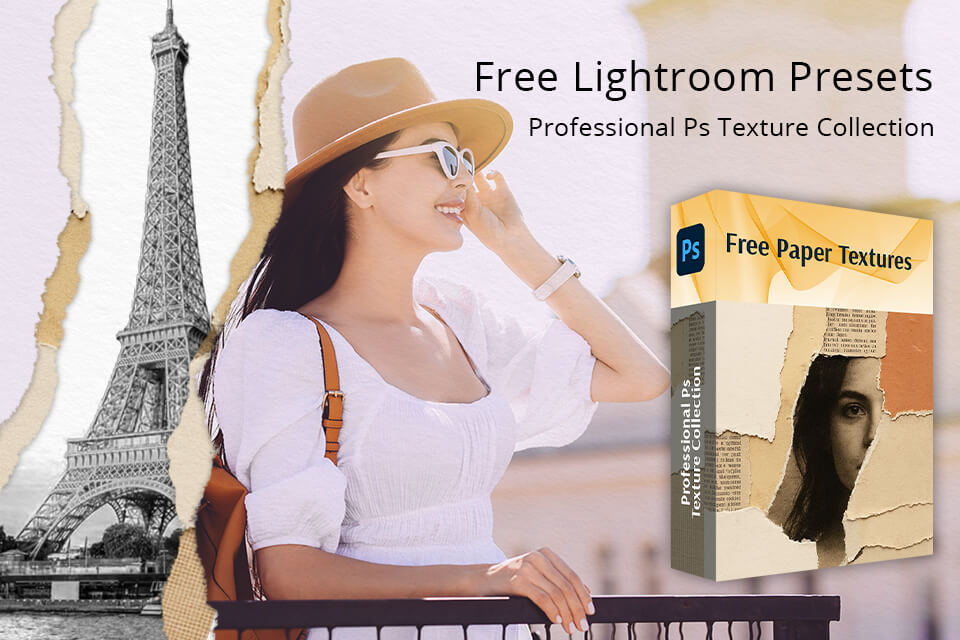
Free paper textures made by the FixThePhoto team can help your ripped paper Photoshop effects a lot. These textures add small fibers, shadows, and depth, which make ripped edges look more realistic and less flat. With them, your digital design looks more authentic and eye-catching.


