A digital photography workflow encompasses all steps a photographer takes, starting with preparation and ending with delivery. All these phases are inter-connected, allowing an expert to organize an efficient working routine.
Simplification and standardization are the major aspects of a photography workflow. When you have a clear understanding of what you have to do and in what order, you can be more productive and achieve the set goals without hassle.
People engaged in a photography sphere professionally know that their success depends on a well-thought-out workflow and how precisely they can follow the developed strategy.
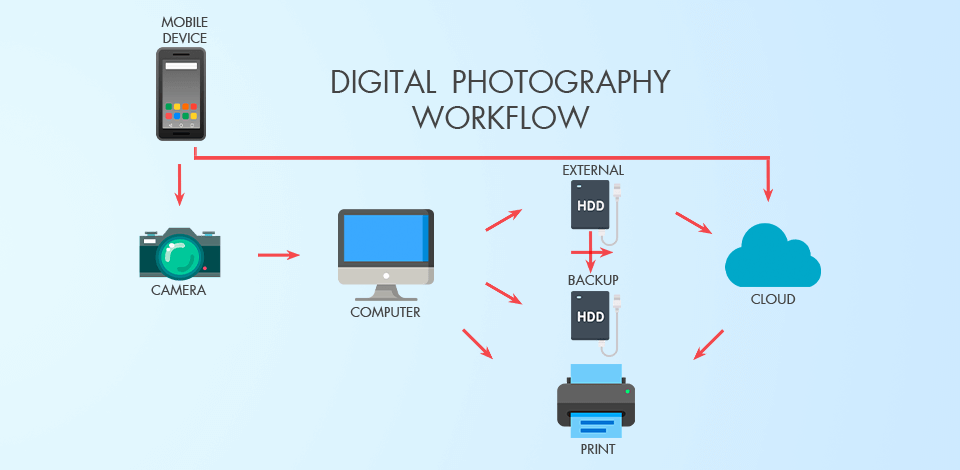
There isn’t a one-size-fits-all approach to organizing a working routine, but in general the process boils down to selecting necessary equipment, setting up a camera, transferring shots to a computer, importing them to photo editing software, image culling, photo editing, exporting, creating backups, photo printing/posting on the net.
The concept of essential photography gear refers to those shooting devices that are indispensable during a photo session, especially if you take images for business purposes. Such crop cameras as Canon 80D, and Nikon D7500 are ideal for beginners. Canon EOS 6D, and Nikon D750 are full-frame cameras aimed at more experienced photographers. Using these cameras, you will get amazing images, but not everybody can afford to pay such a price.
As for lenses, I recommend considering Canon lenses and Nikon lenses. These are 2 trendsetting brands that develop equipment for working in the main photography genres.
If your photo workflow involves shooting handheld at long exposures, you may end up with blurred images. You can prevent such problems, using tripods for photographers.
Amazon Basics is a reliable tripod brand made of special aluminum alloy. It is lightweight and will come in handy if you specialize in portrait photography and real estate photography.
It is highly recommended to take images in RAW format if you work with studio photography. If you can choose RAW file compression in the camera settings, always choose Lossless Compressed, thus all your images will take less storage space. Besides, when shooting in RAW, you may not worry about WB and color space, as you can tweak these parameters during photo editing workflow.
But always choose the JPEG format if you take wedding photography and/or event photography. Such photos are thus smaller and you will be able to take pictures and post-processing them faster.
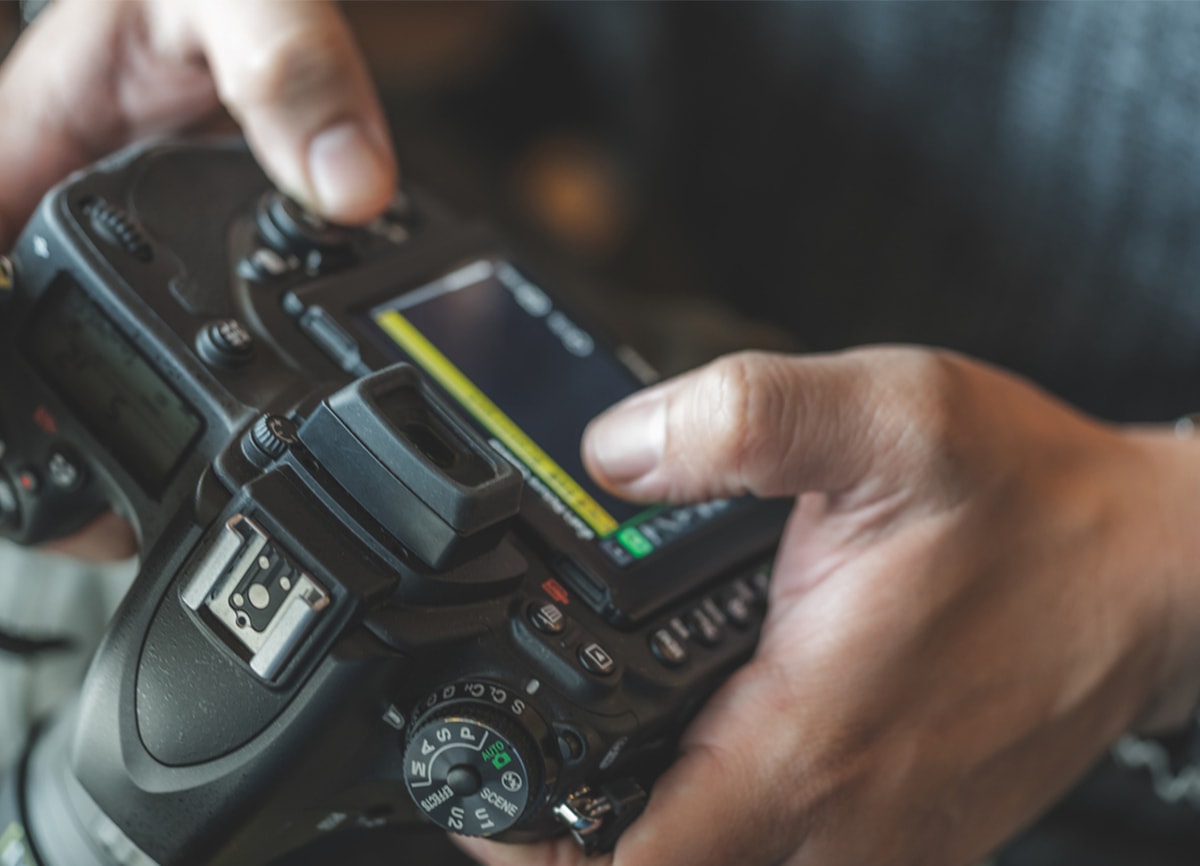
Considering camera modes, I prefer Aperture Priority in most cases, because it allows me to control the aperture and choose how bright or dark the resulting image will be. If a camera offers me a brighter image than I want to get, I simply use the "Exposure Compensation" button and achieve the result that suits me.
Monitor cleaning and calibration is a very important step of a digital photo workflow. If you decide to skip it, you may spend several hours removing non-existing spots that actually were on the screen. I always have screen wipes at my working place, so make sure you get them too.
A calibration involves bringing a monitor in a definite state. This usually involves changing various physical parameters of the monitor, such as brightness, as well as creating a so-called display table. Use Datacolor SpyderX Pro to get precise color reproduction in several minutes.
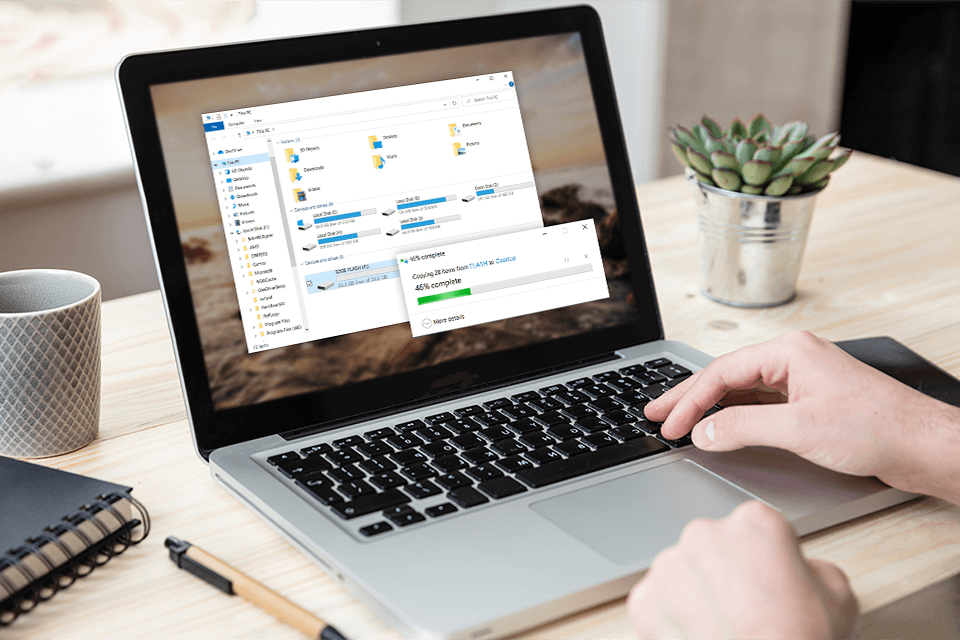
You can perform this action in several ways. The first method is to connect your SD card for DSLR to your computer using either a card reader or a USB cable.
The second method is to activate image copying from your camera to a computer. You can rely on your OS in this case to transfer the needed files. Alternatively, you can take advantage of such programs as Adobe Bridge, or Lightroom to cope with the task.
After you are ready with image transferring, you need to decide how to organize photos, so that you can easily find the needed files. The easiest way is to add keywords. Besides, you can rank them with starts, labels pictures with colors, create custom image groups, etc.
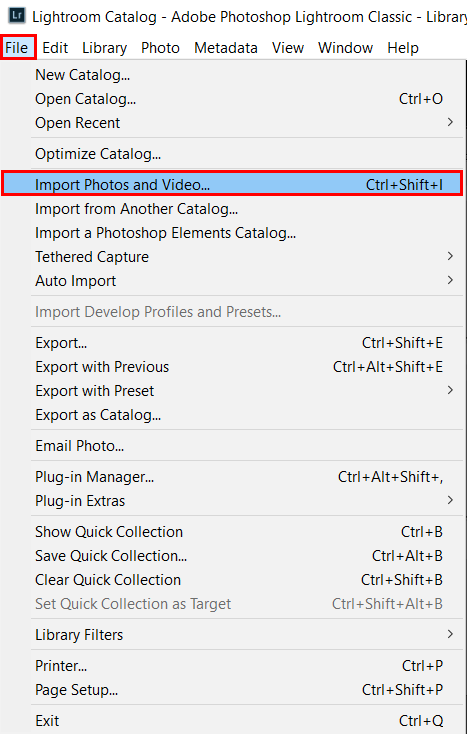
To import RAW files into Lightroom, go to File — Import Photos and video, or drag-and-drop a folder into the program. Then you’ll see an Import window.
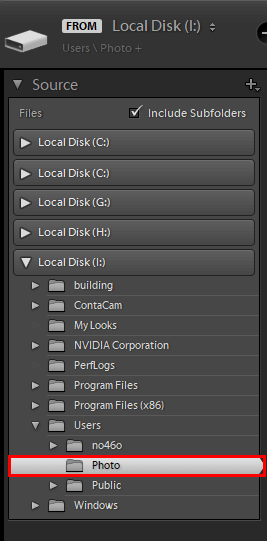
On the left, there will be folders with photos; you can select one or several. If there are subfolders, tick the Include Subfolders checkbox at the top.
In the center of the window, you will see all the photos and videos in the selected folders. If you don't want to import individual photos into Lightroom, uncheck them. By double-clicking on a photo, you can enlarge it.
You can select all photos by pressing the Check all button below, or by deselecting it via Uncheck all.

While using professional photo catalog software, you get whole control over the import process. Besides, you can tag photos adding keywords/metadata, and even apply free Lr presets to photos you are importing, thus optimizing your photographer workflow.
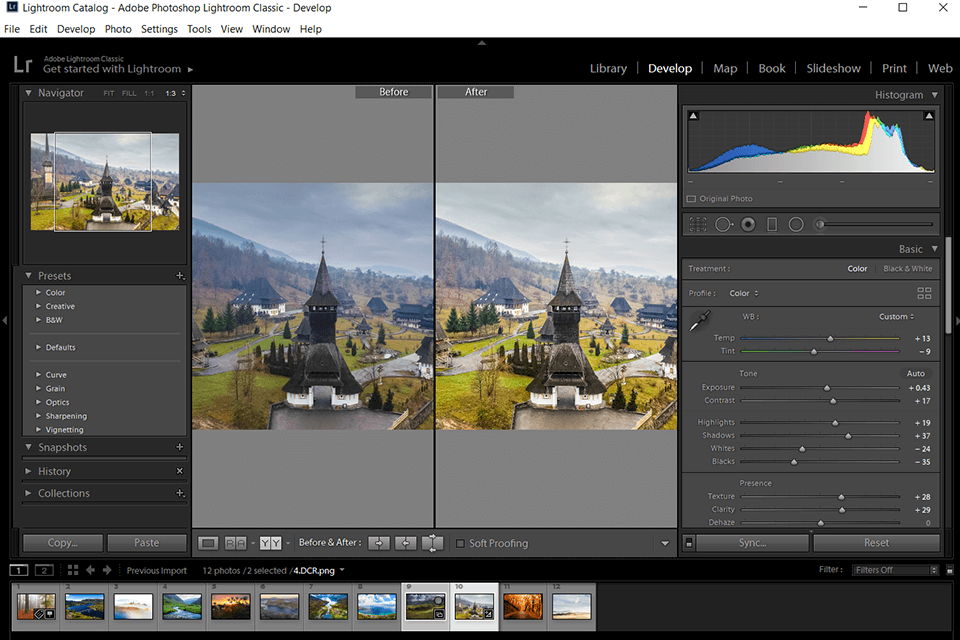
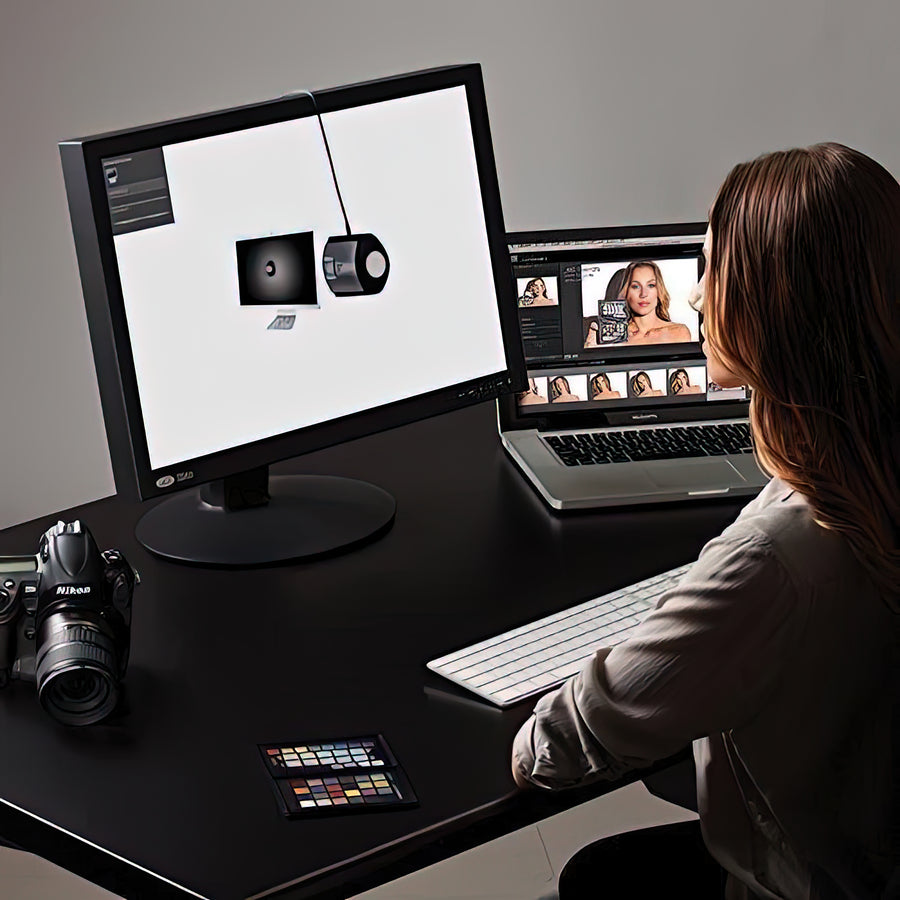
When it comes to image editing, most people use Lightroom and/or Photoshop. These programs are packed with instruments for adjusting brightness, contrast, correcting colors, and more. They allow making your images better without spending much time. You can use them to edit both RAW and JPEG shots.
To speed up your photography post processing workflow, you can use Ps actions suitable for different types of photos. They make colors more saturated, even out skin tones, and fix lighting issues.
If you lack time or skills to edit photos yourself, you can address a professional service.

Experts will take care of your images, correct colors, remove distractions, and more in a quick way. They accept all types of photos.
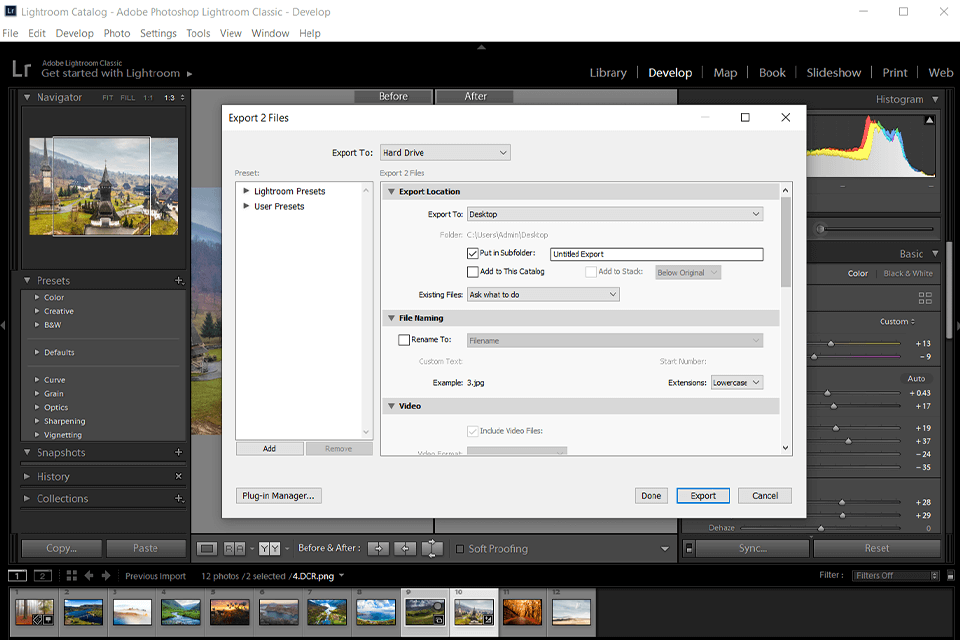
If you want to print your images, you need to find out what formats a printing company can handle. They may work with TIFF files color space or JPEG files in sRGB color space.
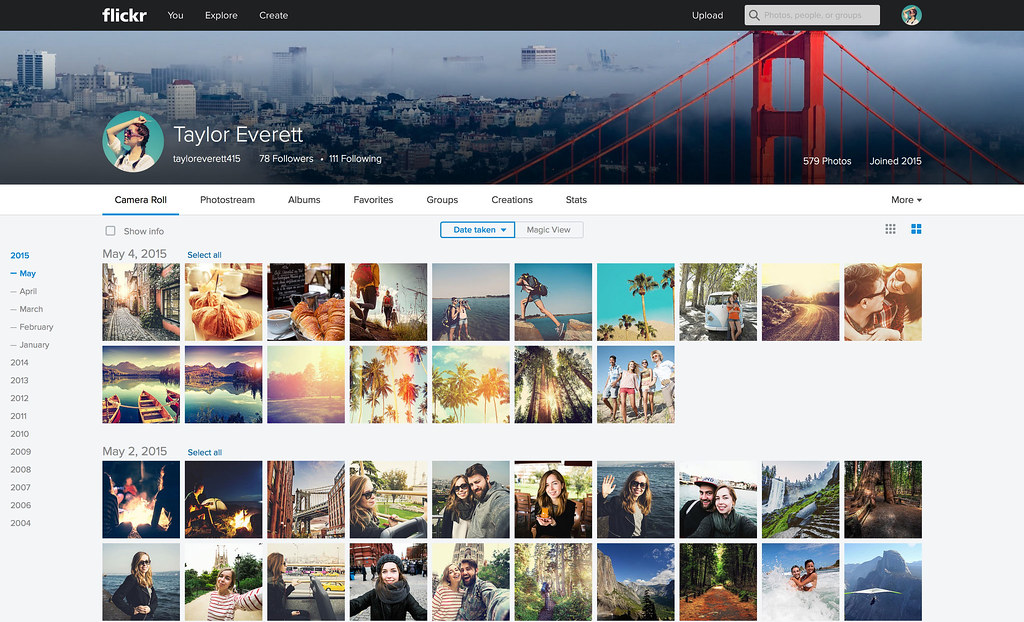
Those, planning to output photos to a blog, SmugMug, Flickr, etc., should select proper picture dimensions and color space (sRGB is preferable). Besides, you need to delete EXIT data from your files if you don’t want other people to see what settings you used during a photo session.

After organizing and editing your photos, you need to back them up. It often happens that digital storage devices are damaged, and people lose all their shots. A good rule of thumb is to make three copies of each file you want to keep.
You can store your backups on an external hard drive. Besides, you can take advantage of cloud backup storage for photos. Though such cloud storage options are rather expensive, it makes sense to pay for them if you are a professional photographer and want your images to be safely stored in a reliable place.
In order to print your photos, you need to send them to the printing agency you’ve chosen. Some companies allow users to upload photos to a website. In other cases, you need to copy/burn files to a thumb drive/CD.
If you have a photo printer, you can cope with printing on your own. It is great that Adobe Lightroom and similar programs allow initiate photo printing using the integrated option. Besides, they have some features needed for printing.

As for sharing images on the web, you can use Lightroom’s built-in feature to publish directly to Flickr, SmugMug, Facebook, and other popular websites, or you can install plugins that allow you to do so. In case you want to export your pictures to social media for photographers, mainly Instagram, I recommend studying Instagram marketing tools to find out how to attract clients to your photos and even sell them.
Fortunately, photography is a creative field, which means you can enjoy a flexible approach to all its aspects. I’ve described a standard digital photo workflow above, but you can try different variations. Feel free to experiment to develop a working strategy that perfectly suits your tempo, requirements, and style.
In order to make your work with digital photos more convenient, I advise you to start photographing in RAW. Thus, you can achieve better results while editing photos. It is also important to cull your shots and organize them in folders. Besides, make use of Lightroom presets for streamlined photo processing.
While conducting a project, you can’t do without a pre-defined workflow that allows evaluating the amount of work and determining the time you have to spend on every task. The complexity of a project significantly affects a workflow. In general, an average photography process includes preparation, photo session, and post-production, with many important steps in between. Every photographer should adapt this standard photography workflow chart to his/her needs.
You can choose photo management software for Mac and Windows, e.g., Lightroom, and upload your photos there. These programs allow users to prepare images for editing and immediately save them there, or back up photos to an external hard drive or cloud storage such as Dropbox or Google Drive. Professional photographers not only make backups of their photos, but also prepare spare memory cards so that they don't run out of free space during a photoshoot.
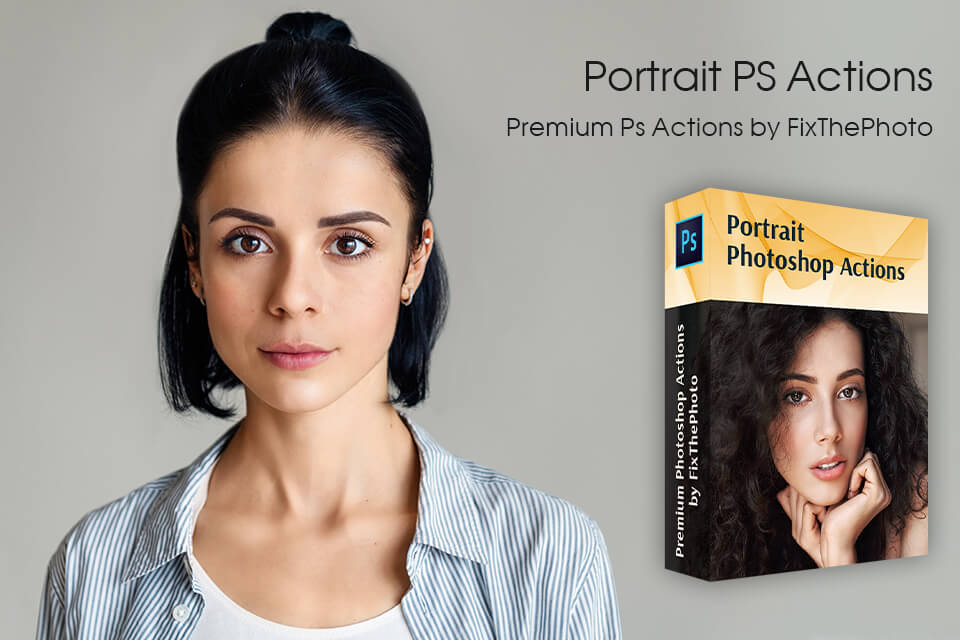
You can cope with editing faster using these actions. They are suitable for color correction, adjusting contrast, fixing minor imperfections, and more. They are compatible with Ps CC and CS6.


