As our FixThePhoto team anniversary approached, I thought what could be a more meaningful gift than a personalized calendar filled with our favorite team photos?
Since I'm not an avid graphic designer, I needed a user-friendly program. Of course, I wasn’t looking for something basic:
For this fun little project, I selected a few calendar-making tools to put to the test. Each one seemed to have its own unique strengths and potential, making the experiment even more exciting.
After creating numerous calendars using the software I tested, I discovered a few key insights that would have been helpful to know from the start:
Photo prep is key. Don’t just use any photo for your calendar. Take the time to edit and carefully select your images to ensure they look their best.
Resolution matters. Always use high-resolution photos, especially for larger wall calendars. Pixelated images can ruin the look, and while many programs will warn you about low-res photos, it’s better to start with high-quality files.
Color correction. Making small adjustments to brightness, contrast, or saturation can greatly improve your photos, especially for printing. While some tools include basic editing options, it’s a good idea to refine your images using specialized photo editing software for PC and Mac before getting started.
Cropping for calendar shapes. Most calendar templates feature fixed photo box shapes, such as squares or rectangles. To streamline the process and minimize tweaking, crop your images to align with those shapes before importing them into the calendar tool.
Don't forget the calendar part. It's easy to get so focused on the photo calendar part, but remember that it is actually a calendar.
Double-check dates. It might sound obvious, but always double-check your dates, especially if you’re customizing the year or months. A calendar with the wrong dates is just useless.
Holidays & events. Many programs come with preloaded holiday options, but be sure to choose the correct region. Also, remember to include any special team dates, including birthdays, work anniversaries, or even those fun inside-joke days to give it a personal touch.
Keep it readable. During the design process, focus on readability. Steer clear of overly decorative fonts for the dates, and make sure the numbers and days of the week are simple and easy to read at a glance. Remember, functionality should be your priority!
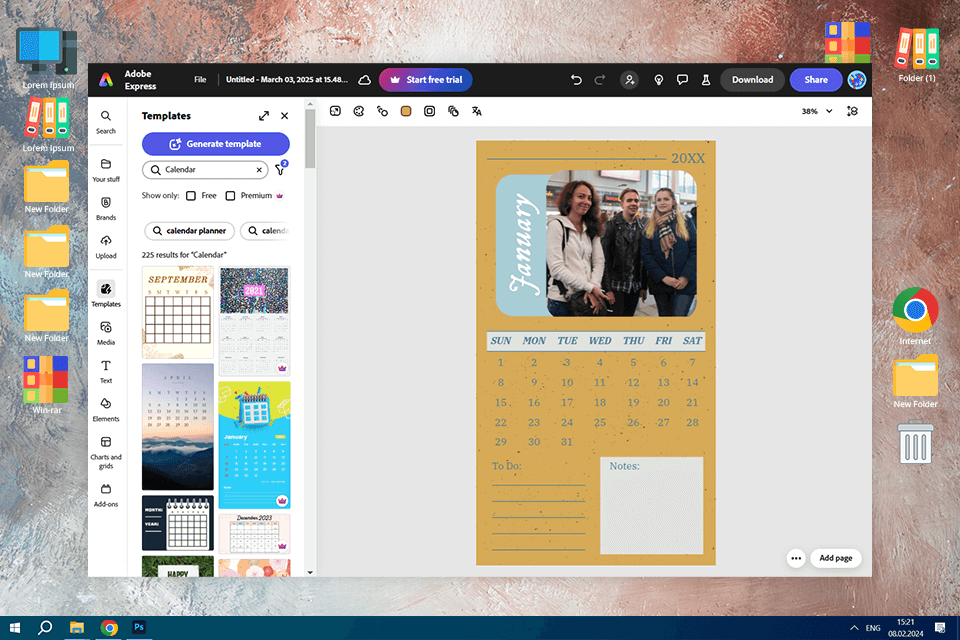
I've used Adobe Express for creating quick graphics in the past but never for making calendars, so I was interested to try it out. I was pleasantly surprised, especially with the new Express updates, as they seem to be tailor-made for projects like this. The app is quite intuitive and makes the entire process incredibly straightforward.
One feature I particularly love is the ability to import photos directly from Lightroom, which is a huge time-saver since all my best team photos are already edited and stored there. I really like its templates: there are so many of them, catering to every taste and occasion, and all of them are customizable. I adjusted colors, fonts, and layouts to personalize the design.
The new table feature initially seemed odd for calendars, but it made grid customization easy. Recoloring helps maintain brand consistency, while the print quality is top-notch and looks professional. As the app runs on an iPad, it allows me to design from anywhere.
Adobe Express is both powerful and user-friendly. Creating custom, professional calendars is easy, even for aspiring designers like me. Watching the process of organizing all the elements as one design was truly enjoyable. Definitely my top program to make a calendar for teams.
Pricing: Adobe Express free plan, Premium plan $9.99/month or $99.99/year
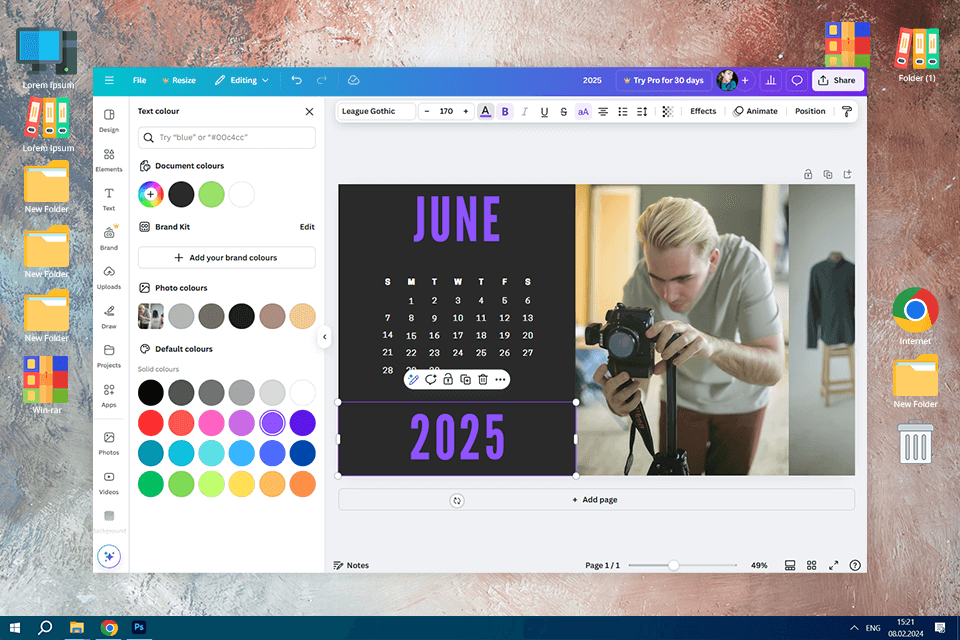
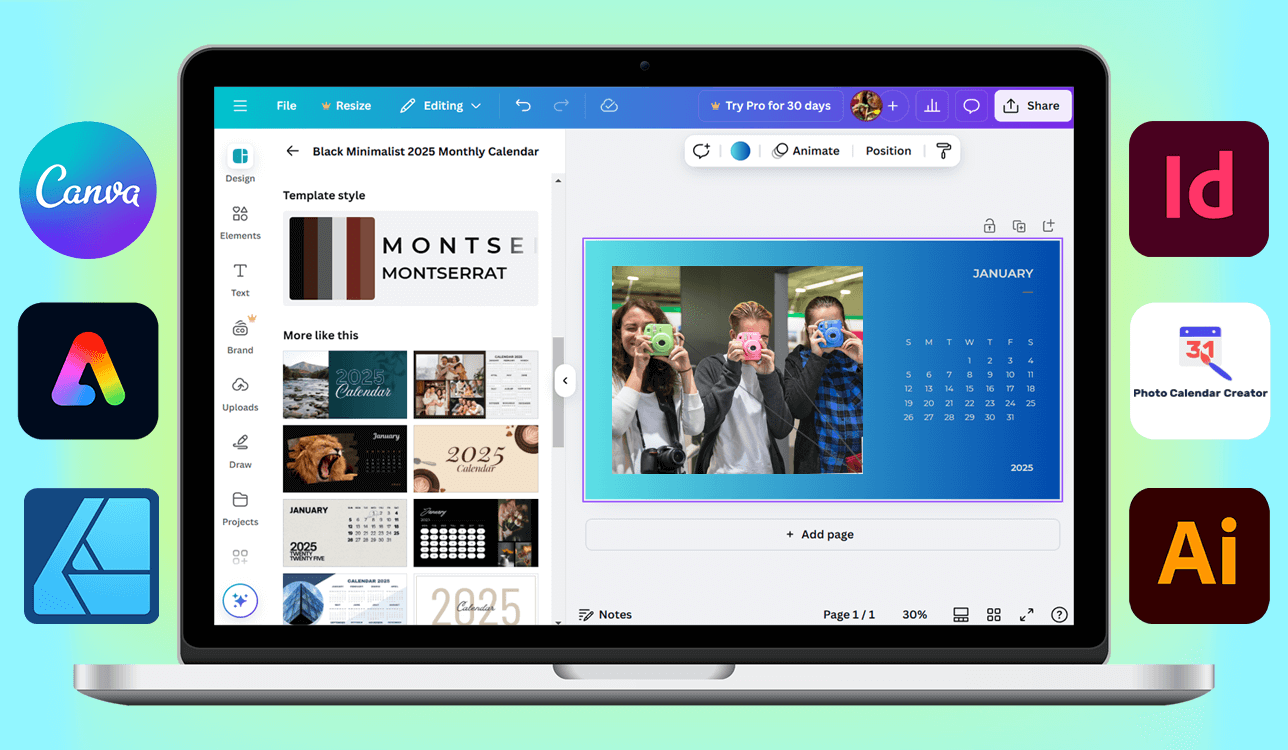
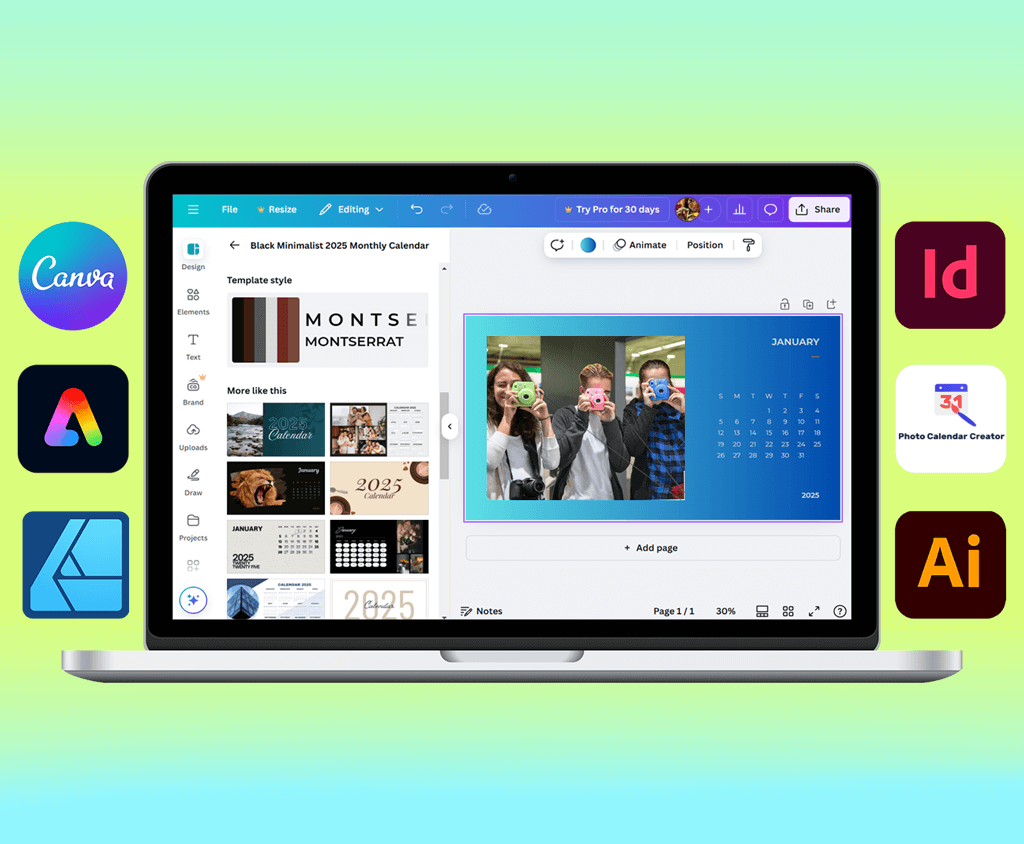
Canva’s interface is incredibly user-friendly, especially for beginners. It offers a wide variety of ready-made templates, including wall calendars, desk calendars, photo calendars, and illustrated designs, which I could easily customize to align with our brand. The extensive photo library and design elements were a lifesaver when I needed additional assets.
When it comes to customization, Canva makes it incredibly easy: simply click and modify fonts, colors, and design elements. Comparing Canva vs Adobe Express, it may not be as deeply customizable as the latter, but it still offers much creative freedom to make any template unique. Plus, the drag-and-drop feature made adding our team photos a trouble-free process.
The most appealing feature for me is the ability to easily resize designs for various formats. For instance, I could create a wall calendar and then quickly adapt it into a social media post or desktop version with just a few clicks.
However, when it comes to print options, Canva feels a bit limited compared to InDesign. Although it allows you to download high-resolution PDFs, I had to be particularly careful with margins and bleed settings to ensure the final print looked professional.
Pricing: Free plan, Pro plan: $12.99/month or $119.99/year
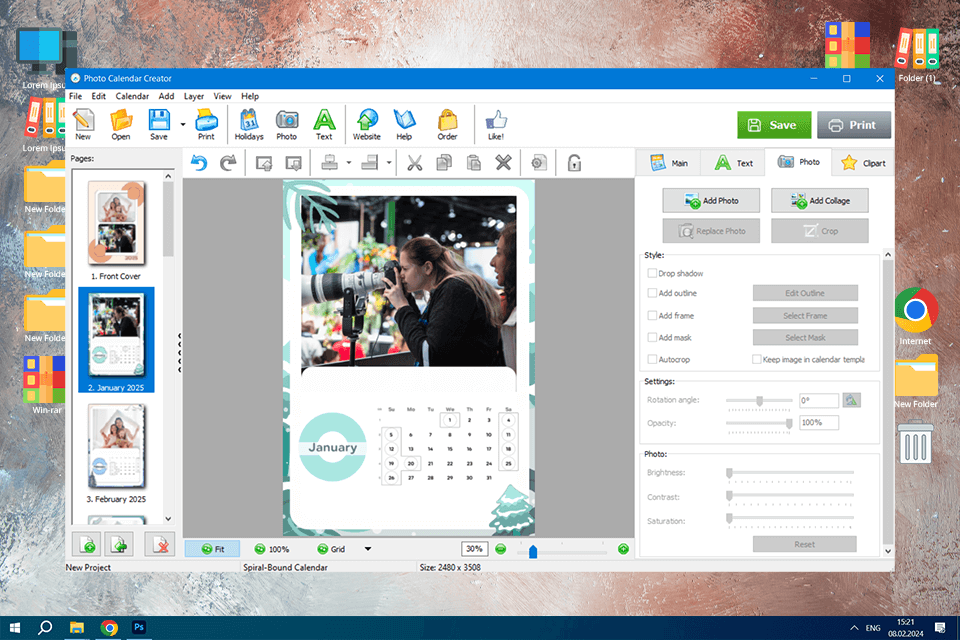
Unlike other tools, Photo Calendar Creator is specifically built for crafting calendars, which means it comes with some fantastic automation features. The software includes a customizable built-in holiday database, and I especially like the feature that lets you highlight team birthdays and mark project deadlines right on the calendar. It also works with different print formats, so you can easily print at home or use a professional printer.
This calendar creator software offers a massive collection of templates designed for making calendars. Although they are not as trendy as those offered by Canva or Adobe Express, they are practical and well-built. The selection includes layouts for wall calendars, desk calendars, booklet calendars, and more. I found a simple, classic design fitting our team calendar photoshoot ideas. The customization options are also good.
The interface, however, seems a bit outdated, and it didn’t provide the same creative freedom as Illustrator or InDesign. While it’s perfect for creating structured calendars, it lacks the flexibility you’d get with more advanced free graphic design software.
Pricing: One-time purchase: $39.95 for a lifetime license
Next, I turned to Adobe Illustrator. This completely transformed the way I approached designing custom layouts with complex typography and vector elements. Since it is a free vector graphic design software, the output remains sharp and clear at any resolution, which makes it perfect for printing in any format or size.
Illustrator’s Generative Shape Fill feature was a huge time-saver, letting me add artistic backgrounds effortlessly without manual work. The Text to Pattern AI tool added a creative twist, helping me craft custom-date designs that matched our brand perfectly. One feature I loved was Objects in Path, which made it simple to arrange design elements neatly around circular month grids.
If Illustrator is a better option for working with vector graphics, InDesign is more suitable for page layout and typography. For calendars, this means you have complete control over text, grids, image placement, and overall layout. The new Generative Expand tool was a lifesaver, letting me resize designs without losing quality, which cannot be said about other InDesign alternatives.
One feature that really stood out was Text to Image. I experimented with AI-generated seasonal backgrounds, which added a unique, personalized touch to the calendar without the need to search for stock photos. Additionally, the option to export in various professional print formats made it simple to send files to a print shop, eliminating any resolution issues.
Illustrator and InDesign are powerful, but they’re not exactly beginner-friendly. I had to spend extra time ensuring everything was perfectly aligned for printing, which is great if you’re detail-oriented but can be frustrating if you’re in a hurry. That’s why I think these tools are more advisable for professionals or those aiming for flawless, high-end designs.
Pricing: Adobe Illustrator free trial, $20.99/month (annual plan, paid monthly), $239.88/year (annual plan, prepaid); Adobe InDesign free trial, $20.99/month (annual plan, paid monthly), $239.88/year (annual plan, prepaid)

Affinity Designer is often considered a powerful and more budget-friendly alternative to Adobe Illustrator. It has templates, and I found some online, but it's not template-driven in the same way as Canva or even Express.
You often end up starting from scratch or modifying existing designs. That said, Affinity Designer gives you amazing control over every little detail in your calendar design. I spent a lot of time fine-tuning vector paths and perfecting typography, which was satisfying but also took a lot of effort.
Comparing Affinity Designer vs Illustrator, the former may lack flashy AI features like Generative Fill, but instead, it offers some practical tools for making calendars. Its grids and guides system is impressive, simplifying the process of setting up precise calendar grids. The snapping and alignment features are top-notch, ensuring clean, professional layouts. Additionally, its typography controls are highly advanced.
However, Affinity Designer isn’t specifically designed for calendars, so I had to manually set up grids and date layouts. For someone seeking a quick, automated solution, this might feel time-consuming.
Pricing: One-time purchase: $69.99 for desktop version (Windows/macOS), One-time purchase: $19.99 for iPad version
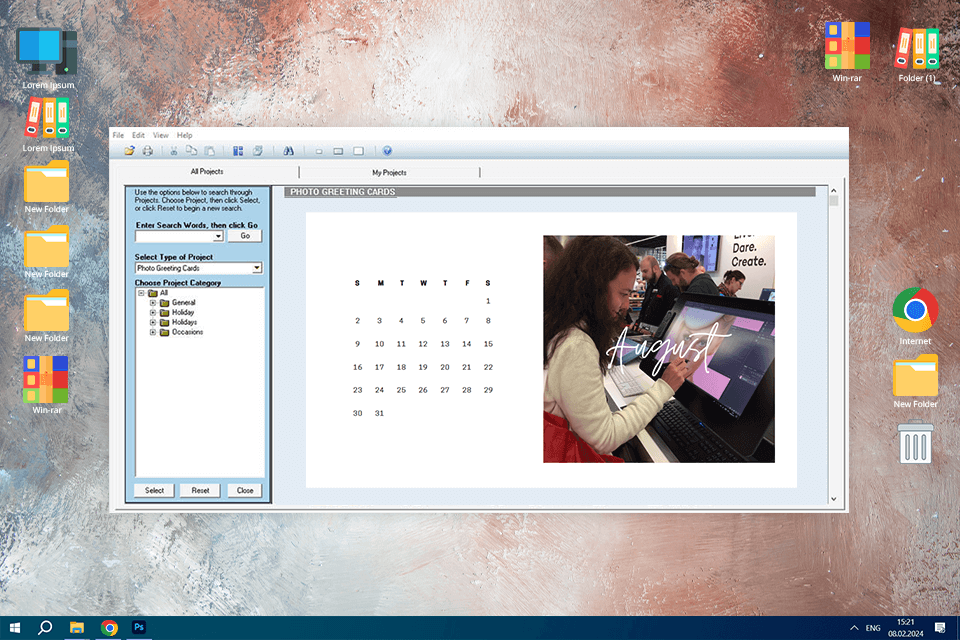
Calendar Creator Deluxe is a bit of an outdated program to make calendars, with an interface that feels like it belongs to an earlier era of software. It reminded me of the older generation of desktop publishing software, and while it gets the job done, it doesn’t offer the advanced functionality of Canva or Adobe.
That said, it’s great for traditional calendar-making. There are tons of templates to choose from, including wall calendars, desk calendars, and more, and you can easily add personal events or photos using its drag-and-drop functionality. The templates might look more classic than Canva’s trendy designs, but there are still plenty of options to choose from.
One standout feature was the ability to customize holidays and recurring events, which made it ideal for creating office calendars with company-specific dates. However, while the print quality was good, I had to manually tweak the settings to ensure the output was high resolution.
Pricing: One-time purchase: $29.99
I had a clear strategy for conducting the testing process. To start, I looked into online recommendations from photographers, designers, and hobbyists, particularly on platforms like Reddit. I also gathered insights from my colleagues at FixThePhoto, many of whom have hands-on experience creating high-quality printed materials for clients.
I structured my testing process around five essential factors that I believed were crucial for this project: ease of use, customization options, calendar-specific features, print quality, and overall value for money. Over a few weeks, I tested every software, evaluating how well they handled each of these aspects.
Step 1. Ease of use. First, I wanted to test how intuitive each software was. For every program, I started creating a basic calendar without reading any instructions. I focused on how user-friendly the interface was, how quickly I could find the tools I needed, and whether the process felt smooth and straightforward. Is it possible to work in it without any prior experience?
Step 2. Next, I wanted to see how much I could customize these calendars. For the FixThePhoto team, personalization is essential to create something unique and original. So, I tested each software’s ability to let me:
Step 3. Calendar-specific options. Since I was creating calendars, I focused on features specifically tailored for calendar design. Did the software include tools that simplified and streamlined the calendar-making process? I looked for:
Step 4. Print quality. These calendars needed to look crisp and professional when printed. To ensure that, I tested:
Of course, I also did test prints. I printed sample pages from each software on my home printer to check the output quality and see if there were any unexpected issues.
Step 5. Value for money. While designing eye-grabbing calendars is the goal, I also wanted to find cost-effective solutions. For each calendar maker software, I looked into: