Polarr 2026
VERDICT: Polarr is a cross-platform and free application. This image editor can be used for deep color correction and for making basic adjustments to the skin of the face. Polarr can be called one of the best free photo editors. Its design is more intuitive and accessible than complex programs like Photoshop.
Among the tools, you will find curves, HSL, presets, custom filters and more. A nice bonus will be an additional workspace for artists. There you can create projects from scratch, draw pictures or web design using dozens of customizable brushes and palettes.
Can Polarr replace Lightroom? It can if we are talking about the free version for beginners. The paid version is similar to the price of Lightroom. But it offers fewer functions and features – so buying Polarr premium will be wrong.
I have almost no complaints about the free version of the editor. But I have one question about the premium version – why should I work only with JPEG images paying $9.99 monthly? I shoot in RAW and am used to working with this format at the image post-processing stage. Editing in JPEG significantly reduces the capabilities and quality.
Speaking of the mobile version, I don't recommend using Polarr if you need deep color correction and advanced skin correction capabilities. Due to the incorrectly designed interface, the use of almost any tool is inconvenient and annoying. In addition, I have not found a way to select the specific area of the image as it is offered in Lightroom Mobile.
From the positive aspects, it remains that the app is available in both the free version and the Pro. The difference is almost invisible, with the exception of some new filters and effects.

Polarr is meant for deep color correction of JPEG images. Artists and web designers can use it instead of Illustrator and Photoshop for Chromebook.
The online and desktop versions are free but have some limitations in terms of functionality.
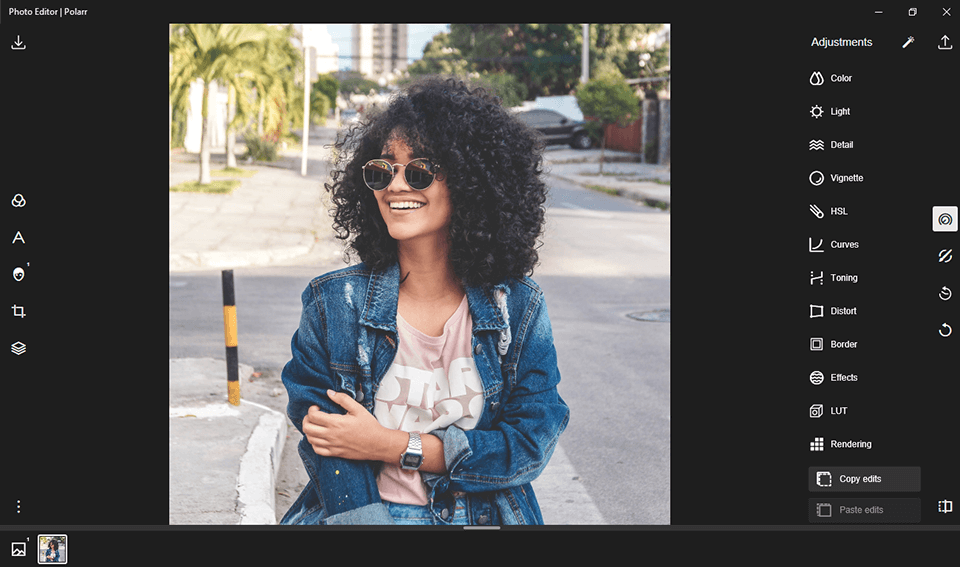
As I said earlier, in Polarr raw files aren`t supported. So, I downloaded a large Jpeg to review Polarr image editor. Polarr copped the task without problems.
I saw a quite good interface. It can be changed using settings. The left side of the screen contains the following tools: filters, text tool, retouch, crop, and overlays. Look at each of them.
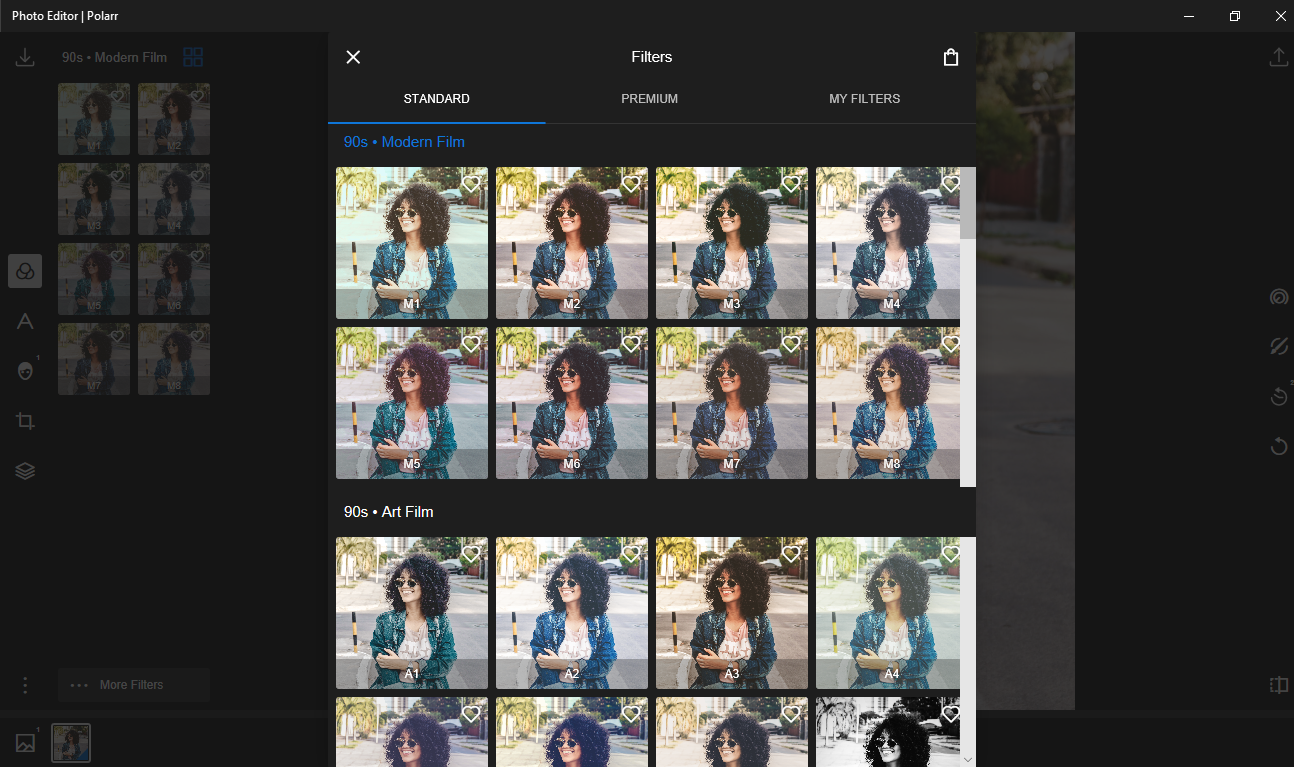
An additional menu opens after selecting the filters. You can see the variants you often use and one semi-knob is given to adjust the filter itself. It's pleasant to note that in addition to the automatic setting of this field, you can also manually select filters from a wider list. This is done in 2 clicks.
A wider range of filters is available. To open it, just click on “More Filters” at the bottom of the screen. You will see dozens of filters for various styles of photos by opening an additional list.
Open the “My filters” column in the filters list. You can also add or create ready-made filters and share with other users. A cool feature that not every editor has.
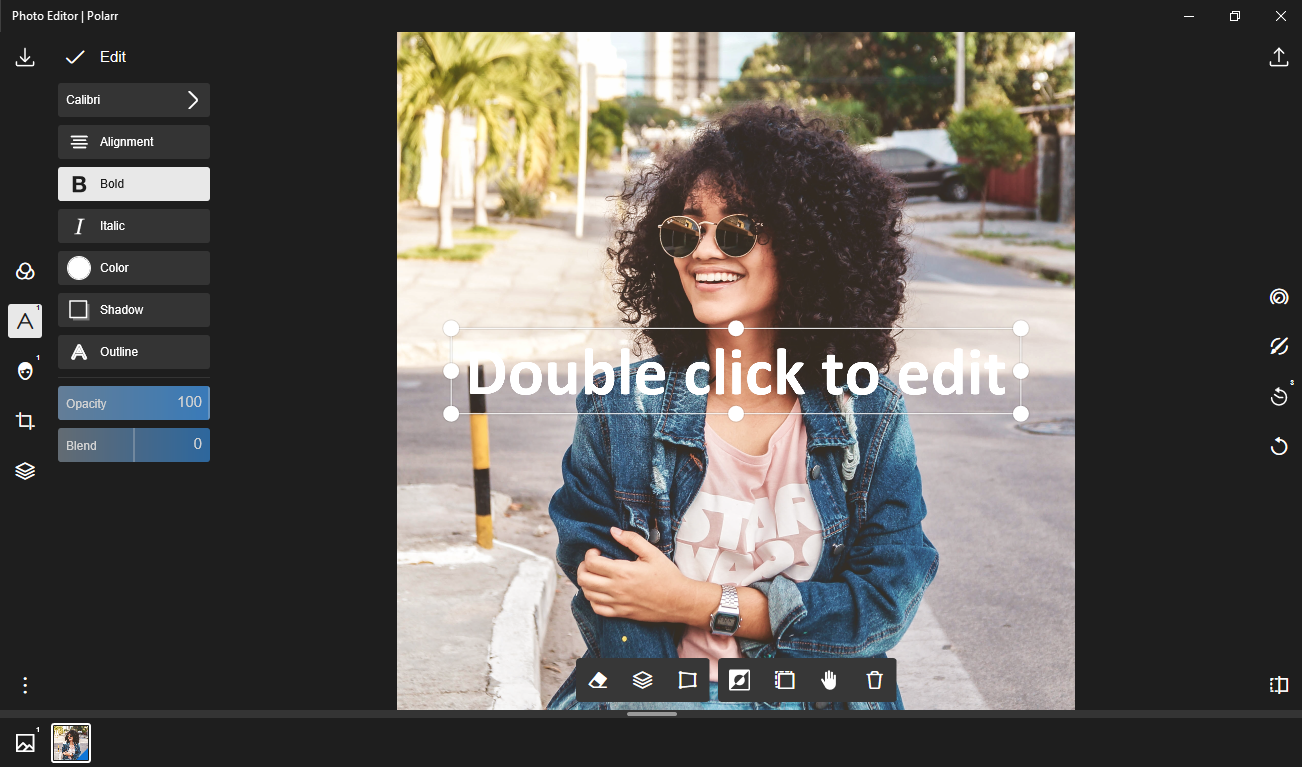
Next in line is the “Text tool”. The tool is pretty well-made. You can use it to add text, shapes, dividers and presets.
You can easily sign or create a watermark using “Add text” without the need to resort to third-party free watermark software. The tool provides a huge number of already prepared fonts, which you can also expand by downloading them.
You can adjust the transparency of the text with the “Opacity” slider. It's a quite useful function because it allows you to impose on the picture no noticeable signature or create a watermark.
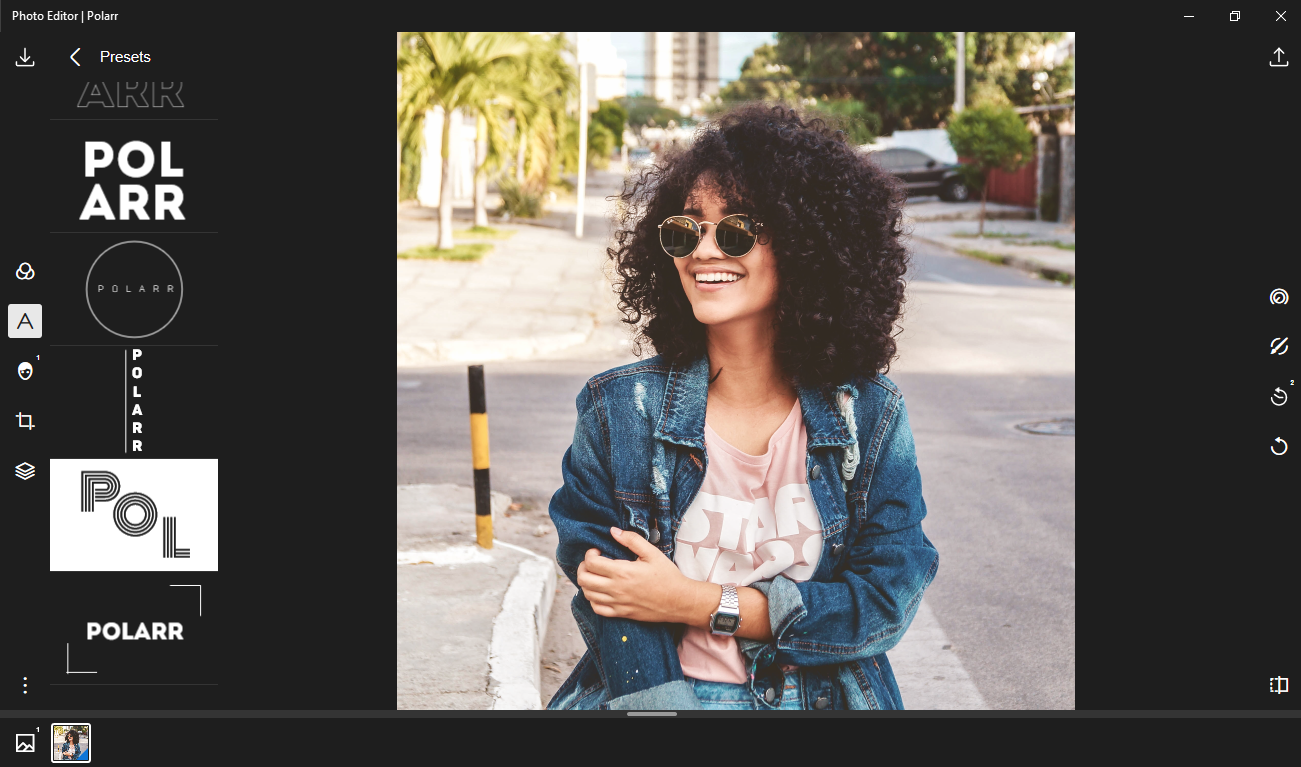
The “Presets” tool is a rather interesting solution from developers, which bears already prepared presets with signatures, in other words, a watermark. But you cannot change the structure of the text, only “Polarr”, it makes them useless.
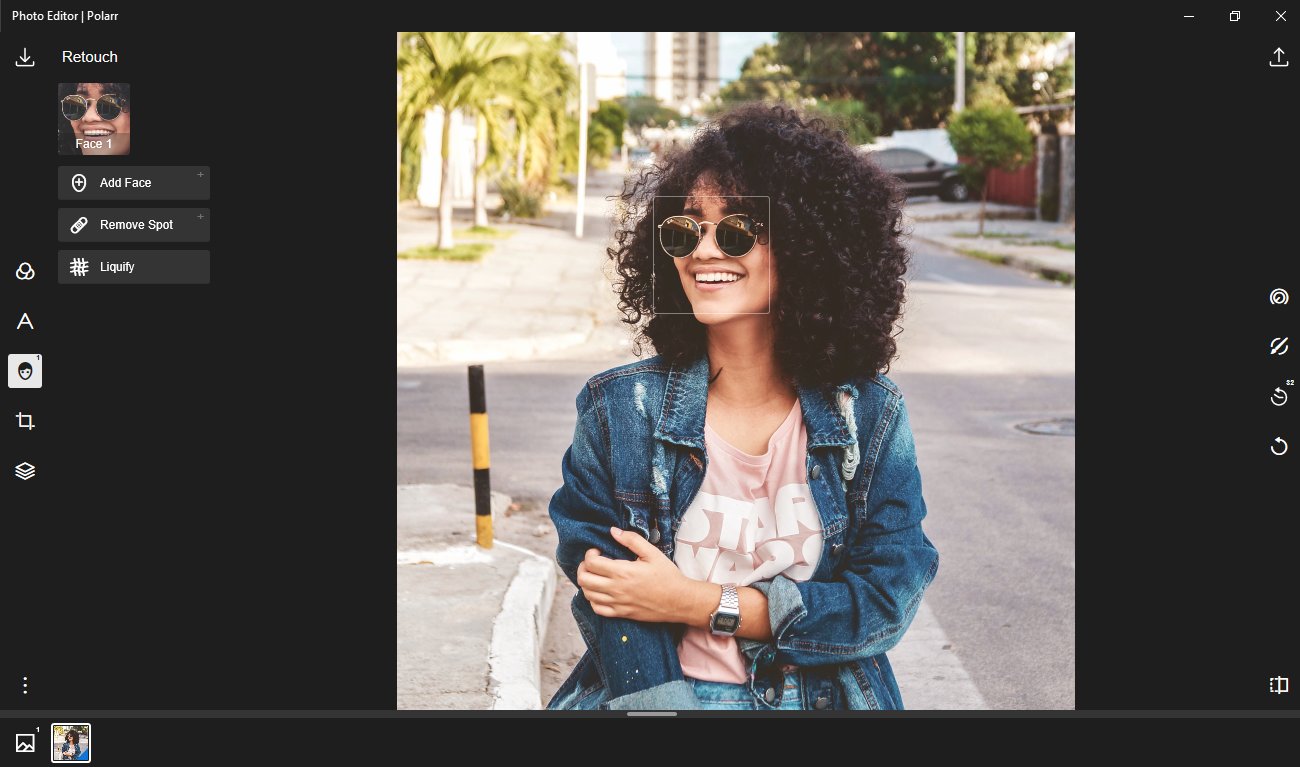
“Retouch” is the first and one of the most interesting tools. The main retouch begins at this stage of photo editing. You can adjust the skin tone by highlighting it with a brush or by placing a square in the square, add shadows, or vice versa lighten a certain part of the image or blur the background with this tool.
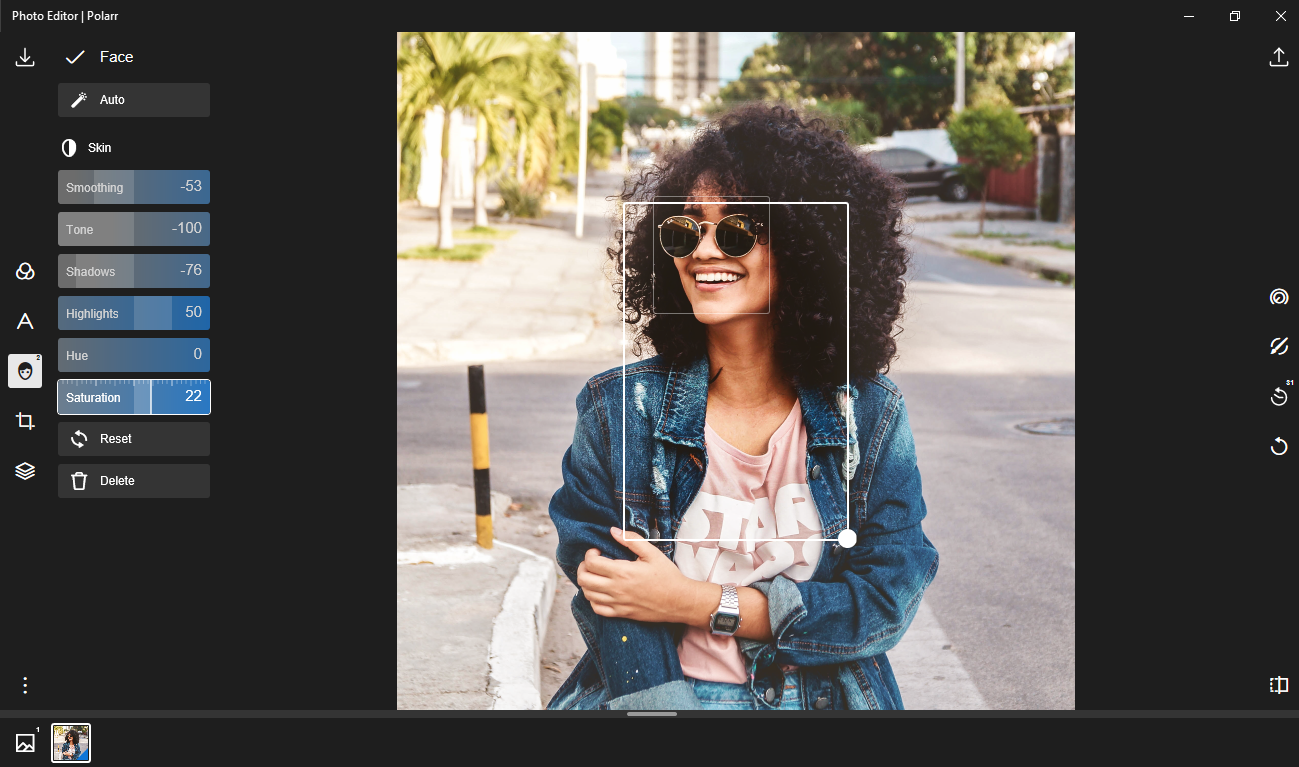
Polarr allows you to auto-correct the image, or adjust everything manually after opening the “Face” tab. I used the manual settings and selected the face area to show the result. Additional sliders opened after selecting the “skin” tab.
These are our tools. I noticed that, surprisingly, the tool works quite accurately, and it's quite enough for photo retouching. If you compare the head with the hand, the difference is visible. The color has become more saturated and interesting.
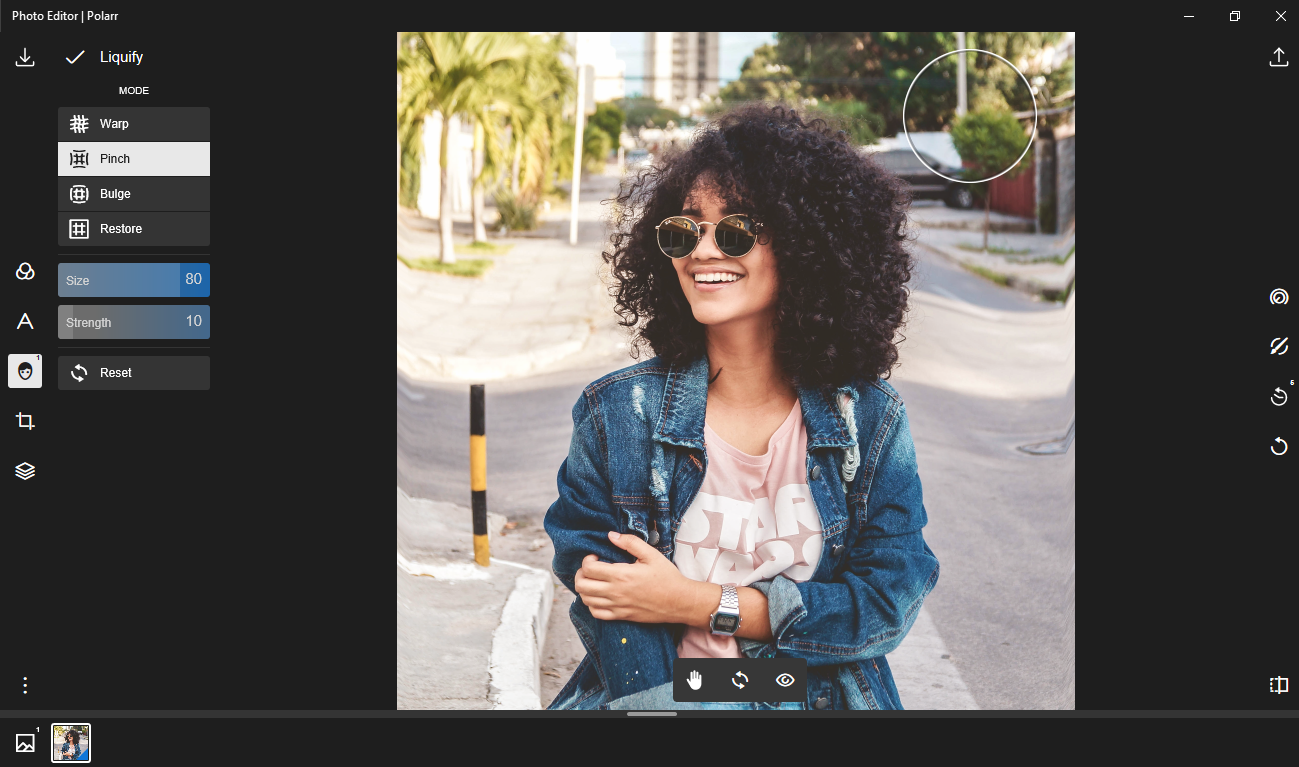
Next, I saw how the “Liquify” tool works and I was satisfied. You can blur the background with such modes as warp, pinch, bulge and restore, using a brush. In addition to the mode selection, two sliders are also available. It can be configured for size and strength. A useful tool if you want to give an image an attractive style.
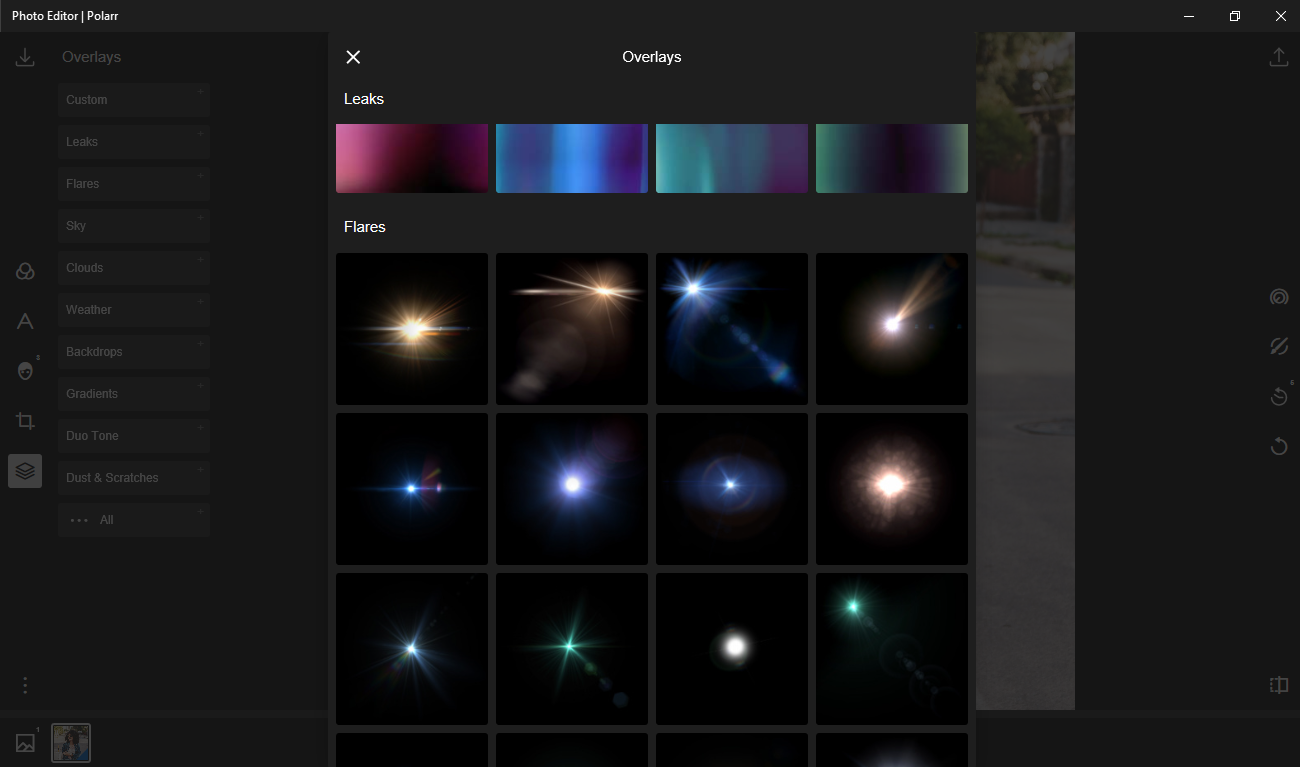
A quite simple tool with a very impressive amount of effects, which are limited in the Polarr free. The tool is quite controversial for photo retouching. However, it is useful for those who want to add some zest to the image, an effect that will distinguish you from others.
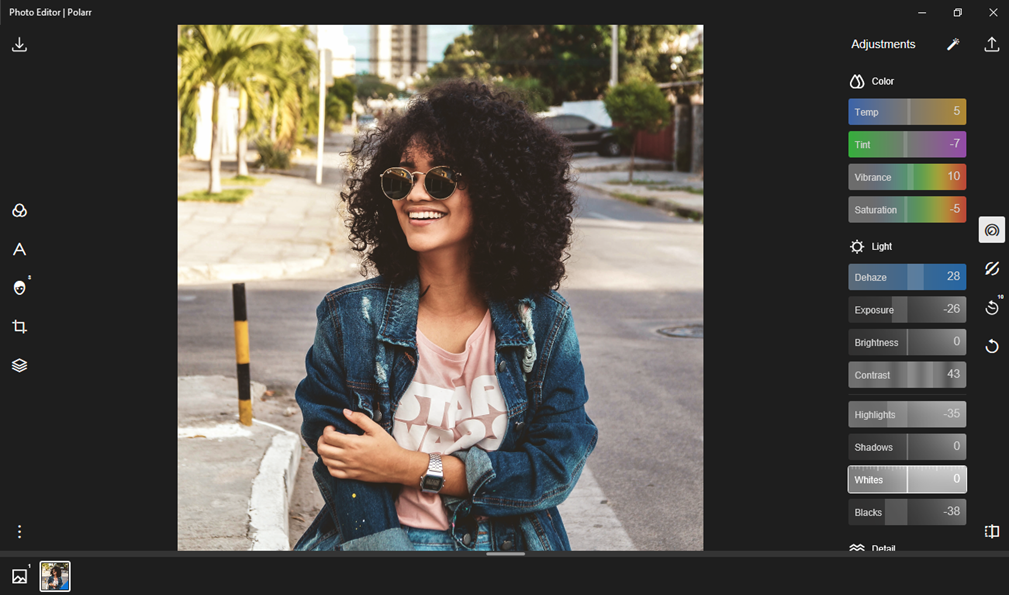
You can use “Adjustments” tool to change the following parameters: color, light, detail, vignette, HSL, curves toning, distort, border, effects, LUT, and rendering.
I changed the temp, tint, vibrancy, saturation, exposure, contrast and highlights indicators by choosing color and light, performing the initial color guide.
I used the slider to configure each of the tools above. The transfer and accuracy of each of them were at a fairly good level, thus, giving me quite a good result.
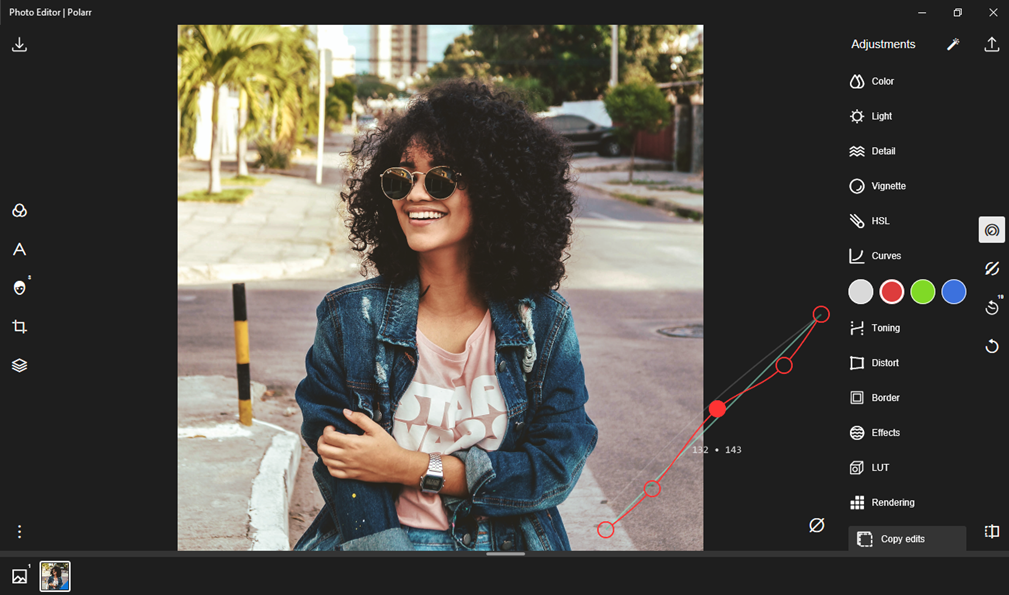
“Curves” is the next tool I used and tested. I set up it after choosing the color. The tool doesn't work quite well, but if you compare it with Photoshop, it is inferior, since its color rendering is more accurate and gives a completely different result using the same settings.
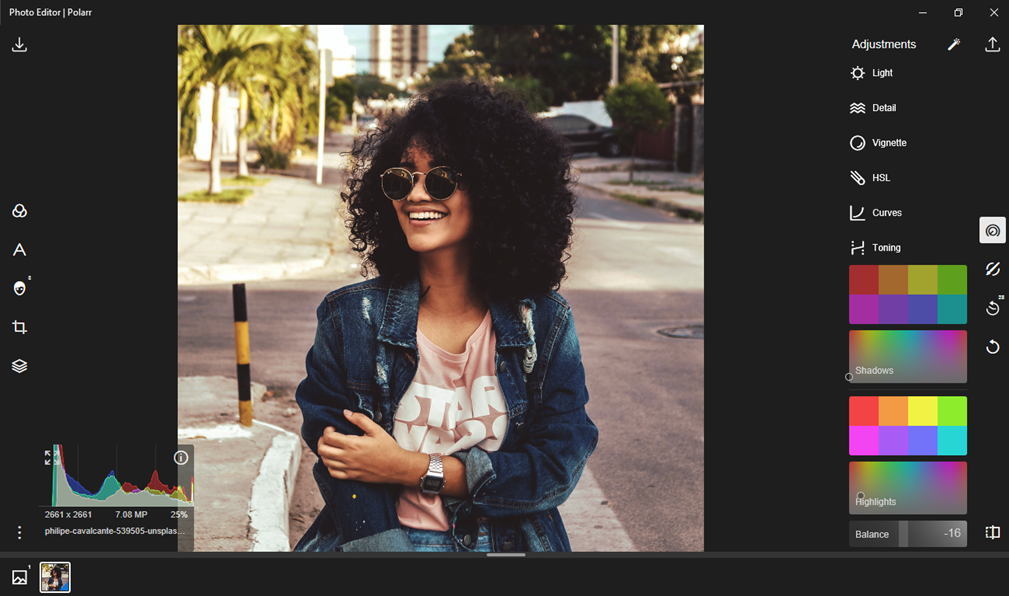
You can easily change the tone of the image with the “Toning” tool. I changed the tone with the help of the color palette. However, I didn't like it. Balance is the only one slider available. It's not enough for more accurate use of this tool.
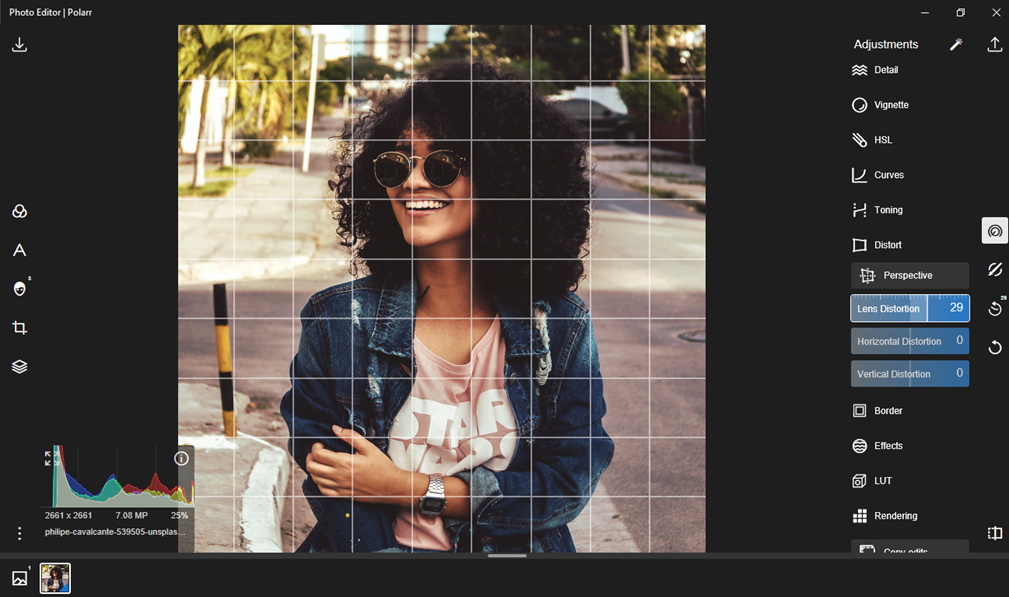
“Distort” is a quite useful tool which not each editor offers. You can correct the image with it if your lens failed or the frame was incorrectly captured. The tool provides 3 sliders that can be unscrewed according to your requirements, thereby aligning the image, or vice versa, make a special bulge.
The next is “Masks”. It helps you adjust the color of the selected area more precisely. I opened the Color mask and I was given a brush to select the area.
Next, I adjusted the exposure, brightness, vibrancy, contrast, shadows, and clarity using the sliders, thereby editing the selected part of the photo.
The result was good, but I was worried that the brush itself doesn't work correctly. It's noticeable in the screenshot above that the area that the photo editor automatically selects doesn't completely cover parts of the body, as a result of which, it's not retouched.
“Brush mask” corrects this situation and does it at the highest level. You already manually define a part of the image using a brush, which can be changed by choosing a size that is convenient for you, after which you can retouch the selected area using the sliders.
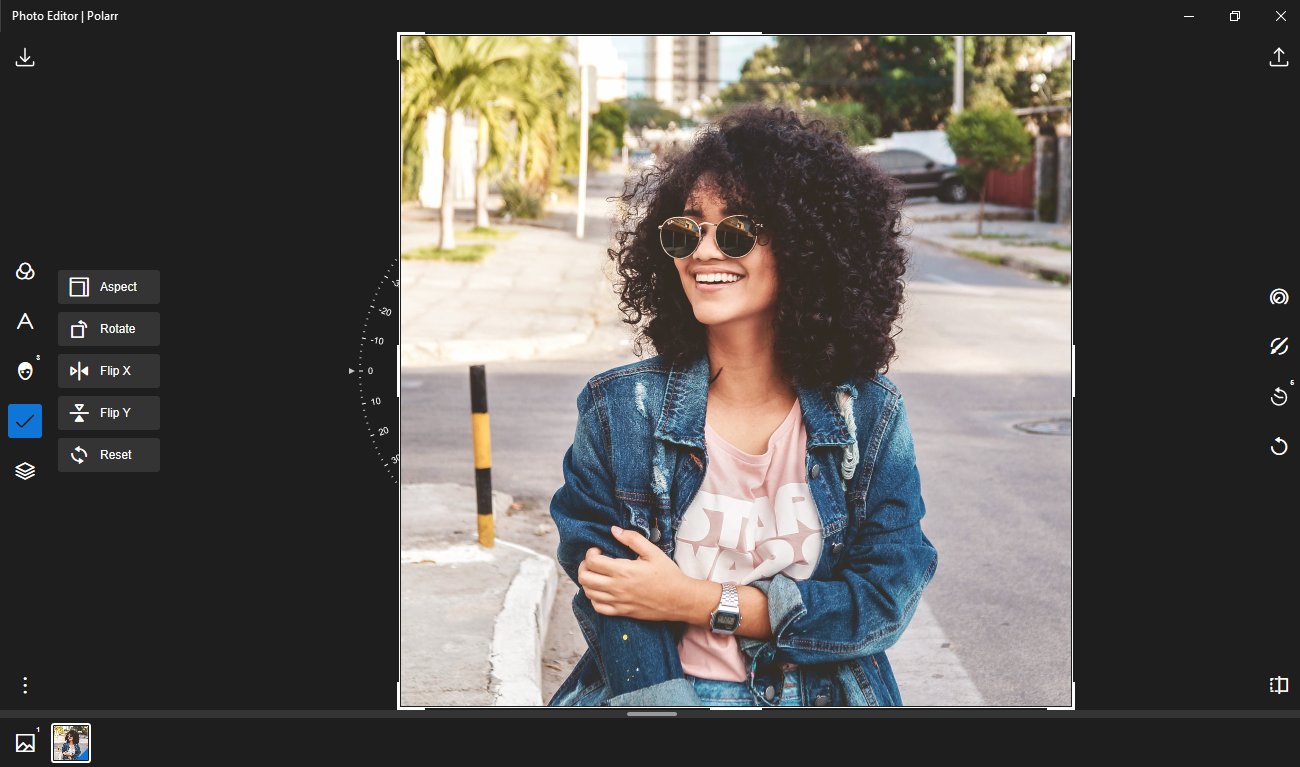
You can crop, expand, display and align the image with the “Crop”. A rather simple tool, and you won't find anything interesting in it.
Polarr Mobile 2026
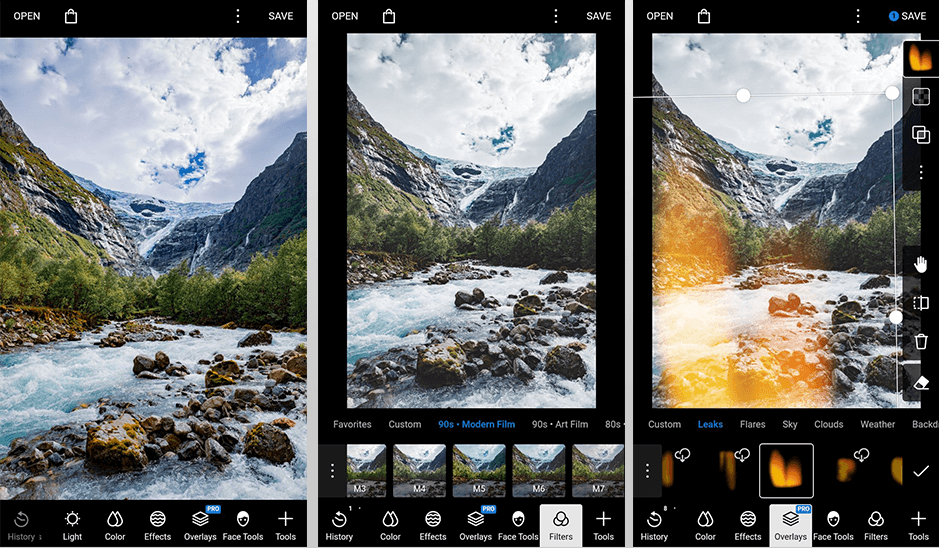
Polarr is an excellent alternative to Photoshop and Lightroom, but only in free version. It hasn't sense in the paid version because, although a little, it's inferior in functionality.
The Light tool consists of 8 sliders: dehaze, exposure, brightness, contrast, highlights, shadows, whites and blacks, with which I overestimated contrast, shadows, and a few other parameters, making the image more saturated and catchier. The app is inferior compared with the full-fledged Polarr. Since the accuracy of this tool has dropped significantly, besides, retouching itself is not done smoothly, the photo constantly twitches.
You can change the color temperature using the color tool, making the image more realistic. Correction is available with four sliders: temp, tint, vibrancy, and saturation. I twirled a couple of them. The tool works quite accurately, but the smoothness isn't enough to back the image twitches.
You can edit skin, face, eyes, nose, mouth, and teeth with the last of the provided Face tools. I had a lot of problems and questions with it. First, the tool, like almost everything, is poorly developed. So, the image constantly twitches, preventing you from properly setting up a particular indicator.
Secondly, this is the accuracy of the instrument itself, compared to the PC version, I wasn't satisfied, because if you take and set the same parameters on the selected sliders, the difference is visible, and it's enormous.
When working with tools such as Filters, Crop and Overlays, I did not notice the difference.
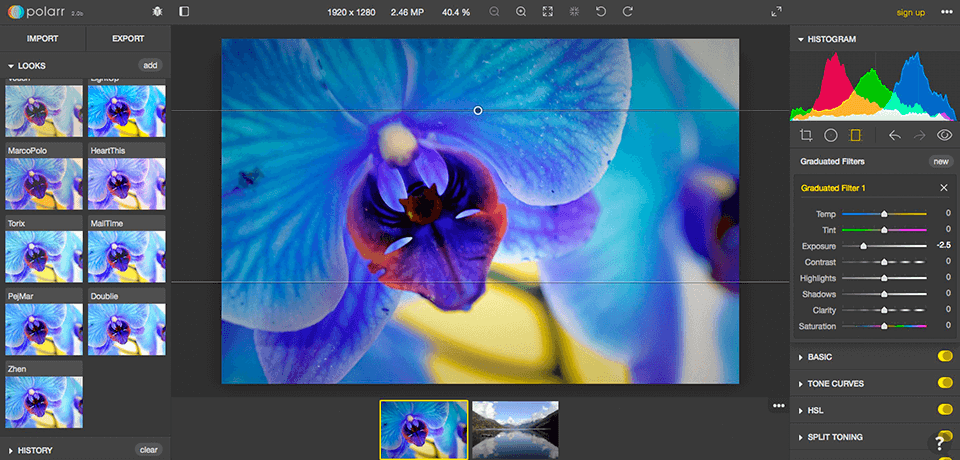
One of the biggest flaws in the Chromebook toolkit has always been content creation apps and utilities. If you need to edit video or audio, do photo retouching, you should better use a laptop with Windows or Mac instead of a Chromebook.
However, what if I tell you that Polarr allows you to work on any Chromebook, without an Internet connection, showing the same results as Lightroom offers?
Polarr is a program developed for Android, iOS, Windows, Mac, Linux and Chrome. There is even an online version that you can use via your web browser. This is a full-featured image editor and is one of the best Chrome apps that you will find.
You can install Polarr for free in the Chrome Web Store. All features are available, but some of the advanced photo retouching settings are locked. What you get for free is very useful and works great. If you like what you see and want more features, Polarr uses a subscription model and costs $24 a year for the Pro version, which is about $100 a year cheaper than Lightroom ($9.99 a month).
Polarr “Pro” has both a free and a paid version. It provides additional functions, such as working with masks, layers, text, and vector. These tools are part of the Pro for $19.99 in addition to batch export, resize, and rename. Don't rush to buy it after reading the review for Polarr.
It provides 30 days of free access with full functionality. You can see whether you are using the photo editor at full capacity after the expiration date.
So, you will understand whether you need to make the first payment. Remember that the functions of the “Pro” are not needed by everyone, so there are many users of the free version.