One of the endlessly amazing elements of photography is its ability to capture a moment of ordinary, everyday life that reveals the beauty of the world around us. Even the most seemingly mundane objects or settings can be made to look striking and emotive if photographed from a creative angle.
A photograph captures more than a moment itself, though. It captures the details within it, holding everything inside the frame in place forever. Looking ‘in’, we see the make-up of our surroundings more clearly. Macro photography takes this up a level and, literally, zooms us in even closer to the little things that surround us all the time.
As with any other photography type, there are some essential guidelines to follow so as to know what it is that you are doing. Once you have the foundation laid down, the world is your photographic oyster offering an infinite amount of possibilities with which you can experiment. Photography can get expensive, and quickly, but it can be worth it in the pursuit of obtaining the best results possible.
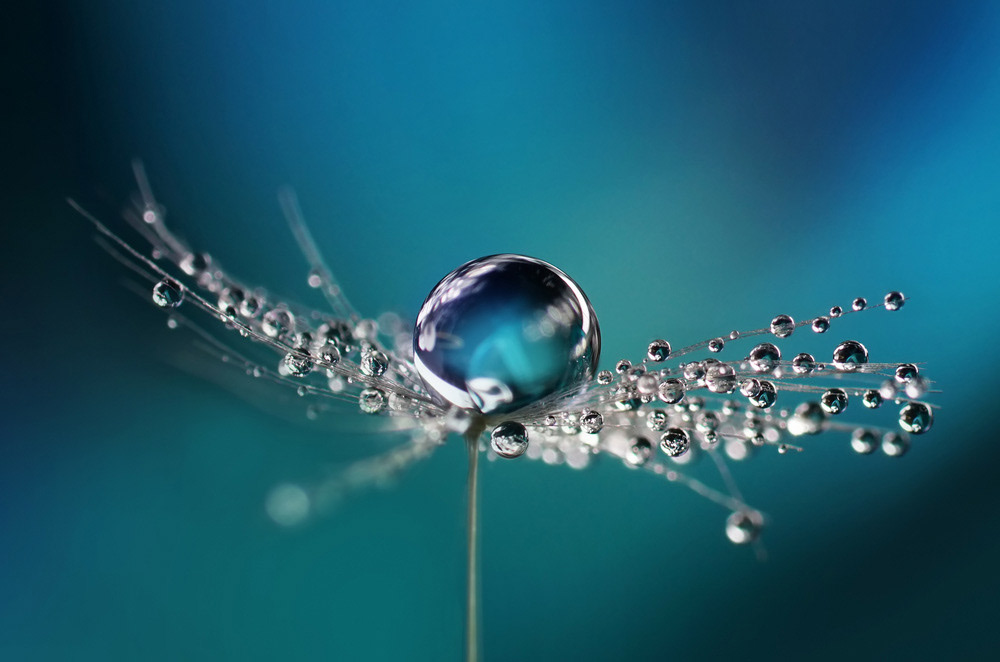
In its essence, macro photography is the specialized art of taking close-up pictures. It is the depicting of very small objects - or of an object detail - at such a close range that the resulting photo makes the subject seem life-sized, or indeed, larger than life. What makes it so incredible is not just the ability to get a clear picture of something tiny, it’s that it enables you to capture so much detail.
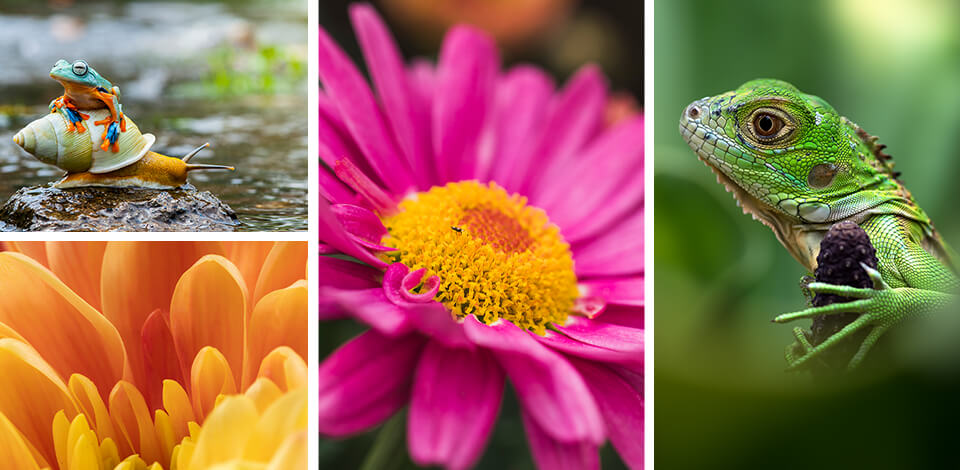
Macro photography deals with details that are often lost in ordinary pictures and sometimes are even virtually invisible until zoomed in on. Butterfly wings, flower petals, or even the texture of bricks and concrete are just a few of the things that can be used to illustrate how this technique can fully reveal the make-up of the smaller things around us.
The ability to see with clarity the intricacies of tiny elements that create the world around reveals to us the world from a whole new and fascinating perspective. It’s what makes macro photography such an interesting and enlightening form of picture taking.
Regarding pursuing photography further, have you ever considered turning your hobby into a business? High-quality, original images are always in demand. With the formation of an LLC (limited liability company), you can go into the professional photography business by yourself as a single member or with other photographers in a multi-member company.
Whether specializing in macro images for retail products, creating a marketplace for free commercial-use images, or becoming an event photographer-for-hire, creating an LLC could be the perfect way to make a living by doing what you like doing best.
From a technical standpoint, macro photography reproduces the object at a magnification ratio of 1:1 at minimum. This means that the camera sensor has made an image that is the same size in reality as its subject. So, were you to take a photograph of a single feather that you had found from a small bird and that feather was 1 inch in length, the feather would need to fill one inch of your camera's sensor.
It may seem strange at first that the photographing of ‘small things’ is called macro and not micro. Both terms do refer to photographing in a close-up of a subject so that it appears life-sized. However, micro means to ‘make smaller’, while macro means to ‘make bigger’.
This means that though the two words mean opposing things, in photography they are referring to the same thing: making a small object appear bigger. Microphotography is a much more specialized, niche field, involving microscopic equipment. Macro photography, though, is a straightforward process.
You might be wondering why it is called ‘macro’ and not ‘close-up.’ Although a macro photograph will sometimes be called a close-up, there is a very distinct element that differentiates these techniques. A close-up may well make smaller objects and subject matter appear large, but this result is obtained by zooming in especially close with the camera's regular lens. What separates a macro and a standard close-up image is the amount of magnification involved in the picture and the scope of detail that has been captured by the image.
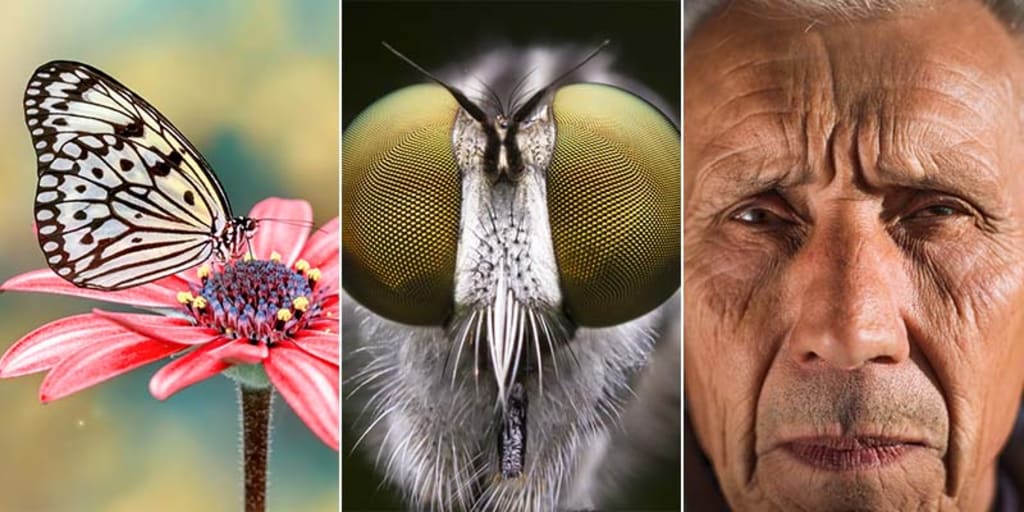
A close-up with a regular camera will make things appear bigger, closer, but the same shot with a macro lens will have hugely enhanced magnification, revealing intricacies that were unseen before: think of hairs on the legs of a bee, or the powdery make-up of a butterfly wing.

The tools available for the post-processing of macro photography are ones we are all familiar with. Photographers often find themselves utilizing Adobe Photoshop or Lightroom to further enhance and edit their work. When retouching, these adjustments require precision. This is why it is common for photographers to use a drawing tablet for Photoshop.
If for some reason you didn’t manage to process your photo by yourself, you can always contact our professional service. We provide color correction services for beginners and experienced photographers alike. You will get high-quality results in no time thanks to a short turnaround time. Our team will edit shadows, tweak colors, improve white balance and adjust other parameters to give your photos a professional look. FixThePhoto will take into account all your requirements to process your pictures in the shortest time possible.
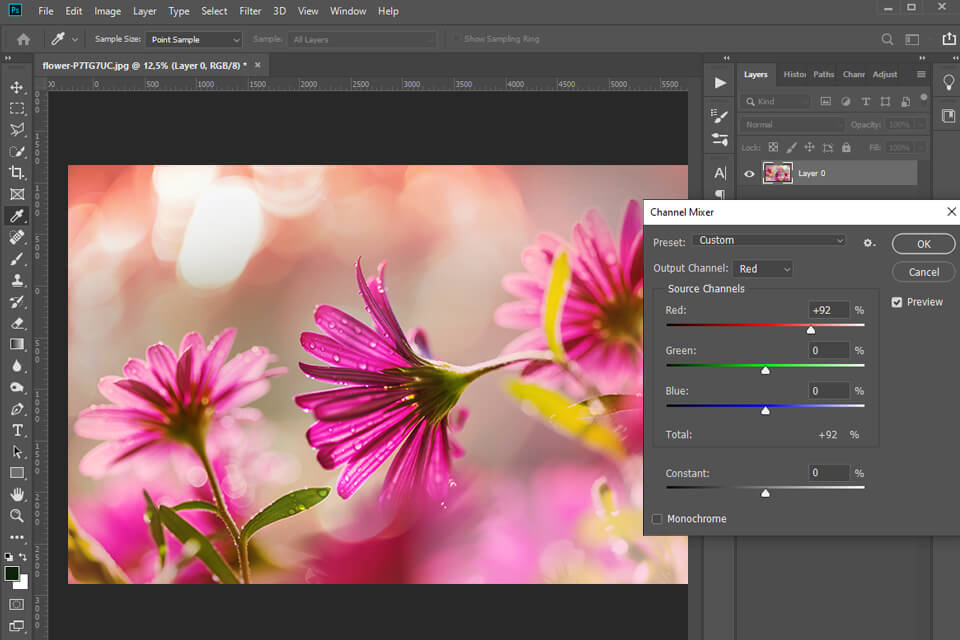
With macro photography, you will find yourself utilizing a basic post-processing workflow to adjust the image as per your or your client’s preference. Examples of post-processing in Photoshop or Lightroom include implementing contrast, adjusting the colors of the object, utilizing filters, blending, and cropping images.
Macro photography can be utilized for pretty much anything and everything, depending on how creative you wish to be. The possibilities are endless. For specific themes though, some of the most popular topics for macro use are:

If you have a digital camera, you will most likely be able to begin experimenting with macro photography ideas already. The majority of digital cameras have a macro function built-in as standard. If you currently do not have a digital camera but are on a budget and wish to get into macro photography, most new no-fuss cameras will come with a ‘macro mode’ setting available.
Basic digital cameras are more affordable now than ever. This built-in macro option will allow for basic, standard macro photographs, as well as close-ups. For those who are hesitant or just wish to experiment to get a feel for it, standard digital cameras are the best way to discover if taking macro images is something you would like to pursue more fully. If you are looking for a camera, I recommend you pay attention to the Panasonic Lumix ZS70. It is fitted with a 20.3MP high-sensitivity MOS sensor that allows it to capture photos with an impressive level of detail. The camera is powered by the Venus Engine, which enables you to take professional shots with low noise levels even when working in poorly-lit rooms.
Digital single-lens reflex cameras are more commonly and simply referred to as DSLR cameras. If you want to take macro photographs of greater quality than those of a point-and-shoot, as well as have more shooting options available to you, a DSLR camera is essential.
DSLR cameras provide a wider range of macro shooting possibilities. They support different lenses and also have a full-frame or frame cropping sensor. This will provide enhanced focal zoom-in capabilities. If you are looking for the best camera for macro photography, I believe that the Canon EOS Rebel T7 will be a perfect option since it has great value for the money. Featuring an impressive 24.1MP CMOS sensor, speedy AF, and an integrated wireless module, it has an advanced set of features and is extremely easy to use. With it, you can capture amazing macro shots that will look great in your portfolio.
Having a DSLR camera opens up other possibilities, like optional macro lenses for your camera. This includes the purchasing of a dedicated lens. These are designed and built especially for the purpose of excelling at macro image capture.
If you wish to obtain a dedicated lens for your camera, they come in three focal range sizes. The price of each increases from short being the cheapest to long being the most expensive.
The three focal ranges are:
Macro lenses can get expensive, which makes them unavailable for those who are on a budget. However, there is a cheaper option available - though image quality won’t be as high: extension tubes. These are hollow spacer cylinders to attach to your camera mount, adding to the length of your camera's lens. Spacers don’t contain any optics at all, just glass.
The purpose of spacers is simply to change your camera's focal distance and, therefore, your proximity to the subject you wish to take photos of. A disadvantage of this method is that the spacer tubes reduce the amount of light, so adjustments to lighting will be required during post-processing.

One of the first things you are likely to discover when attempting to take macro shots is that you need a very steady hand. The extreme zoom-in of macro won’t forgive a single tremor, and you may find yourself taking multiple shots in order to get one that isn’t blurred to some degree or other.
A tripod will fix this for you and make your macro shooting easier and more enjoyable. It’s particularly useful for keeping your camera steady when shooting from larger distances. Your tripod will be a good investment as you can use it for other photographic projects aside from your macro shots. I recommend you take a closer look at the Amazon Basics 50-inch. Since you can tilt it at any angle, you can use it to take stunning panoramic shots with 360-degree swiveling. To ensure that your camera is securely fixed in place, use special knobs.
The macro setting on a point-and-shoot or the dedicated macro lens attached to a DSLR will take care of the bulk of the macro duties by default. However, there is one particular setting to which you need to pay attention when taking your photographs, and that is the light setting.
With macro photography, there can be a very fine line between an image being too dark or too bright. Your camera will host a variety of shooting settings. Pay attention to the configurations of these three settings:
When taking macro shots, you might notice that it’s impossible to use AF since it fails to select a focal point. To focus manually, come closer to the subject and experiment with different settings.
After selecting the best camera mode for your needs and adjusting the settings, you can try to slightly rock your body to focus on different parts of the frame. Take a photo when you see your subject in focus. If it’s impossible to focus on the whole subject, it might be better to take several photos with a focus on various parts of the subject.
Thanks to these actions, you can spend less time editing your macro images and get pro-level results. You can apply them in a few clicks to turn your bleak pictures into eye-catching photos that you can upload to your portfolio. In this collection, you will find Photoshop effects created by professional designers. These actions meet all modern requirements and will help you enhance your pictures in no time.

Roy Emmerson is a Media Relations Coordinator at TechTimes.com and content-strategist of Market Business News. He started several companies and failed, and then learned from his mistakes to have several successful and very profitable projects. Roy is focused on making a difference with the content he develops and curates.


