If you want to design objects that mask other objects to ensure only parts of them are visible, you need to learn how to make a clipping mask in Illustrator. This feature is commonly employed by graphic designers for achieving different results like clipping a portfolio image to a creative poster.
You should start by downloading Adobe Illustrator so that you have all the necessary tools at your disposal. There’s also the option of using the Adobe Illustrator free trial but be sure you’re downloading it from the official website and not some third-party download link that can infect your system with a virus.
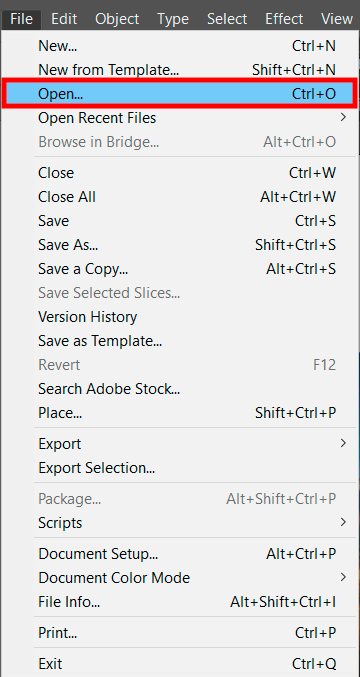
Launch Adobe Illustrator and pick the needed file. To do so, go to the File menu section and click Open > Place.
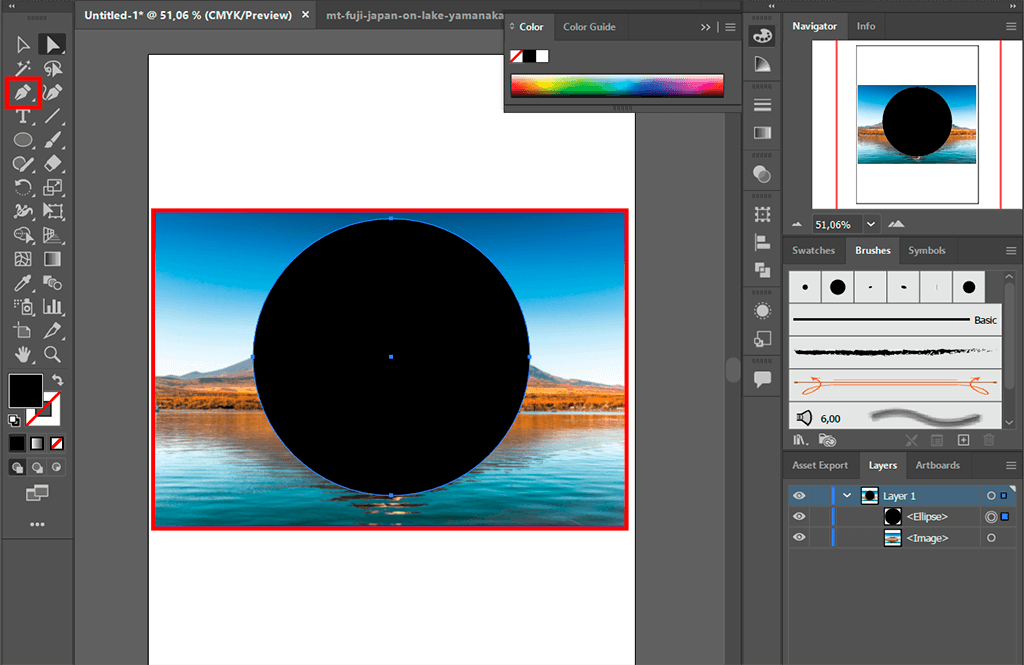
The next stage of this Adobe Illustrator tutorial involves you making the object that you’ll use as the clipping mask. You have to select the Pen tool and draw the desired shape or make an enclosed path.
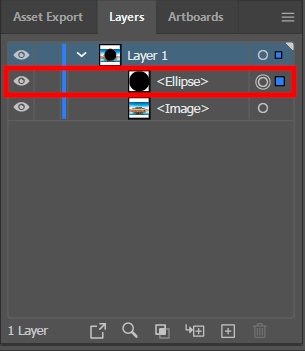
The clipping mask needs to have an enclosed shape, just like the circle featured in this clipping mask Illustrator tutorial. The outline color doesn’t make any difference since it will eventually automatically be changed to None.
It’s also vital to remember that the object that will serve as a mask should be located at the top of the stacking order, which you can tinker with by going to the Layers panel.
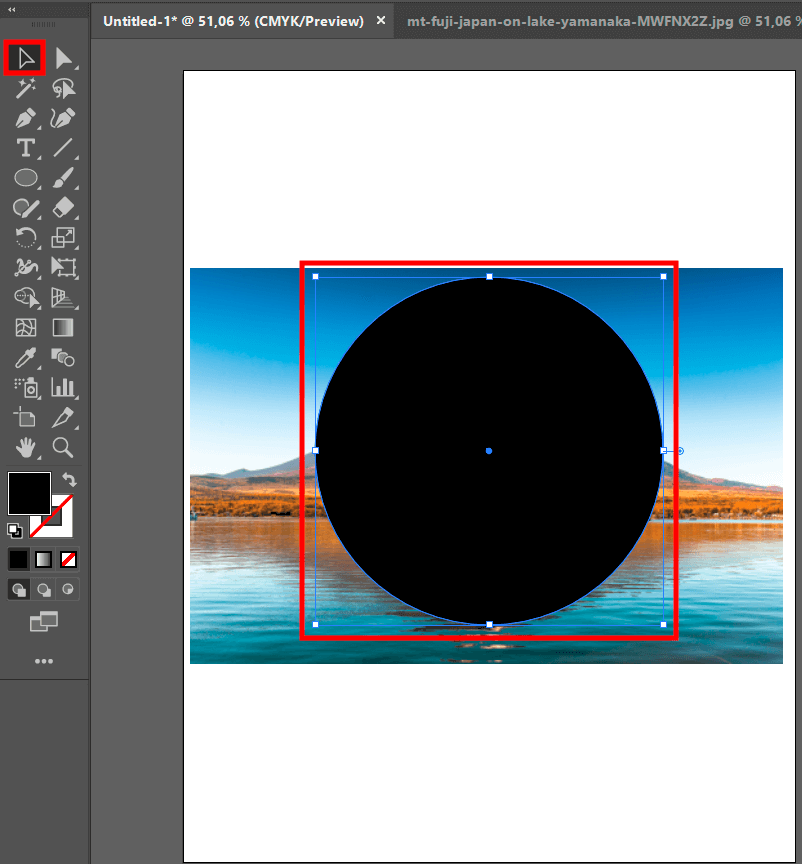
Use the Selection tool to select the placed image and shape.
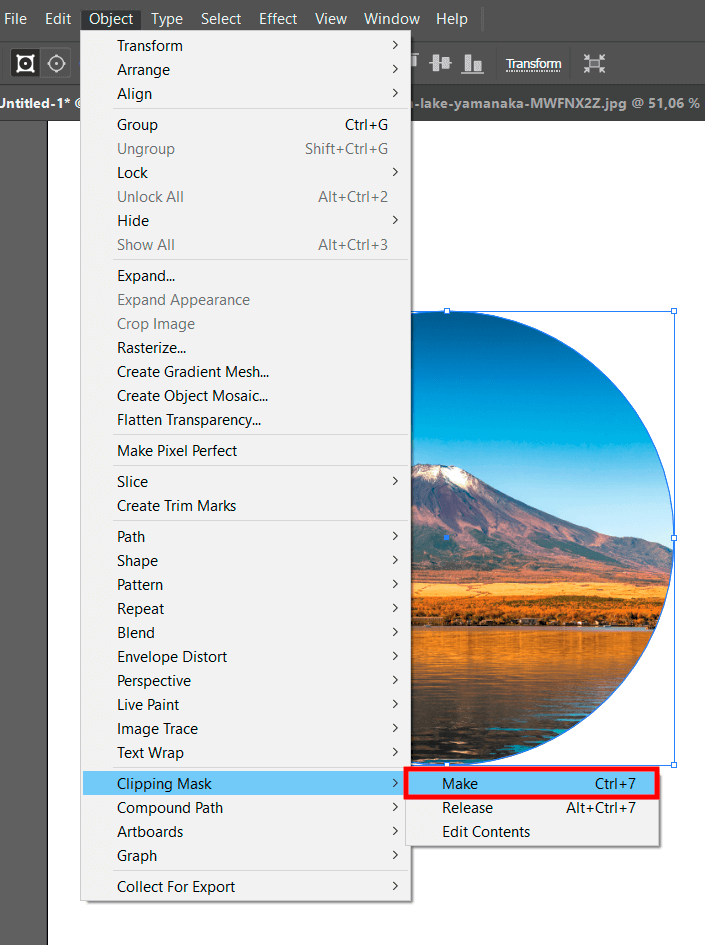
Next, pick Object > Clipping Mask > Make. Alternatively, you can use the Ctrl + 7 (on Windows) or Cmd + 7 (on Mac) hotkey combination to achieve the same result.
That’s it, you’ve learned how to do clipping mask in Illustrator. All masked objects are grouped by default but you can employ the Direct Selection feature to reposition or mask objects separately.
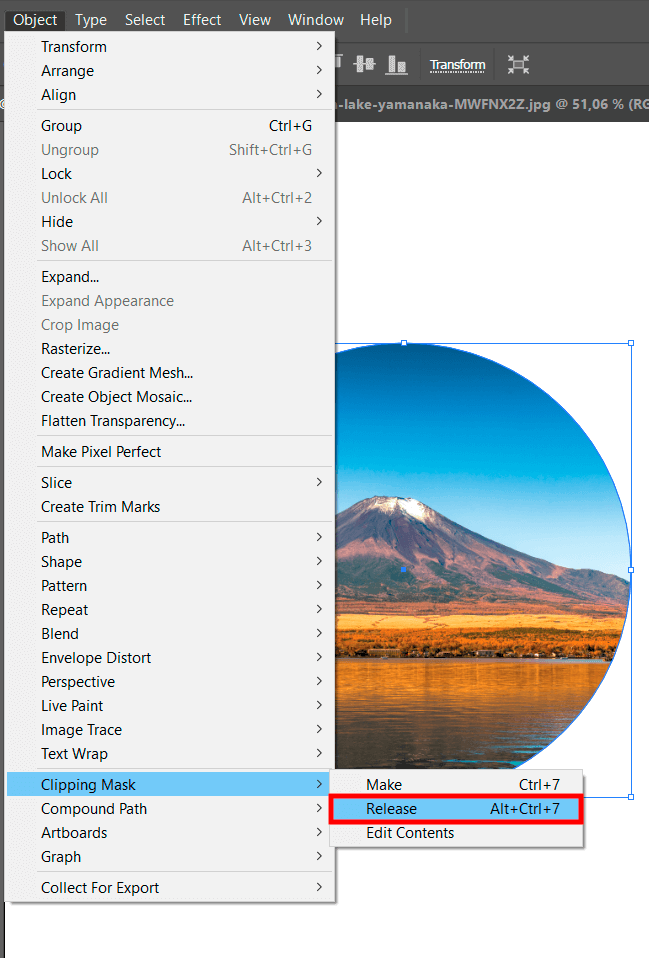
Should you need to turn off the clipping mask, you simply have to choose Object > Clipping Mask > Release. You can also always take advantage of other features provided by this graphic design software to enhance your graphic design project further once you’ve achieved your initial goal of creating the clipping mask.
Now that you know how to create a clipping mask in Illustrator, there’s no need for you to look at various Adobe Illustrator alternatives. Adobe also allows you to create a mask in Photoshop, but if you pit Illustrator vs Photoshop in this aspect, the former offers a significantly more straightforward process.
If you want to add beautiful writing to your creative projects, make use of the free fonts developed by the FixThePhoto designer team. In just a few clicks, you’ll receive a creative, unconventional text style that will perfectly match your design.
A clipping mask consists of an object the shape of which covers other objects/art to make only the parts within the mask visible, essentially clipping the art to the mask’s shape.
Clipping masks can be extremely useful for a broad range of graphic design areas including posters, ads, gift cards, blog banners, etc.
The creation of a clipping mask requires at least 2 layers, one of which is used for the mask itself while the other has the artwork that needs to be masked. The type of the layer doesn’t matter so feel free to use text, shape, and even group layers.
Yes, the software allows you to make multiple clipping masks for one illustration as long as you create separate layers for them and clip them appropriately.