The Brenizer method involves shooting multiple shots on the open aperture at close range. This method also allows for going beyond the fixed sizes of a frame.
Pictures are stitched together to obtain an incredibly beautiful panorama, which cannot be achieved with any lens. In this article, I have collected the most effective tips for applying this method in different types of photography.

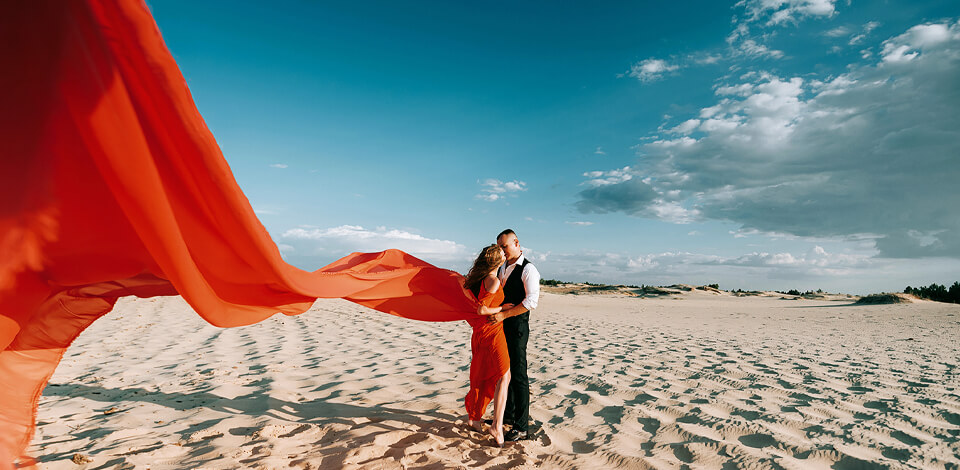
The Brenizer effect was invented by photographer Ryan Brenizer, who used it mostly for portrait shots. However, this is a great way to make any of your subjects stand out from the background, but it looks best with complementary colors rules applied.
What’s more, at the stitching stage, it will be easier for you to work with a simple background and an object that contrasts with it.

Keep a close eye on the movements in your frame as you risk duplicating moving people or objects. Your model must also be absolutely still, because even the slightest movement can greatly distort the frame, making it weird and displeasing.
When shooting something moving, such as water, in a panorama, it is better to opt for a slow shutter speed.

The Brenizer technique involves preliminary visualization of the frame and determination of its angles. The inventor of the method compares the portraits stitched together with jigsaw puzzle assembling.
By not including all the necessary elements for a panoramic image, you run the risk of not stitching all the pictures together automatically using photo editing software for PC.


Such photos are rarely shot in the studio, but if so, then it is necessary to provide COB lighting so that all frames have the same light-and-dark pattern.
If you decide to take such photos at sunrise or sunset, then keep in mind that you need to hurry. I suggest trying the Brenizer method photography on a cloudy day first to reduce lighting problems.
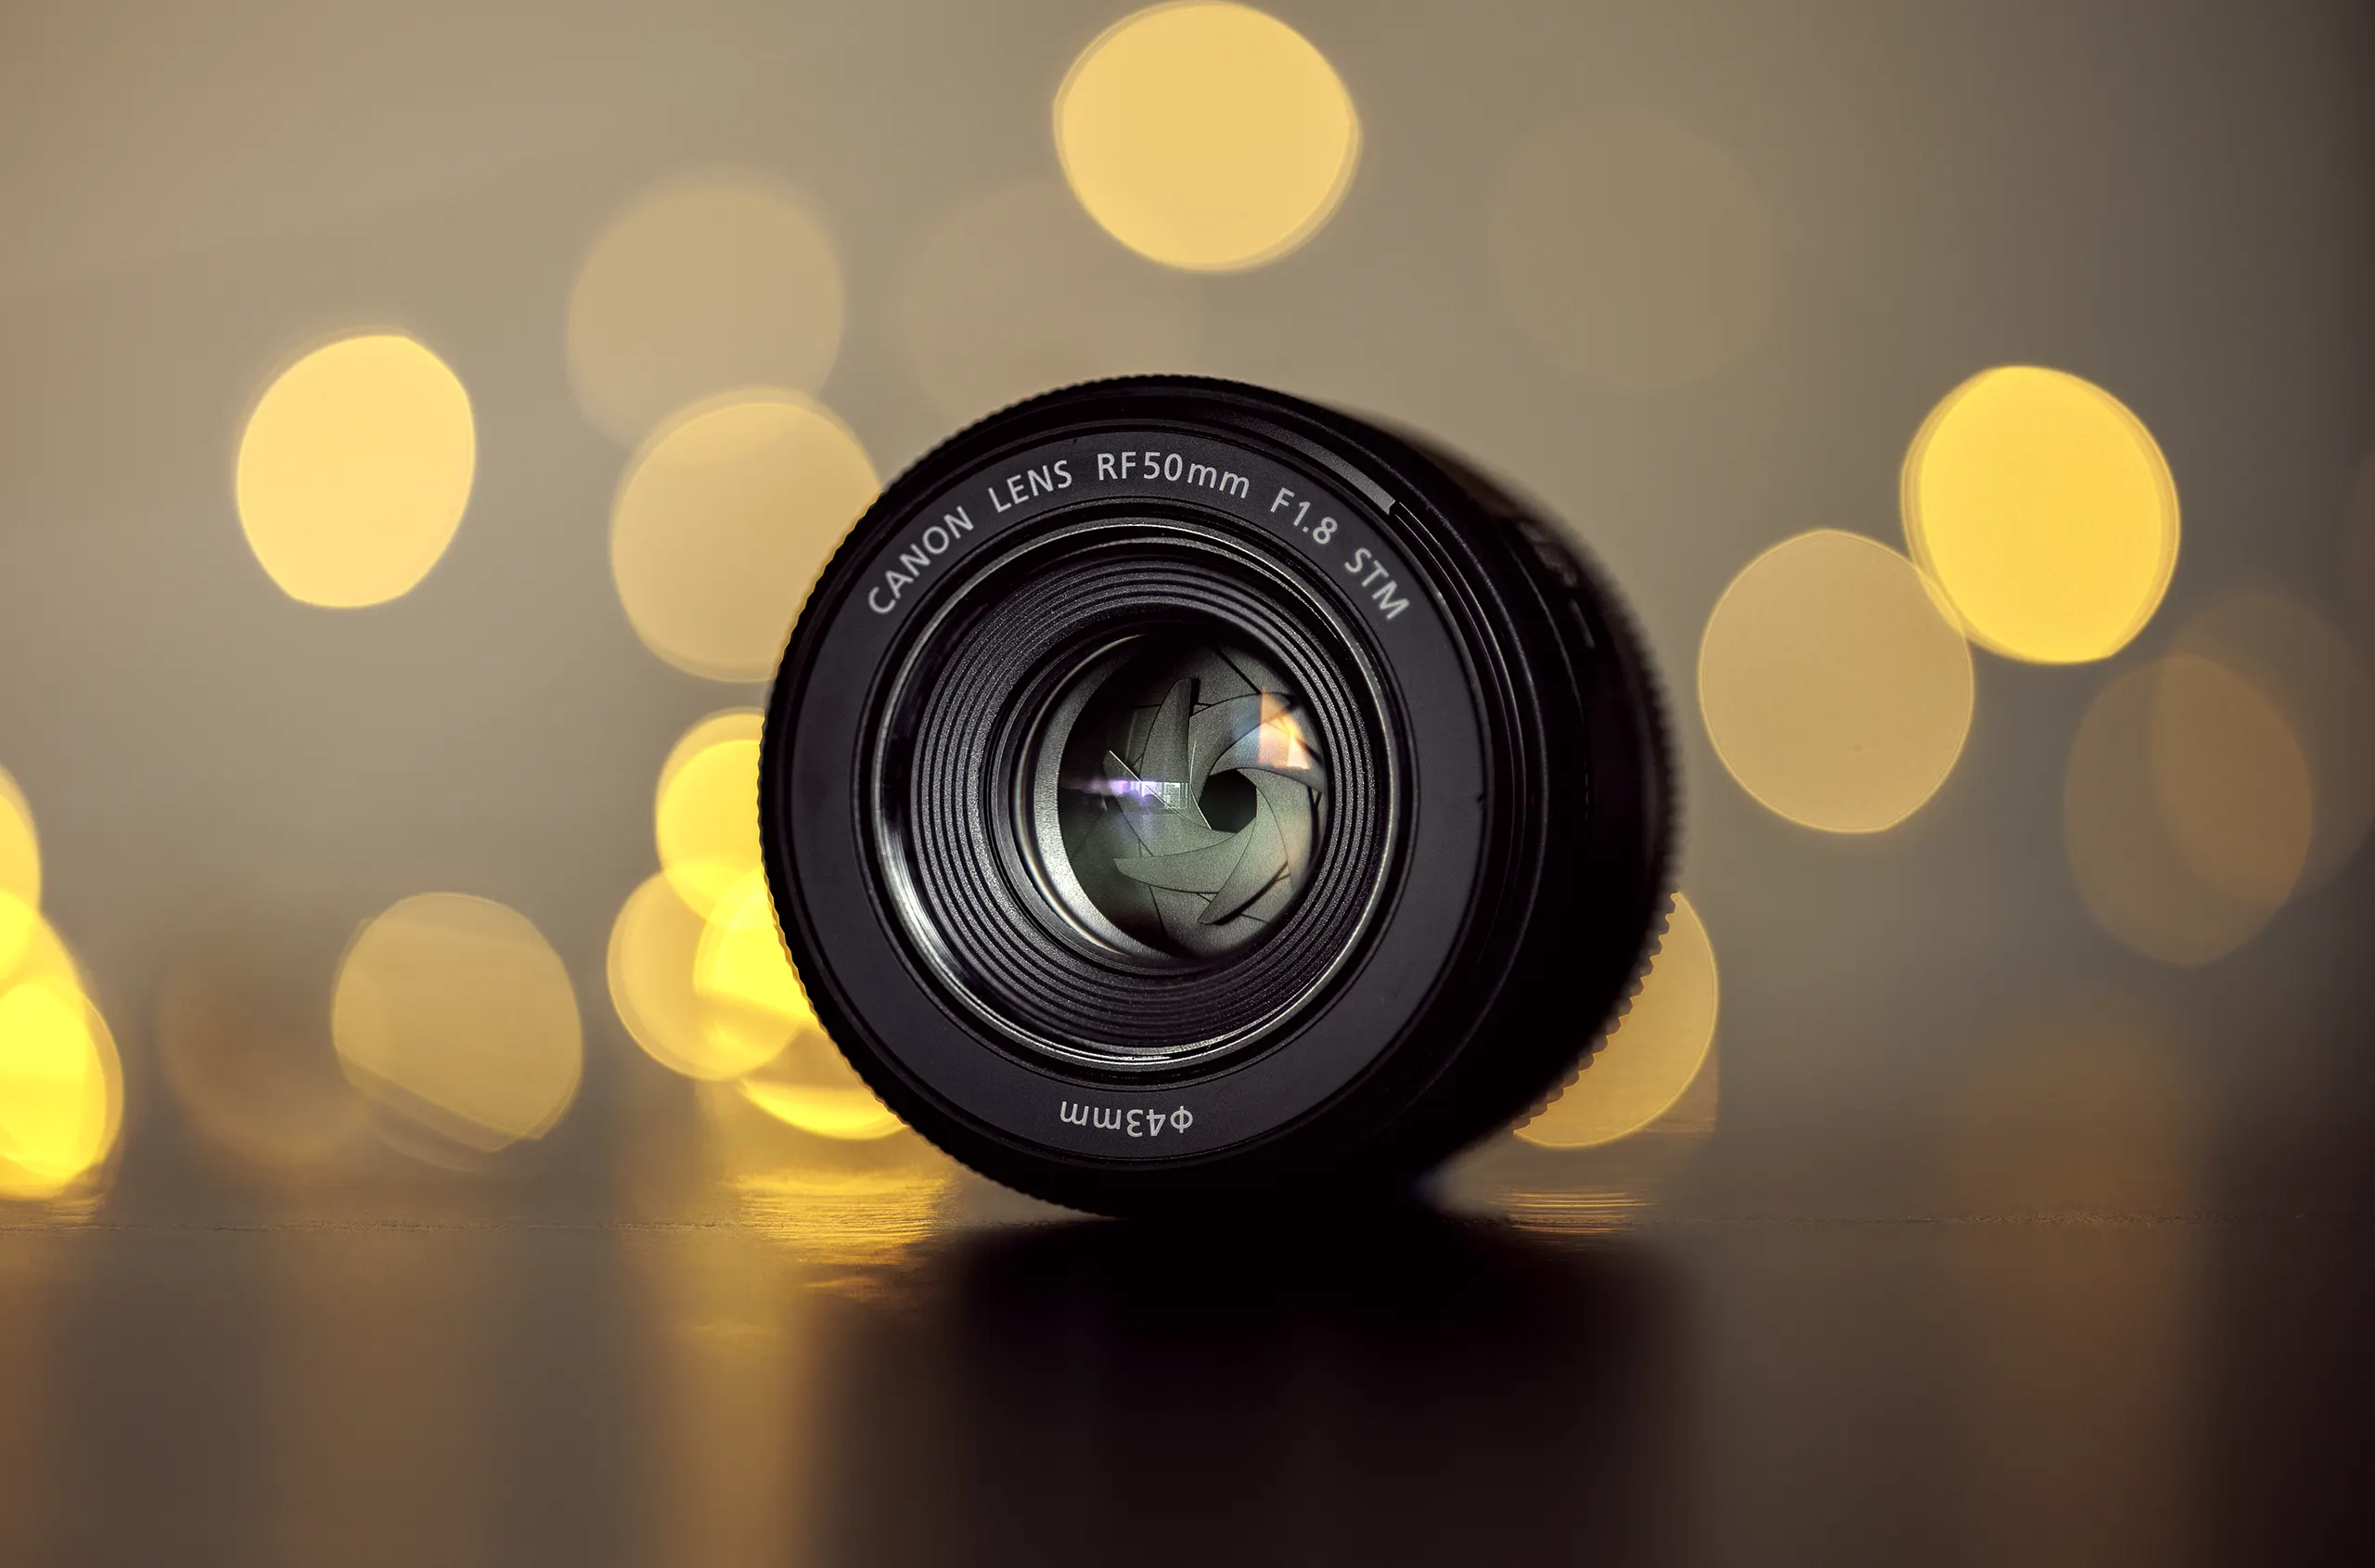
To avoid vignetting and distortion, do not use a wide angle. The Brenizer technique gives another option on how to use 50 mm lens since the Brenizer Method in essence is very similar to the key features of a shot taken with a 50mm f/0.8 lens. Also, it resembles the combination of a large format camera with a fast lens but with softer bokeh.
So don’t waste your time looking for a unique lens to match, since Canon EF 50mm f/1.8 STM Lens or other fast aperture lenses in combination with stitching method will suffice.
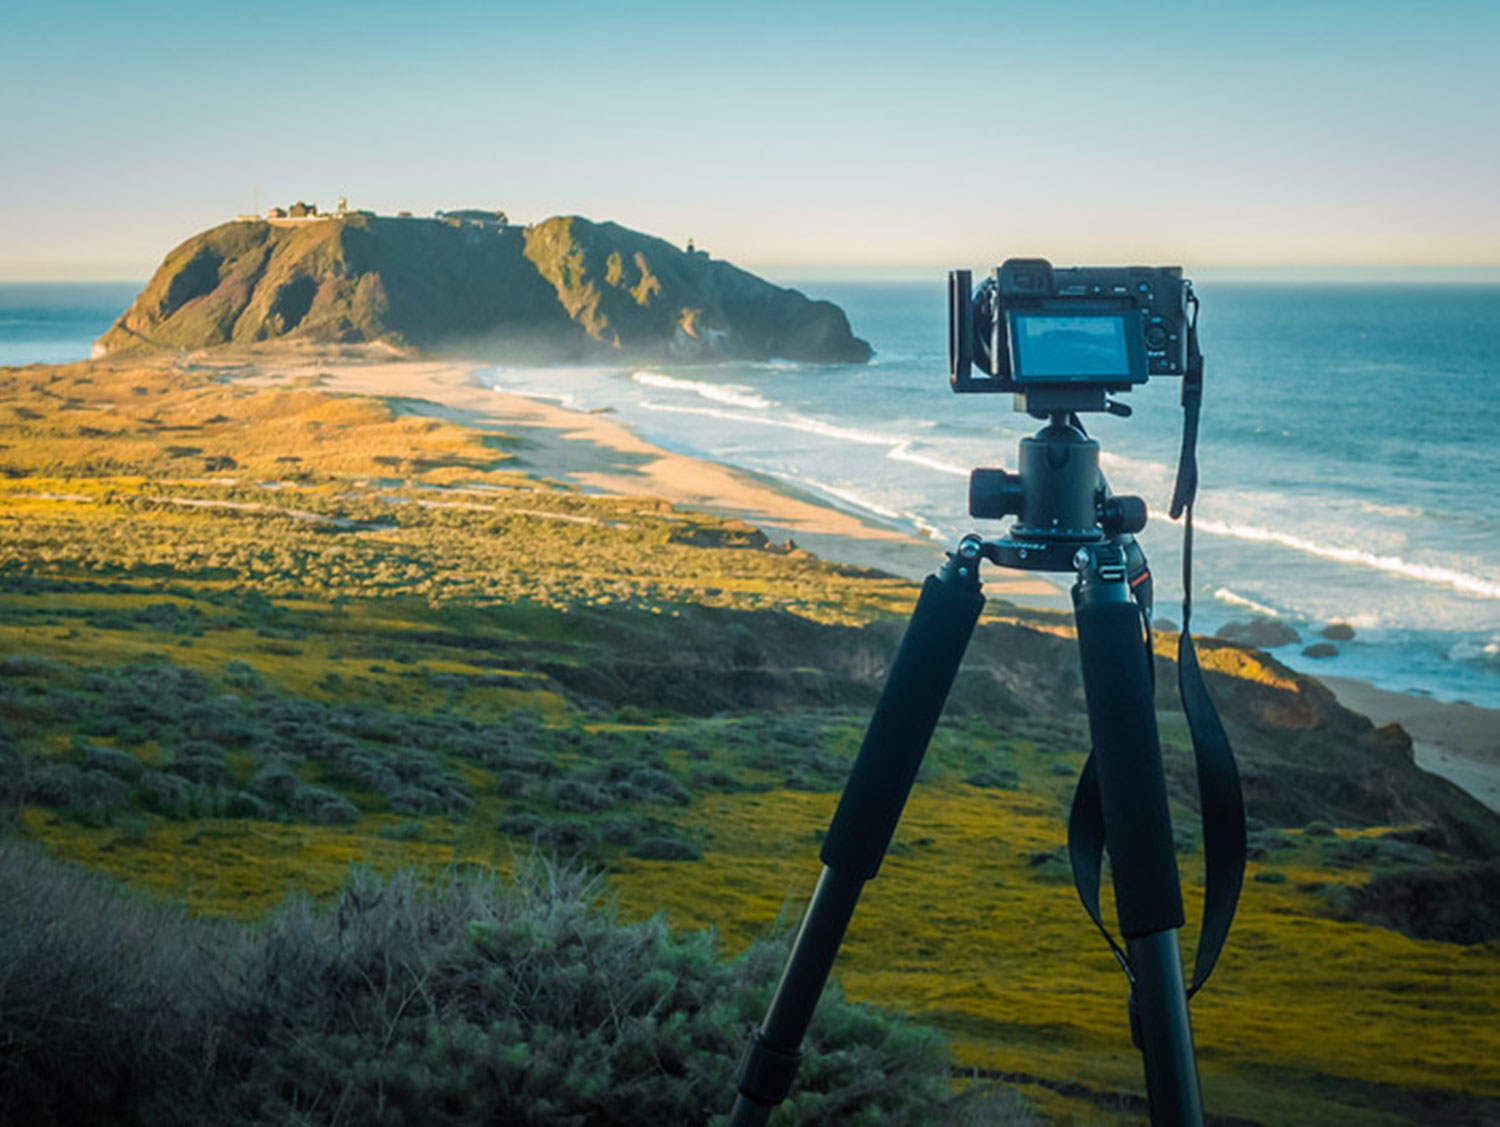
To get a proper Brenizer effect picture further your photos must be taken evenly. I recommend a tripod for DSLR to avoid trembling hands and crooked horizons. However, if you are an experienced photographer, then just be as calm and still as possible when taking a photo for a future panorama.
When you find your angles in photography it’s time to set up your camera. The wider you shoot the better, as this is what affects how breathtaking your shot will be.
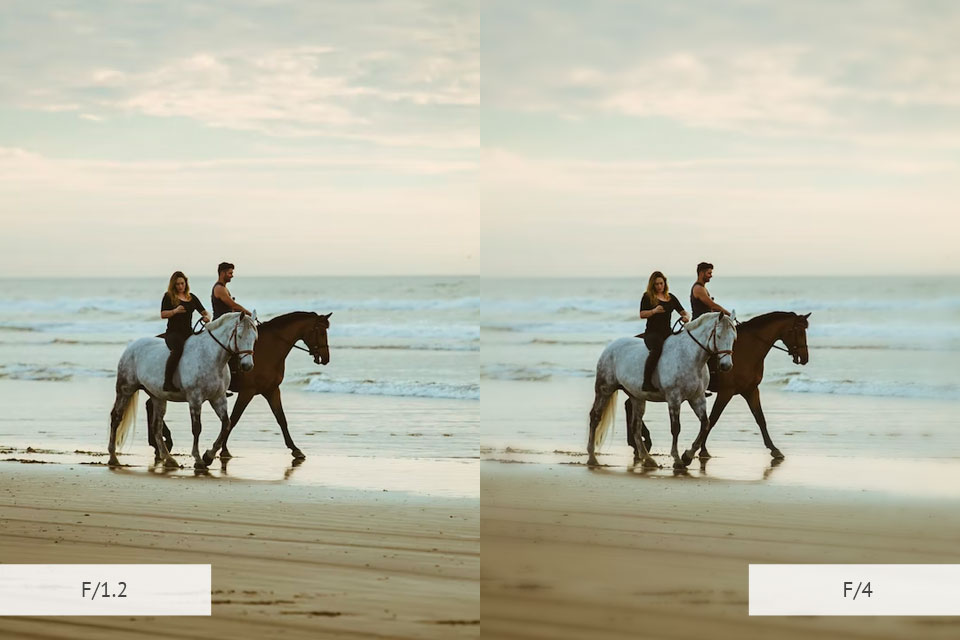
Take a closer look at f/1.2, f/4, or even f/5.6 values. Focusing on your subject, switch to manual mode on the camera. Don’t change anything until you’ve finished shooting your series of shots.

Also, don’t forget the importance of proper ISO values and shutter speeds to ensure well-exposed photography composition created with Brenizer method applied.
When shooting in good light, I prefer the base ISO and adjust the shutter speed to get a good exposure. In low-light conditions, I tend to stick with ISO 400 or higher for brighter exposures and faster shutter speeds.
If you shoot with a DSLR camera, then you probably know about its advantage in producing photos in both RAW and JPEG format.
The RAW format is what you should opt for since it offers more freedom while image improving. This is because RAW contains tonal and color data that you can work with to achieve more consistent photo editing with a wider dynamic range.
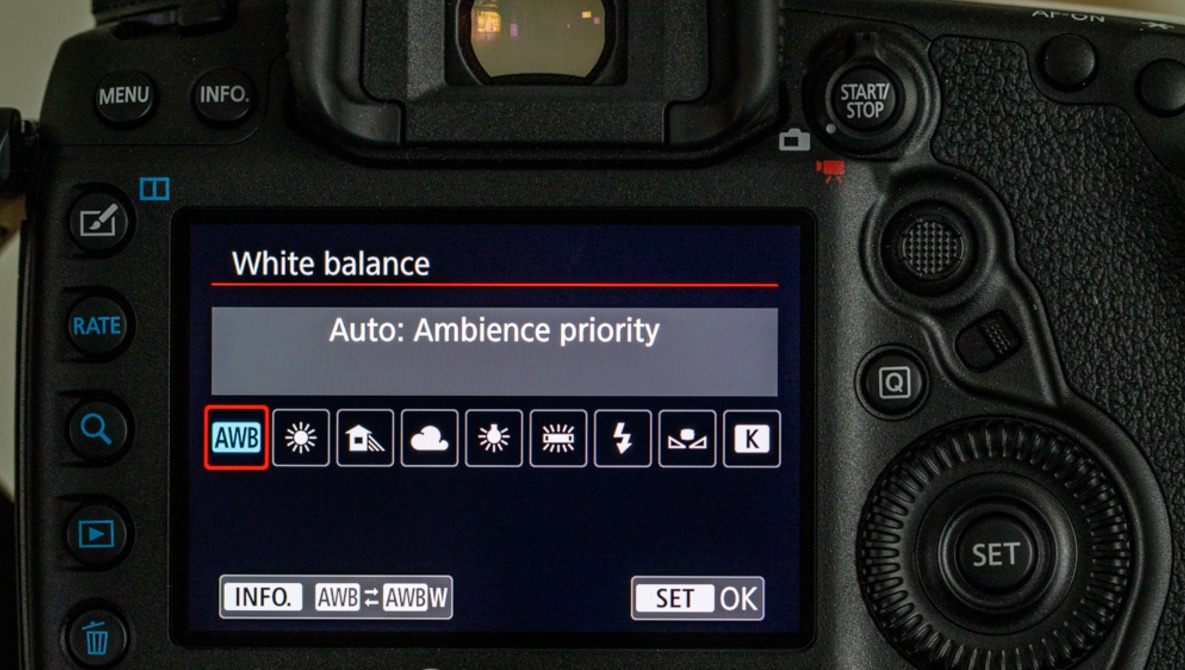
Any other option will be ok, but not automatic. Of course, you want the white balance to always be the same during a photo shoot, but by choosing an auto, you risk getting a sudden change right during your series of shots.
I prefer one of the most popular photography trends – manual Kelvin temperature setting, maybe you will like it too. Alternatively, you can opt for the white balance preset.

The Brenizer method of photography is based on shooting a wide-angle portrait with a shallow depth of field. When you first try this technique, you can take 20 to 50 photos. As you become more proficient with this effect, you will need to take fewer and fewer shots.
Everything is simple here – the more photos you stitch, the larger the size of the final image will be when printed. Also, try different options for placing the subject against the background, so that you have plenty to choose from for your creative photography.
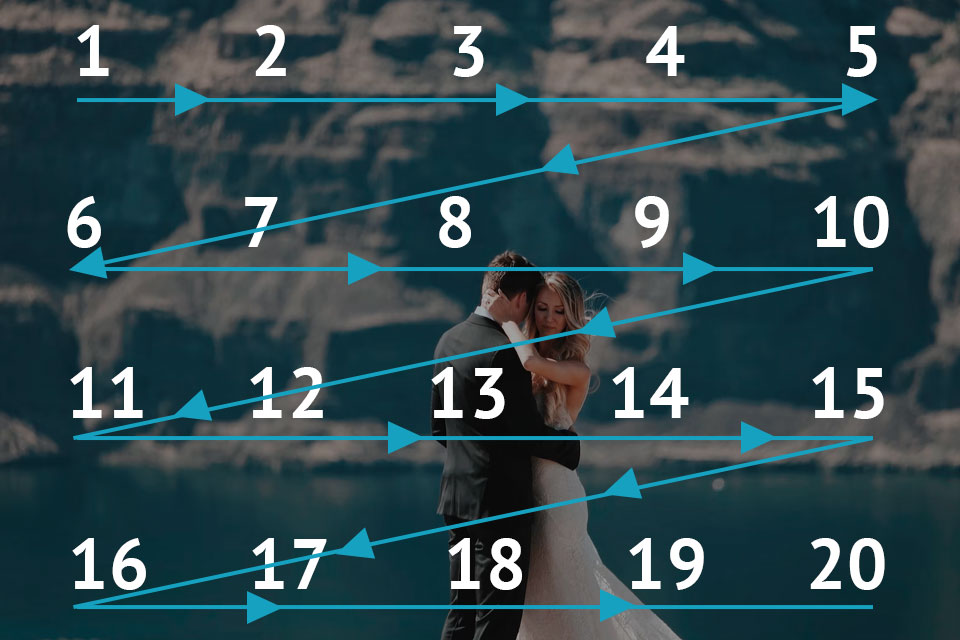
To make it easier to remember, I compare shooting for Brenizer method photo to reading a book. Start from the upper left corner and move gradually to the lower right. This will help you not to get confused and not to shoot random pieces.

You should overlap each frame with the next by about a third. This will help your software determine the location of each photo during stitching. Move the camera to the side smoothly, keeping the image of the previous frame in mind.
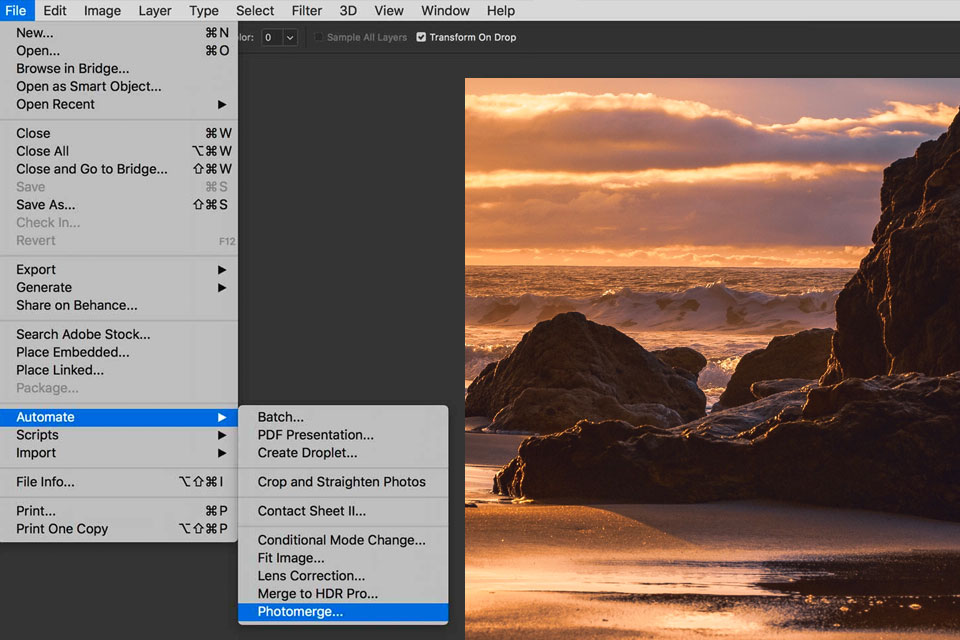
You can get your photos or portraits stitched together without long manual manipulations. If you use Photoshop or Lightroom just perform a simple File>Automate>Photomerge command.
When the Photomerge window appears in front of you, find the Blend Images Together option, check the box there, and also select the Auto Layout parameter. Then you should upload your photos, then confirm your choice by clicking OK. Merging can take a couple of minutes or even half an hour – it all depends on how many pictures you have and what size they are.
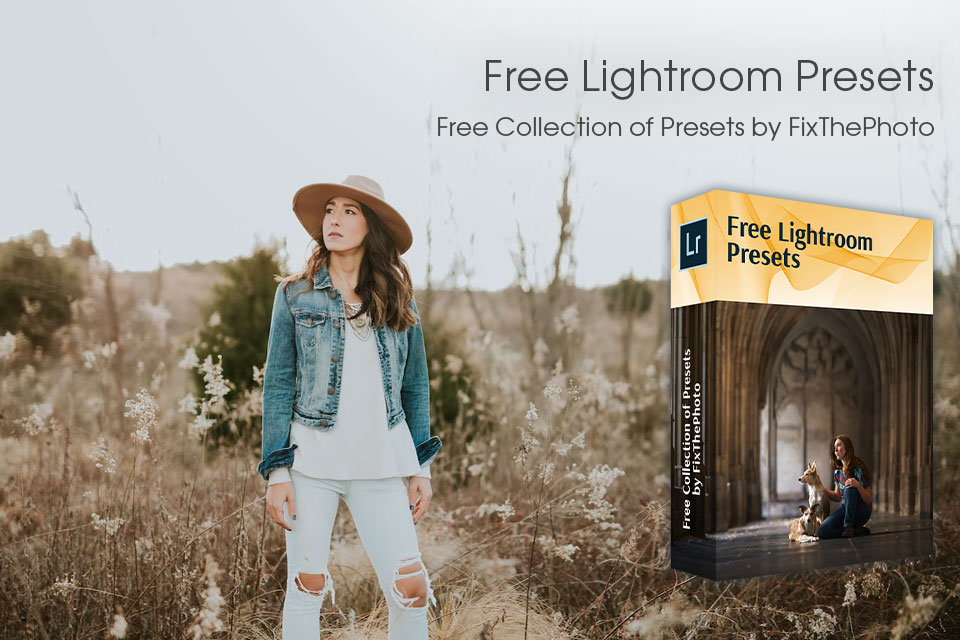
To make your Brenizer effect photos really stunning, use our presets. You can choose the suitable preset for your photography type, whether it’s a landscape or a wedding portrait.
Here you can find a rich collection of aesthetic presets to increase brightness and sharpness, create a matte surface, as well as to lighten photos, and give them the proper temperature.


