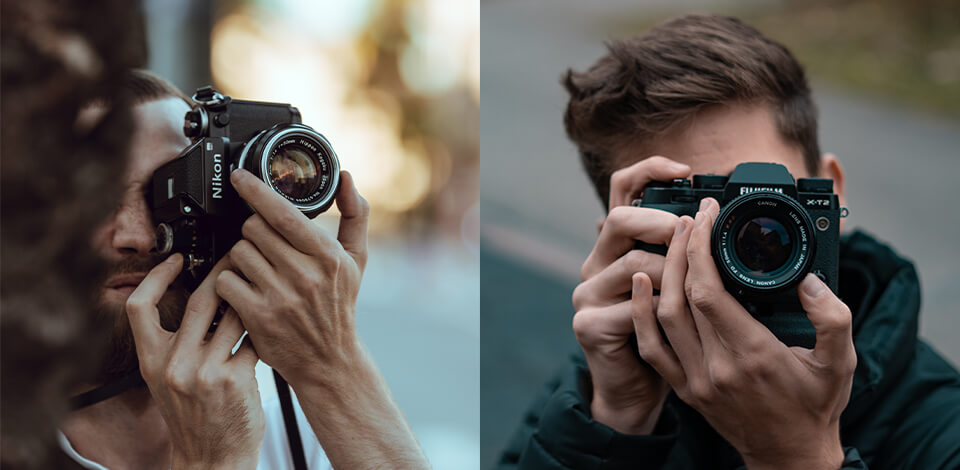
Every photographer willing to take high-quality pictures has to be aware of the overall camera handling standards. All photography tips for beginners given below will help prevent trembling and blurring, and give an opportunity to reduce the shutter speed, which appears in low lighting.

If your gear is heavy, and you have to take pictures without a DSLR tripod, it is vital to choose a favorable position to prevent handshaking at the moment of shooting. The main idea is holding the camera with both hands.
Hands position. Place your forefinger a little bit higher than the shutter release, put your other three fingers around the front of your DSLR camera. Place your right thumb onto the back of the camera.
At present, the majority of camera brands have a kind of grip and even conditions for where fingers should go so that this feels normal. Gras the camera strongly with your right hand, but avoid grasping it tightly due to camera shaking.
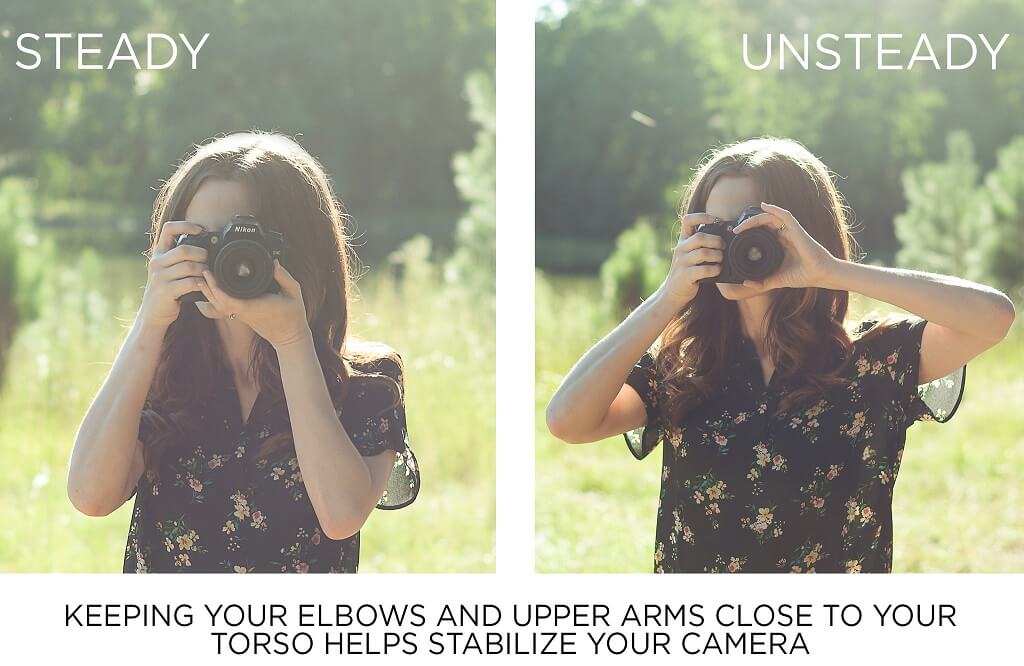
The position of your left hand is to decrease the camera shaking in terms of its weight. You had better put it above the shutter to uphold it below.
Furthermore, consider preventing your fingers at the lens which can make you employ additional apps to remove unwanted objects from photo.
Shooting with viewfinder. If you’re taking photos applying the viewfinder to line up your photo, you’ll position your camera nice and close into your body which will give you additional stability but if you’re employing the LCD, make sure you don’t handle your camera too far from you.
Place your elbows to the sides and lean the camera out a little from your face (approximately 12inch). As an option, employ the viewfinder if it’s not too small or it takes effort to look through (a problem on many point-and-shoot cameras these days).
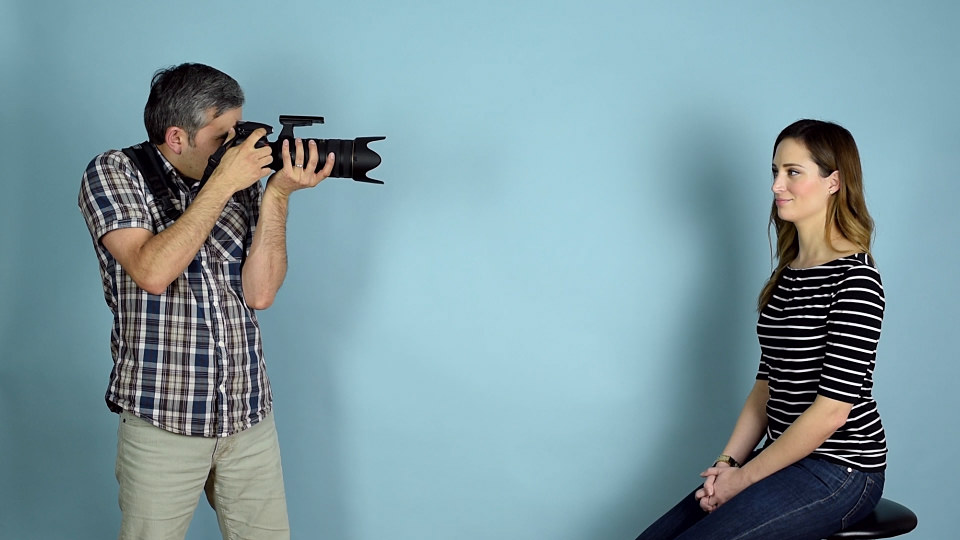
Legs position. As regards the legs’ position, place them correspondently to your shoulders. It is even better if you make a little step with one of your legs – by doing so, you will ensure maximum stability of your body.
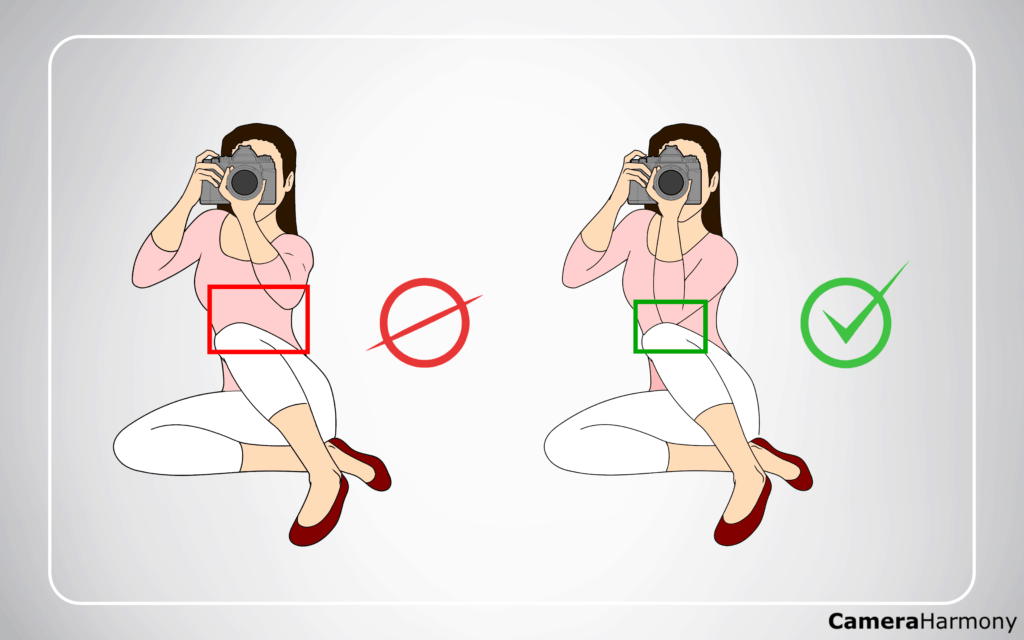
The photographers frequently have to shoot from various perspectives, so they have to know a proper way to hold a camera and choose the right corner. If you shoot sitting or standing, it gives you more of a stability than standing, and you will less frequently wonder why my pictures are blurry.
Nevertheless, it is vital to know how to hold the camera in various positions correctly.
Shooting while standing. The right legs position is fundamental here. You should not stretch your legs, then bend on the knees, and thus you will have the space for your elbows. So, by laying, you make a solid core that you can put your camera on top of.
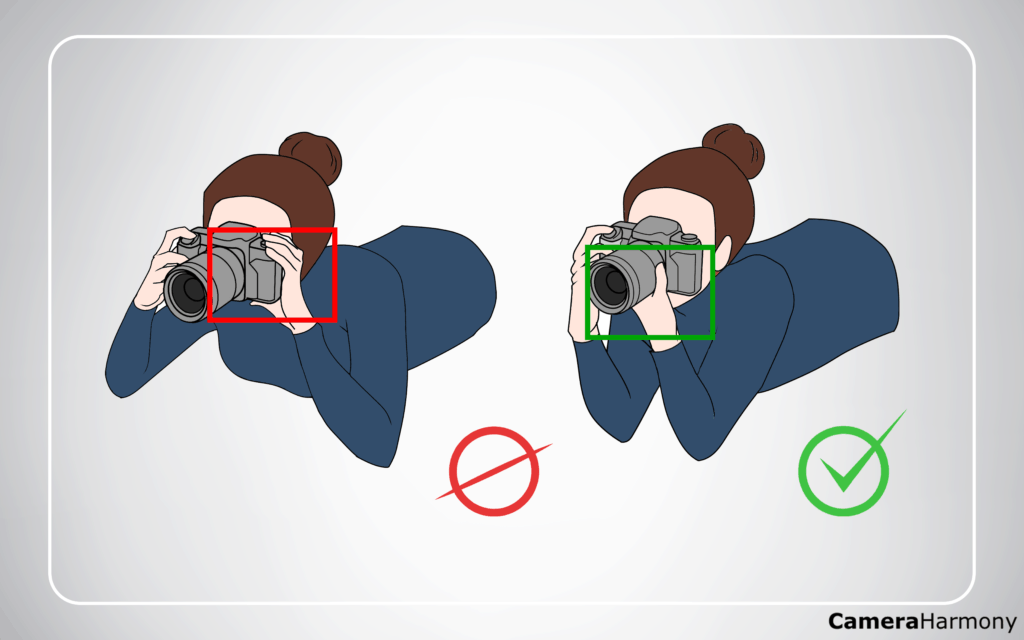
Shooting while laying. When you shoot while laying, legs position does not matter, as your weigh is given to the front part of your body. By doing so, you should hold the hands as you do this shooting while standing, holding the camera with your right hand and holding the lens with your left hand at the bottom.
At the same time, make sure your hands are in parallel to one another, do not place them too widely.
Famous photographers concluded their own hacks and tricks of how to hold a camera in order to take hi-end pictures. You can try any to learn which one suits you best.
Breath technique. Some photo experts use a certain technique of breathing during making photos so that photos are precise.
Before you make a photo, take a gentle breath, and breathe out. Press the shutter button holding your breath, ad breathe out. This technique will help you stay stable, and it will be less probable that your hand shakes.
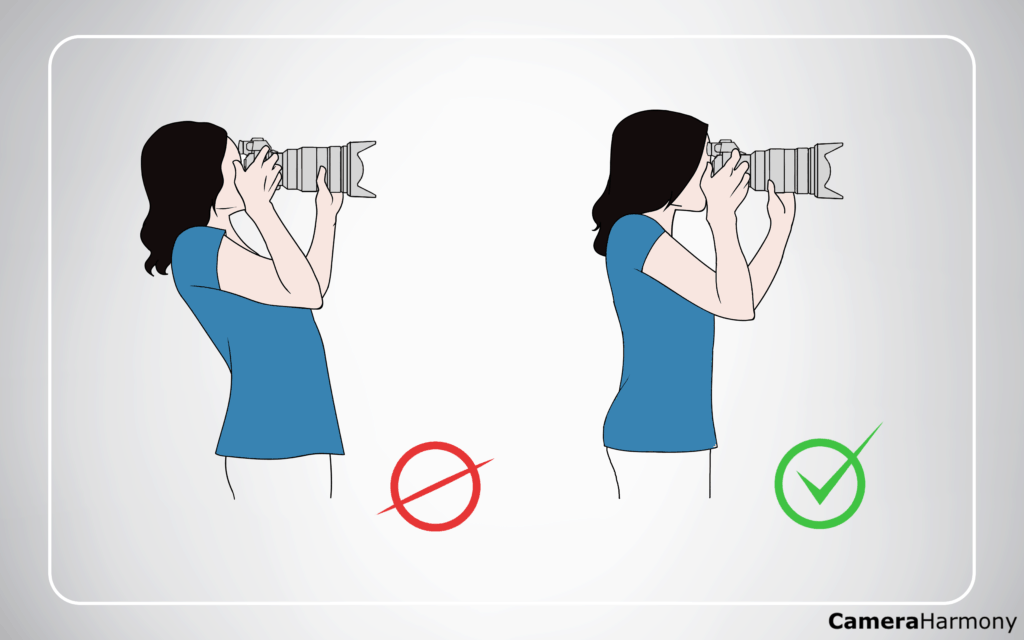
Core inclination. Right core position gives more stability. If you lean backwards or keep your posture upright, your shoot will be more susceptible to get blurred. To prevent this, lean a little bit forward, and fix yourself while taking a shoot.
It is vital to stand right even if you take photography as a hobby, as it is important even for your back’s health.

A camera on the shoulder. Consider your left arm as a support by putting your left hand on your right shoulder. Then place your camera on the top half of your arm. Then you may apply your camera as normal, just turning to the side of your subject, rather than keeping straight on.
Reliance. If the weather is windy, or your shutter’s release is too slow (1/100 or lower), try to find something, which you may use as your support, shall we say a tree or a pillar.
You can also put your elbows on the low wall or table. However, if your equipment is really heavyweight, you’d better purchase a tripod for heavy lenses, and gear.