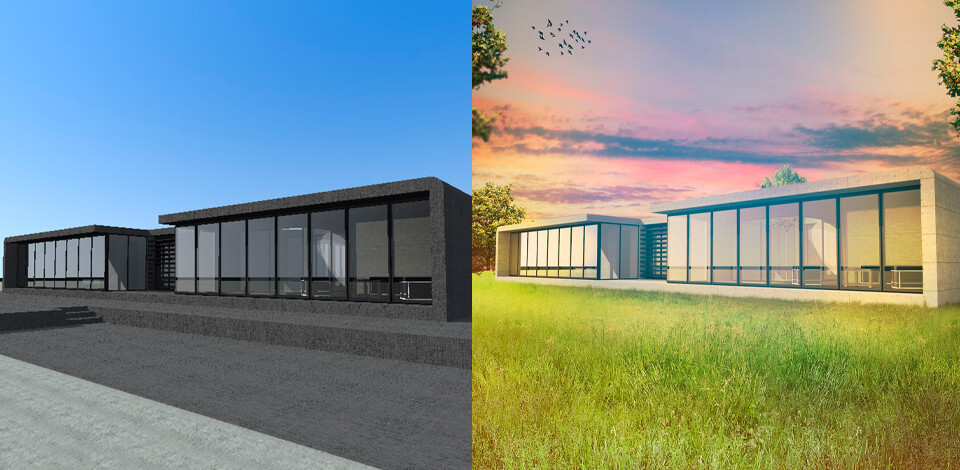
Photoshop architectural rendering is a technique used to create 2D and 3D images of a future building. The main idea behind this process is to produce a lifelike picture of how a property will look before it is actually built.
Photoshop has long established as a top-notch instrument for architects involved in different creative spheres. I have prepared some tips on Photoshop architecture rendering, which you can use to make the process streamlined and resultative.
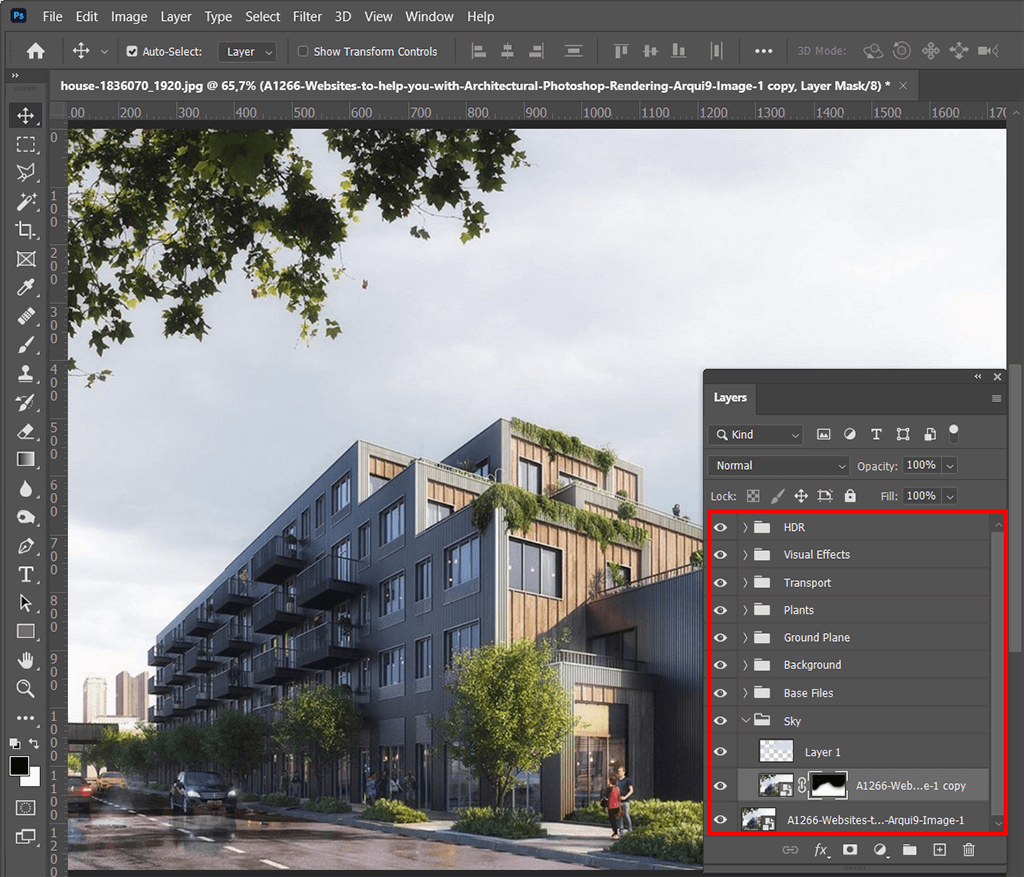
Though it is easier to work with a smaller number of layers, the rendering procedure involves handling multiple files, which can end up being chaotic and confusing. The best way out here is to arrange them in folders based on the content.
With thematic groups, you can manipulate multiple files as a single line, so the navigation process will be a breeze. Another advantage of this method is the possibility to apply masks to an entire group, which makes rendering in Photoshop intuitive. You should also learn how to merge layers in Photoshop to keep all layers well organized.
While making folders, you can use the following criteria:
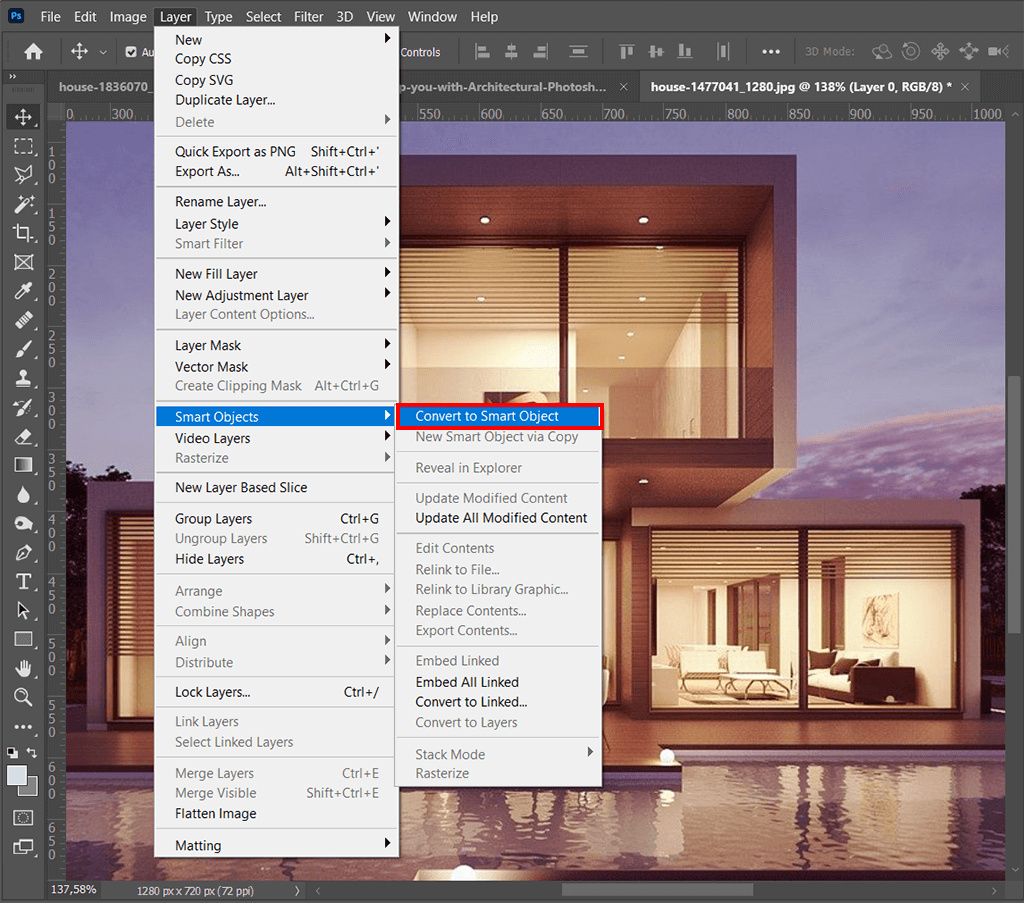
If you have ever tried adding a photo to a canvas and scaling it down, you have probably noticed a severe quality decrease. You can easily solve this problem by using Smart Objects. They are indispensable tools for Photoshop architectural rendering, as they allow resizing objects, rotating and performing other changes without affecting the original quality unlike what you get with rasterized pictures.
You may also want to use Smart Objects if you need to preserve manipulations made in Free Transform. This means you can alter or totally delete the changes made regardless of their sequence. You can also easily duplicate Smart Objects.
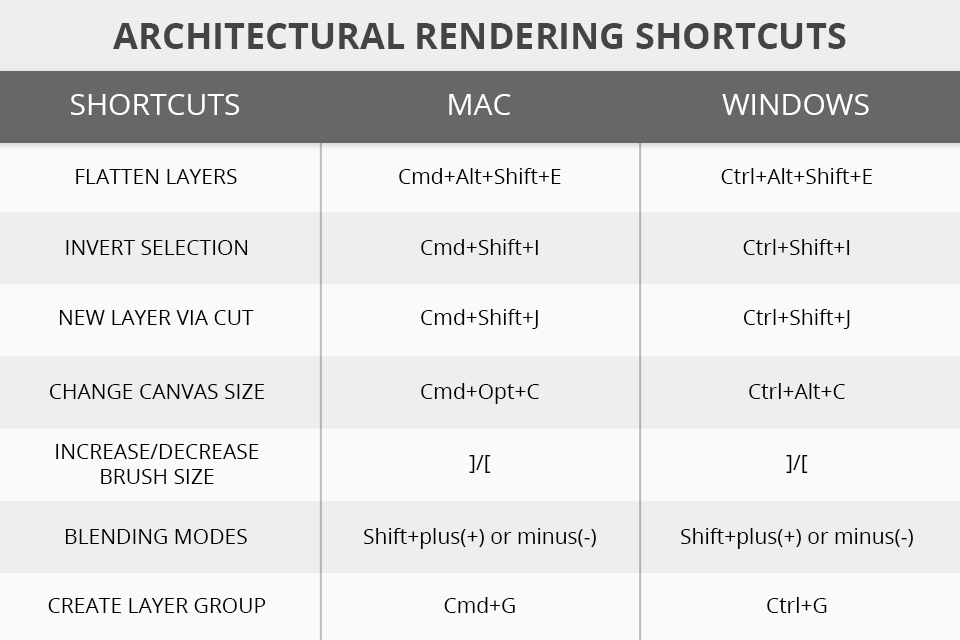
While handling renders for Photoshop, you constantly have to switch from one menu to another, adjust settings, and look for different tools. This is a time-consuming process, so it makes sense to speed it up. The most efficient way to do so is to learn essential Photoshop keyboard shortcuts.
Using them, you can immediately activate particular functions and instruments. Above, I have prepared a list of frequently-used hotkeys that are bound to make Ps architectural rendering as quick as possible.
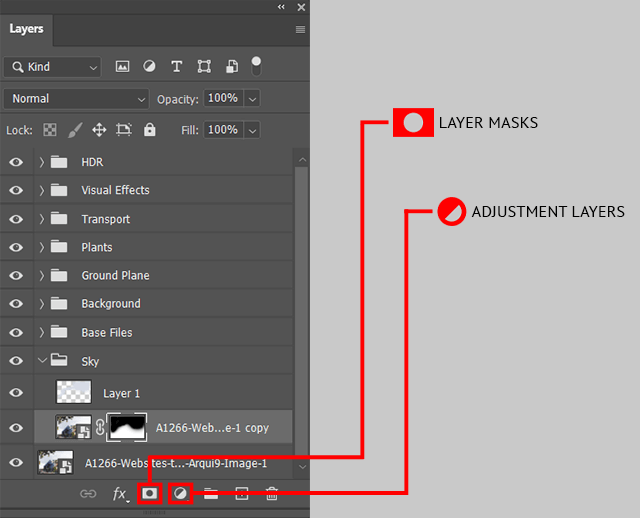
Regardless of the project you work on, it is important to be in full control over the changes made and have the possibility to jump from one step to another in a fast way. If that is something you are striving for, you need to stick to “non-destructive” methods while editing layers. This means you can edit a picture and return to alterations whenever needed.
Masking in Photoshop is a core of non-destructive image editing. Using masks, you can hide or mask parts of a layer. This resembles the effect of erasing, but the main difference here is that you can get rid of a mask or bring it back to the area of a layer that was erased.
Besides masks, you can use adjustment layers. They stick to non-destructive editing principles and allow you to customize layers, contrast, etc. This way you can make changes to several layers simultaneously and reverse the adjustments when needed.
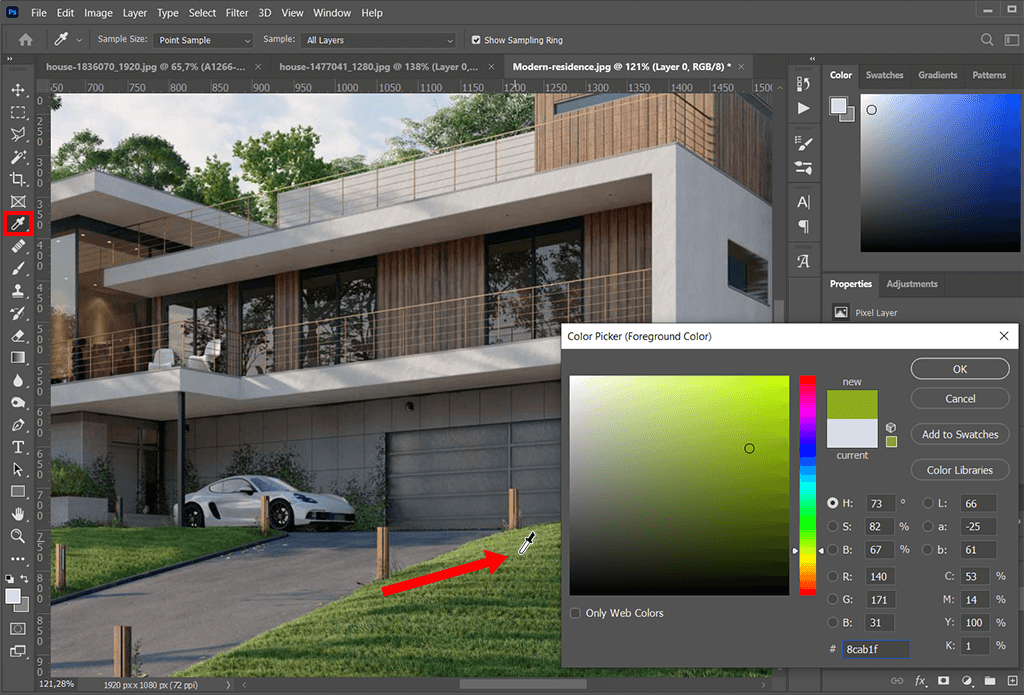
Newbie designers, who disregard Photoshop tutorials often import photos to the software just to perform color sampling, which makes Photoshop architectural rendering so much longer.
You can make this adjustment faster by using the Eyedropper. Click on it and hold the left mouse button; then move the tool to the color point of an object. This can be an opened image, a desktop picture, a web page, etc.
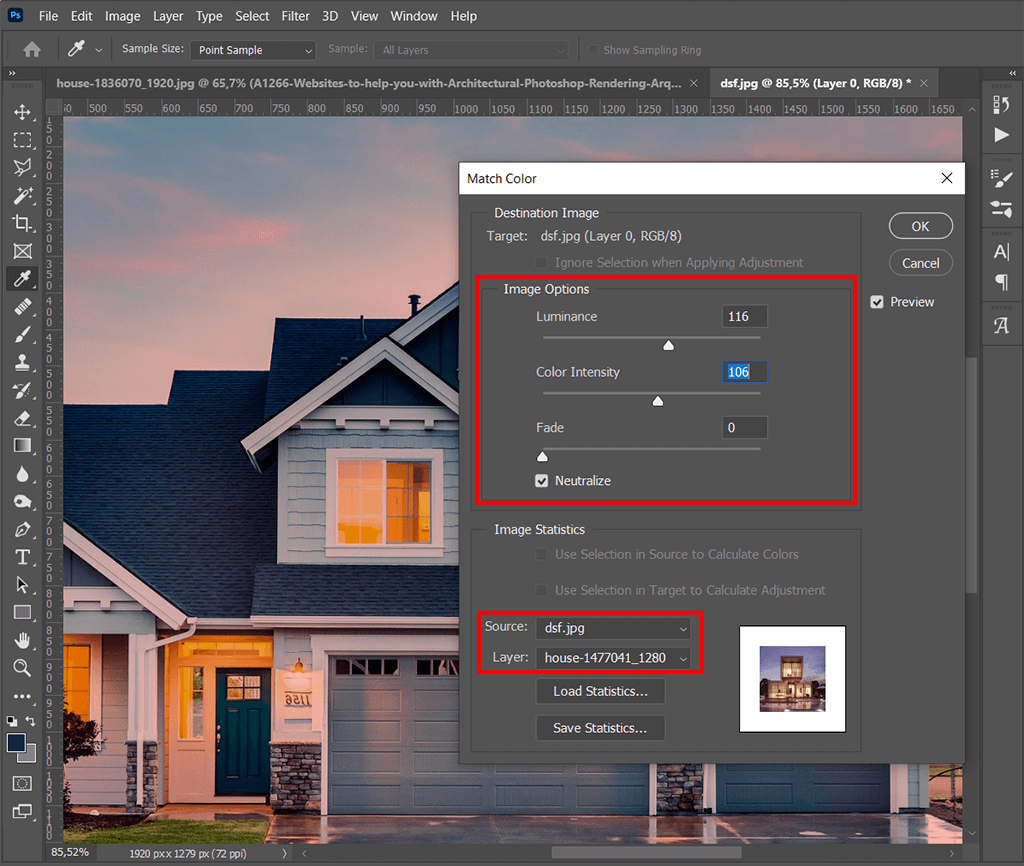
In case your project consists of numerous images, you may face problems trying to keep a consistent color scheme across all pictures. Fortunately, there is an efficient method to cope with the task – choose Image > Adjustments > Match Color. That’s it.
If you go this path, the program reads the color specs of a picture and uses the info while processing the rest of the images. You can use this approach while adjusting color intensity, fade, and luminance.
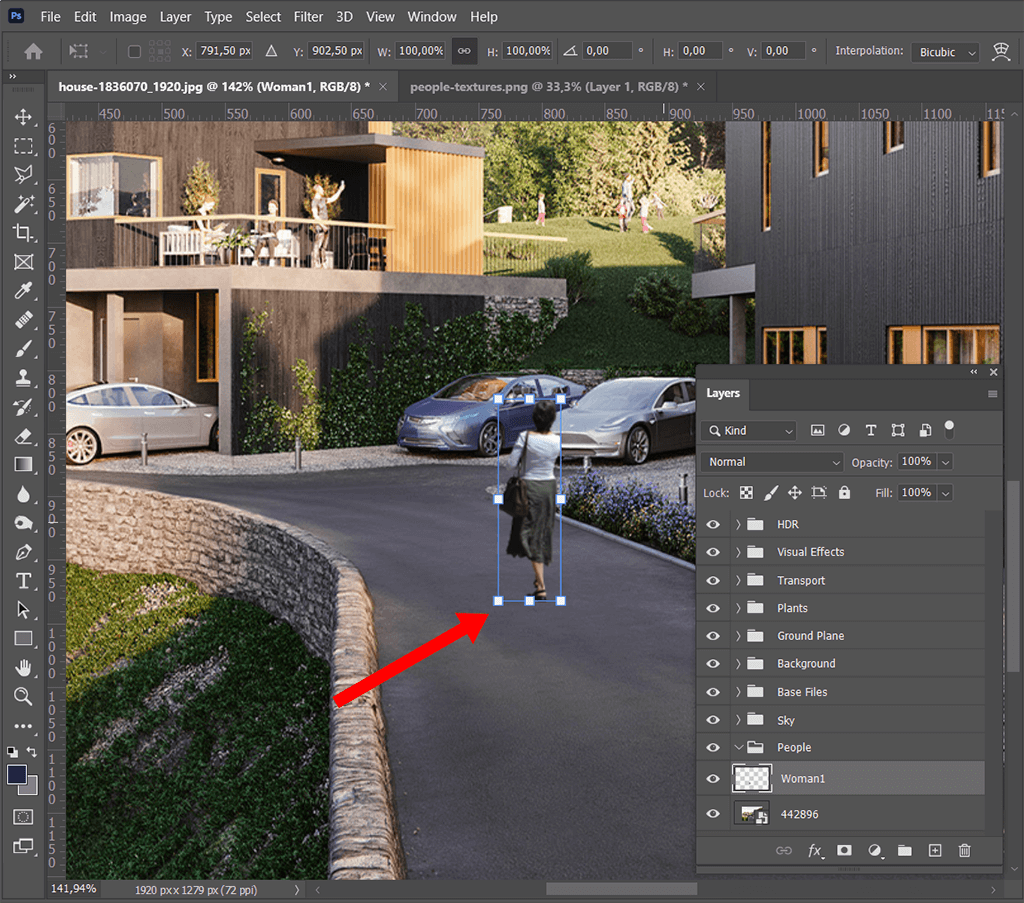
While working with renders Photoshop, you have to be very accurate and make them look absolutely realistic. Usually, designers add people, plants, everyday objects, which are available on free 3D models sites. Look through the PNG files and choose a suitable cutout.
Then adjust it so that it perfectly matches the scene. Once you are done with cutout inserting, learn how to add a drop shadow in Photoshop to create a lifelike image.
The simplest method to add a shadow is to make a copy of the added cutout. Be mindful about light direction not to violate the laws of physics. You can take advantage of the Gaussian Blur filter to make some areas blurred or add a layer mask for a fading out effect.
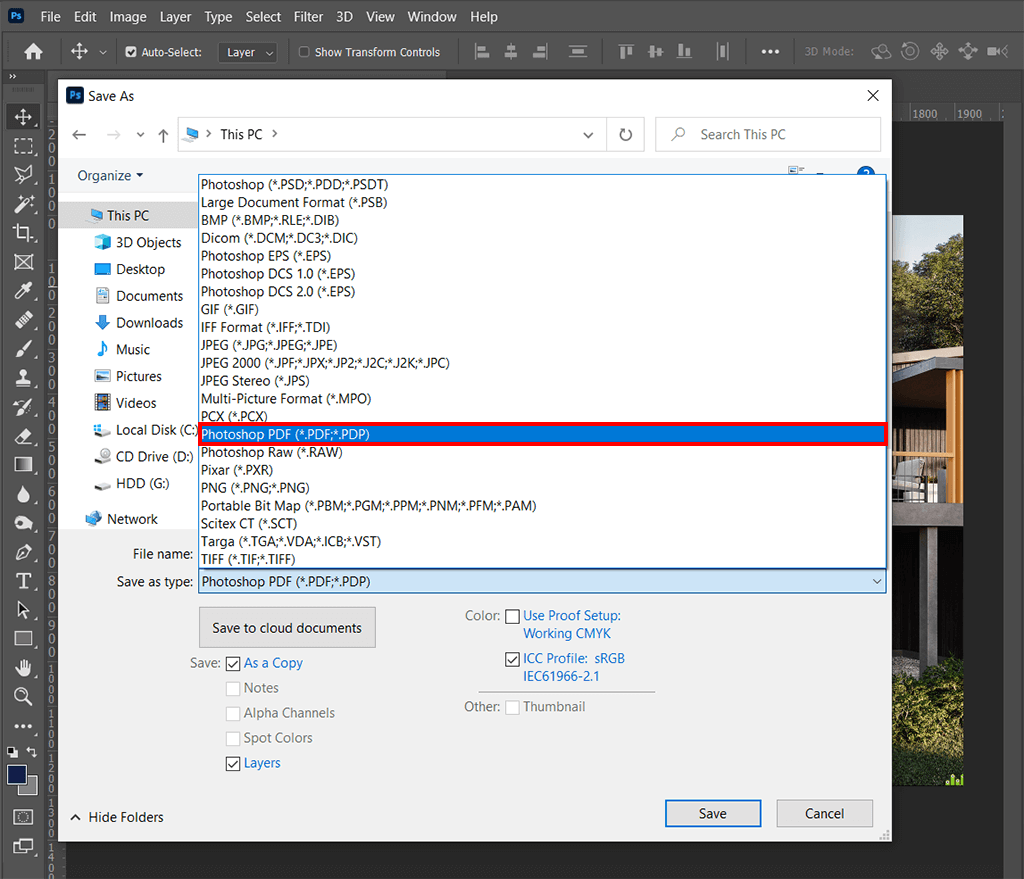
Photoshop architecture rendering doesn’t end up with a creative part, there are some precautionary measures you have to take in order to protect your creations. It happens that clients may use finished projects for different purposes without your permission. That’s why, you need to use all possible methods to indicate your authorship.
Many designers decide on making a watermark in Photoshop, but this isn’t a 100% guarantee your works are safe. A better idea is to use a password, so that no one can remove it to print a “clean” picture. You just need to save your files as PDFs and type in a password in the Security > Permissions section.
Nowadays many visualization algorithms have been developed for making our life considerably easier. To make things even more complicated, existing paid and free rendering software can use several algorithms at a time to obtain the final image. Thus, you should be aware of their combinability too. Let`s consider the simplest ones.

The first comes light tracing. The laborious tracing of each light ray in a scene is totally impractical and takes unacceptably much time. Even tracing a small number of rays, sufficient to get an image, takes a huge amount of time if no approximation or sampling is applied.
Because of this, four groups of methods were developed, more effective than simulating all the rays of light that illuminate the necessary interior scene.
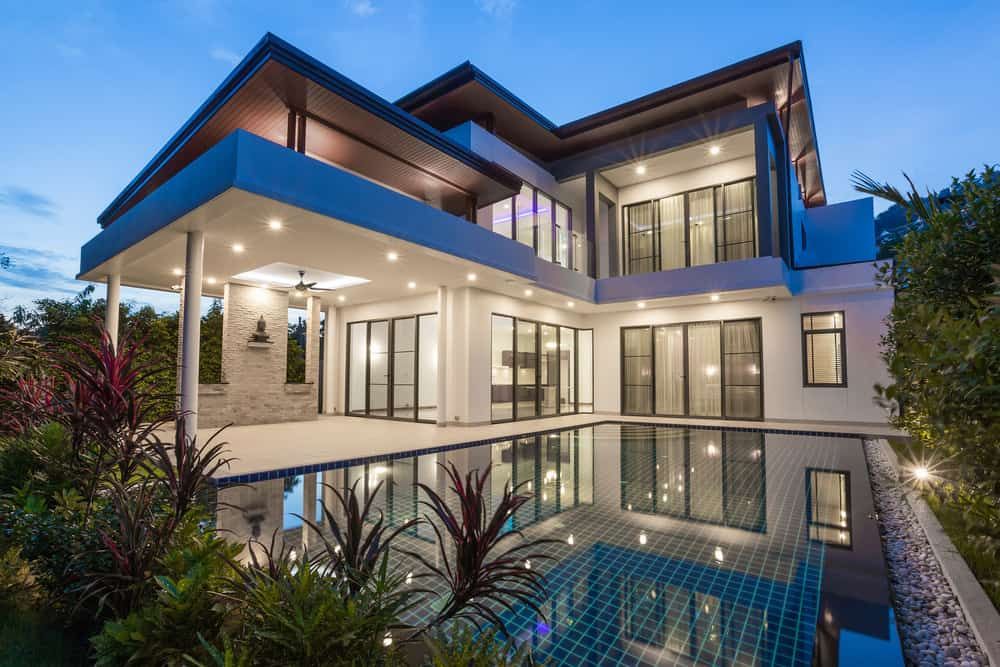
Rasterization together with the scanning of lines is a common thing for applying Photoshop for architectural rendering. Visualization is carried out by projecting the objects on the screen without considering the perspective effect on the observer, to be more precise a customer.
Begin by importing your architectural render, then use Photoshop's rasterization tools to refine details and textures, ensuring a polished and realistic outcome. Leverage layer masks to precisely control which areas undergo rasterization, maintaining flexibility in design adjustments. Fine-tune lighting effects and shadows with Photoshop's brushes and blending modes, adding depth to your render. Utilize filters for nuanced texture applications, emphasizing materials and architectural elements.
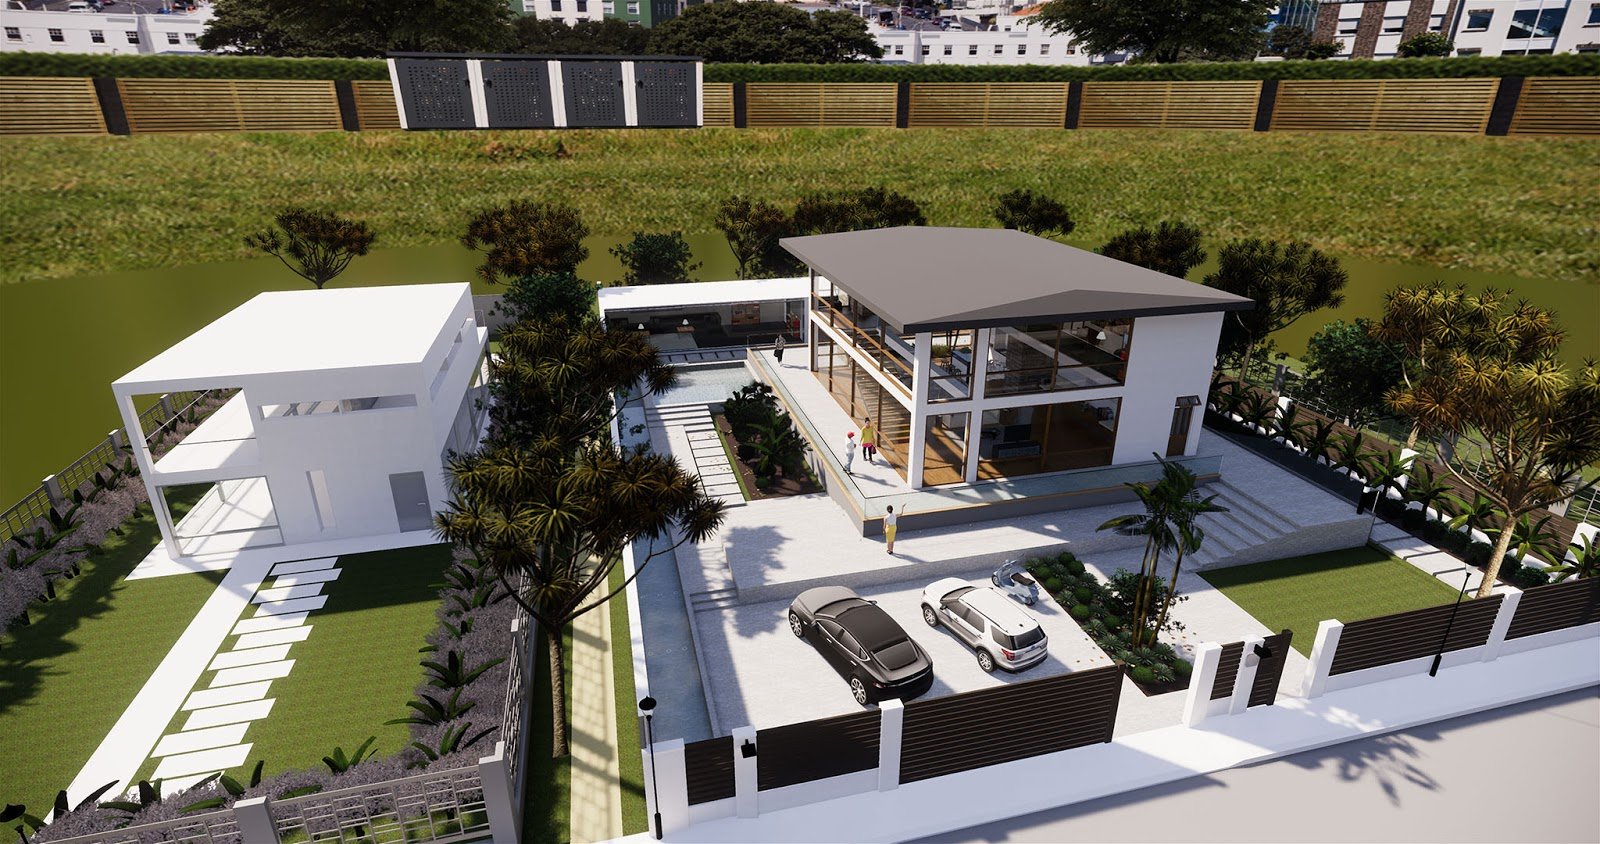
Then we will consider ray casting. The scene is seen as an observable from a certain point. From the point of observation, rays are directed to the items of the scene, as with their appearance the color of the pixel on the two-dimensional screen is determined.
In this case, the rays stop their propagation, unlike the method of reverse tracing, when they reach any object of the scene or its background.
It is possible to use some very simple ways of adding optical effects. The perspective effect is obtained naturally in the case when the light rays are thrown at an angle depending on the position of the pixel on the screen and the maximum viewing angle of the camera.
In the realm of architectural rendering, selecting the best camera for architectural photography becomes crucial. The camera's ability to capture accurate perspectives and intricate details significantly influences the quality of the rendered images. Opting for the right camera enhances the effectiveness of ray casting, ensuring that the visualizations accurately represent the architectural scene from the chosen point of observation.

Ray tracing is similar to the method of throwing rays. From the point of observation, rays are directed to the objects of the scene, with the help of which the color of the pixel on the two-dimensional screen is determined.
But the rays do not stop their propagation, but they are divided into three ray-components, each contributes to the color of the pixel on a two-dimensional screen: reflected, shadowed and refracted.
The number of such components determines the depth of the trace and affects the quality and photorealism of the image. Due to its conceptual features, the method makes it possible to obtain very photorealistic images, however, because of the high resource consumption, the visualization process takes considerable time.

Path tracing uses a similar to ray tracing principle, but this method is quite approximate to the physical laws of light propagation. Also it is the most resource-intensive. Advanced software usually combines several techniques to obtain a sufficient high-quality and photorealistic image for acceptable computational resource costs.
Still method description is a good and useful thing, but for us it is much more convenient to see than to read. Thus, in the following video, which is a Photoshop architectural rendering tutorial, you will see all described methods in action. You will understand with your own eyes how they influence the surface of the picture.