Many photographers believe that sunny weather, especially the time at sunset or sunrise, creates ideal conditions for landscape photography. However, if the weather is cloudy and the sky is overcast, you can still take good photos. You just need to learn about the peculiarities of shooting in bad weather and use the best camera setting for cloudy day.
Taking photos in such weather has its pros and cons. You can use such days as an opportunity to take photos and capture subjects that are impossible to shoot when the weather is different.
By using the camera settings for overcast day listed below, you can learn how to use the lighting to capture your object perfectly.
In case you prefer shooting in manual mode, you can solve exposure issues by configuring the aperture, shutter speed, and ISO. Professional photographers call these settings the exposure triangle.
For example, if you use a low aperture, you can use a high ISO for cloudy day to ensure higher light sensitivity. You can also improve the exposure by increasing the shutter speed, just like you do when adjusting camera settings for portraits.
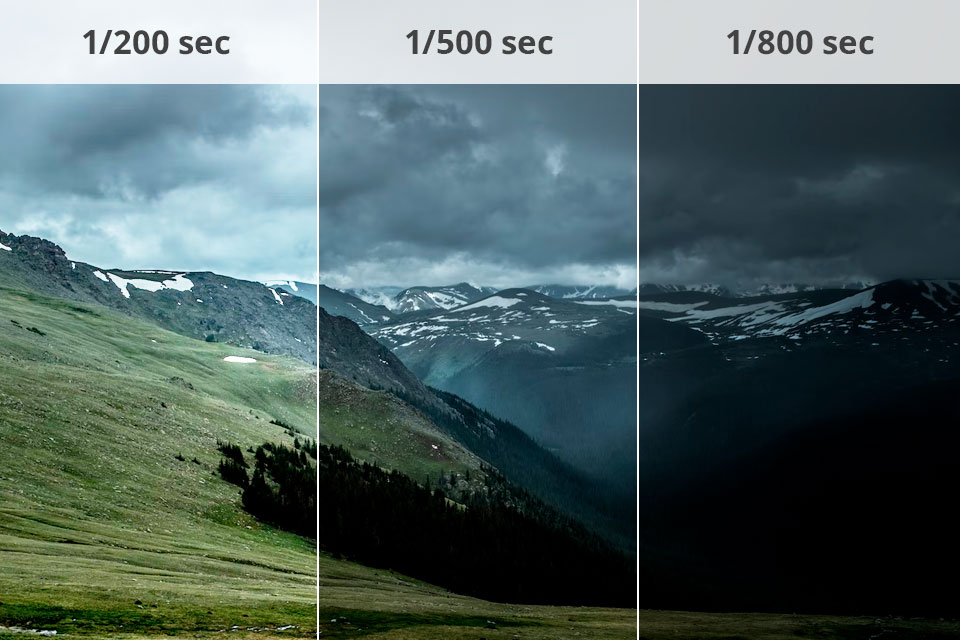
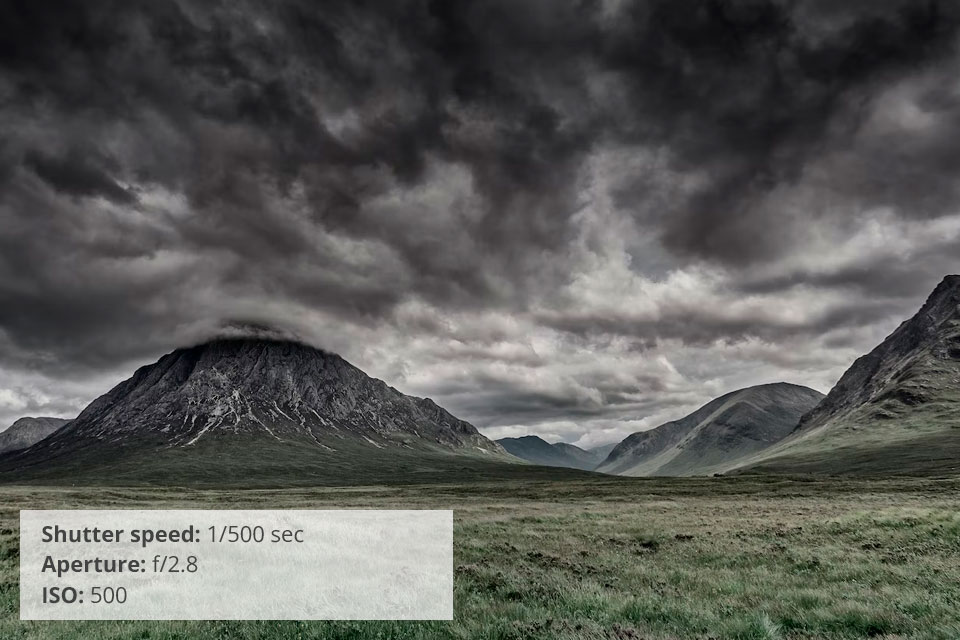
For taking photos on a cloudy day, you need to use a slower shutter speed. It will allow you to capture your subject without any lighting issues. However, you might notice some blur in the frame. To reduce it, you need to stabilize your camera by using a tripod.
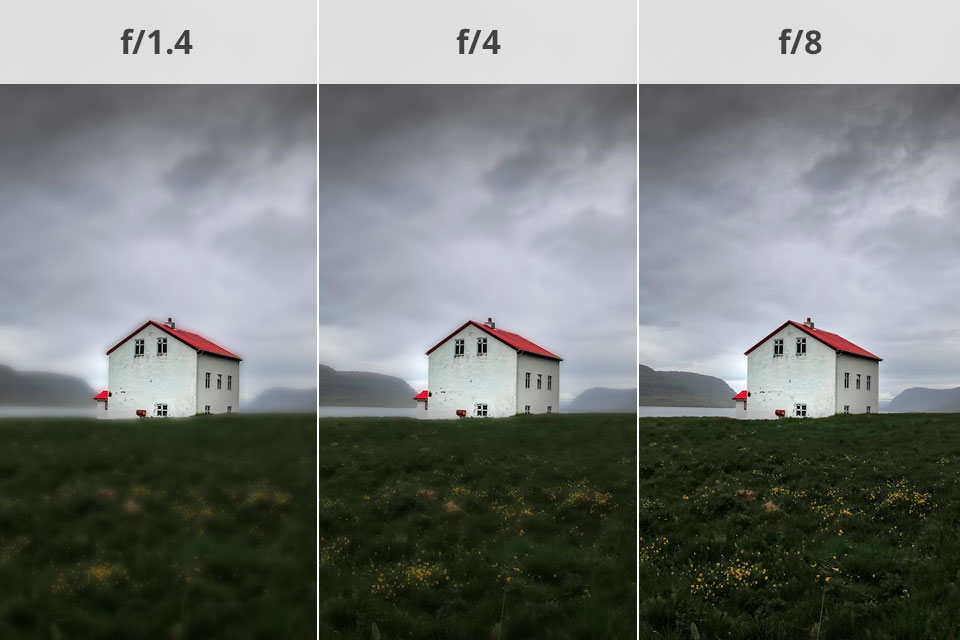
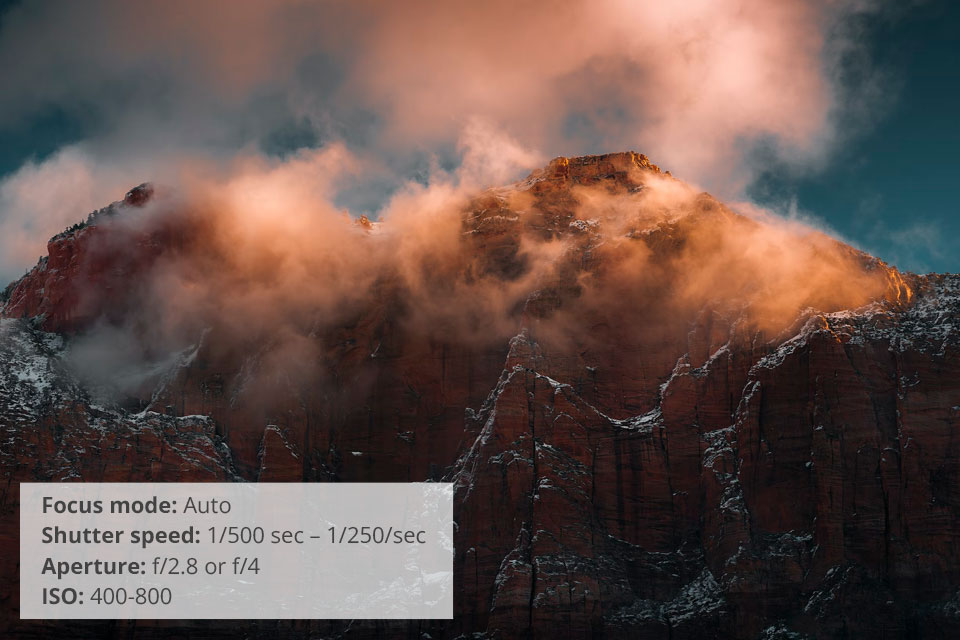
When the sky is cloudy, you can’t take photos using a fixed aperture, as you will need to adjust it every time when the sun comes out. This is why it’s better to use an aperture ranging from f/2.8 to f/4, as such settings for cloudy day photography allow you to take the best shots.
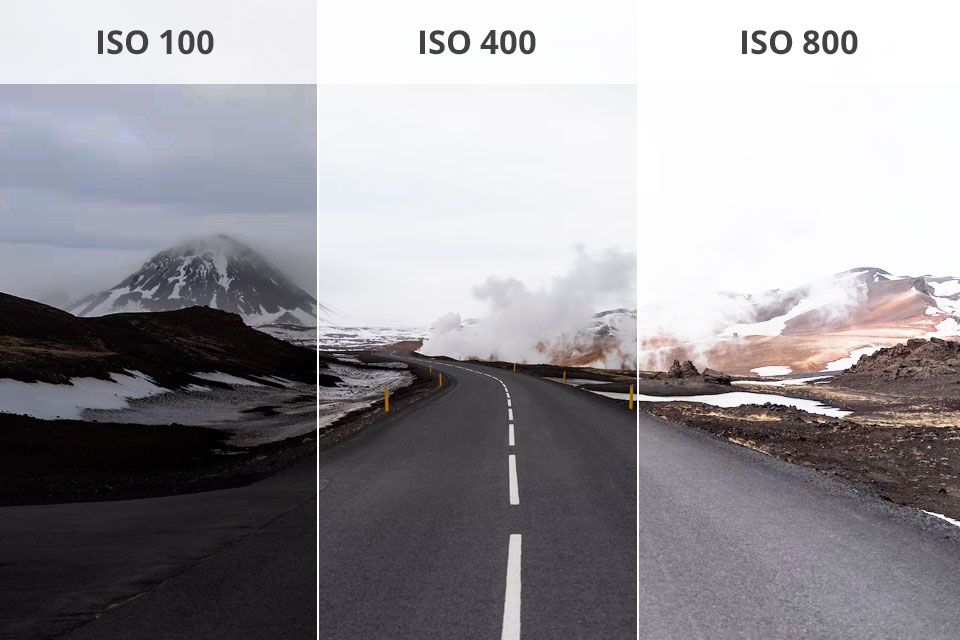
It’s recommended to increase ISO and set it to a 400-800 value. It will allow you to achieve the optimal sensitivity level. By doing this, you can minimize noise and capture natural colors.
Similarly to the case when you need to use specific camera settings for sunsets, you need to set the drive mode to “single shot.” Due to this, the camera will take only one photo when you press the button. To capture moving objects, you will need to select a different mode.
It doesn’t make any sense to adjust overcast camera settings to take several photos at once unless you want to capture birds in the sky.
Experienced landscape photographers know that you need to set WB to 6000-6500K for overcast conditions. When shooting in the shade, one should use 7500K.
To take photos of snow, use 8000K. If your image has a pinkish or bluish tint, you may slightly increase or decrease this value.
If you have a DSLR camera, make sure to take photos in RAW mode. RAW files aren’t compressed, which makes this format perfect for saving photos with a lot of details.
Besides, this format allows you to save photos in the highest quality. Due to this, it’s better to save photos on RAW, as it will make it easier for you to edit them later.
JPEG photos are compressed. If you decide to edit them, you will not be able to do it at an advanced level as they will lack some detail.
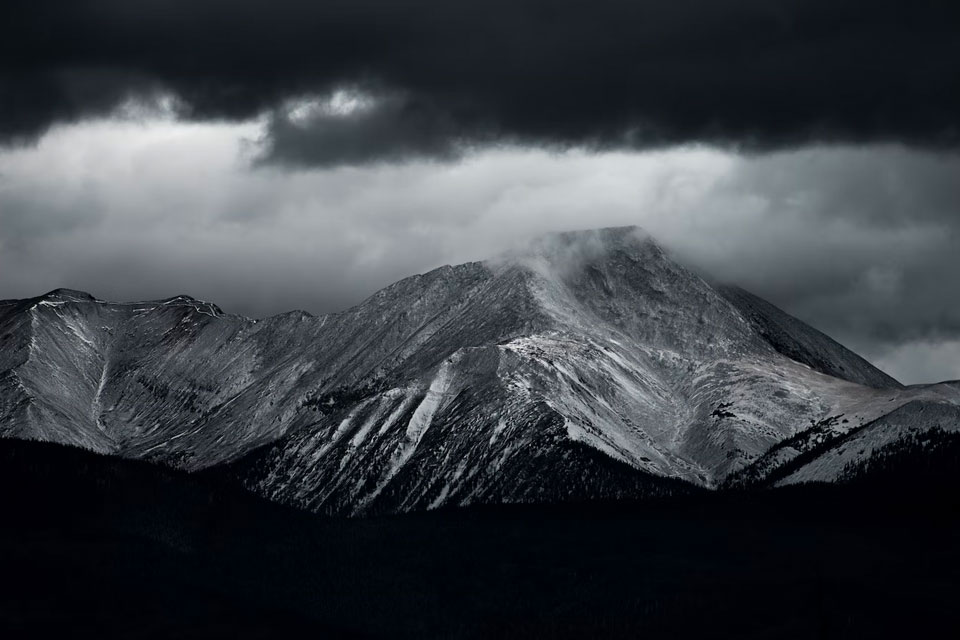
If you like to capture black and white images, pay attention to textures and shapes. Cloudy days are perfect for taking such pics, as you can capture clouds and take dramatic photos.

To take photos on an overcast day, use the photography locations where you won’t be standing under direct sunlight, such as porches, tunnels, or roofed terraces. In such locations, the light is softly diffused, which allows you to take photos of people and objects while capturing the most beautiful colors.
When taking photos of humans and animals, find the higher ground, as it will allow you to snap great overcast photos. This way, you can capture the reflection of the sky in the eyes to emphasize the beauty of the surroundings.
It’s a perfect time to use color as a key element when taking photos. Due to even lighting on overcast days, colors will become noticeably richer. It is when you can capture the most beautiful red and yellow hues.


If you are interested in doing nature photography, try to experiment and capture the beauty of the sky with a variety of cloud formations. Pay attention to unusual shapes and beautifully-lit clouds to take attention-grabbing photos. You may also have an opportunity to shoot the rainbow if you are lucky.
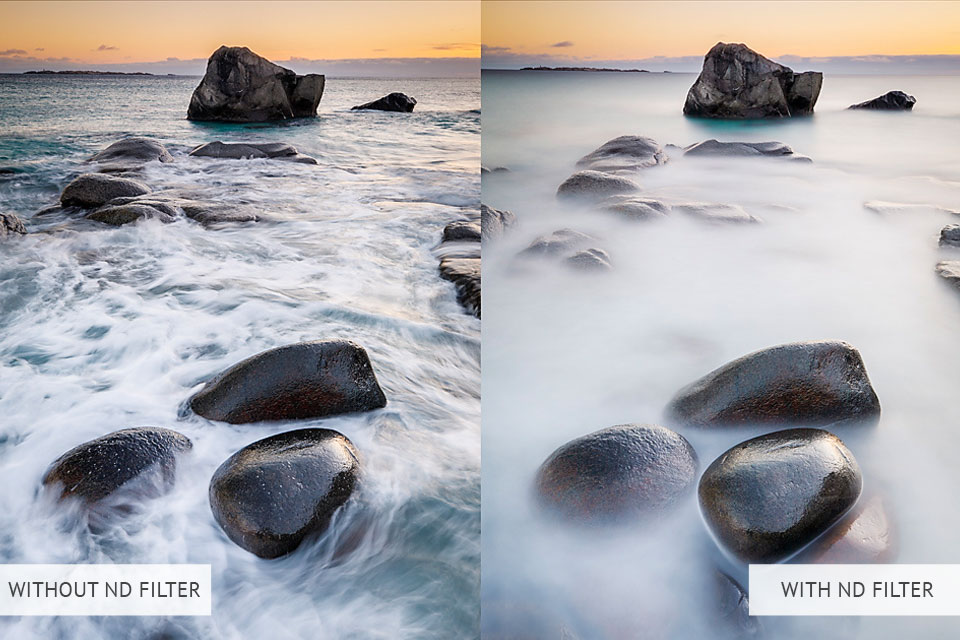
This tip will be especially suitable for those who specialize in taking photos in autumn, as there might be some lighting issues due to the contrast between the dark ground and the light-gray sky. It happens when the sky is overcast but not too much.
To fix this problem, you can use ND filters.
When the sky is overcast, you can still capture beautiful landscape pics as the contrast between the sky background and the foreground will be more noticeable. However, you should pay attention to glare and reflections as they might spoil your photos.
While some photographers mistakenly believe that it’s better not to venture out when the weather is gloomy, it couldn't be further from the truth. On such days, you can capture mesmerizing clouds and benefit from using the diffused light provided you use the best camera setting for cloudy day. You can also experiment with taking long exposure photography and capturing detailed photos.
You can still practice golden hour photography when the sun is hidden behind the clouds. Even clouds can’t fully prevent the sun’s rays from making everything look more beautiful. When the light falls at an angle, everything gets a magical feel. You don’t even need to use a softbox, as you can capture everything perfectly even without using specialized photography equipment.
The only thing that you should remember about it is that your shutter speed should be the opposite of an ISO value. For instance, if you use an f/16 aperture and set ISO to 100, you need to set the shutter speed to 1/100 second.