About 85% of leading real estate agents state that staged houses are far easier to sell than their unstaged counterparts, while 65% claim that virtual staging allows you to increase the sale price as well, according to HomeLight’s Top Agent Insights Survey.
Even though you have to pay for staging a house an additional fee of about $1,719 a month, the delivered results and the increased number of potential buyers more than make up for it.
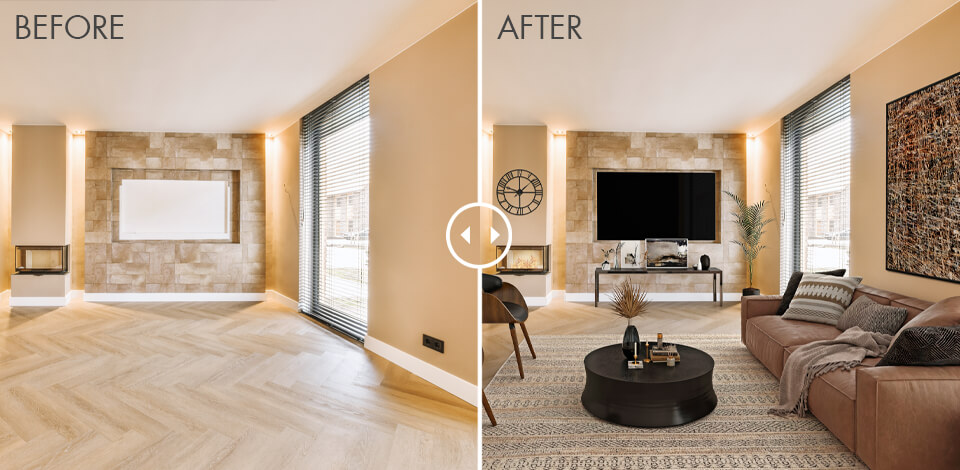
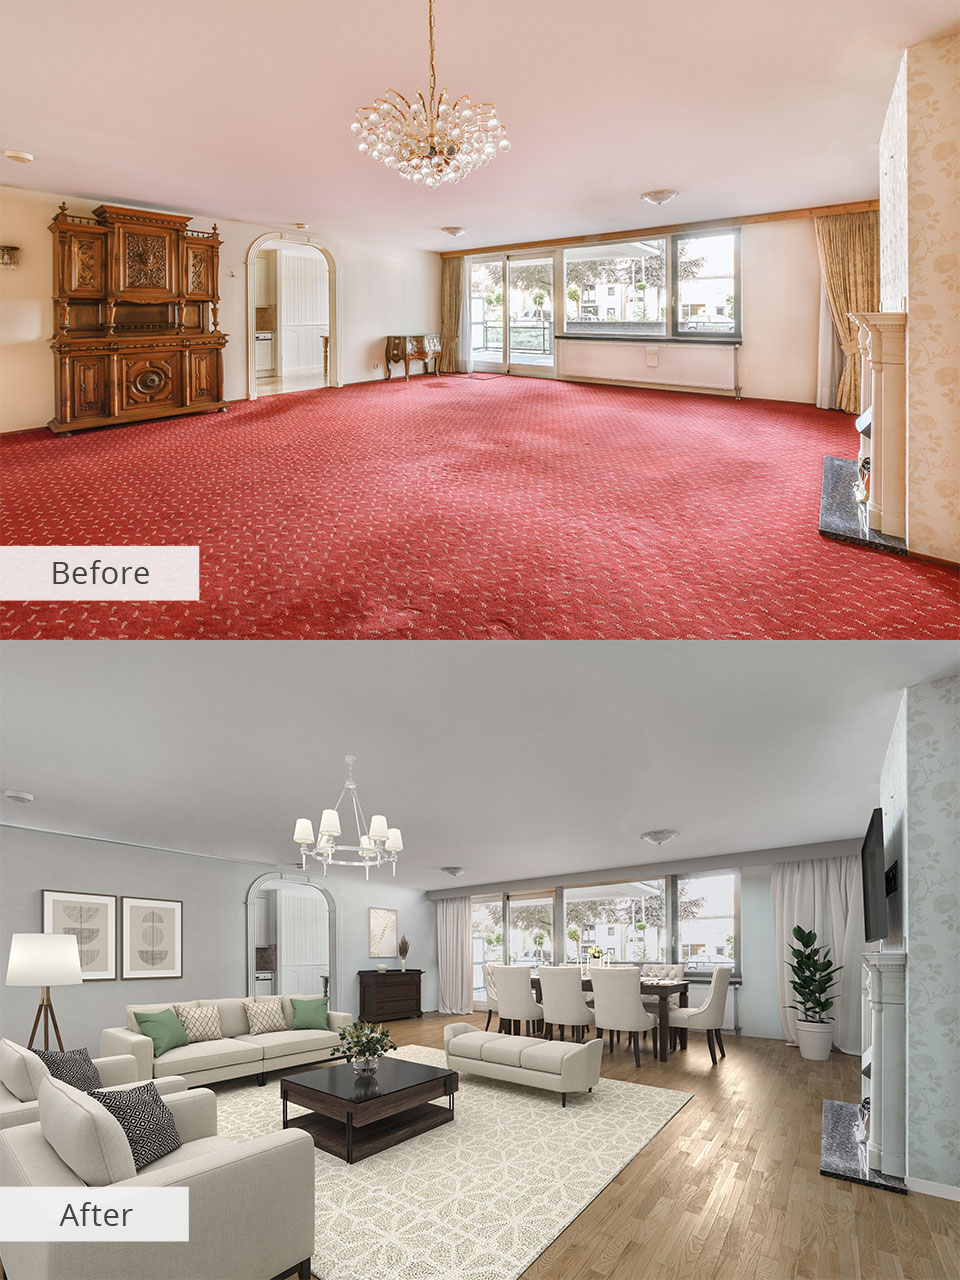
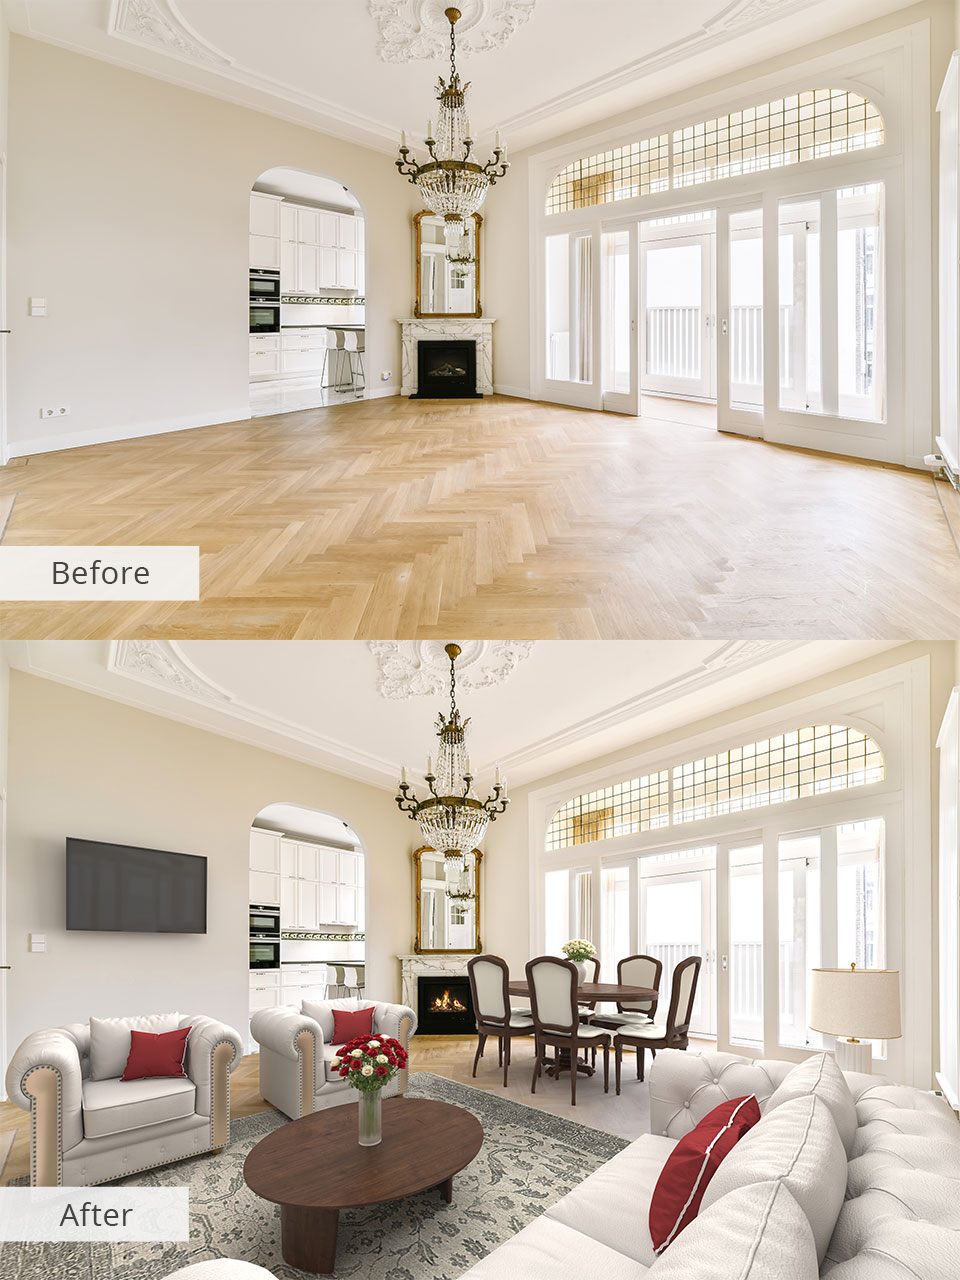
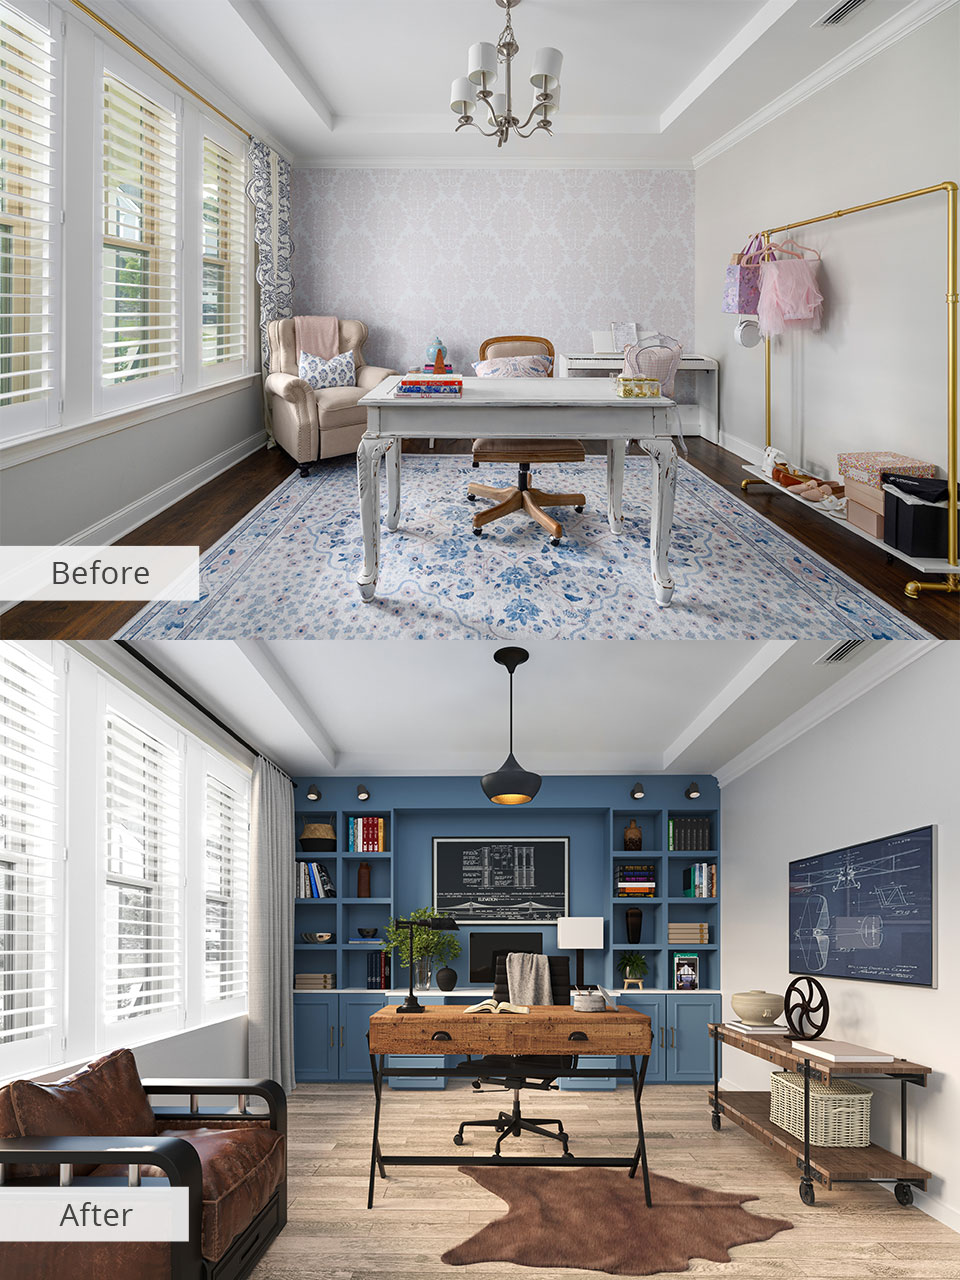
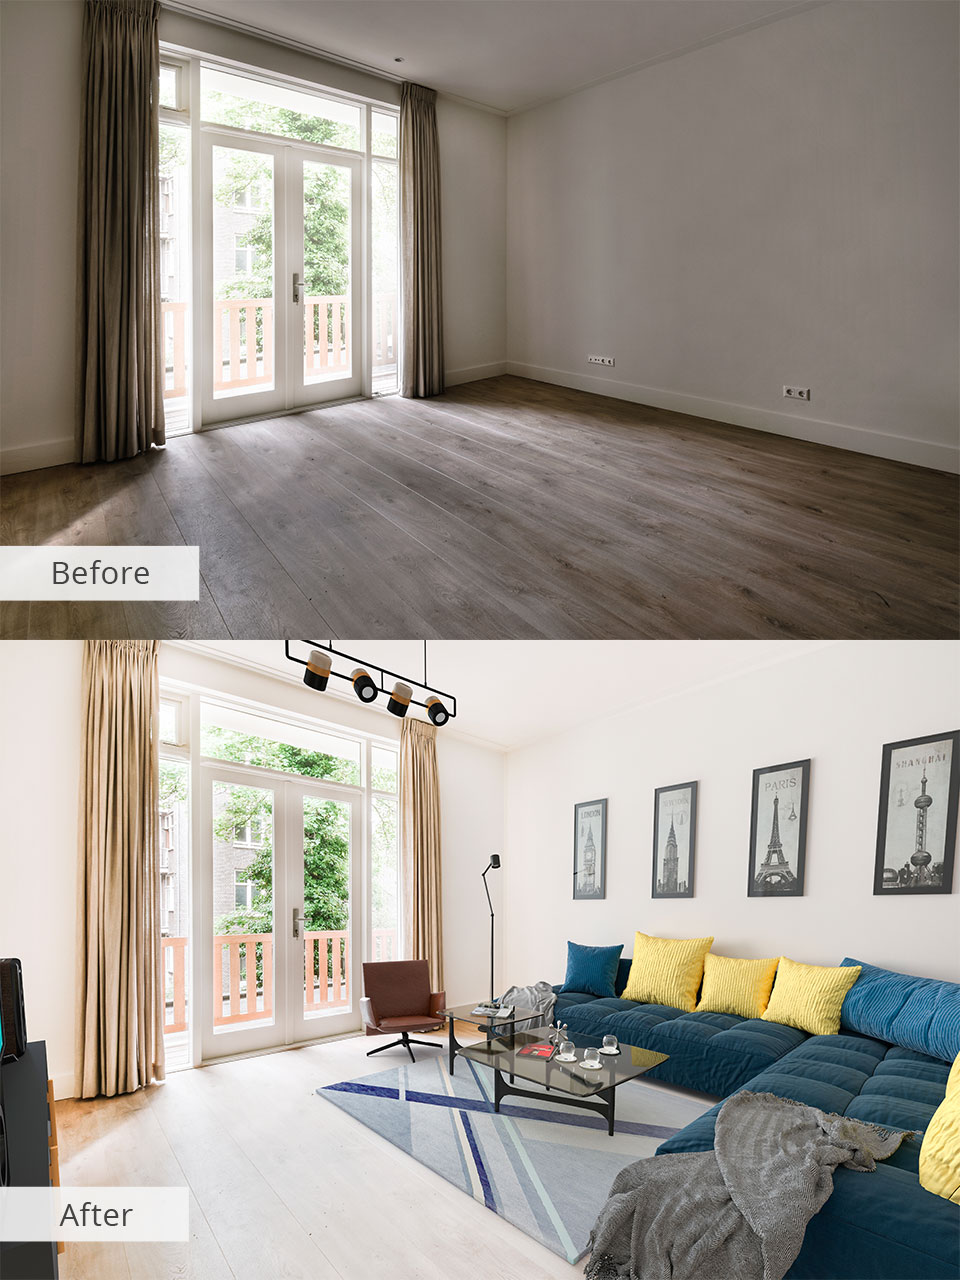
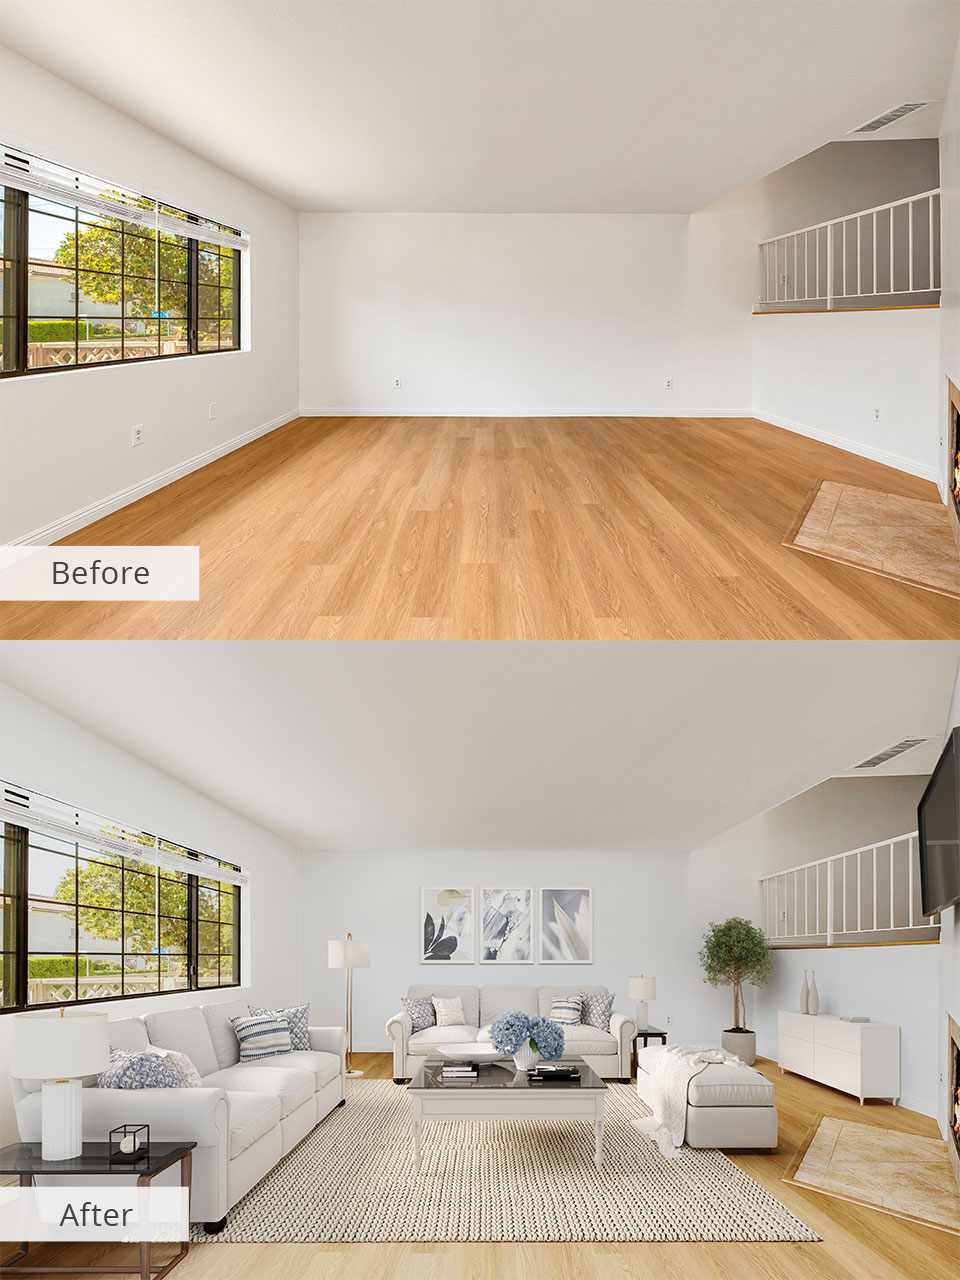
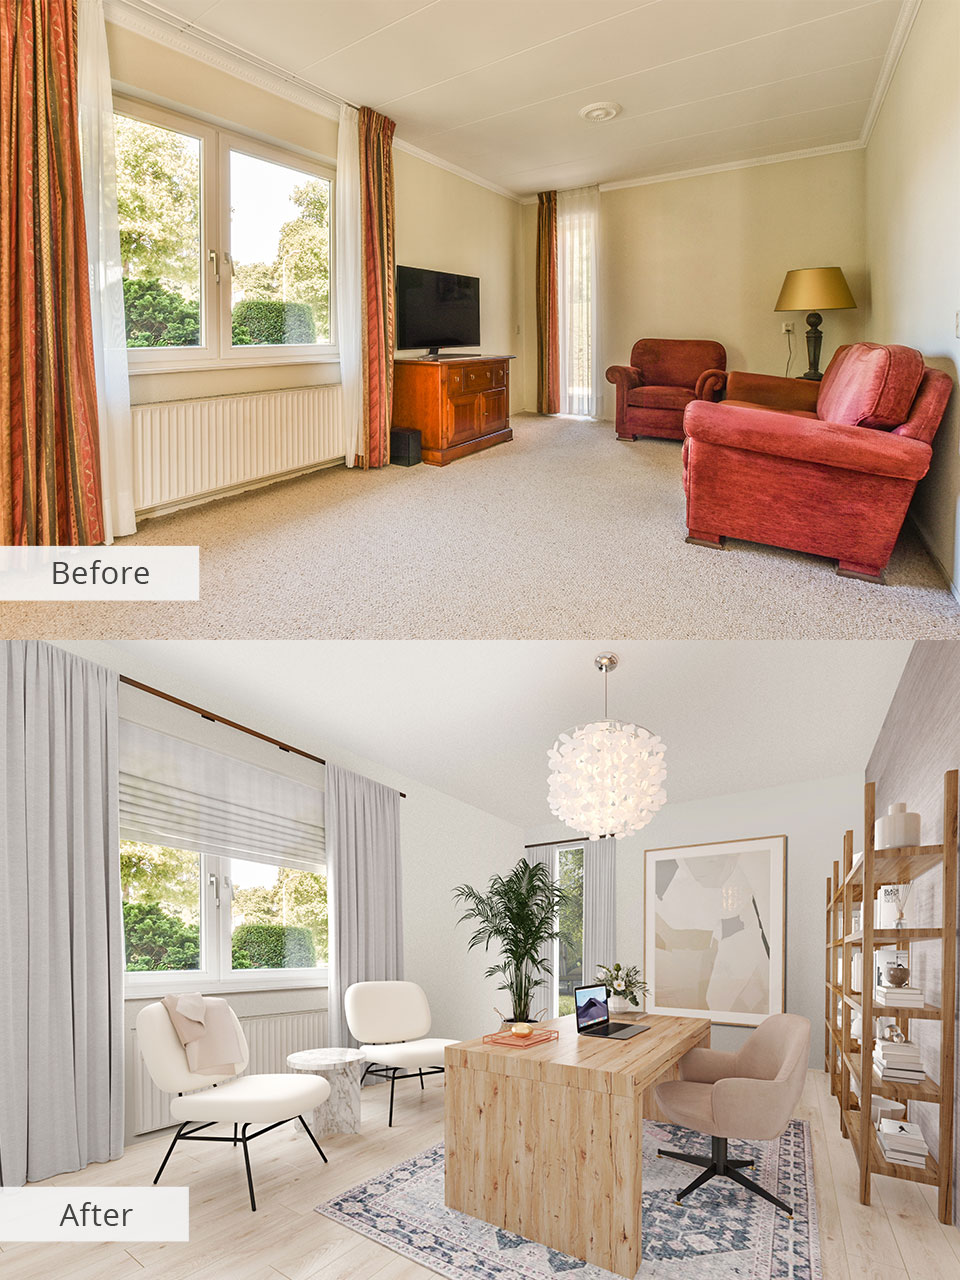
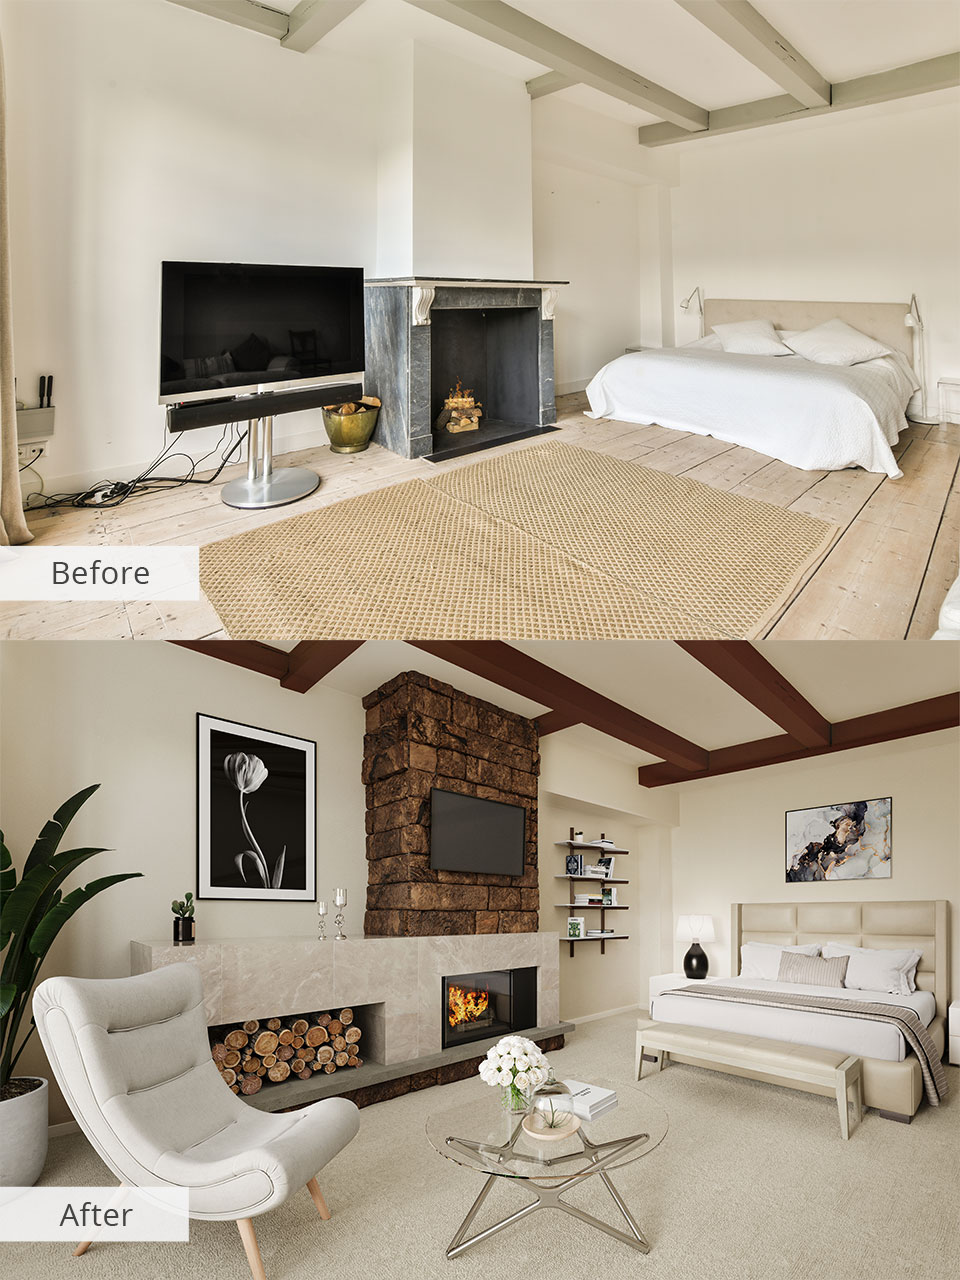
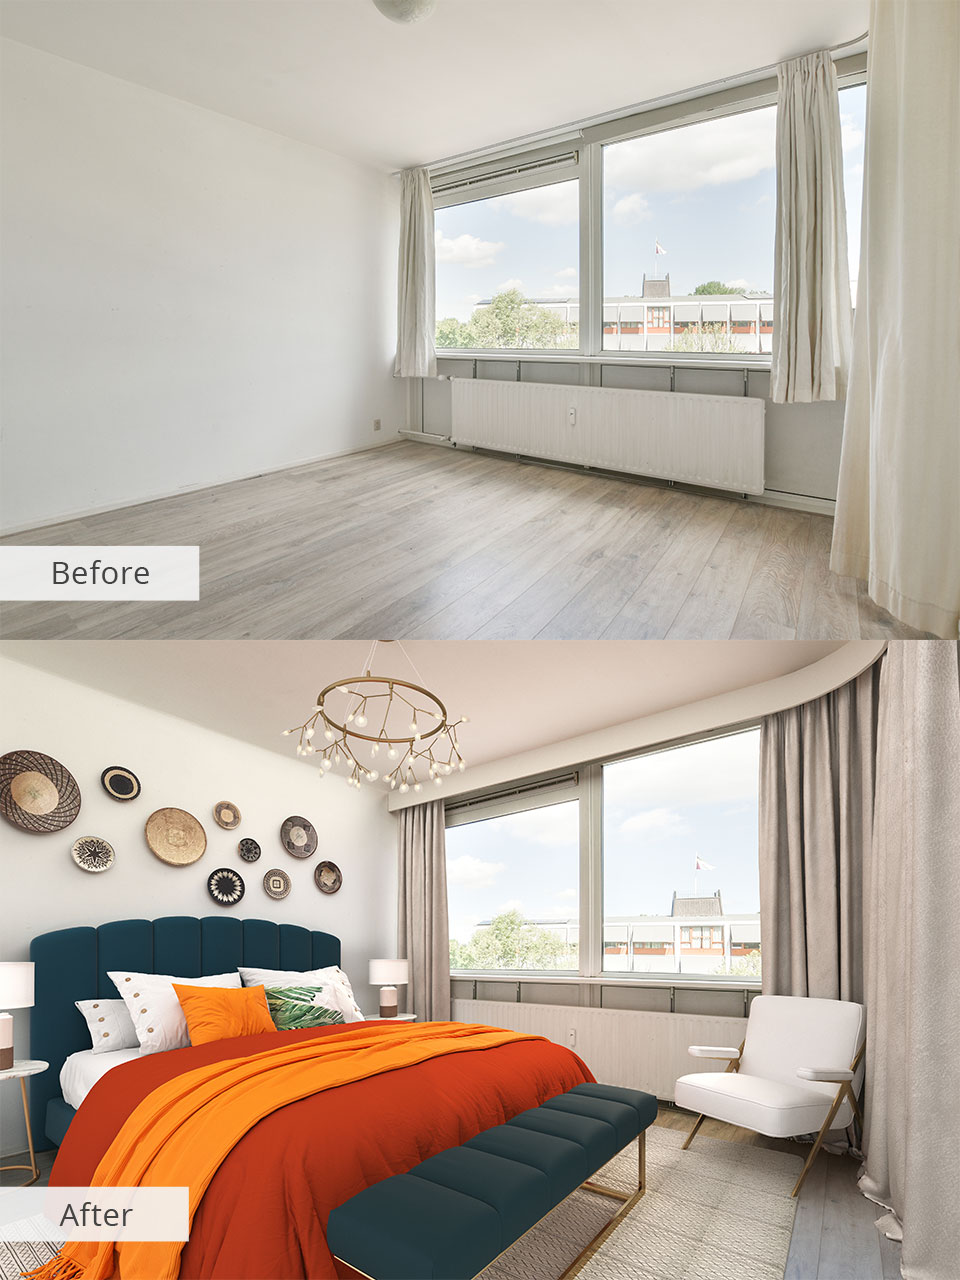
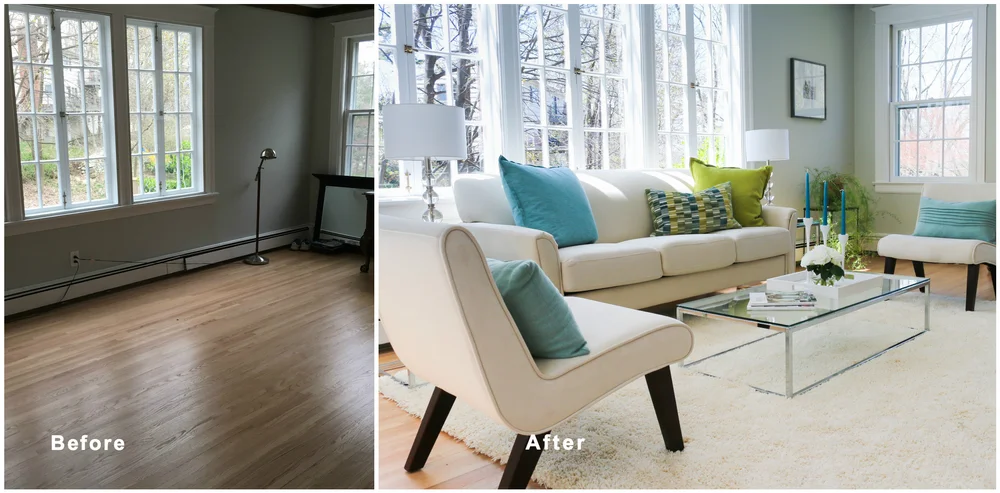
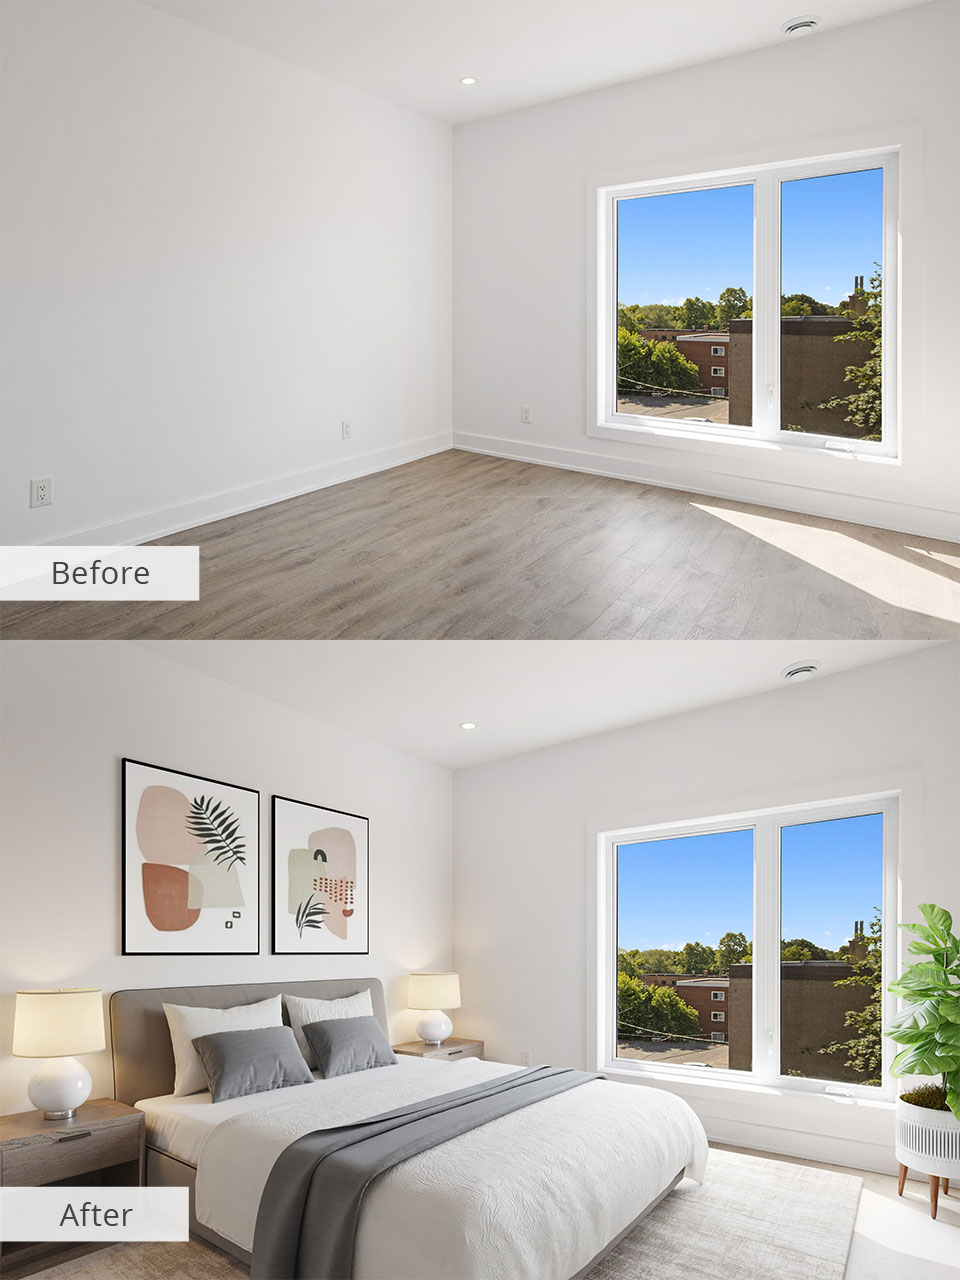
Get inspired by these staging homes before and after examples and tips to turn a bland floor plan, cluttered, unappealing space into an eye-catching, marketable showroom.
Photos that show a clean house inform potential clients that you know how to take care of it and market your property. Put the necessary effort in to clean the entire building from the floors to the ceiling as well as every single nook and cranny to ensure your real estate photos look flawless no matter what angle you choose.
You can either take care of the cleaning yourself or hire a cleaning company by looking for one on Fiverr, AllBetter, or Handy.
It’s recommended to write down a list of the different things you need to do like fixing a dripping faucet, mending the guttering, filling a wall crack, etc.
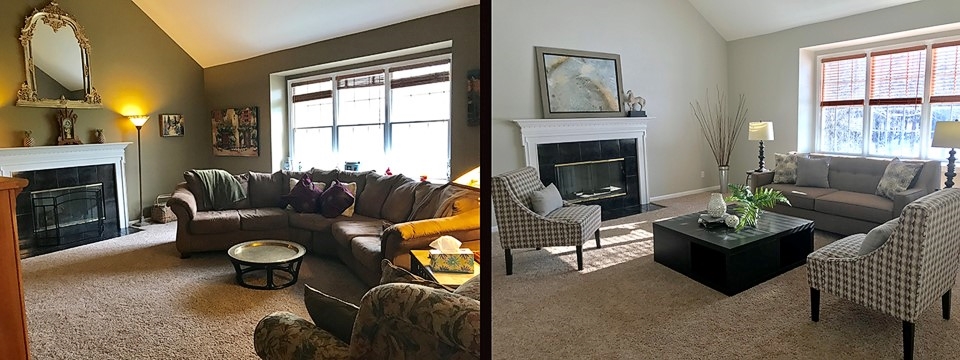
When staging the room for before and after photos, you need to have a clear plan and theme in mind. You can transform an extra room into an office or a gym but not both. If the property has a proper attic, turn it into an office.
Meanwhile, a nice basement can serve as an entertainment room while a room used for storing random stuff can be turned into a guest bedroom.
Even if the person who buys the property won’t use the rooms for the purposes you’ve shown in the photos, it’s still vital to show how each part of the house can be used, including smaller zones like alcoves, window seats, corners, breakfast nooks, etc.
If you have never staged a room before, experiment with interior design software that will help you imagine how your room is going to look and what elements you can add to complement it.
Cluttered areas distract potential customers from the more appealing aspects of your property while also making the amount of available space seem smaller. Before you start the shoot, place all unnecessary items (various knickknacks, documents and folders, seasonal clothes, and messy objects) into storage or you may always ask for items removal.
Try to make sure all your shelves, coffee tables, and kitchen surfaces are as empty as possible. You can use wicker or rope baskets for storing items you use regularly but don’t want to constantly see. You can also get some additional storage containers to free up more space.

Experts at Sacred Space Organizing recommend starting the decluttering process by letting go of items that no longer serve you or your family. By simply focusing on the things that bring you joy it makes the decluttering process that much more manageable and empowers you to confidently let go the things you no longer need, use, or treasure.
Leave the curtains and blinds opened to secure suitable lighting for real estate photography. Place around some fixtures where needed and turn on all the lights (even the ones in your closets). Such a setup will ensure your pictures are bright, eye-catching, and inviting.
If the fixtures you already have in place produce sufficient lighting already, remember to simply clean them before the shoot. On the other hand, if some of your light sources work poorly or are broken, you can easily replace them with minimal investment.
Possible destinations for buying light fixtures include Wayfair, Pottery Barn, and Schoolhouse. Alternatively, you can check out both the new and used accessories on Facebook Marketplace.

Warm lights that offer a color temperature in the 3000 to 4000 Kelvin range excel at establishing an inviting atmosphere that relaxes and calms the viewer or visitor, helping counterbalance the colder aspects of a property.
As such, it’s recommended to both have the blinds open to let in natural light and get warm lightbulbs to make the overall color scheme of the photo warmer.
Purchase warm light bulbs and replace all the lights in the house to cast a warm glow, or get a premium LED smart bulb kit that will allow you to pick between various color temperatures based on your needs.
If you want to help potential buyers imagine how comfortable it’s going to be living in the house they see in your photos, follow these spacing recommendations when preparing staged homes before and after pictures:

Experiment with virtual staging software to add realistically-sized furniture and accents to design a homey, warm space that is also modern and neatly organized.
While real-life staging is expensive and ensures every mistake you make is even more costly, virtual staging allows you to try out different designs to appeal to different target audiences with ease.
For a small room, stick to only having a couple of larger furniture items to ensure the area doesn't become overcrowded. You should stay clear of overstuffed, bulky couches and trendy wood-framed loveseats while prioritizing more compact, low-profile models.
Don’t purchase new expensive furniture if you just want to take some visually appealing furniture photos. Instead, you should consider bringing some pieces from your own home or getting cheap furniture online.
Paint the furniture white or another neutral color and you'll already improve its look tenfold. Moreover, such items can be brought to your future houses to serve the same purpose. The best places for buying furniture include Facebook Marketplace, Etsy, and Amazon.
Replace blankets that have complex patterns and worn-out dark décor items with bright elements to emphasize specific features of the room. You can purchase reasonably priced décor on platforms like the Facebook Marketplace, HomeGoods, Michaels, IKEA, Target, and Walmart.
Having walls painted in a neutral color is always a great idea but you can make your rooms even more eye-catching by adding a couple of accents in the shape of stylish throw pillows or properly arranged chairs that tie the space together.
Remember to follow the 60-30-10 rule:
If you need help picking complementary colors when coming up with pictures and ideas for staging houses, consider choosing two tones on the opposite sides of the color wheel. Alternatively, you can pick different shades of a single color as long as you ensure they offer the necessary level of contrast.

Proper use of texture will help you make the room in your photos look significantly more stylish. Possible combinations to consider include soft rugs and hardwood floors or stainless steel items and slick subway-style tiling.
Textured carpets can also do wonders for making a space feel warmer and cozier while defining the living room as its separate distinct part of the property.
A couple of well-placed plant pots can breathe new life into your before and after photos, making the space feel much homier and more relaxing. If you're dealing with a large number of plants, tastefully arrange them so that they don't clutter a single area (unless it's a greenhouse).
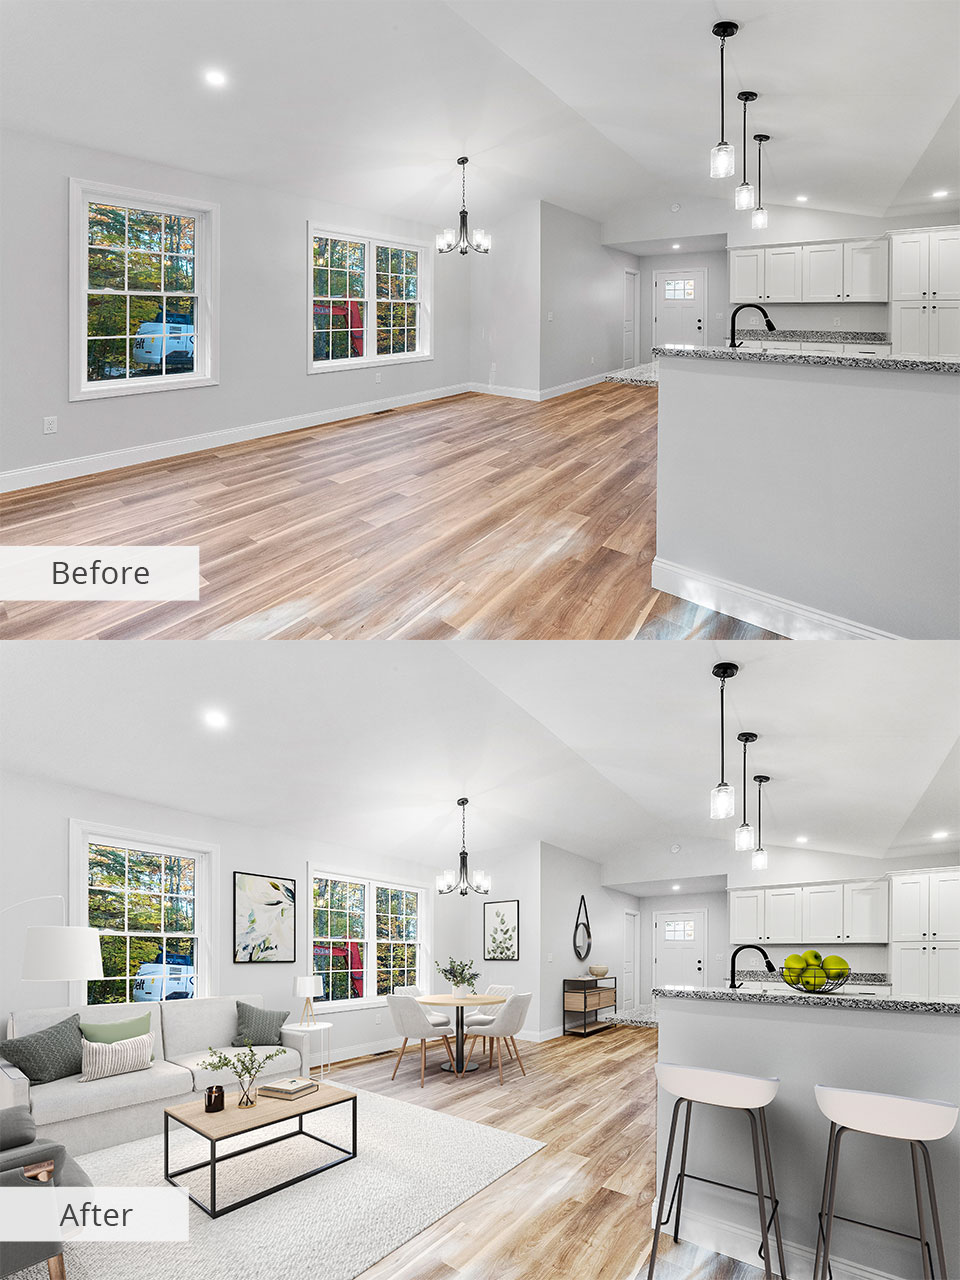
Many consider the kitchen to be the heart of the house but that doesn't mean it should look lived-in when you're selling a property. Before you begin the photo shoot, get rid of all unnecessary items from the counters, shelves, and dining table, including different types of products and appliances. If you have nowhere to keep the stuff, find a cheap storage near you. StorageCafe offers a variety of options at a reasonable cost. That said, a single bowl of lemons or apples will only serve to enhance your photos.
If you don’t want to spend time staging a house to take beautiful photos, reach out to professional virtual home staging companies. They will add realistic furniture to photos of empty rooms, get rid of unnecessary details, and add trendy décor. Some reliable companies that you can consider include Stuccco, VirtualStagingSolutions, and VHT Studios.

It’s important to ensure the lawn, hedges, trees, and flowerbeds around your house are looked after and organized. Clean the windows properly and maybe even add some flower boxes where you don’t usually have them.
If possible, consider power washing the entire exterior to create a freshly-painted look without putting in the extra effort and expenses. Besides, you may always use day to dusk conversion to get a beautiful ambient light that can hide some flaws.
Another aspect to take care of is ensuring the sidewalk that goes to your property is clear and clean and it’s probably a good idea to replace the doormat as well. If the house comes with a pool, make sure the water inside is crystal clear.

Another strategy for making the exterior of a house look more appealing is adding an outdoor living area in the backyard in the shape of a deck or patio with suitable furniture.
You can also involve some landscape designers in the process that you can find on Houzz or Upwork. Alternatively, you can experiment with landscape design software yourself by using tools like SketchUp or Kerkythea.
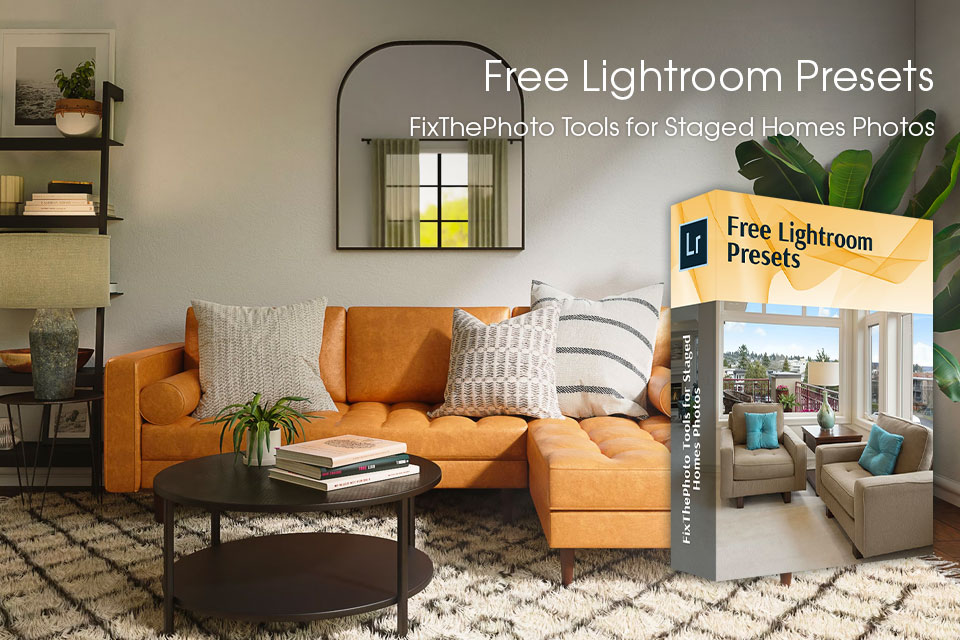
Once you have staged the house and taken photos of all the rooms, it's time to edit your real estate images. Thankfully, you can perform color correction and adjust the brightness, contrast, and other parameters in just a few clicks with the help of these free tools.
The provided tools come in .lrtemplate and .xmp formats and can be used in Lightroom Mobile, Lightroom 4, 5, 6, and CC.


