Geometry photography is built on all sorts of geometric lines, shapes, and patterns that surround us in life. Geometry is closely related to architectural photography, but buildings are far from the only source of geometry around us. Natural landscapes can also be a godsend for this genre as well.
The geometry surrounding us is roughly divided into two types – hard and soft. Interesting objects may even be hidden in non-geometric objects. Also, you can always arrange your objects so that they form geometry in photography on their own.

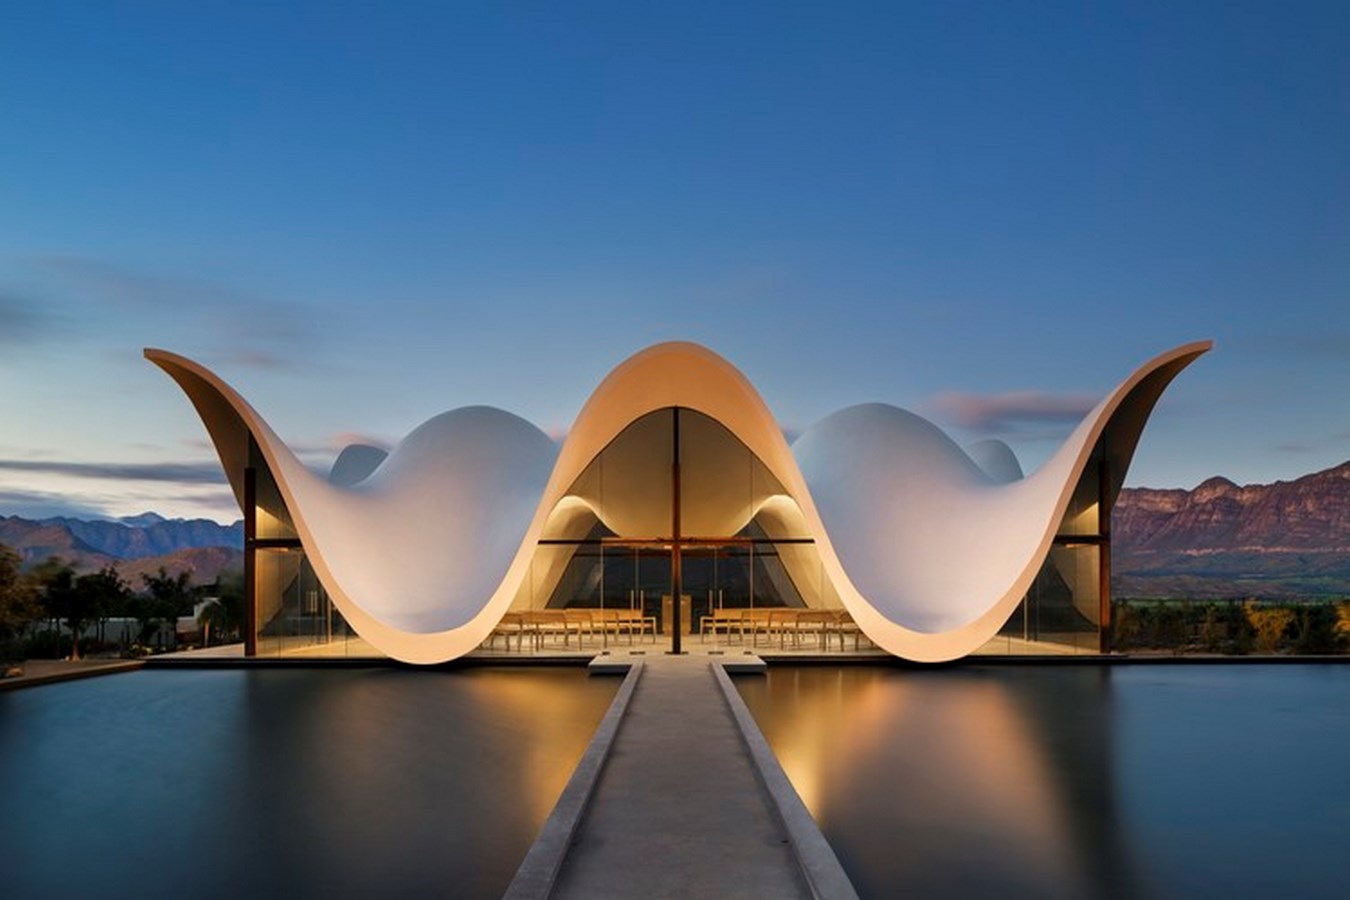
Hard geometry or true geometry. This type includes everything that has a clear geometric shape. Typically, these are objects created by humanity or technology, since such clarity requires incredible precision.
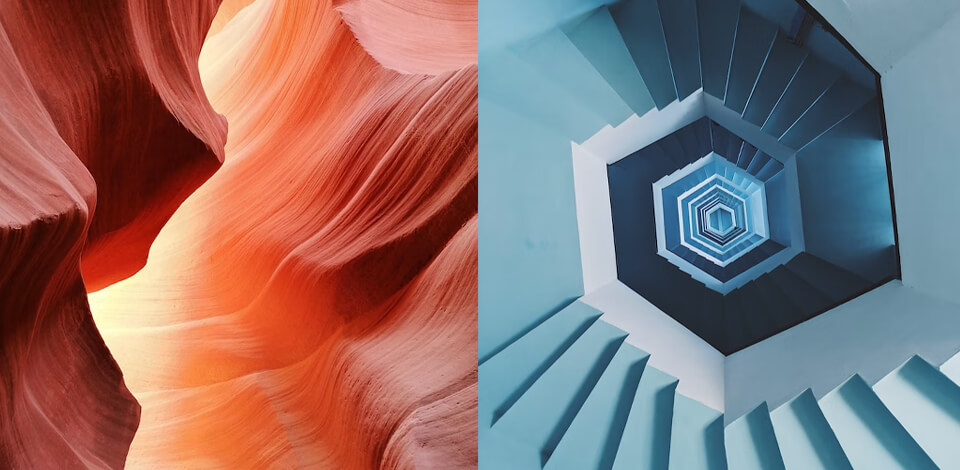
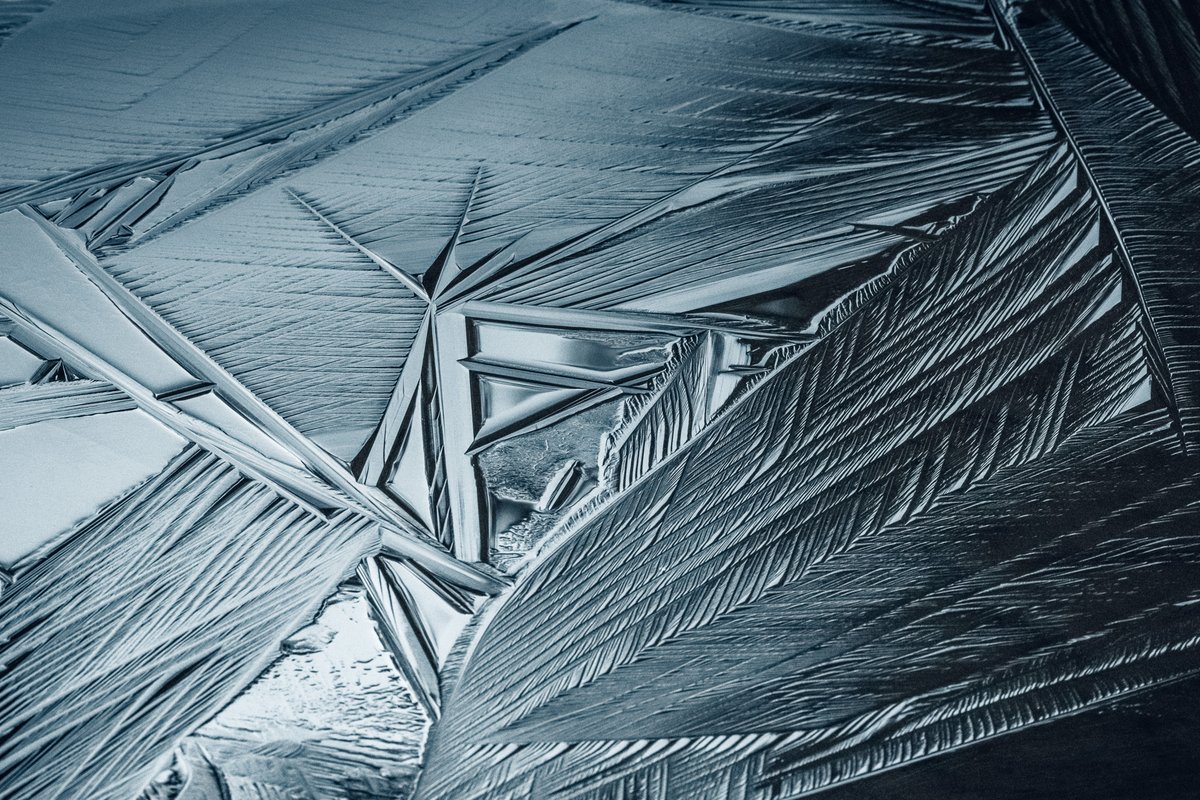
At the same time, nature is not far behind technology, creating crystals, beehives, shells, snowflakes, and other things of natural origin that amaze us with their distinct geometry.

Soft geometry or perceptual geometry. This type includes objects whose shapes are not exactly defined. You can see examples in nature photography, photos of plants, landforms, sealines, and hills.
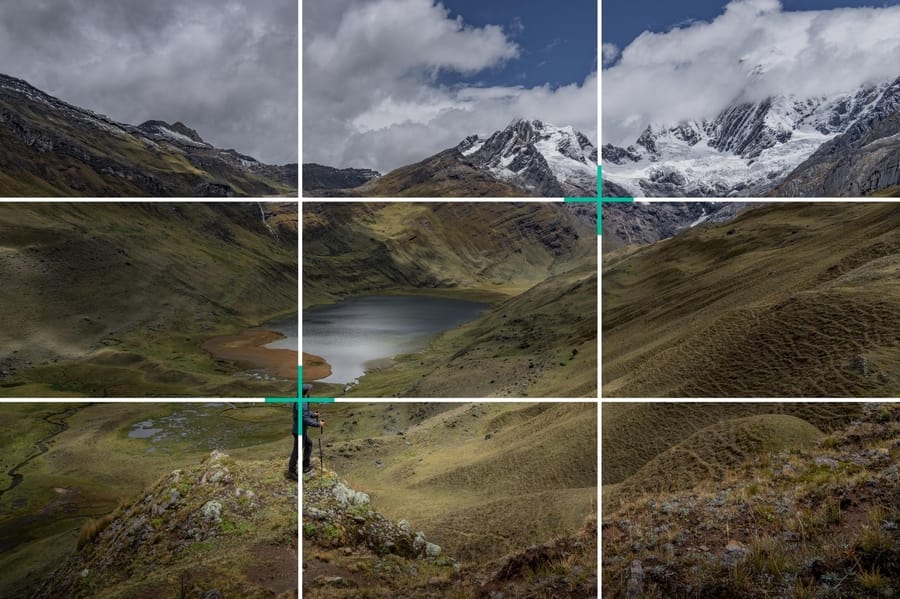
Rule of thirds is a fundamental one in any genre and geometric shapes photography is no exception. It is based on horizontal and vertical lines which when interesting form four points.
This rule helps in creating compelling shots by telling the photographer how to place objects in the frame correctly. By using it to fit your geometric shapes into the frame in the right way, you will get an impressive effect.

This is another basic photography composition rule that says it’s better to have an odd number of objects in a frame than an even number. When shooting 3 subjects, try arranging the subjects in a triangle instead of a line to achieve a more original and attractive look.
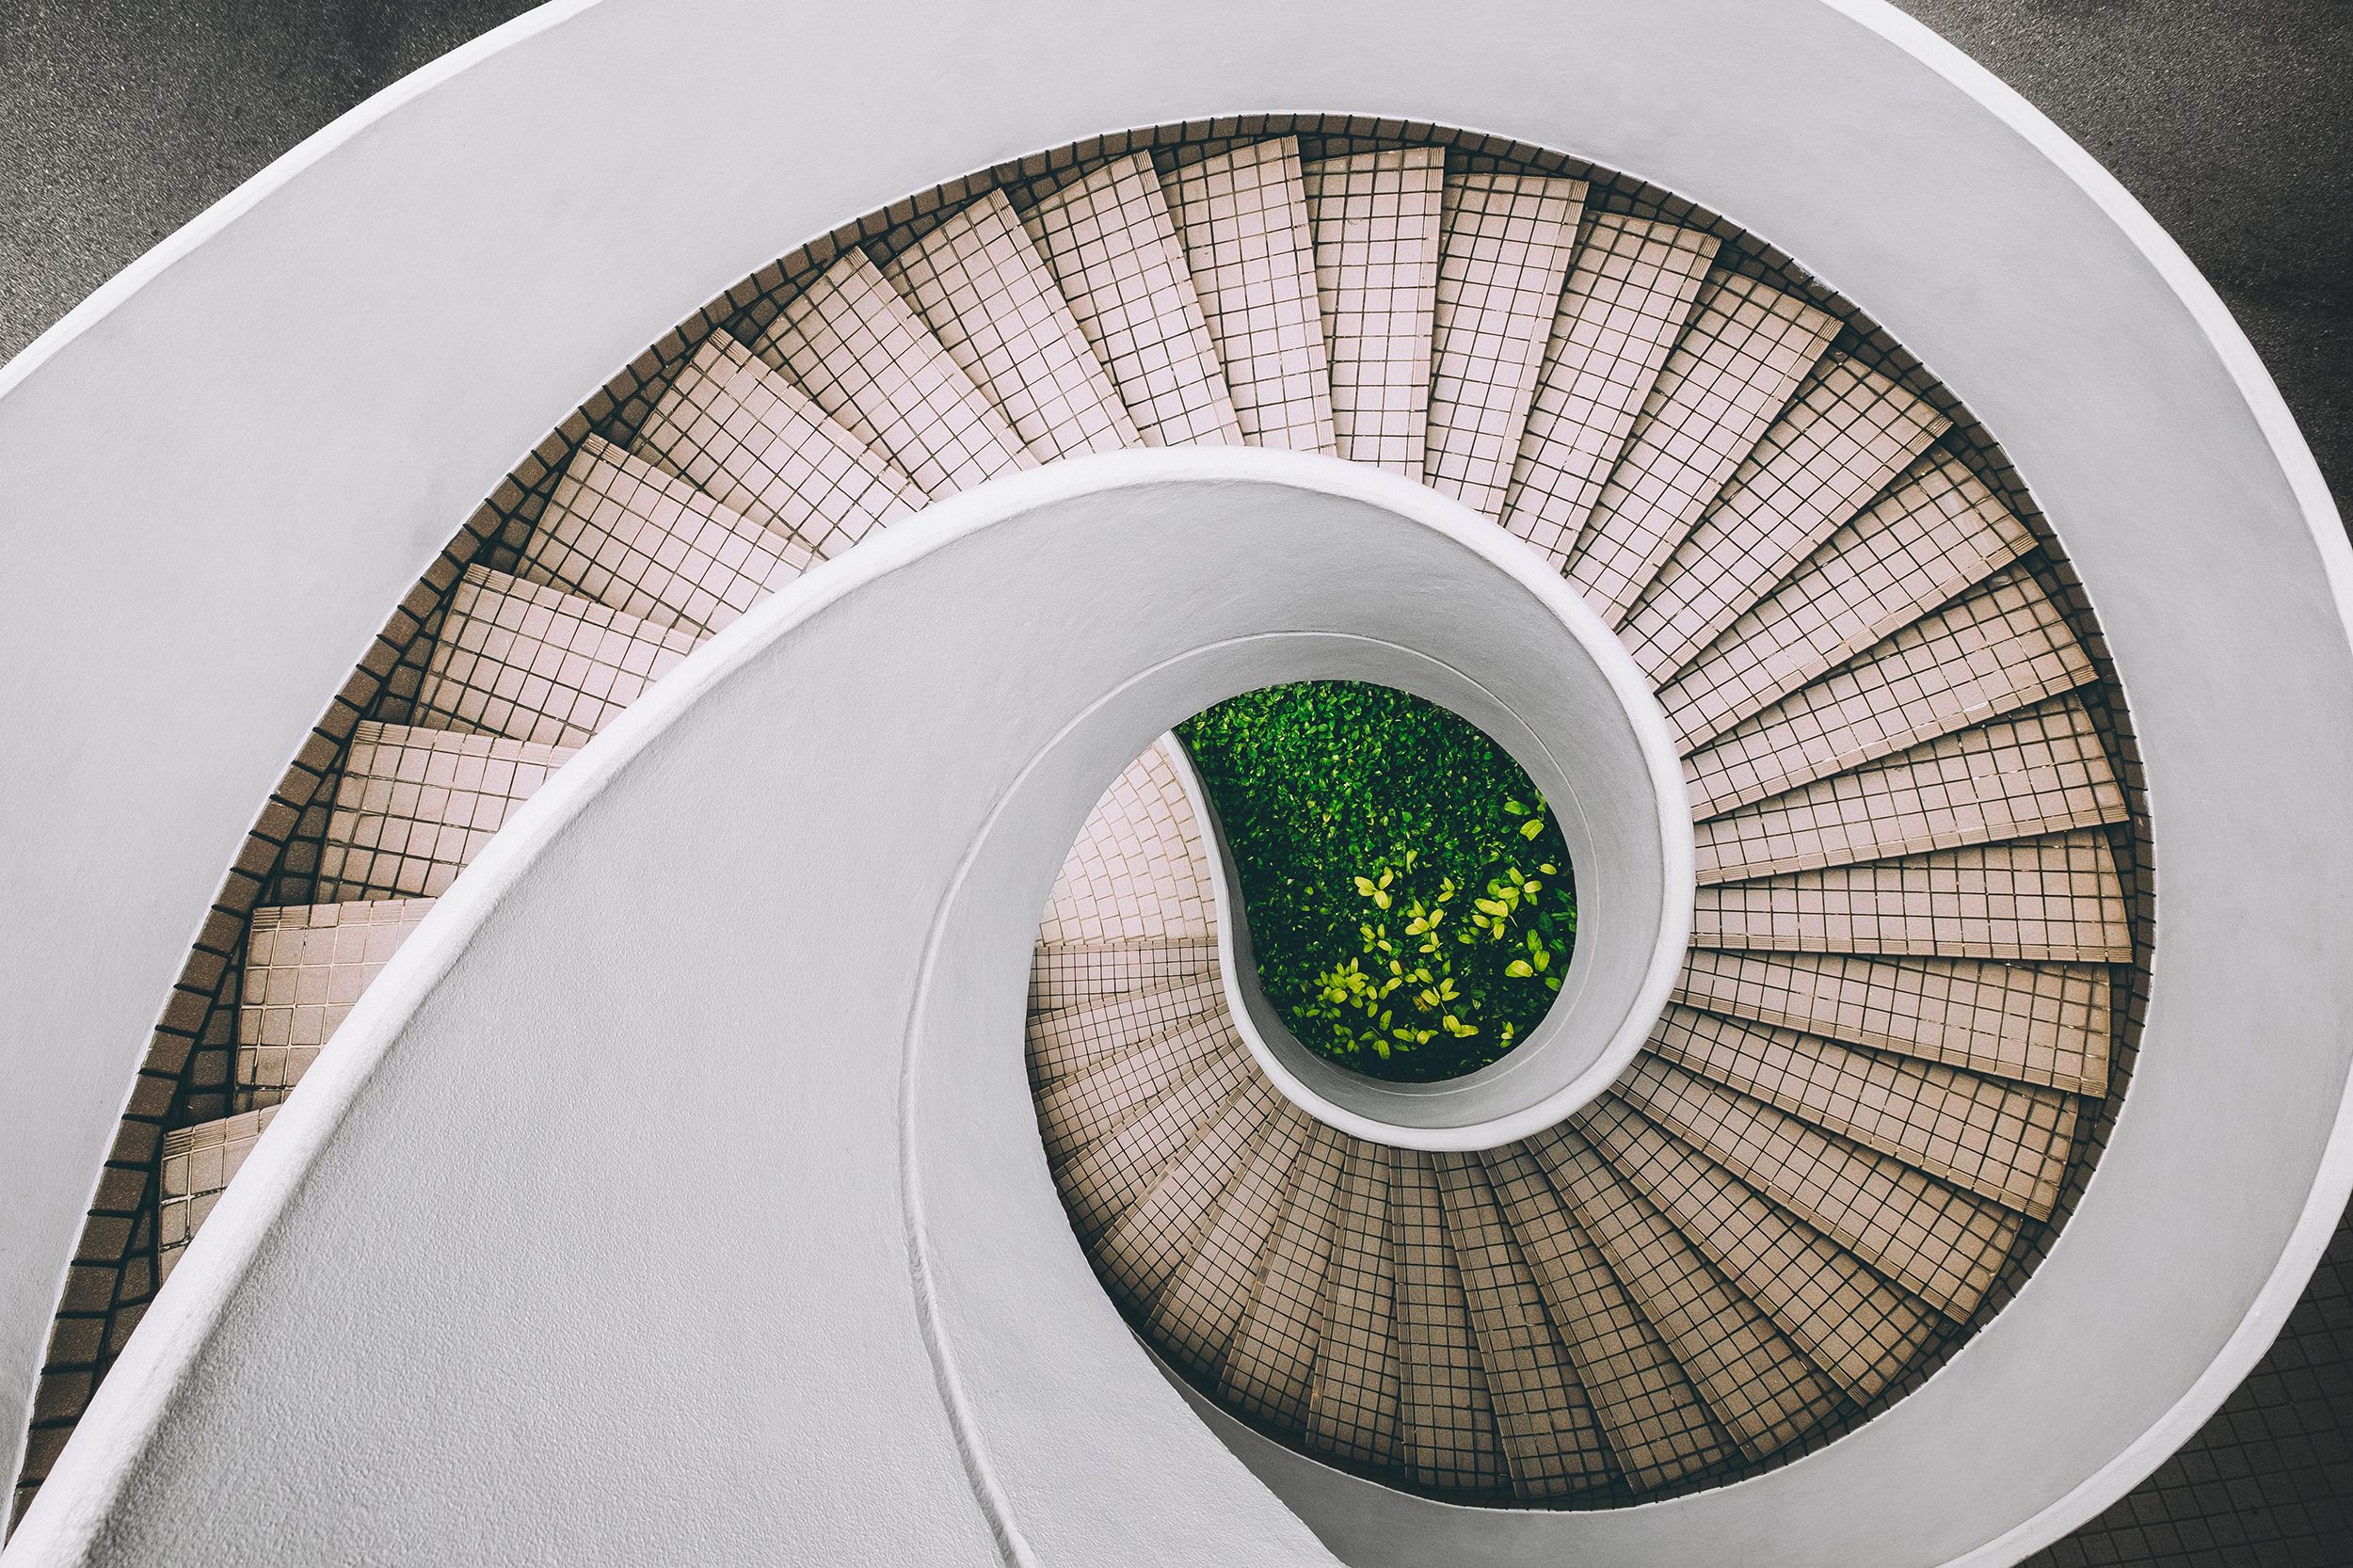
Using a golden spiral when shooting geometric photos will help to make your shots properly balanced. This is achieved by dividing the area of the image, which is bordered by real lines or virtual edges, into positive and negative.
The main condition is to place the central object of your frame in the center, and the rest in a spiral. Alternatively, you can place just one object in the center, leaving the rest of the photo free to achieve radial balance in photography.
Another great way to recreate a geometric shape in photography is to use a golden triangle. Start by drawing an imaginary diagonal in a rectangular box from one corner to the other, and then draw a perpendicular to the diagonal from the remaining corners.
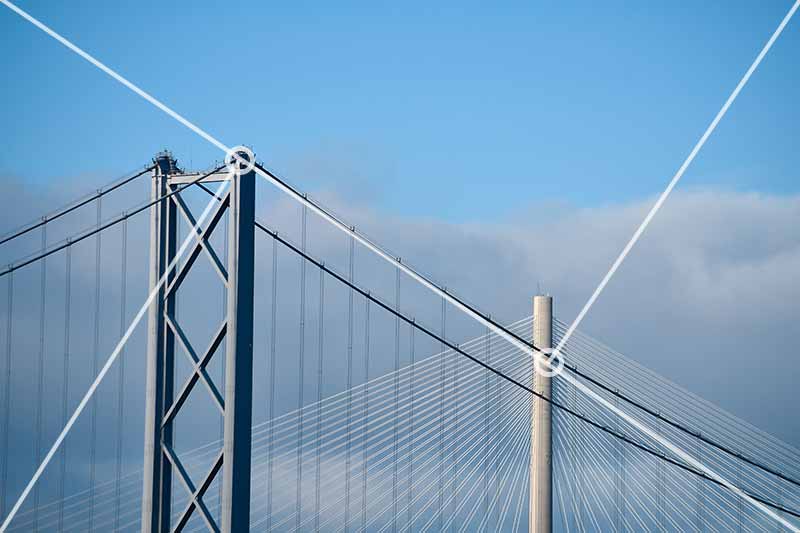
To achieve a spectacular effect, you should ensure that the resulting intersection points contain the most important parts of the picture, such as the face of the model or the eyes in the case of a portrait.
You can form triangles on your photos using the world around you, be it buildings or natural objects. Try creating triangles from your models, for example, using leg or hand posing, or if there are several models in the frame, arrange them according to the triangle.
Symmetry is also an integral part of geometry in photography, and all you need to make a frame symmetrical is to place the subject and divide the frame equally on the right and left.
Alternatively, you can highlight the center of your composition with symmetrical patterns or repetitions in photography.
That being said, don’t worry if you can’t achieve perfect symmetry, as you may end up with an unexpected interesting effect. There are many stunning examples with one half of a symmetry photo containing a catchy object.

Reflection photography is somewhat reminiscent of symmetrical photos, complementing your geometric shapes photography with the picture-perfect reflection.
Besides the obvious mirrors and windows, you can take amazing photos with reflections in the water, whether it’s a puddle, lake, river, or sea.
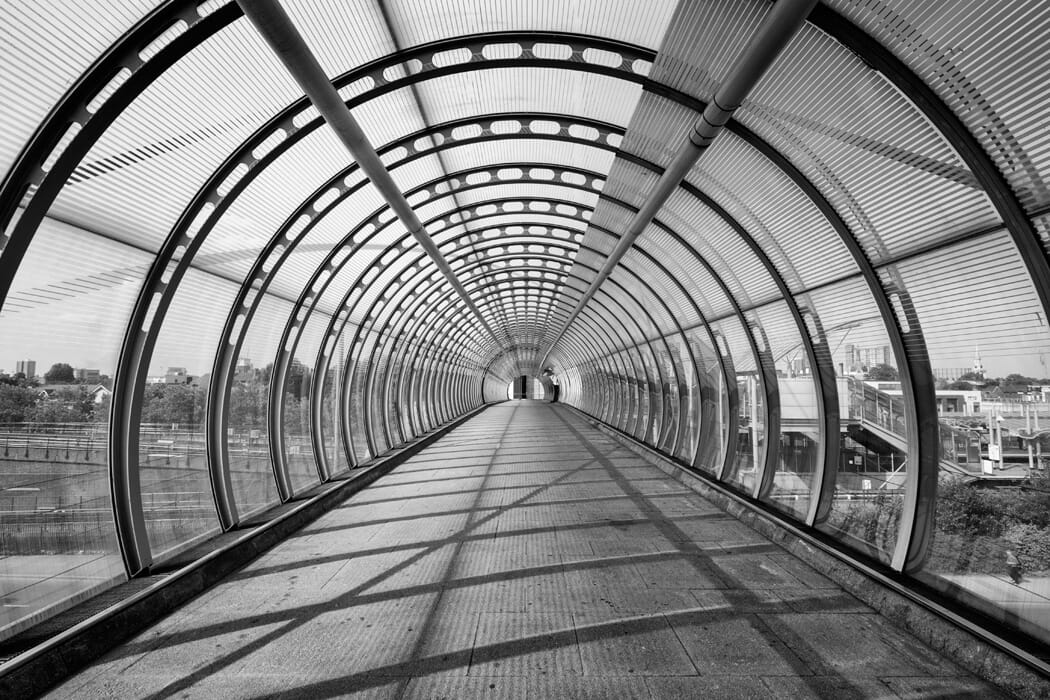
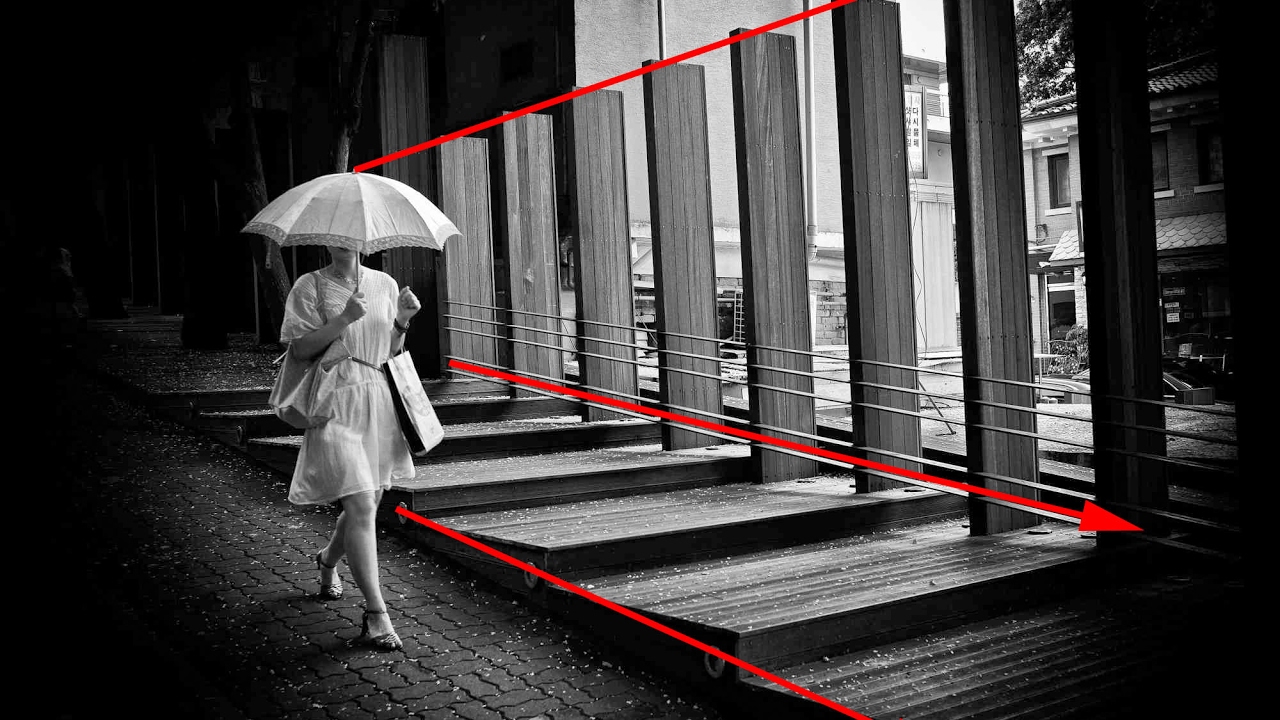
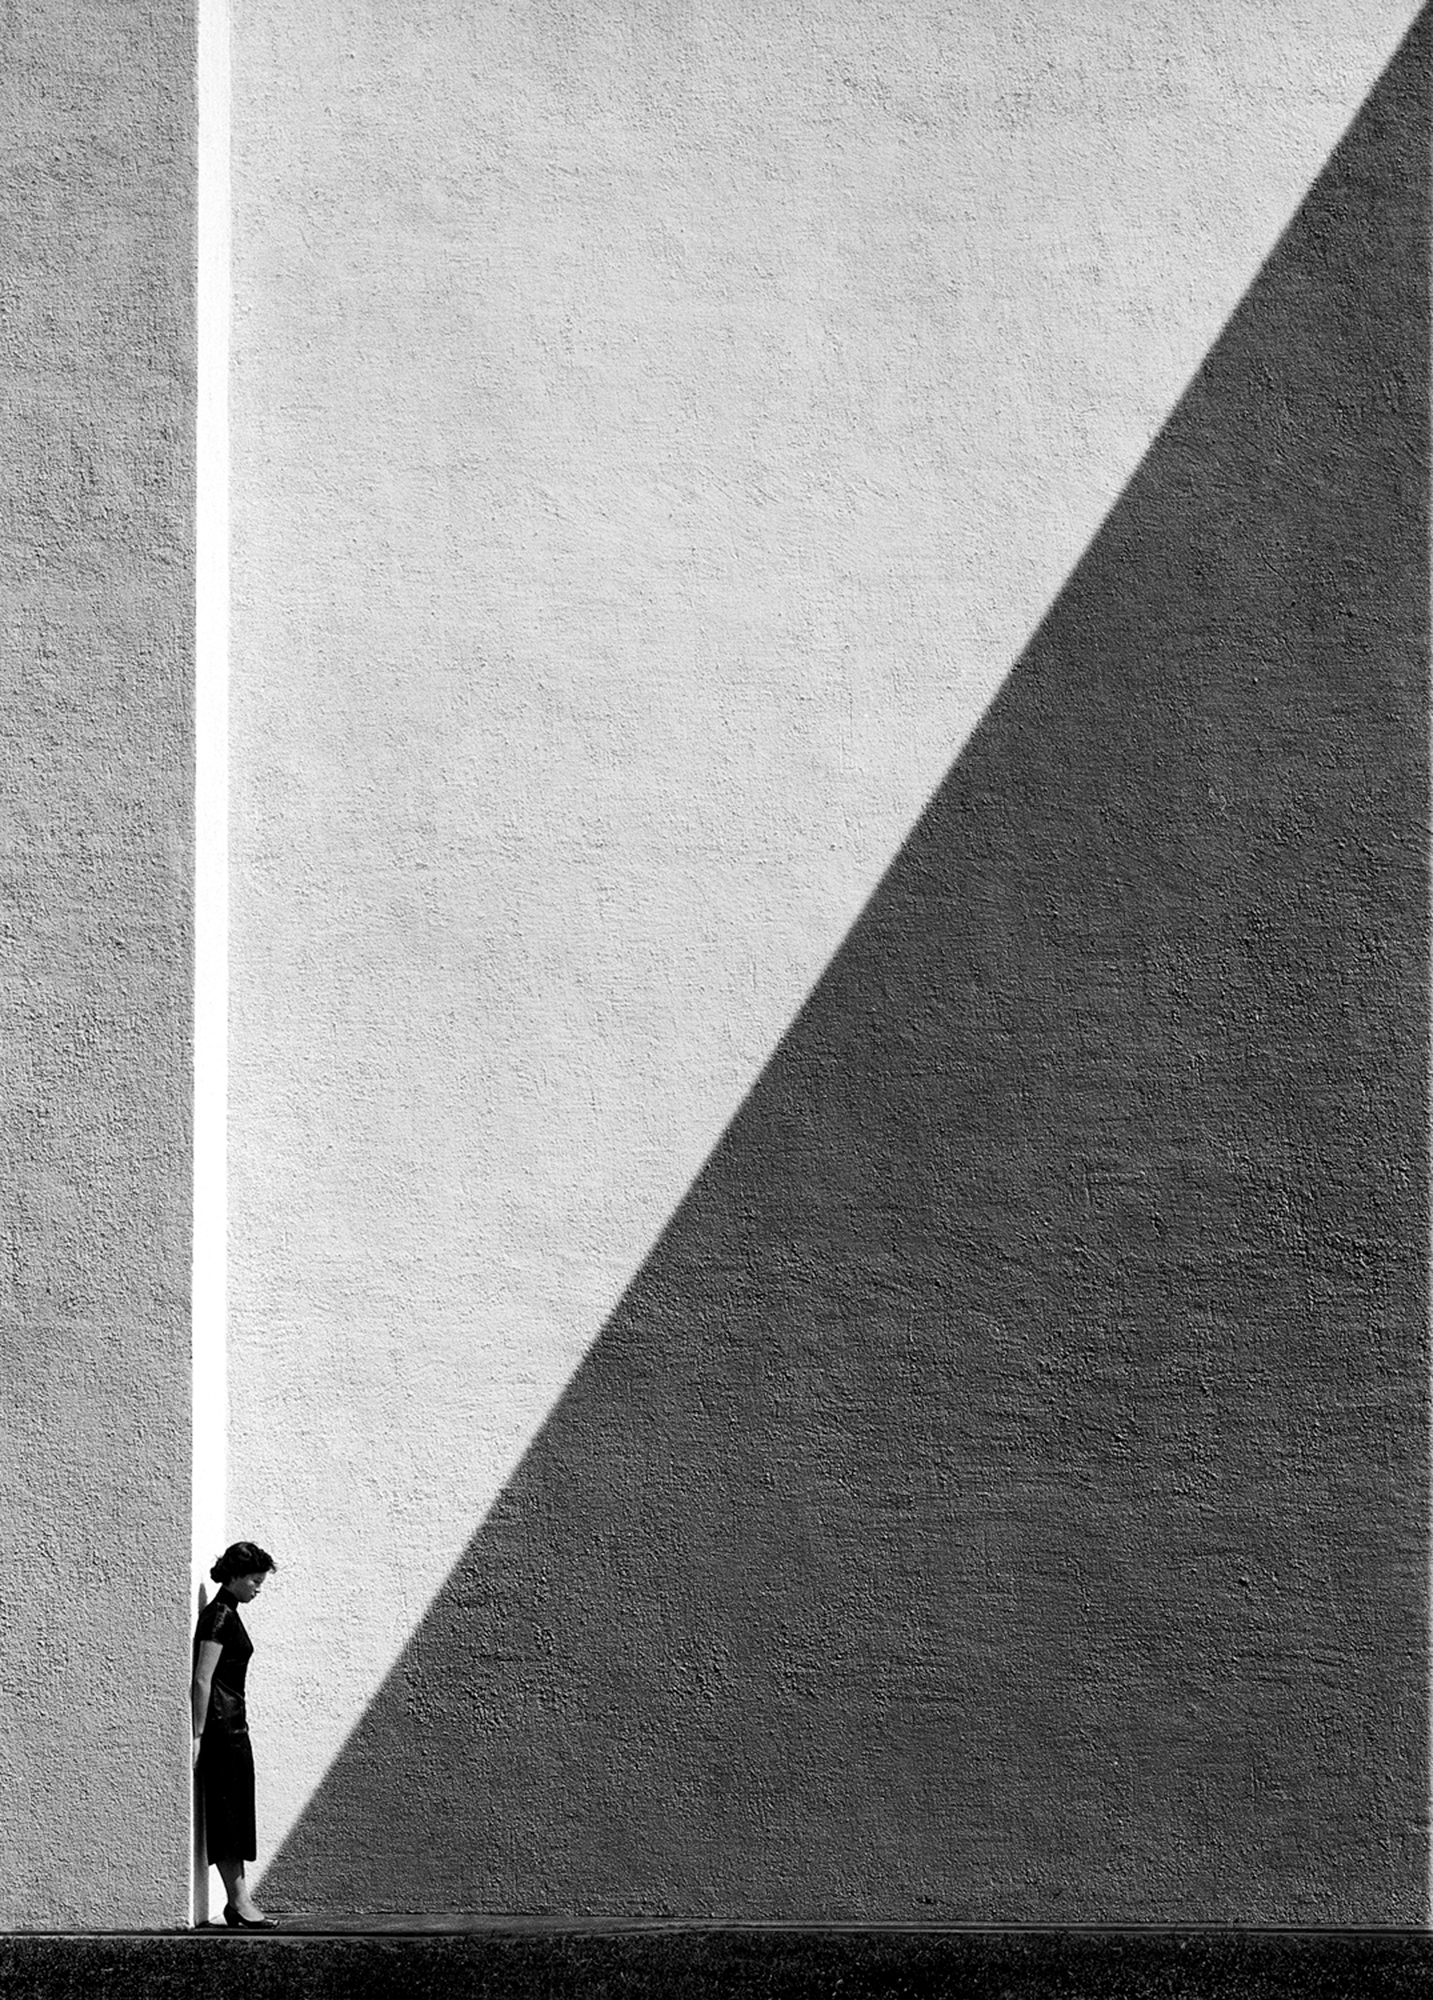
Leading lines in photography are a great way to not only direct the viewer’s attention to the center of your composition but also create exciting geometric effects with them.
The direction from the corner of the image to its center is traditional, however, other types can end up with an unusual look.
For those who are trying to create balanced and rhythmic geometric photos, I recommend trying parallels. Even though they are just lines, they have the power to color your frame with a certain mood. Horizontal lines are associated with calmness and tranquility, while vertical lines represent strength and growth.

When capturing architectural objects or buildings, regardless of the photography type used, play around with perspective. By trying different angles and perspectives, you can get a completely different view of the geometry of your buildings.
This type of photography is beautiful in its absence of rules. Only your imagination plays a role when implementing abstract photography ideas that are easily combined with geometric shapes.
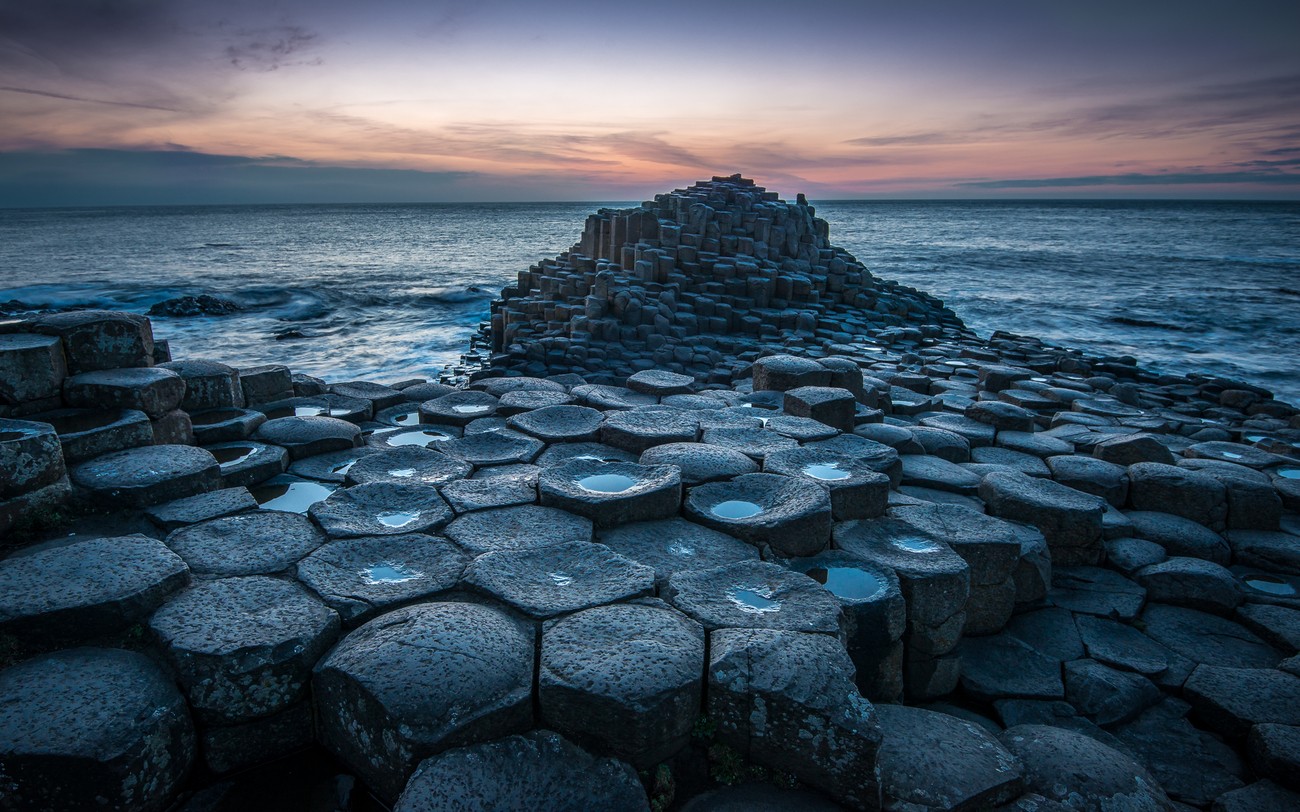
Nature and landscape are a wellhead of soft geometry. Study the location, choose the right lighting, and implement the most daring landscape photography ideas incorporating geometric shapes.
If you practice drone photography, then completely new possibilities of geometry in photography open up before you. Watch cities, neighborhoods, squares, and even fields from above in search of terrific geometry.
If you are a fan of cityscape photography, then finding geometric shapes around you will be a no-brainer task. Avenues, boulevards, arches, architecture, lanterns, windows – all these and other urban attributes are geometry.
Once you’ve chosen your subject, start looking for the right angle to make your composition eye-catching and incorporate geometric form into it organically.
It will be optimal to depict a leading line, which can be a road, a lamppost, etc. You can also use framing incorporating a window, door, archway, etc. to grab the audience and keep their eye on the central object.

If you shoot urban fashion or high fashion photography, then you must know how important it is to lay stress on each element of the composition so that the photo turns out to be well-balanced and elegant.
This means that taking care of the geometric shape in photography behind the model may not be enough. In this case, you should ask the model to pose in such a way that her body complements or creates a geometric figure. Start by framing the face with hands, this is a simple yet spectacular shot.

Small edits made in reliable photo editing software will never get in the way of your geometric photos. Here are a few aspects that I recommend paying attention to when editing a photo:
Get rid of unnecessary objects. Take the Clone Stamp and seamlessly remove anything that messes up your focal points.
Perform color and light correction. Make your photo more contrast and richer, or enhance the shadows to make the photo more dramatic.
Improve lines. Geometry loves precise, confident, and straight lines. However, when shooting, things can happen with the camera and lens, and the lines will no longer be straight. Correct the perspective to get rid of any distortion and make your lines and shapes perfect.


For those who do not want to mess with their photos, there is a great solution – ready-made professional easy-to-use actions specifically for geometric shapes photography. Just add presets to Lightroom and enhance your shots with just a couple of clicks.


