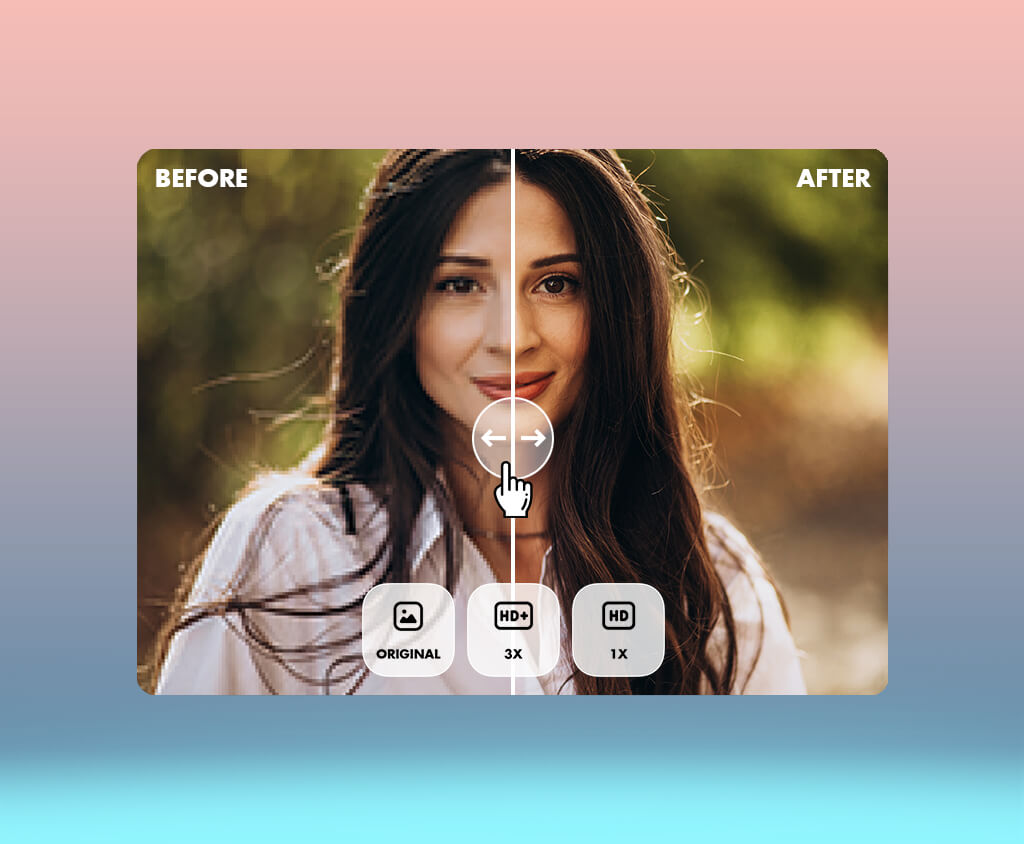
I work as a freelance photographer and often need to take quick lifestyle photos, portraits, and travel pictures, which is why I decided to find a reliable app to enhance photo quality. While working on my projects, I regularly need to take photos and send them to my clients on the same day. I often need to meet tight deadlines and capture pics with my smartphone in changing conditions. It means that the photo quality may be inconsistent, as it depends on lighting and location.
It is extremely difficult to edit pictures on the go when I do not have access to my powerful desktop setup. Professional software allows me to achieve polished results, but such programs are challenging to master and are hardly suitable for photo enhancement tasks when I need to change my location constantly. This is why I decided to find a mobile app that could help me enhance photos on my phone and expedite my workflow.
I decided to find practical AI-driven photo enhancement apps that would allow me to fix issues with poor-quality lighting, blurry details, and inconsistent colors. I wanted to discover a solution that would allow me to sharpen pictures, give portraits a professional feel, improve quality, and get polished outputs without complicating my workflow.
When using these apps to enhance photo quality, I considered whether they were suitable for practical tasks instead of comparing them in terms of the available features only. I assessed how quickly they enhanced photos and evaluated the results to understand whether they were natural. Besides, I wanted to check whether these apps had intuitive tools and produced outputs that were suitable for client delivery or being published on social media.
Together with my colleagues from the FixThePhoto team, I tested popular photo enhancement apps to see whether they are suitable for enhancing travel photos, portraits, pictures taken indoors, and low-quality pics captured with a smartphone. I compared these solutions in terms of image quality, speed, AI tools, and workflow. This approach helped me understand which apps are suitable for enhancing photos at a professional level without using desktop software.
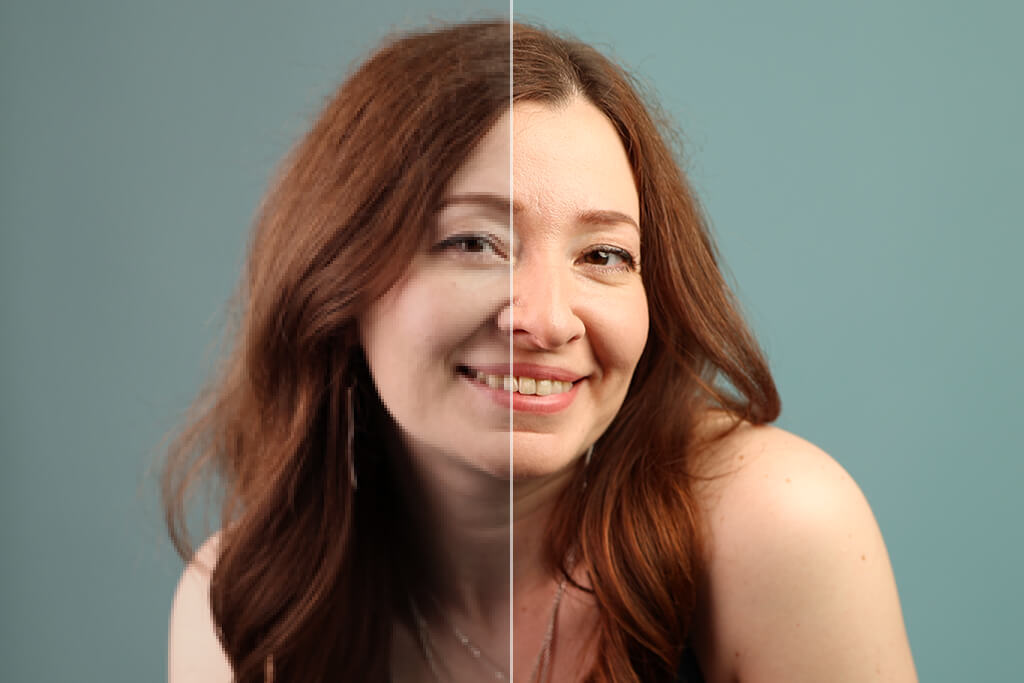
Resolution and image size
Example: Enhancing a small, blurry travel picture to increase its resolution and make it suitable for printing or being published on a website.
Sharpness and details
Example: Removing softness from a portrait and making the eyes and facial features sharper.
Noise reduction. Eliminate grain and digital noise from:
Example: Enhancing a city night photo with noticeable grain that was taken with a phone camera.
Lighting and exposure
Example: Fixing an indoor portrait where the face seems to be too dark compared to the background.
Colors and white balance
Example: Making a travel photo more realistic by recovering natural sky colors and tones.
Face and portrait enhancement
Example: Enhancing a selfie photo captured in a low-light situation to make it look more natural.
Background improvement
Example: Removing passersby from a travel photo or making a product image more polished.
Old photo restoration
Example: Restoring a vintage family portrait and making it recognizable.
Composition and framing
Example: Expanding a portrait to put it onto a social media banner without removing the subject.
Creative improvements
Example: Transforming a regular product photo into a polished advertisement picture.
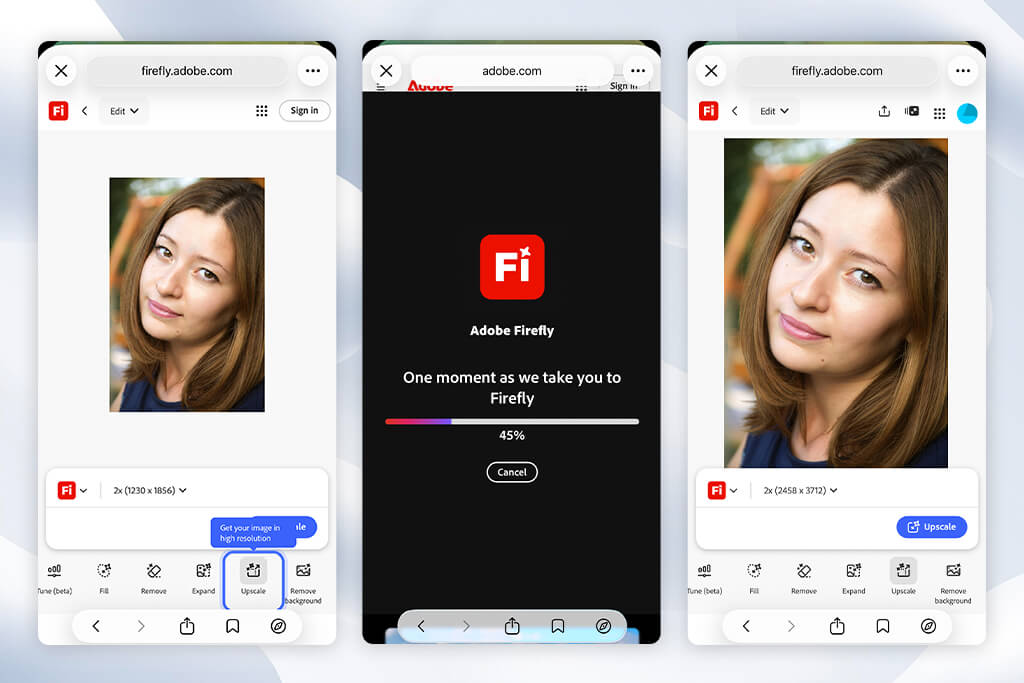
When I started using Adobe Firefly, I decided to enhance a product photo. I realized that I would need to perform other tasks besides tweaking colors and making the picture sharper. The photo was quite clear, but the background was too generic, making this photo hardly suitable for a premium-level marketing campaign.
I wanted to experiment with Firefly’s AI-driven features, including Generative Fill, Text to Image, Generative Expand, and Text Effects. My main goal was to understand whether this solution could help me give my photo a professional feel. Unlike regular enhancement apps, Firefly was built for creative image transformation, making it less suitable for simple correction tasks.
When I used it to enhance a lifestyle product photo, I transformed the image in a creative way with ease. This photo enhancer app saved me a lot of time, as I did not need to capture a new photo. I removed the elements cluttering the background with the help of the Generative Fill feature. It helped me create the background in the style that aligned with the style of the marketing campaign I was working on. The AI created multiple variations of the background, so I could choose the most natural solution.
I discovered that this feature was handy when I needed to prepare advertising materials. Using it, I could edit the backgrounds automatically and avoid organizing additional shooting sessions.
“I’ve used this solution to enhance some pictures and make them cleaner. I liked the fact that it helped me make the outputs more polished. It’s especially suitable for situations when I need to quickly enhance my photos with the help of AI instead of fixing issues manually. Even though it might occasionally change the details in my photos, it’s perfectly suitable for creative environments.”

During another test, I tried enhancing photos to publish them on social media and use them for branding materials. With the help of the Generative Expand tool, I extended the composition of my photo so that it could be used for Instagram posts, site banners, and promo graphics.
The free Adobe app allows me to keep the original subject the same while transforming the background. It allows me to resize pictures with ease. Besides, I experimented with Text to Image and Text Effects. Firefly is suitable for those who want to use AI to add unique visual elements to their photos instead of performing basic enhancements.
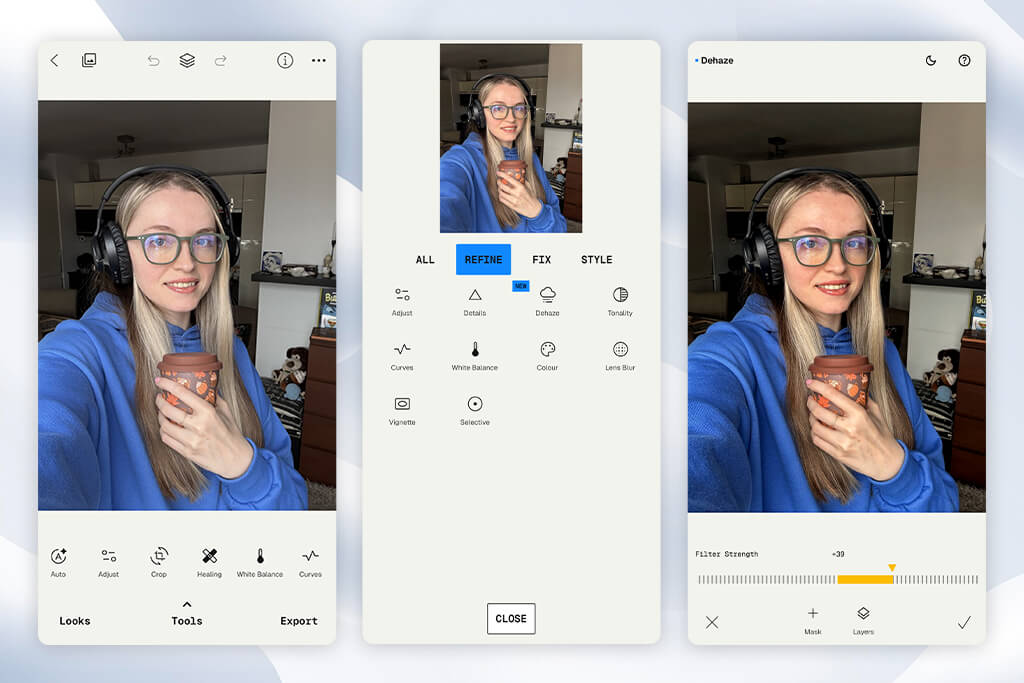
When I started testing Snapseed, I opened a photo I took in a café with my smartphone. There were lighting issues, making the objects in the frame look darker and flatter. I wanted to discover whether this mobile app could help me restore the original atmosphere without making the image look unnatural.
I did not want to apply the filters straight away. At first, I used such features as Tune Image, Details, Selective, Healing, and Curves to check whether I would be able to maintain control over the output. I was pleased by the fact that Snapseed was quite intuitive, making it suitable for beginners. At the same time, it has powerful tools that can be found only in advanced editors.
Next, I decided to edit a portrait where the subject’s face was in shadows and the background was overexposed, making it difficult to see the facial features. With the help of the Selective Adjust feature, I fixed exposure in specific areas without affecting the whole image. The Details tool helped me restore the texture in the eyes and hair. Using the Healing feature, I eliminated distracting elements from a street photo I captured during a trip.
I could achieve higher accuracy using previews. This AI photo enhancer app allowed me to experiment with various ideas without impacting the source image. Snapseed is suitable for all sorts of creative tasks. I used it to enhance landscape and lifestyle photos. The HDR Scape effect helped me add some depth to cloudy skies and outdoor scenes. The Lens Blur effect was suitable for enhancing a portrait in a soft style to achieve better camera depth.
In addition, I used the Curves feature and tried applying Snapseed editing tips. It helped me control highlights and shadows with higher precision. I could also save the effects I applied as Looks to achieve consistency when enhancing multiple photos.
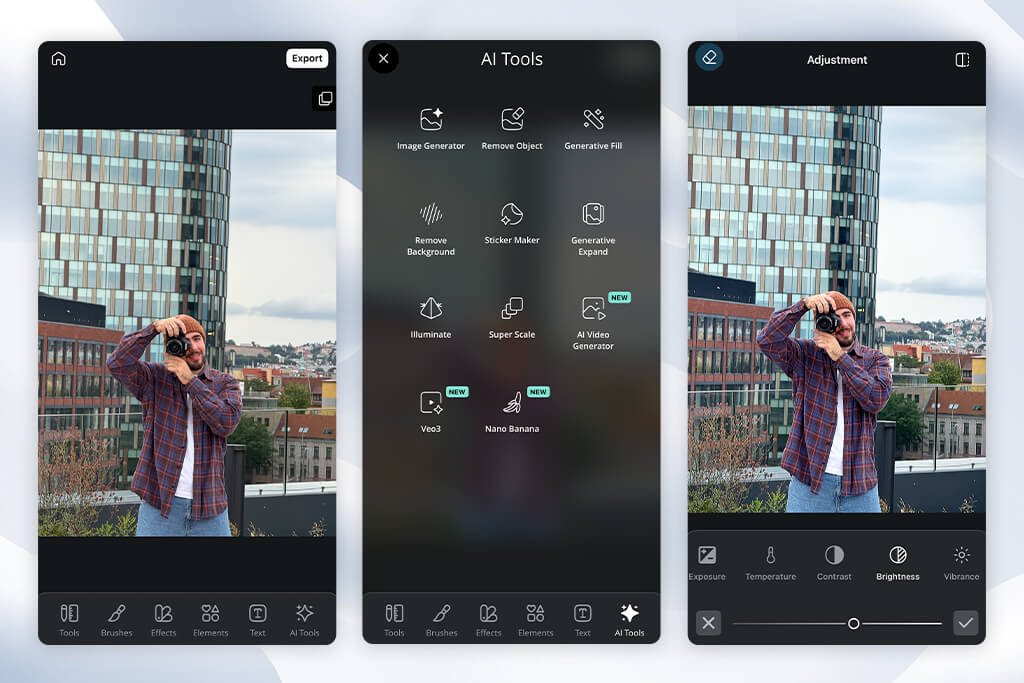
When I started to use Pixlr, I decided to enhance a faded photo taken outdoors to restore it to its former glory. The colors were bleak, there were some contrast issues, and the image was less vibrant and vivid than the original photo I remembered.
I decided to use automatic enhancement and manual editing tools. I used such options as AI Enhance, Adjust, Background Remove, Overlays, and Effects. It helped me understand that Pixlr was less suitable for advanced professional correction, but it allowed me to make my visuals more appealing quickly.
While testing this platform, I enhanced a product photo that had a cluttered background. I used the Remove Background tool to make the object stand out. It helped me improve the composition and make my photo suitable for being published online. Next, I fixed brightness, improved saturation, and adjusted contrast. The AI tools helped me expedite my workflow, as I did not need to configure the settings manually.
“It’s an excellent solution when I need to enhance a photo quickly without installing desktop software. The effects easy to apply, but the AI enhancements may lead to unnatural results. It’s mostly suitable for casual edits.”

Pixlr stands out among many other enhancement apps for its helpful editing and design tools that can be used together. I tried using Templates, Text Tools, Stickers, and visual effects to enhance my pictures before publishing them on social media.
Using them, I could make a simple travel photo more attention-grabbing by tweaking colors, applying overlays, and adding typography elements. Due to its creative features, Pixlr is suitable for enhancing pictures and working on complex visual projects.
After testing Pixlr, I realized that it’s the perfect solution for users who prioritize high speed, creative tools, and intuitive functionality. This app will come in handy for bloggers, small businesses, and social media creators who want to make their photos more attention-grabbing without using advanced software.
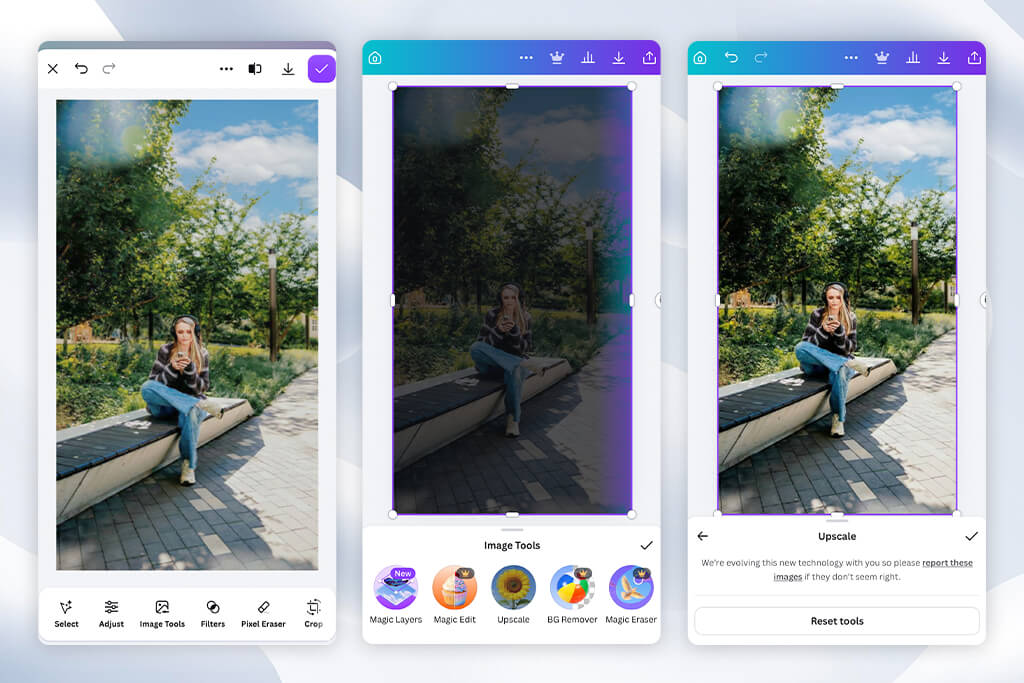
When testing Canva, I decided to choose a bit different approach because this platform is more focused on design than photo enhancement. This is why I decided to check whether it would help me create engaging content.
I used Auto Enhance, Magic Edit, Magic Eraser, and Background Remover to enhance portraits, product photos, and social media graphics. Besides, I used the template library available on the platform. Soon enough, I realized that the main advantage of Canva lies in the fact that it allows users to use enhanced photos in more complex creative projects.
During one of the tests, I gave a plain-looking image a professional look. First, I used the Auto Enhance feature to tweak colors and brightness. Then, I deleted unwanted elements using the Magic Eraser tool and pasted the output into a promotional template. It took me a few minutes to create the output ready for online marketing campaigns. I was impressed by the fact that I did not need to alternate between editing and design apps when working on my project.
What impressed me most about this image enhancer app was the fact that I could use the enhanced images as a part of larger projects. I used Frames, Filters, Brand Kit, and AI design recommendations to maintain consistency when creating content in various formats. For instance, I could turn a portrait into a profile image, presentation slide, or social media announcement. Canva functions as a creative workspace, making it different from regular photo editors.
After testing Canva, I decided that it is perfect for those who need to achieve attention-grabbing results and do not want to waste time trying to master advanced editing techniques. I believe that it will come in handy for students, marketers, entrepreneurs, and content creators who need to create professional-looking images often.
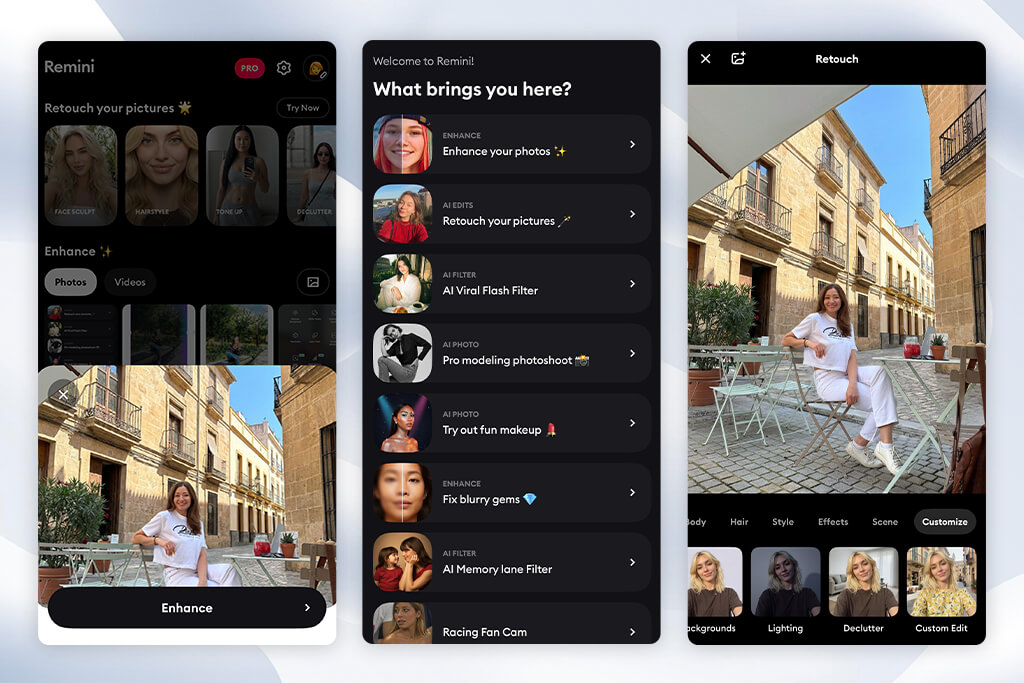
When I started to use Remini, I decided to find out whether it would be suitable for enhancing an old photo that became less clear over time. Even though the face was still recognizable, many facial features looked blurry. This is why I wanted to use photo AI restoration tools to check their effectiveness.
I used tools like AI Photo Enhancer, Face Enhance, Unblur, and Colorize to test this app to fix blurry photos and assess its detail recovery capabilities. What makes it different from traditional editors is that it does not require me to configure settings manually. It analyzes the photo and produces an enhanced version instantly.
I was impressed with this app’s performance when I used the Face Enhance tool when working on low-resolution portraits. It helped me make facial features sharper, achieve natural skin tones, and make the image cleaner. In addition, I tested Unblur on blurry smartphone pics with focus issues and was pleased with the output. However, I discovered that AI restoration tools weren’t always accurate and had issues with restoring missing details.
“It delivered an excellent performance when I needed to restore old and blurry pictures. I used it to make facial features more detailed. However, I noticed that in some cases the AI tools make people look a bit different.”

When I started to use this photo quality enhancer while working on other projects, I realized that it was suitable not only for photo restoration. I used its AI Avatar and creative generation tools to produce new images. I liked the fact that the app handled the results quickly and many steps were completed automatically. It makes this app perfect for those who need to restore family photos, enhance old portraits, or improve selfies before sharing them online.
I believe that Remini is one of the best AI-powered tools for recovering faces and restoring damaged or poor-quality photos. Its key advantage is that it has automation tools. With them, even beginners can enhance their photos without mastering complex techniques.
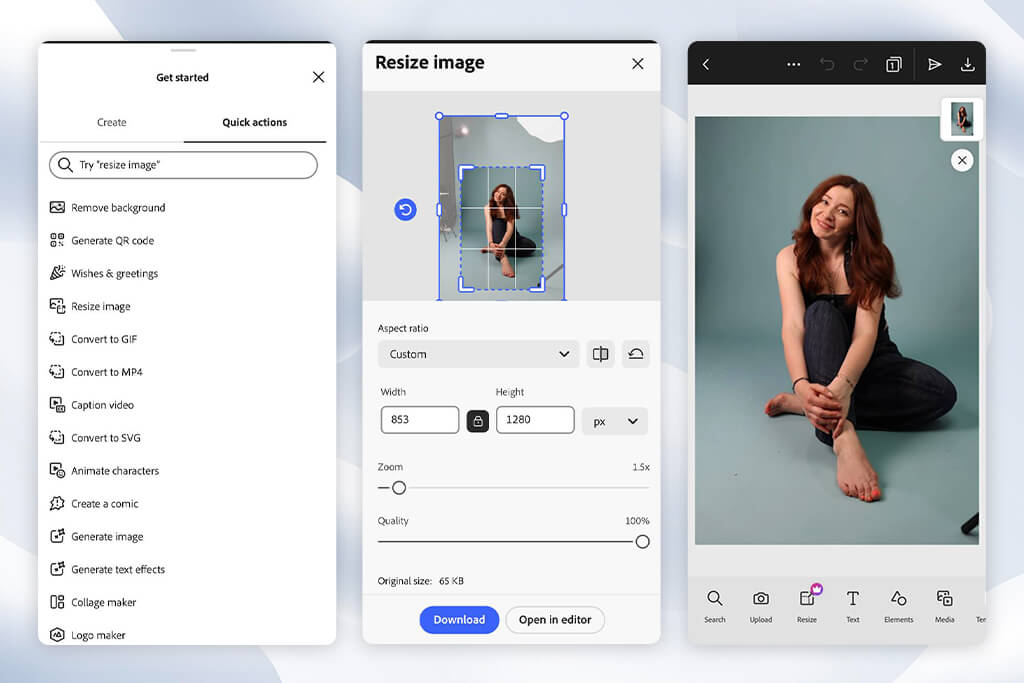
When I started testing Adobe Express, I mostly wanted to know whether it could help me enhance my photos at a professional level quickly. I used this app to enhance a product photo that had some lighting issues, a portrait that required improved color balance, and a travel photo with low contrast.
I did not want to perform only manual edits, so I checked whether I could use editing tools together with content creation features like Enhance, Remove Background, Generative Fill, and Text Effects. This enhance photo quality app is different from regular photo editors because it was created for producing shareable content.
During one of my tests, I decided to make a simple product photo ready for being published on social media. I improved the composition using the Remove Background tool, fixed lighting using enhancement tools, and added design elements using the available templates. I did not need to edit everything manually, as I could use the AI-driven tools. I was especially impressed with the Generative Fill feature, as it enabled me to change or extend parts of the image without affecting its consistent style.
While working on my projects, I discovered that Adobe Express delivered the best performance when I used it to enhance pictures for digital platforms instead of traditional photo projects. I used it to create Instagram posts, promotional visuals, and announcements.
Adobe has excellent editing tools and a collection of layout templates, which helped me expedite my workflow. I especially liked Brand Kits and templates, as they made it easier for me to achieve consistency while working on my designs.
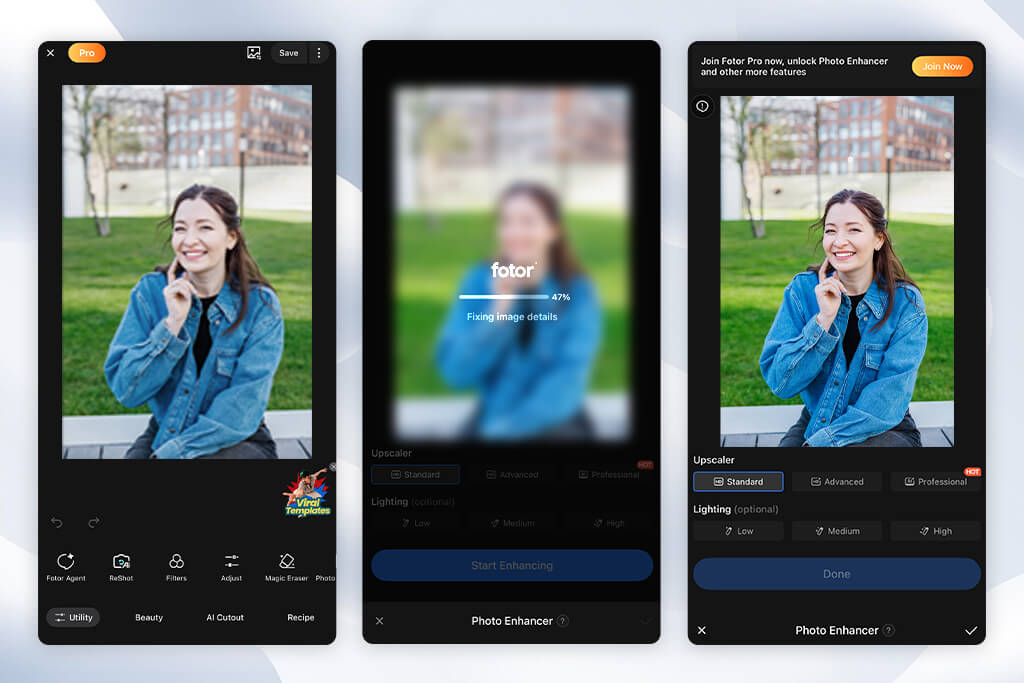
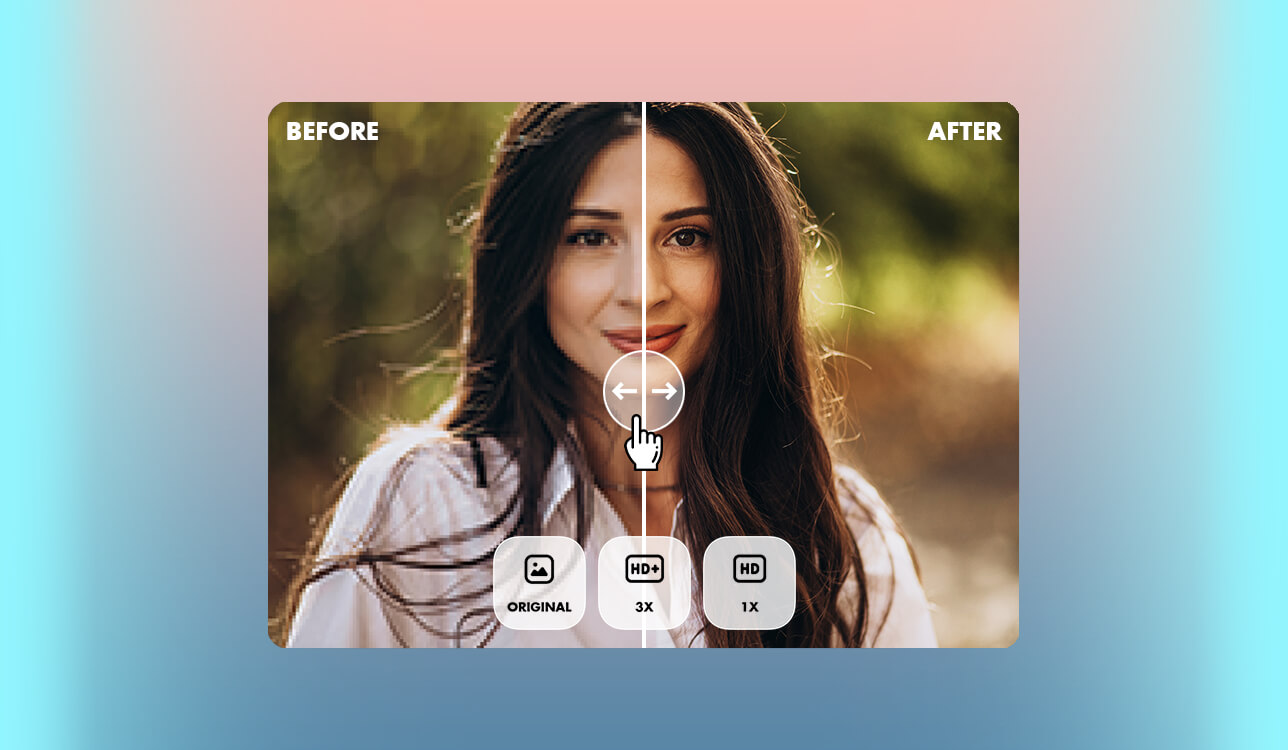
I decided to check whether Fotor is suitable for enhancing photos without using manual tools too much. I tested it in everyday use to see whether it could help me make them more visually appealing. I used the AI Photo Enhancer, AI Upscaler, and One-Tap Enhance features to adjust brightness, sharpness, and color balance. I was especially pleased with the performance speed. I enhanced a simple smartphone photo within seconds.
In addition, I decided to edit a portrait with blurry details and bleak colors. Using the AI Face Enhance feature, I achieved better facial clarity and increased sharpness with ease. I used the AI Enlarger tool to upscale a low-resolution photo and was pleased to see that it helped me enlarge my photo without losing the details. After using this app to improve photo quality, I decided that it is especially useful for preparing photos for larger displays or large-format prints.
“This platform is quite intuitive and suitable for one-click enhancements. I use it when I need to enhance everyday photos. However, some edits look excessive if you increase the intensity of the effects.”

Besides Fotor’s enhancement tools, I tested its creative features, including the AI Replace tool, Background Remover, filters, and portrait effects. I replaced backgrounds and experimented with various effects, trying to transform the atmosphere in my photos.
The AI features are perfect for quick enhancements.
However, I noticed that the outputs depended on the quality of the source photo. I was impressed by the fact that Fotor had both automatic tools for beginners and customization options for those who wanted to maintain advanced control over the outputs.
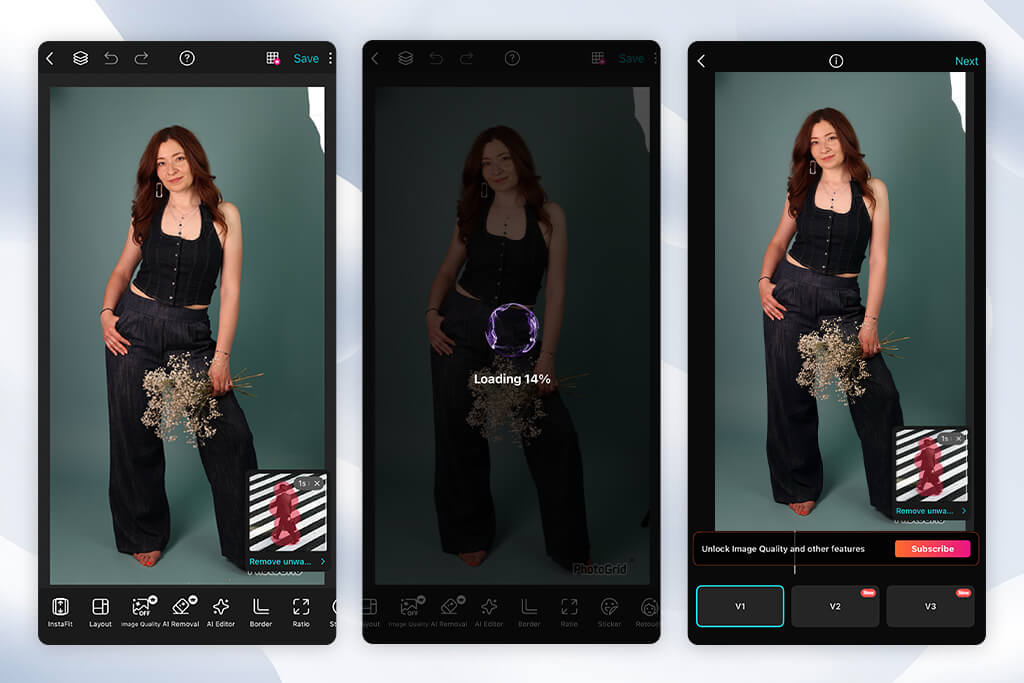
When I started to use PhotoGrid, I mostly wanted to know whether this photo enhancement app could help me significantly improve the quality of my social media images. I tested it on selfie photos, travel pics, and collections of images that I wanted to enhance and organize.
This free photo editing app impressed me with its powerful image enhancement and creative presentation capabilities. It comes with tools such as AI Enhance, Collage Maker, Background Blur, and Filters. Unlike traditional solutions, PhotoGrid has a more extensive toolkit for those who need to make their social media content more attention-grabbing.
When testing this photo enhancer app, I used it to enhance vacation photos that had some color issues and were taken in different lighting conditions. With the help of the AI Enhance tool, I fixed each image and then used several photos to create a collage. I was pleased with the outputs, as they looked quite consistent. In addition, I tested the Beauty Camera and portrait enhancement tools. They helped me improve the quality of my selfie photos by making skin tones well-balanced and applying subtle effects.
I was especially interested in the features that make PhotoGrid stand out among other professional editing apps. It has an extensive collection of templates, stickers, animated effects, and collage layouts, which helped me personalize my visuals.
I liked applying AI Filters because they helped me fully transform the atmosphere of an image in a few clicks. I could make my pictures warmer, add a cinematic feel, or enhance them in a more artistic style. The app was created for those who want to enhance their pics in a few clicks before publishing them on social media platforms.
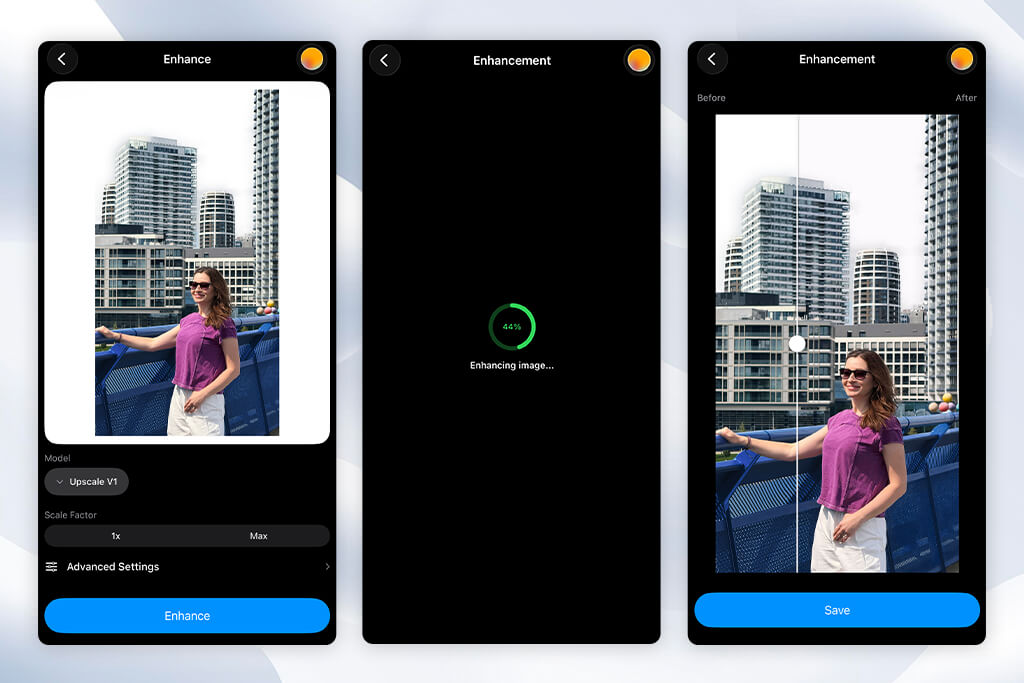
When testing Krea, I decided to follow a different approach, knowing that it comes with powerful artificial intelligence tools. I did not want to use it to fix brightness and contrast manually. Instead, I tested its AI features to see whether they could enhance image quality, tweak details, and experiment with various visual ideas. I used low-quality photos and tested AI Enhancement, Real-time Generation, and image refinement features. It felt almost like I was collaborating with an AI-powered creative assistant.
I started by enhancing a blurry photo that lacked visual depth. Krea has powerful AI tools that can analyze an image and produce its polished and more detailed version. The outputs had more prominent textures and a better composition.
I discovered that this AI photo editor was especially suitable for enhancing creative visuals, illustrations, and AI-generated images. I liked the fact that I could see the results of my actions in real time and make quick adjustments when it was necessary.
“This platform is perfect for those who want to test out different AI enhancements. I was pleased with some outputs, but in some cases, the AI changed the details that I did not want to change. It was built rather for creative edits than basic fixes.”

In addition, I checked whether Krea was suitable for more creative enhancements. I used this AI image enhancer to change image styles and improve some artistic elements. This service allows me to produce visuals in different styles and experiment with several ideas while keeping the main subject the same.
I liked using the AI Canvas feature and was pleased by the fact that this platform supports real-time generation. It makes it especially suitable for those who want to enhance their photos and give them a new look. Krita is more suitable for creative experimenting and testing out new visual ideas than regular enhancement apps.
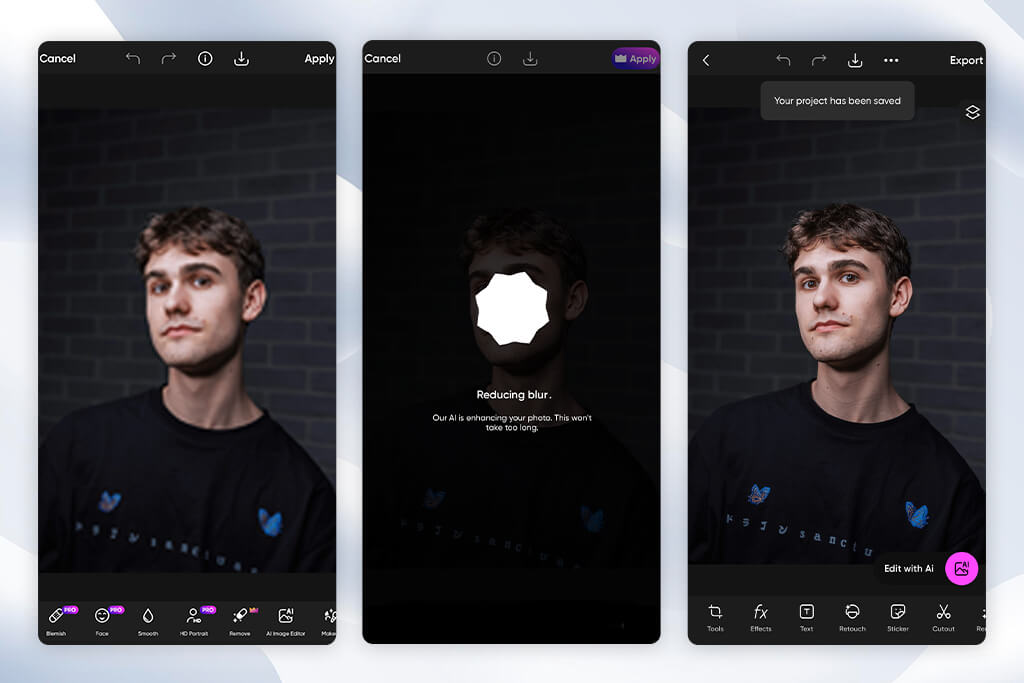
When I heard about Picsart, I decided to check whether it could help me enhance a street photo I took. Even though it looked technically perfect, something was still lacking. I did not want to focus only on improving sharpness and colors. Instead, I tried using enhancement and creative tools to make my photo more attention-grabbing.
After using AI Enhance, Remove Object, Background Remover, and AI Replace tools, I realized that Picsart did not focus only on simple correction. It was created for those who want to completely transform their images and give them a creative feel. I did not want to follow the traditional editing process. This is why I used restoration tools, performed some retouching, and applied creative results to achieve better outputs.
I wanted to check whether this app would help me enhance a portrait captured indoors in low-quality lighting conditions and remove the distracting elements from the background. The AI Enhance tool helped me brighten the image and boost clarity. Using the Remove Object feature, I quickly removed the elements that I did not need and made the subject stand out.
I enjoyed using the Beautify features, as they helped me make the skin smoother, enhance the eyes, and fix facial features. As a result, I could fully control the output. What makes this photo editing app for Android and iOS different from the rest is that it allows users to make subtle adjustments instead of applying full-strength effects. It allows me to ensure that my portraits will look natural.
After using many apps to enhance photo quality, I concluded that Picsart stands out among them because it has a wide choice of creative tools. I used its AI Filters, Stickers, Effects, and the AI Image Generator to enhance my photos and fully transform their atmosphere.
For instance, I created a modern-looking digital portrait based on a regular selfie. I used both AI-powered and manual tools. It made me realize that Picsart is more similar to a creative studio where one can perform a variety of tasks besides enhancing photos.
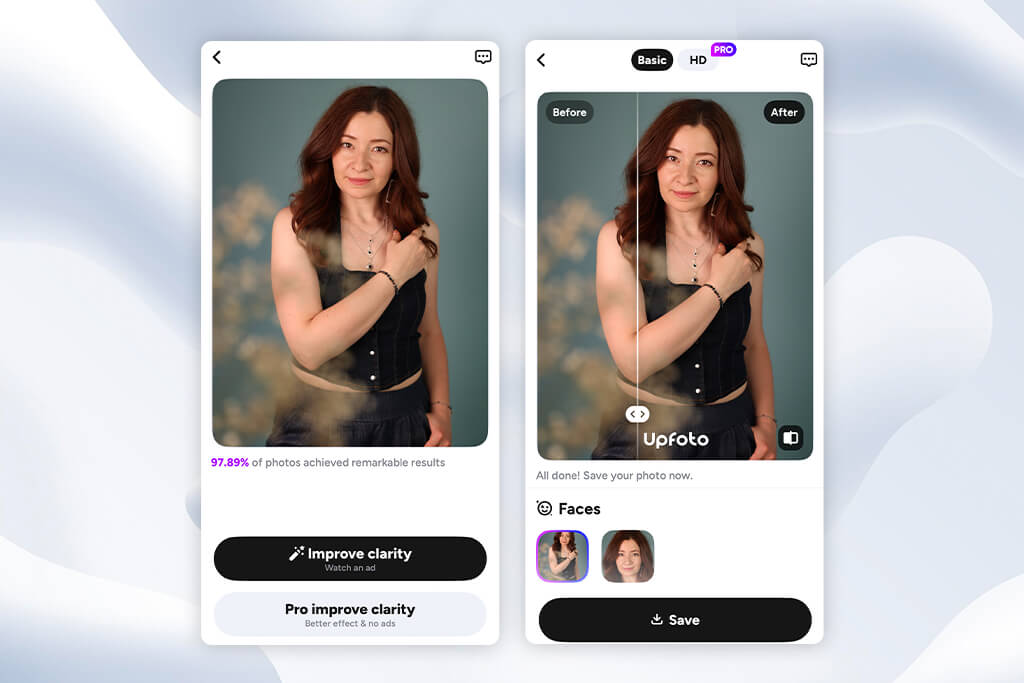
When I started testing UpFoto, I decided to enhance an old portrait with barely visible details and a blurry face. I did not need to spend hours trying to fix it manually. AI tools helped me restore it automatically and expedite my workflow. The app has helpful AI Enhance, Face Restoration, and image upscaling tools.
What makes this solution different from advanced automatic photo editors is that it does not require me to take any extra steps. After uploading a photo, I applied the filter, and compared the output with the source image.
The AI made the face sharper and enhanced the overall look of a photo. I used the same tools on low-resolution photos, including compressed pictures taken with a smartphone and old photos from a family album, as I wanted to check whether they would be just as efficient.
The Face Restoration feature helped me make the eyes sharper and improved hair and facial structure. However, I noticed that the AI tool occasionally recreated details that weren’t present in the original photo.
“This app allows me to enhance portraits with ease. Using its tools, I can make faces clearer. However, it occasionally produces outputs that look overly edited.”

Besides using the restoration tools, I considered whether this app could be a practical solution for regular users who want to enhance photos capturing their cherished moments. The interface was extremely intuitive. I did not need to configure complex settings or have extensive knowledge of professional editing techniques.
I liked using the HD Enhance feature and sharpening tools, as they allowed me to enhance my images automatically. One of the main advantages of UpFoto is its intuitive functionality. This app allows me to optimize my routine and minimize the number of steps I need to take.
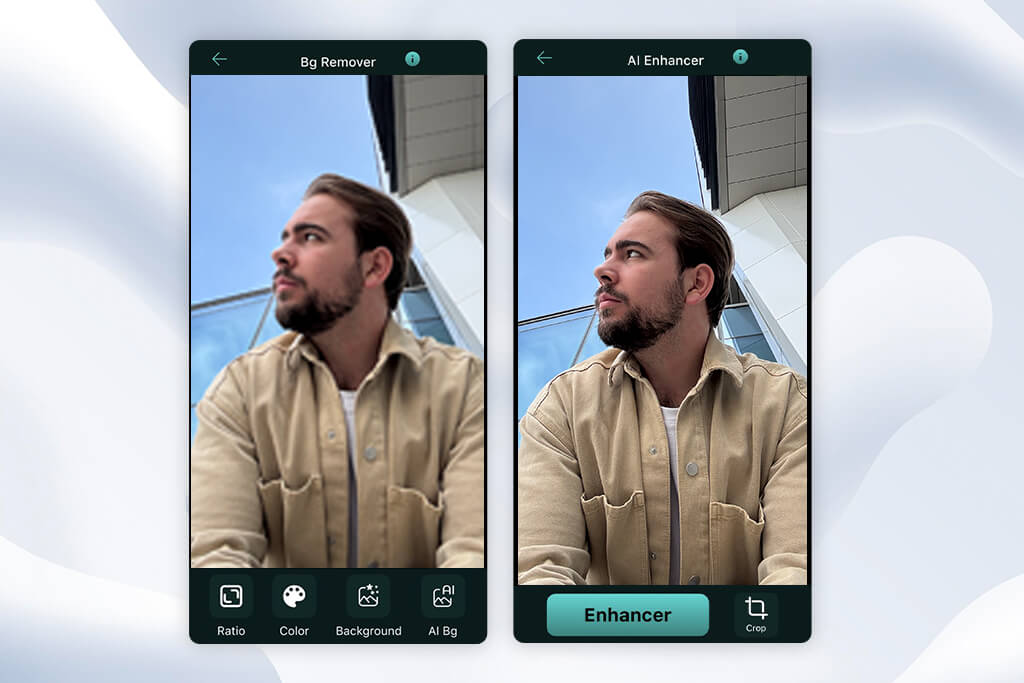
When I started to test EnhancePhotoQuality, I wanted to understand whether this basic enhancement app could help me achieve polished results without using advanced tools. This is why I tried enhancing everyday images with typical issues that are challenging to fix. I enhanced screenshots, compressed images saved from messaging apps, and photos taken with a smartphone’s camera in challenging lighting conditions.
This selfie app has helpful automatic processing tools like Image Enhancement, Sharpness Improvement, and Resolution Boosting. It allows users to automatically enhance the quality of their photos without adjusting settings manually.
During testing, I enhanced a picture that was often shared online and finally saved in lower quality. It looked blurry, and its edges lacked definition. However, when I enhanced it, its textures became more defined and realistic. I analyzed the outputs in different image sizes and noticed that the app delivered better performance when I used it to enhance photos that were a bit damaged instead of trying to fix completely blurry images. The enhancements were subtle, but they helped me transform the look of my photos and make them perfect for everyday use.
I was especially pleased with the intuitive functionality of EnhancePhotoQuality. I was glad to discover that there weren’t any convoluted menus. Besides, I did not need to master professional terminology to use it. Such streamlined functionality makes this app perfect for those who use it for the first time.
The app does not have a huge collection of creative effects, but it can help one increase sharpness when enhancing photos. It will come in handy to users who need to enhance their pics quickly before uploading them online, printing them, or sharing them on social media.
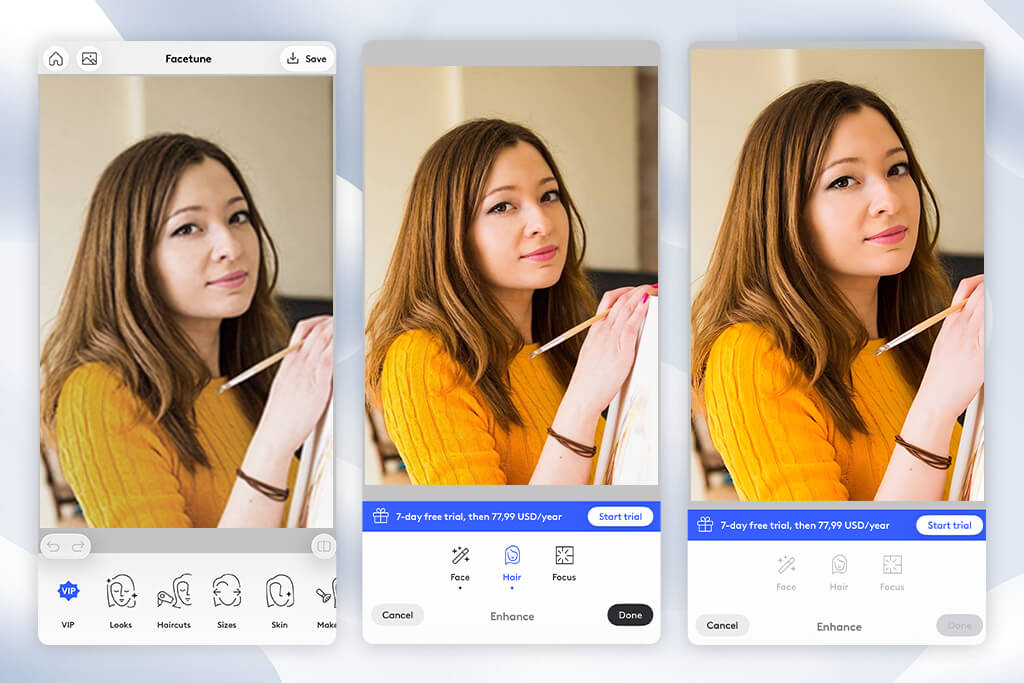
When I started to use Facetune, I tried enhancing a portrait captured in challenging lighting conditions. The face in the photo wasn’t illuminated evenly, and some details looked off. I did not want to impact the whole image. Instead, I wanted to see whether this app could handle individual adjustments.
I used the available features, including Retouch, Relight, Smooth, Details, and Whiten tools, to understand whether they could help me achieve polished outputs. This filter app stands out among regular photo enhancement tools because it focuses on portraits.
I was pleased to discover that I can combine several minor enhancements to achieve a better effect instead of using automatic beautification tools. I made shadows better balanced using the Relight tools. The Details feature helped me emphasize the eyes and hair. The Smooth effect helped me improve skin textures without making them look artificial.
However, I realized that it’s important not to overdo it to achieve the best results. Subtle enhancements helped me give portraits a polished feel. However, when I adjusted the settings too much, my images acquired an artificial look.
“It’s an excellent choice for making selfies brighter and more polished. This app has intuitive features and delivers fast performance. However, one should be extremely careful to avoid overusing its effects.”

In addition, I tested the AI-driven features available in Facetune to see whether this app is suitable for enhancing portrait photos. I used the AI Enhance feature, applied background effects, and added creative filters to produce different versions of the same photo.
We could turn the same portrait into a polished headshot or enhance it in a more artistic way to make it suitable for social media. Due to such extensive functionality, Facetune stands out among other apps that have only simple filters.
We wanted to discover the most practical solutions that can help us enhance photo quality. This is why our FixThePhoto team developed an approach that involved testing the practical usability of these apps instead of focusing only on their technical specs. Our team included Tetiana Kostylieva, Kate Gross, and Tati Tailor, who decided to use photos that illustrated the issues many photographers face.
The bundle included low-resolution images, blurry photos taken with a smartphone, portrait photos taken in challenging light conditions, compressed pictures, and photos with bleak colors. We wanted to check how each app would handle image enhancement tasks and assess the outputs to understand whether they were professional enough.
During the testing process, my colleagues and I worked on this set of photos to ensure that our findings and verdicts are unbiased. We checked how each app increases sharpness, restores details, minimizes noise, fixes exposure, tweaks colors, and enhances the overall portrait quality.
For instance, we enhanced a city photo taken at night to eliminate grain and check the efficiency of noise reduction. Besides, we improved faces in indoor portraits taken in challenging light conditions and performed automatic color correction to enhance travel photos with bleak colors. This strategy helped us assess the outputs and check whether they still looked realistic.
We focused on the main advantages of each app that made it stand out among the rest, including enhancement features, background removal tools, upscaling options, restoration capabilities, filters, and manual editing controls. Tetiana assessed image quality and editing precision, as she wanted to see whether these apps were suitable for professional use. Kate checked the usability of these apps and tested them to see whether they could help photographers produce high-quality outputs quickly.
Tati was more interested in creative tools. She analyzed the functionality of these apps to understand whether they were suitable for producing social media content and enhancing photos daily. After completing the testing stage, we exchanged our thoughts to understand the key advantages and shortcomings of each service.
When conducting the final assessment, we considered several things, including enhancement quality, intuitive functionality, processing speed, list of tools, pricing, and suitability of each app for different tasks. We compared before-and-after images to understand whether these apps helped us actually enhance photos or just applied unnecessary effects.
Some apps delivered excellent performance when we used them to edit portraits. Others were more suitable for enhancing social media pics or restoring old images. Our approach helped us understand the advantages of each solution.
After testing these apps, we reviewed them in detail to provide a comprehensive overview of their advantages. We did not want to focus only on the apps that produced the best outputs. We wanted to discover the solutions that were best suited for photographers, content creators, travelers, and regular users. We analyzed the feedback of each team member and considered the results we achieved to choose the best photo enhancement apps available today.